
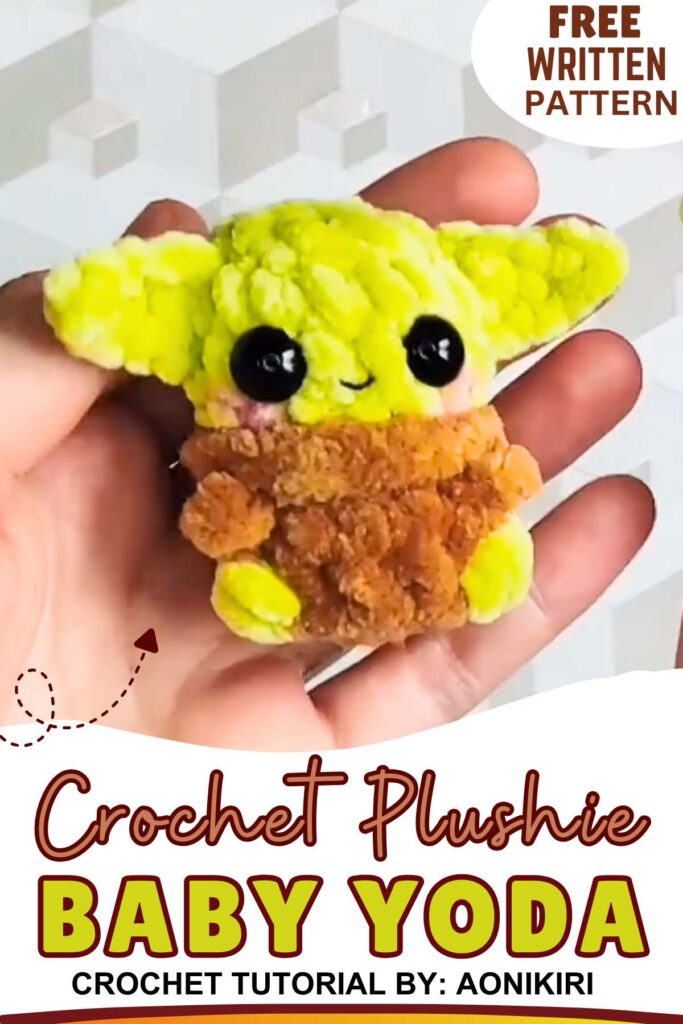
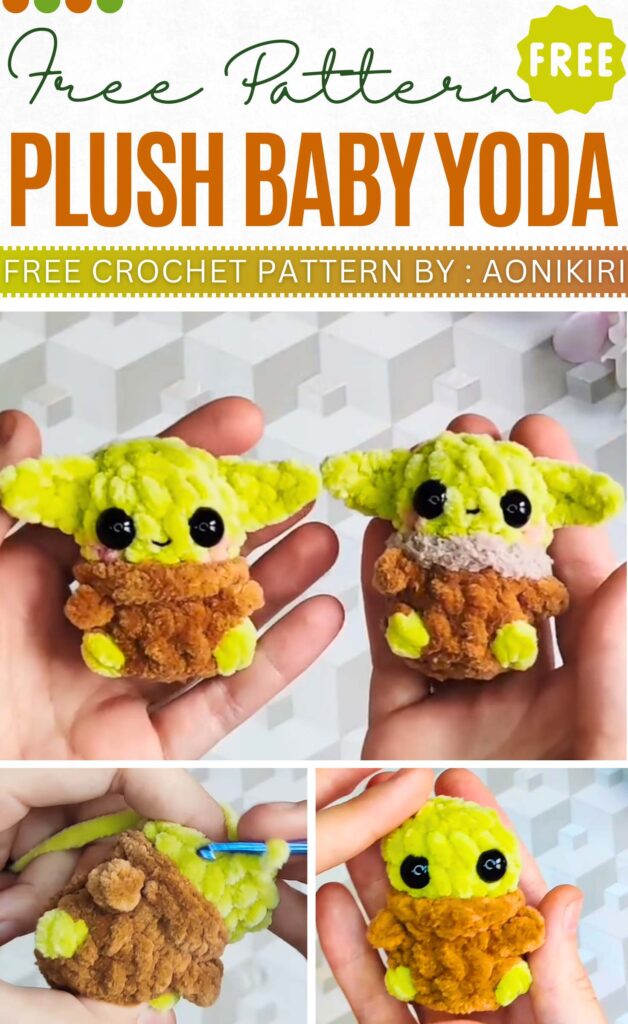
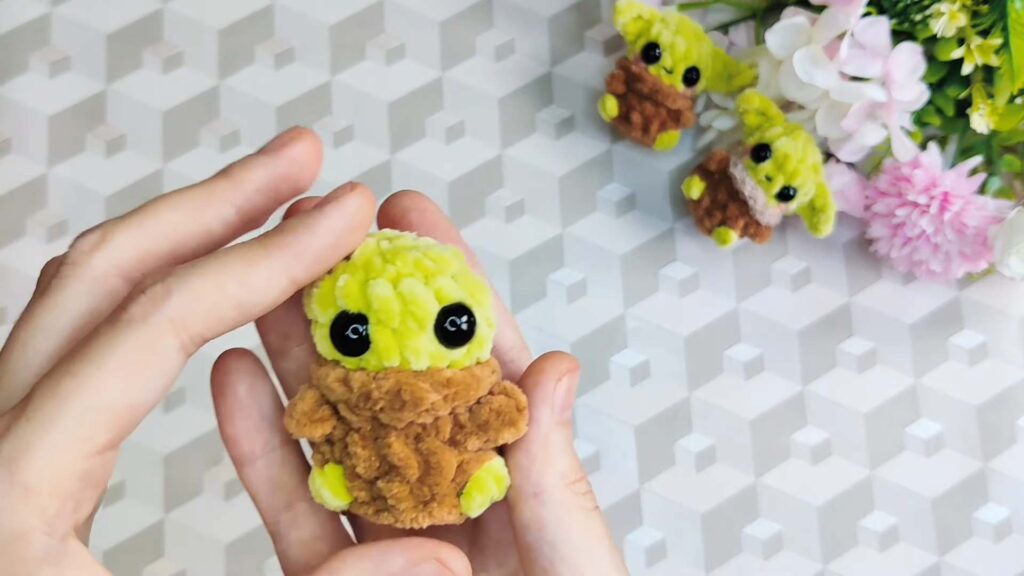
Free Crochet No-Sew Baby Yoda Pattern for Gifting
Today’s quick written pattern will help you to crochet an oh-so-cute Baby Yoda plushie measuring about 5cm tall. This baby Yoda is no-sew, needs little yarn for completion, and works up fast enough to be completed in less than 30 minutes. This plush alien Yoda finishes as a mini kawaii doll and can even be completed using leftover yarn.
The bottom of this plushie is flat, which makes it sit without any support on your table as a buddy. I especially love the use of a little amount of fuzz yarn around the neck and the use of large safety eyes for the size of the body.
Crochet Mini Baby Yoda Plushie Pattern
Designer of the Baby Yoda Plushie:
The designer of this baby Yoda alien plushie for kids is @aonikiri – she has expertise in “no-sew” crochet keychains and small plushies that are always so cute.
Note: For this crochet Baby Yoda plushie idea in particular, I will provide you with the complete pattern using English terms.
Here is the complete crochet pattern for the Grogu (Baby Yoda) keychain. It is written U.S. English terms.

Abbreviations Used in Yoda Pattern:
MR: Magic Ring
ch: Chain
sl st: Slip Stitch
sc: Single Crochet
hdc: Half Double Crochet
inc: Increase (2 sc in one st)
dec: Decrease (sc2tog)
BLO: Back Loop Only
FLO: Front Loop Only
Puff: Puff Stitch (2 unfinished hdc in one st, finished with a different color)
Deep Sc: Single Crochet worked deep into the stitch, inserting the hook from the back of the “V” to the front and back out the back (a back-bar or deep stitch technique used for body shaping).
Materials Used
Here are the materials needed for this no-sew plushie:
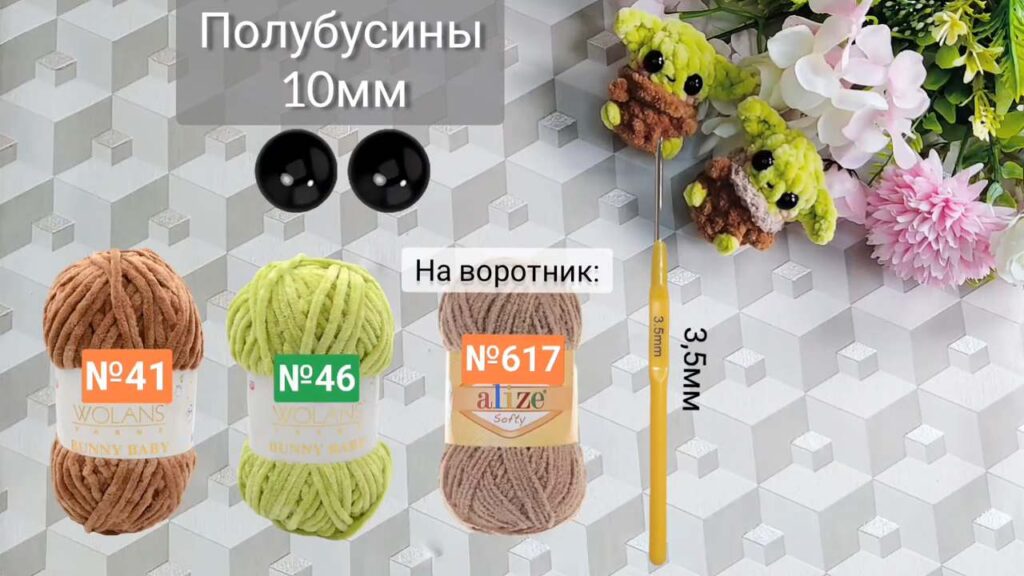
Yarn
Wolans Bunny Baby No. 41 — brown
Wolans Bunny Baby No. 46 — light green
Alize Softy No. 617 — beige/brown (label says: “For the collar”)
Eyes
Half-beads, 10 mm — black
Tools
Crochet hook 3.5 mm
Grogu (Baby Yoda) Keychain Pattern
This pattern is worked in continuous rounds from the bottom up.
Body (Robe – Brown Yarn)
R1: In a MR, work 8 sc. (8)
R2: (sc, inc) repeat 4 times. (12)
R3 (Legs/Shaping):
3 Deep Sc (work the sc deep into the center of the stitch from the back, pulling the stitch forward).
Leg 1: Join the Green yarn. Work into the BLO of the next stitch: Puff (2 unfinished hdc in the BLO). Complete the final yarn over of the Puff with Brown yarn. Complete the stitch by pulling through all loops with Brown yarn.
3 Deep Sc.
Leg 2: Work the same Green Puff into the BLO of the next stitch, completed with Brown yarn.
2 Deep Sc.
1 Deep Hdc.
1 hdc (normal hdc in the last stitch). (12)
R4 (Arms):
4 sc.
Arm 1: ch 2, starting in the 2nd ch from hook work sl st, then sl st back into the body stitch where the chain began.
4 sc.
Arm 2: ch 2, starting in the 2nd ch from hook work sl st, then sl st back into the body stitch where the chain began.
4 sc to end. (12)
R5 (Shaping/Decreases):
2 sc.
dec.
Decrease over Arm 1: Insert hook before the arm, pull up a loop. Insert hook after the arm, pull up a loop. Yarn over, pull through all 3 loops on the hook (pseudo-decrease).
sc.
dec.
Decrease over Arm 2: Work the same pseudo-decrease spanning the arm base.
3 sc to end. (10)
Pull the Brown working yarn tail out to the exterior of the work. Change to Green yarn for the head, but do not cut the Brown yarn yet.
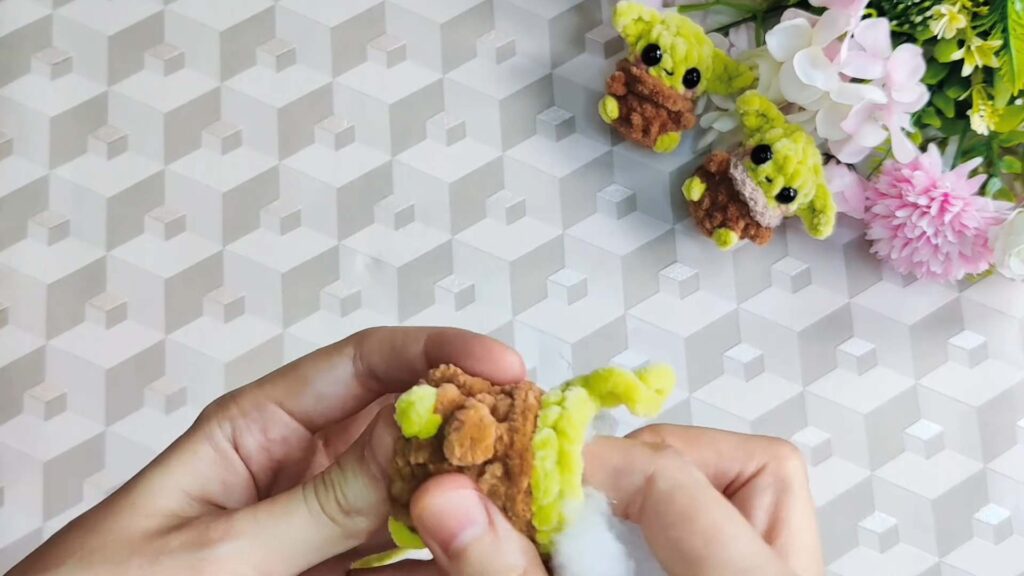
Head (Green Yarn)
R6 (Head Start): With Green yarn, working in BLO only:
2 sc, 2 inc, sc, 2 inc, 3 sc. (14)
R7: 14 sc. (14)
R8: 14 sc. (14)
R9 (Closing): 7 dec. (7)
Cut yarn, leaving a long tail for sewing. Stuff the body and head firmly, then use the tail to close the remaining hole.
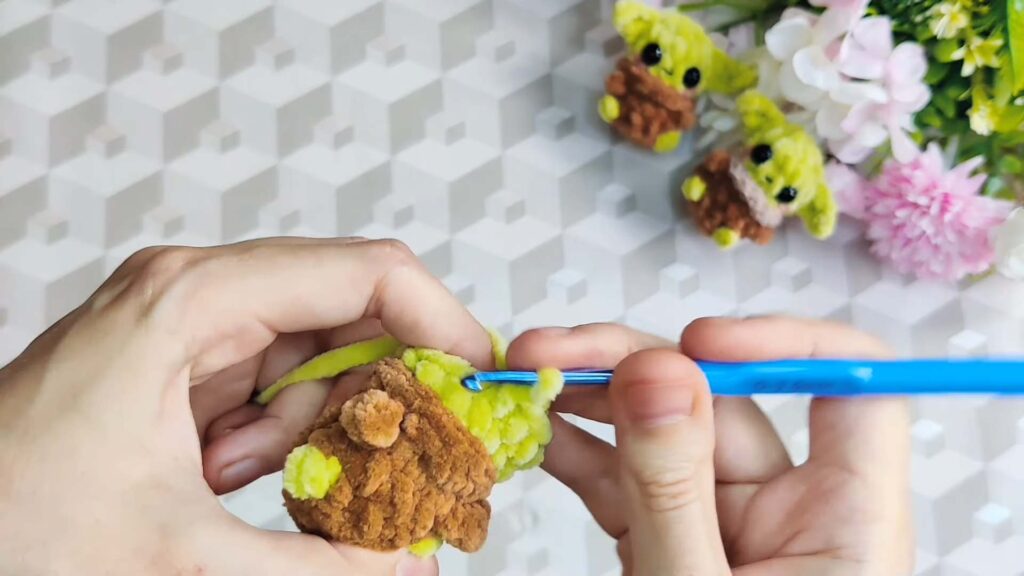
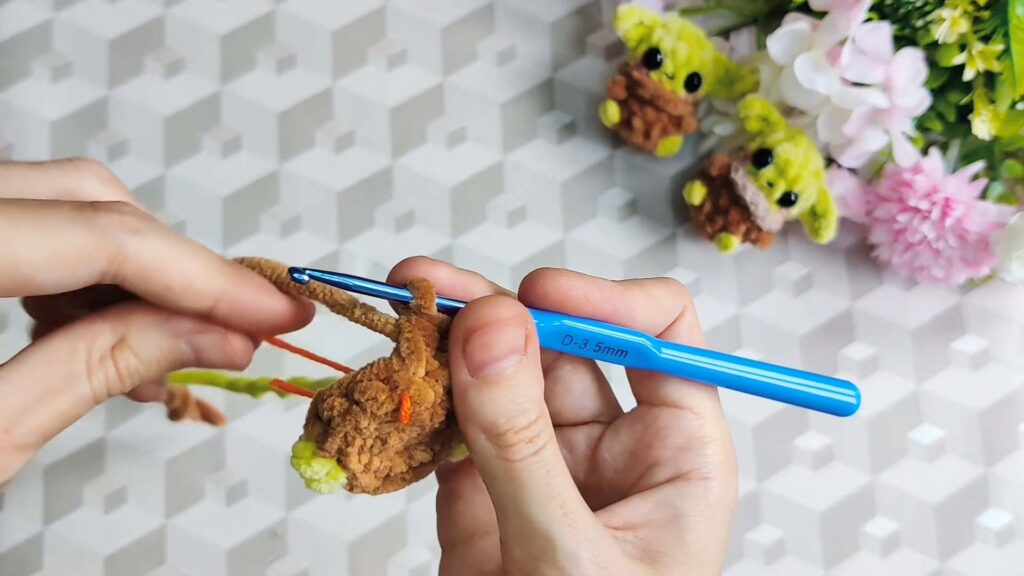
Collar (Brown Yarn)
Find the FLO loops left unworked on R5 (the last full Brown round).
Join the Brown tail left on the outside into the first FLO.
ch 2.
4 hdc.
hdc inc (2 hdc in one st).
5 hdc.
Work 1 hdc into the side of the stitch.
Work 1 hdc into the base stitch of R5.
sl st to join.
Cut and secure Brown yarn.
Ears (Green Yarn)
Hold the Grogu facing you. The ears are placed 1 stitch away from where the eyes will be placed.
Ear 1 (Right):
Attach Green yarn 1 st away from the eye location.
ch 4.
Starting in 2nd ch from hook: sl st, sc, hdc.
sl st into the next stitch on the head.
Cut and secure yarn.
Ear 2 (Left):
Attach Green yarn 1 st away from the other eye location.
ch 4.
Starting in 2nd ch from hook: sl st, sc, hdc.
sl st into the next stitch on the head.
Cut and secure yarn.

Final Assembly
Eyes: Glue 10 mm half-bead eyes (or use safety eyes) between R7 and R8 of the head, leaving 3 stitches between the eyes.
Mouth: Embroider a simple mouth with thin black yarn between R7 and R8, about 1 stitch wide.
Finishing: Use the yarn tails from the ears to hide them inside the head. You may optionally use a little blush to rosy up the cheeks.