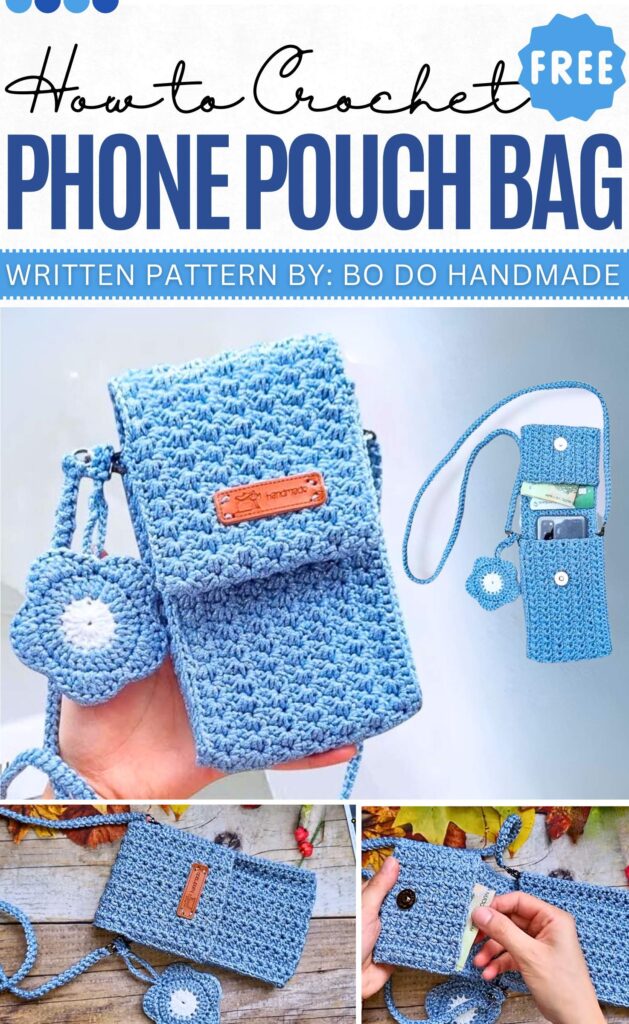
Crochet Phone Pouch Bag Pattern Step by step
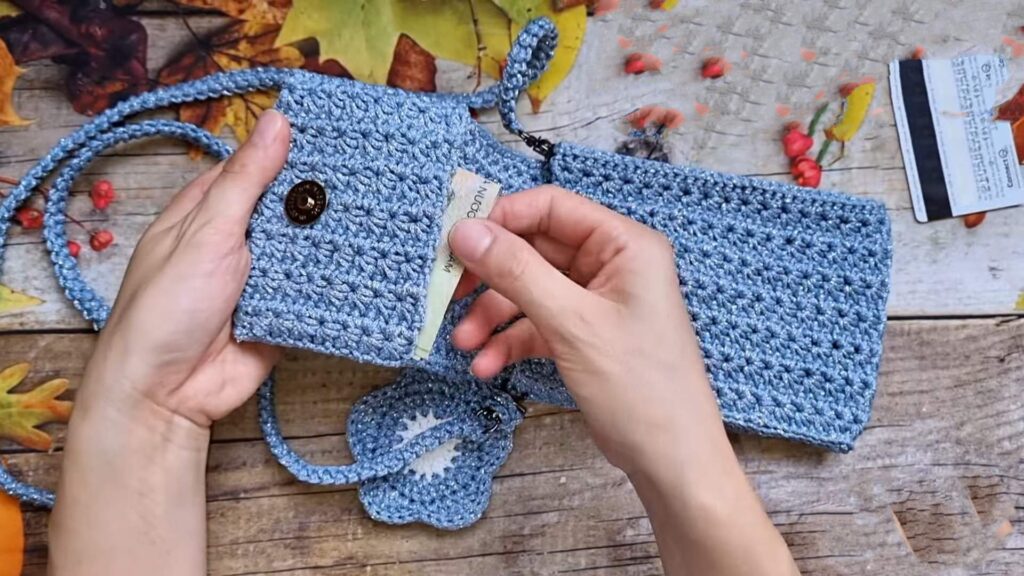
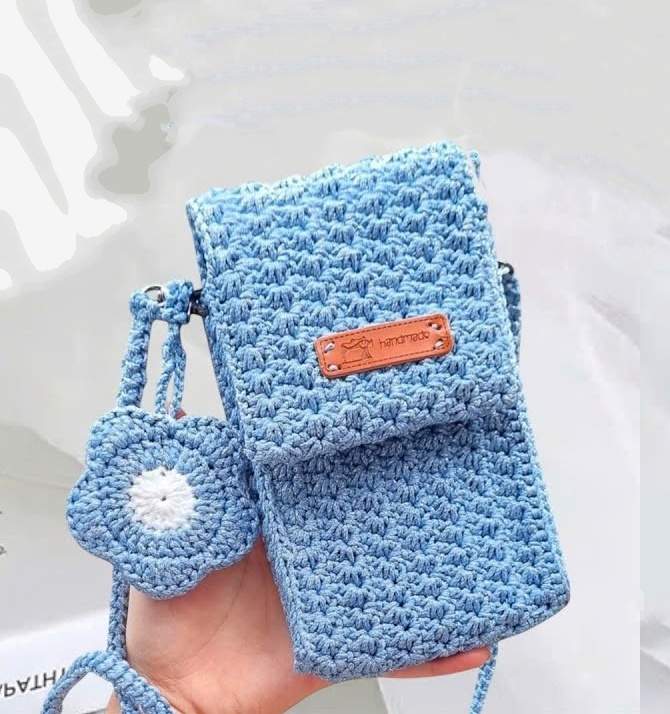
Have a look at this handy and cute bag designed to keep your phone safe. The bag has a main space for your phone and a clever little pocket on the front flap to hold money or cards. It comes with a long strap so you can wear it easily across your body, and a sweet flower charm hanging on the side makes it look extra lovely.
Easy Crochet Phone Pouch Bag
About The Creator:
Bi do Handmade has been an expert in crocheting and designing crochet amigurumi, bag charms, and pouches. Also visit her YouTube channel for more exciting projects.
Crochet Phone Pouch Bag Pattern
Materials
-
Yarn: Polyester macrame cord (2mm – 3mm) or any sturdy woven yarn (approx. 125g/1 skein).
-
Hook: 2.5 mm
-
Accessories:
-
Magnetic snap button
-
2 small D-rings or lobster clasps (optional for strap attachment)
-
Yarn needle
-
Stitch markers
-
Abbreviations (US Terms)
-
ch: Chain
-
st(s): Stitch(es)
-
sc: Single Crochet
-
hdc: Half Double Crochet
-
dc: Double Crochet
-
sl st: Slip Stitch
-
yo: Yarn Over
-
inc: Increase (2 sts in same st)
Instructions
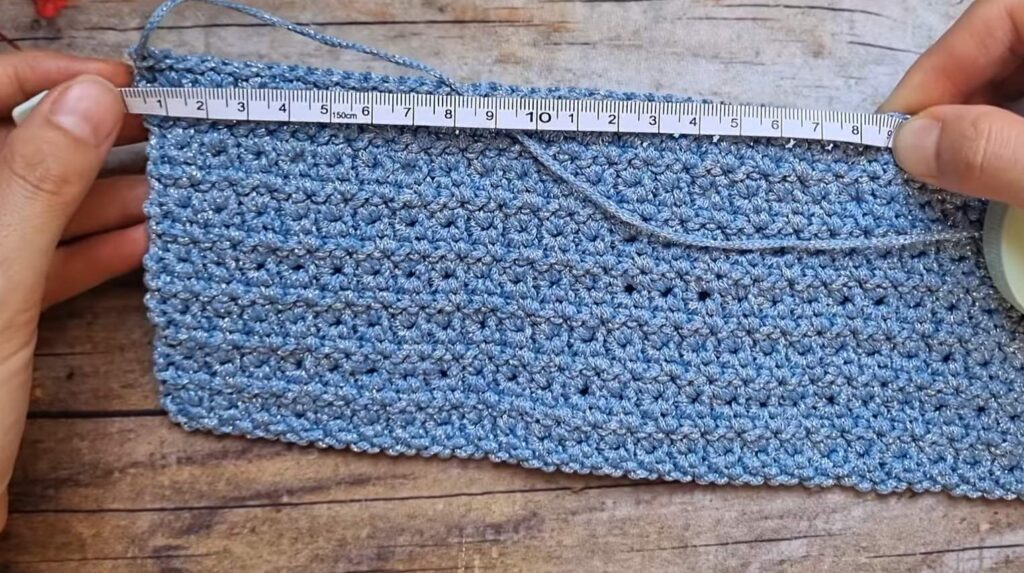
Part 1: Main Body Panel
The body is worked as one long rectangular strip which will fold up to form the front, back, and flap.
Sizing Note: Measure your phone height (including case). Add 3 cm (approx. 1.2 inches). Multiply this total by 3 to get the length of your foundation chain.
-
Example: Phone is 16cm + 3cm = 19cm. Chain length should be 19cm x 3 = 57cm.
-
Estimated Chain Count: ~120 chains (adjust based on your tension and measurements).
Foundation:
-
Make a chain based on the calculation above + 4 extra chains.
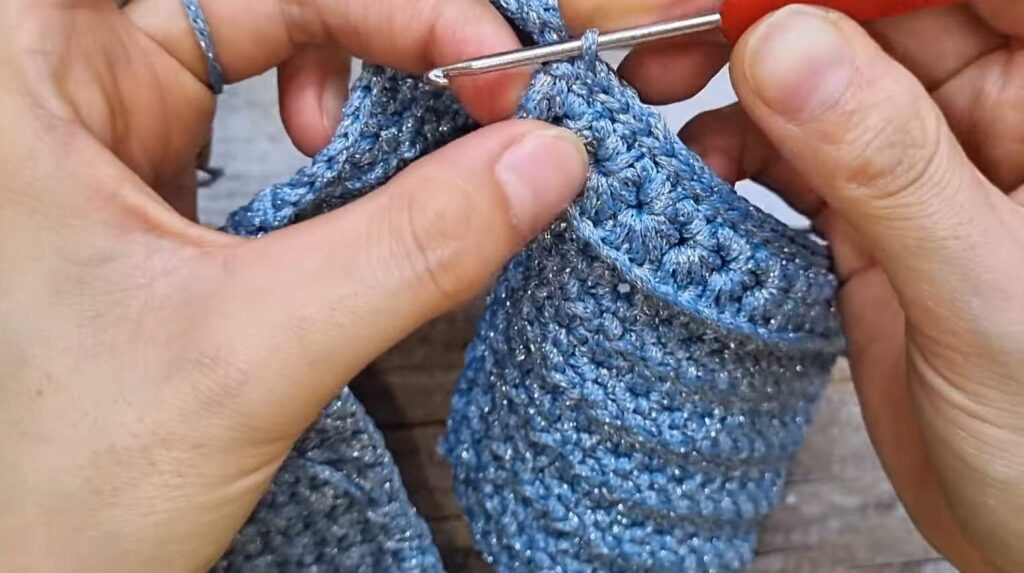
Row 1 (Star Stitch):
-
Insert hook in 2nd ch from hook, pull up a loop.
-
Insert hook in 3rd ch, pull up a loop.
-
Insert hook in 4th ch, pull up a loop.
-
Insert hook in 5th ch, pull up a loop.
-
Insert hook in 6th ch, pull up a loop. (6 loops on hook).
-
YO and pull through all 6 loops. Ch 1 to close the “eye”. (First star made).
-
Star Pattern:
-
Insert hook into the “eye” just made, pull up a loop.
-
Insert hook into the side of the last loop of the previous star, pull up a loop.
-
Insert hook into the same base stitch as the last loop of the previous star, pull up a loop.
-
Insert hook into the next ch, pull up a loop.
-
Insert hook into the next ch, pull up a loop. (6 loops on hook).
-
YO and pull through all 6 loops. Ch 1.
-
-
Repeat the Star Pattern across the chain.
-
End of Row: Work 1 hdc into the last stitch (same stitch where the last star finished).

Row 2 (SC Row):
-
Ch 1, turn.
-
Make 2 sc into the “eye” of each star across the row.
-
Work 1 sc into the top of the turning chain at the end.
Row 3 (Star Stitch):
-
Ch 3, turn.
-
Insert hook in 2nd ch from hook, pull up a loop.
-
Insert hook in 3rd ch from hook, pull up a loop.
-
Insert hook in the first st (base of ch 3), pull up a loop.
-
Insert hook in the next 2 sts, pulling up a loop in each. (6 loops on hook).
-
YO, pull through all 6 loops. Ch 1.
-
Continue the Star Pattern (as described in Row 1) across the row.
-
End with 1 hdc in the last st.
Repeat Rows 2 and 3 until the panel width is approx. 3–4 cm wider than your phone.
-
End on a Row 2 (SC row). Fasten off.
Part 2: Side Gussets (Make 2)
These panels create the sides and depth of the bag.
Foundation: Chain the height of your phone + approx. 2 cm (approx. 38 chains + 4 extra). Row 1: Work the Star Stitch pattern (same as Main Body Row 1) across the chain. Row 2: Work the SC pattern (same as Main Body Row 2) across. Edging: Work 1 row of sc around the strip to finish. Fasten off, leaving a long tail if you plan to sew (or weave in ends if crocheting together).
Part 3: Bag Assembly
-
Card Pocket (on Flap):
-
Lay the Main Body panel flat (Right Side/Star side facing down).
-
At the top end (flap end), fold the edge back by approx. 2 cm to create a small lip/pocket.
-
Sew the side edges of this folded section to secure the pocket.
-
-
Forming the Bag:
-
Fold the bottom of the long strip up to form the pouch, ensuring the front pocket height matches your phone height.
-
The remaining length at the top is the flap.
-
-
Attaching Side Gussets:
-
Position a Side Gusset between the Front and Back panels.
-
Method: You can sew them or slip stitch (sl st) them together for a sturdier edge.
-
To slip stitch: Insert hook through the gusset edge and the body edge. Sl st down the side, work 2 sl st in the corner, sl st across the bottom, 2 sl st in the corner, and sl st up the other side.
-
Repeat for the second Side Gusset.
-
Part 4: Strap (Romanian Cord)
-
Leaving a tail, Ch 2.
-
Row 1: Sc in 2nd ch from hook. Turn.
-
Row 2: Insert hook under the single loop at the side/bottom of the sc just made. YO, pull up loop, YO, pull through 2 loops. Turn.
-
Row 3 onwards: Tilt the work to see the two parallel loops on the side. Insert hook under both loops. YO, pull up loop, YO, pull through 2 loops.
-
Repeat until the strap reaches desired length (e.g., crossbody length).
-
Fasten off and sew the strap ends to the side gussets (or attach to D-rings).
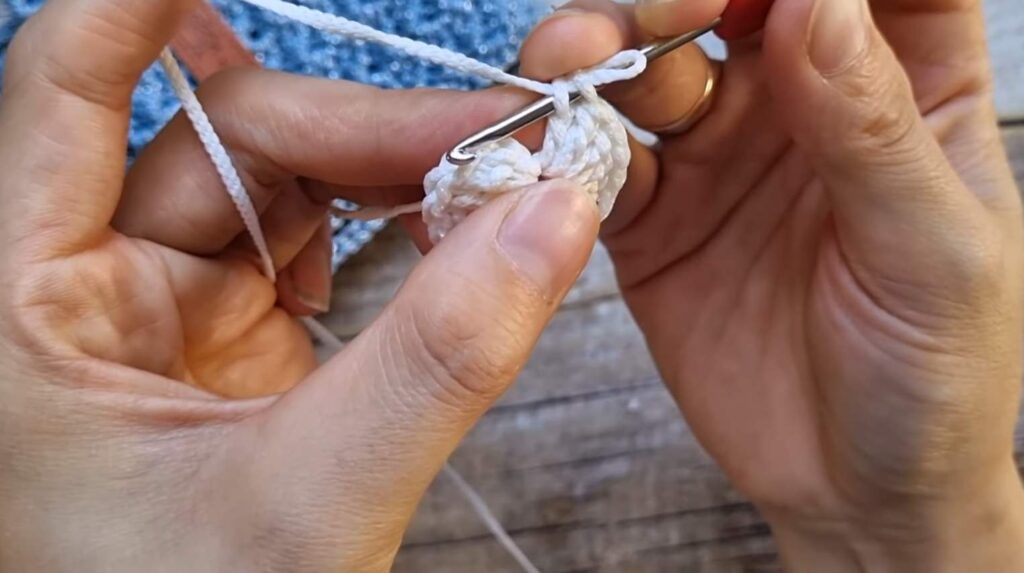
Part 5: Flower Charm (Make 2 and join)
-
Rnd 1 (Center): With White yarn, make a Magic Ring. Ch 2, work 15 dc into ring. Join with sl st. (15 sts).
-
Rnd 2 (Increase): Ch 2. Work 2 dc in each st around. Join. (30 sts).
-
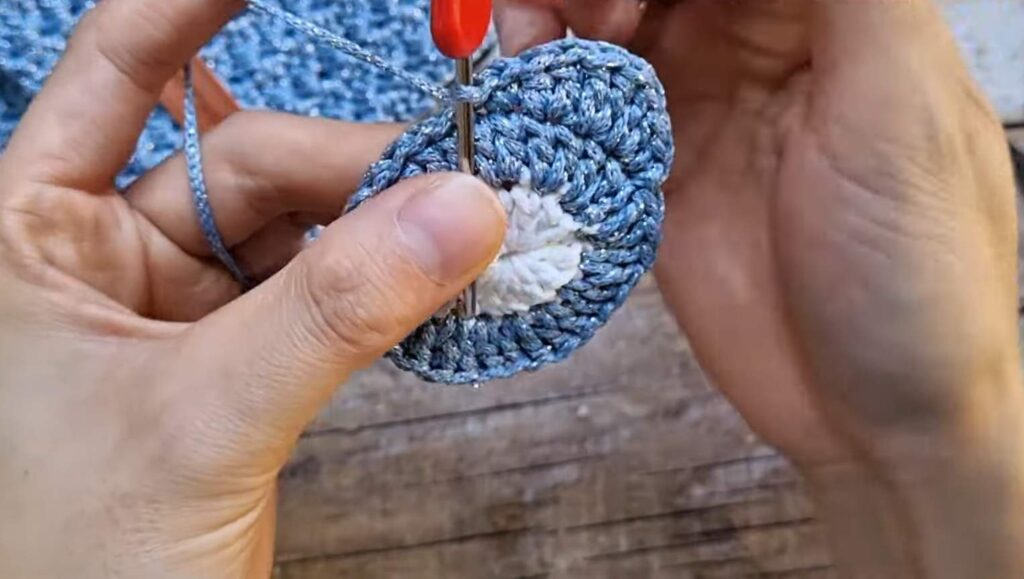
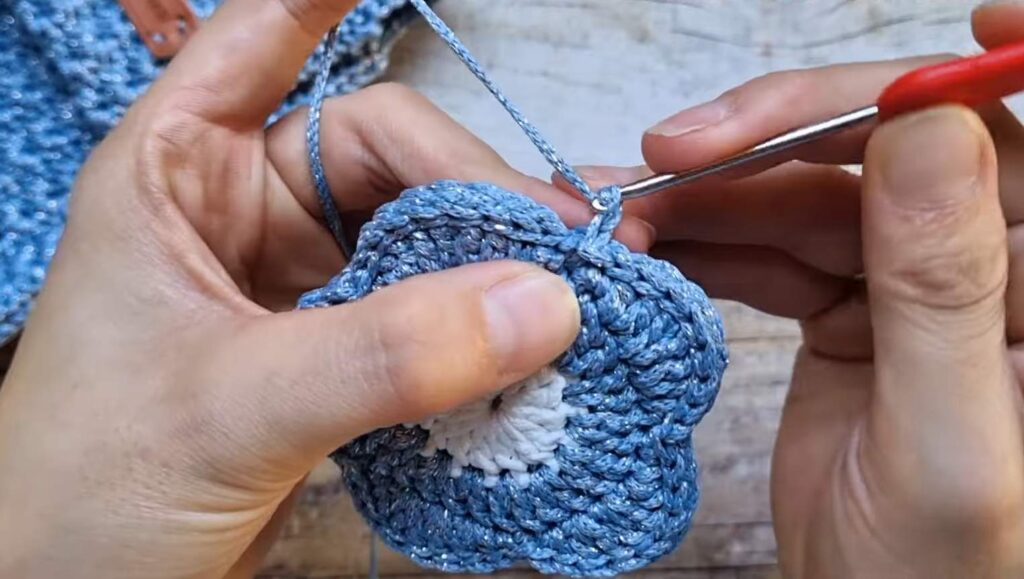
Rnd 3 (Petals):
-
Petal Sequence (over 6 sts):
-
Sc in 1st st.
-
Hdc + Dc in next st.
-
2 Dc in next st.
-
Dc + Hdc in next st.
-
Sc in next st.
-
Sl st in next st.
-
-
Repeat 5 times to make 5 petals. Fasten off.
-
-
Assembly: Place the two flowers wrong sides together. Sl st around the edges to join them into one thick flower. Add a chain loop to hang it from the bag.
Finishing
-
-
Attach a magnetic snap button to the inside of the flap and the body of the bag.
-
Weave in all loose ends.
-
Attach the flower charm to the side of the bag.
-