
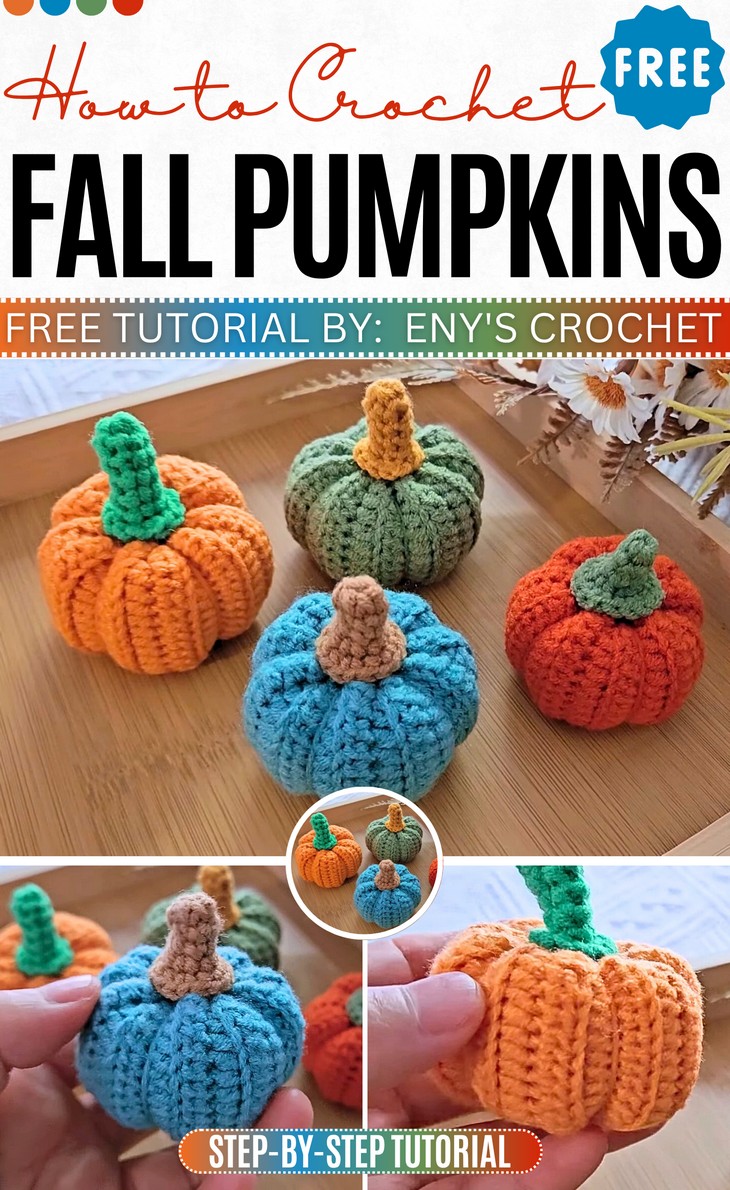
How to Crochet Pumpkin in Any Color from Rectangle
What is a better way to welcome fall than by crocheting a pumpkin amigurumi! So, we have brought a stitch-by-stitch tutorial for crocheting this cute fall pumpkin in any color from orange to blue and even in green al by sewing a crochet rectangle.
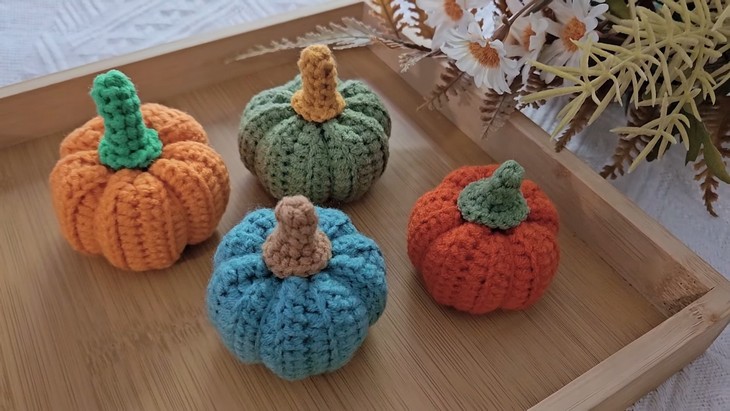
The pumpkin is so accurate and features detailed stems and ribbing. You can decorate your table easily with 4 of them, each in a different color. They are super easy to customize and require basic crochet techniques.
So, continue reading this post for crocheting one pumpkin amigurumi for yourself, too.
About the Designer: The designer behind this crochet fall project is @Eny’scrochet – She has an ability to crochet very accurate amigurumi even though she always tries to alter and beautify the subject even more. You will especially love her crochet big acorn amigurumi and crochet bunny with carrot amigurumi.
Note: In respect for the creator’s pattern rights, there will be no provision of the written pattern. You can watch the tutorial with on-screen written instructions at the end of this post.
Crochet Pumpkin in Any Color Tutorial
Skill Level: Beginners. You will be working in flat rows by working in the back-and-forth rows; therefore, sewing is a must for crocheting. The tutorial uses basic crochet stitches (single crochet, chain stitch, half-double crochet, and working in that will be easy even for beginners.) You will also need the ribbing techniques and using the thread to make the ridges.
Tutorial Timing: Approximately 26 minutes. (perfect for learning how to properly sew a crochet piece to change its shape into anything you want. A popular example is crocheting a slipper using a rectangle.)
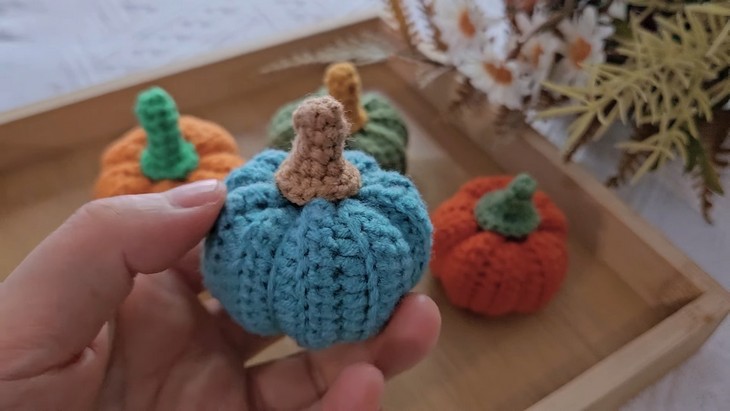
Personalization Tips: There are 4 options to choose from: orange pumpkin, dark green, blue, and light orange amigurumi. You can also use the bulky yarn for crocheting this as a large pumpkin amigurumi plushie.
Pattern Type: The on-screen written pattern is available if you find written instructions easy to follow along with. Also, the tutorial is slow-paced.
Supplies Needed
Gather the following crochet materials and tools needed for crocheting this amigurumi pumpkin by yourself:
- 4ply milk cotton soft yarn
- Size 2mm crochet hook
- Yarn needle
- Stitch maker
- glue gun
Techniques Used
Learn the following crochet techniques needed for crocheting this amigurumi pumpkin keychain and understanding the pattern:
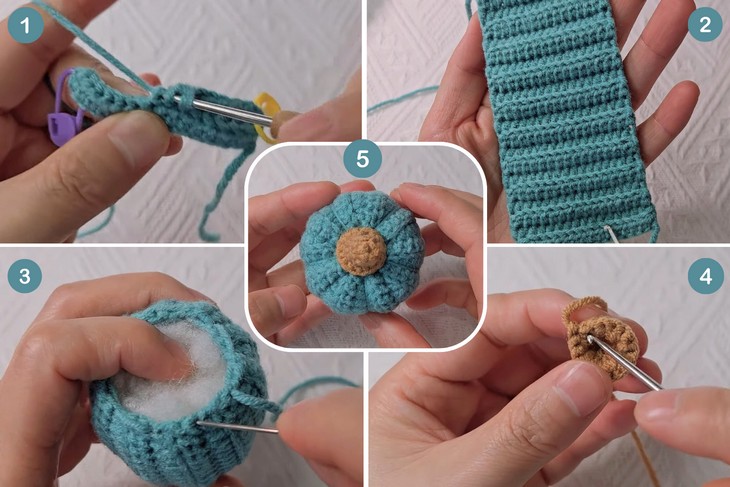
Body of the Pumpkin
- Half Double Crochet (hdc): Crochet a half double crochet in the second stitch from the hook and continue with 15 hdc.
- Stitching sides together: Stitch the two sides together to close the crocheted piece.
- Stuffing and shaping: Stuff the body with fiberfill before cinching the bottom closed and stitching through the center to create the pumpkin shape.
Stem
- Magic Ring with Single Crochet (sc): Make a magic ring with 5 single crochet stitches.
- Single Crochet: Continue with 5 single crochets for the next two rows.
- Increasing stitches: Increase the stitches by making 2 sc in each stitch to create a flare at the bottom of the stem.
How is it done?
This video provides instructions on how to crochet a pumpkin. It covers two main parts: the body and the stem. The body is made by crocheting 20 rows of half double crochet stitches, which are then stitched together, stuffed with fiberfill, and shaped. The stem is created using single crochet stitches in a magic ring and is then attached to the top of the pumpkin.