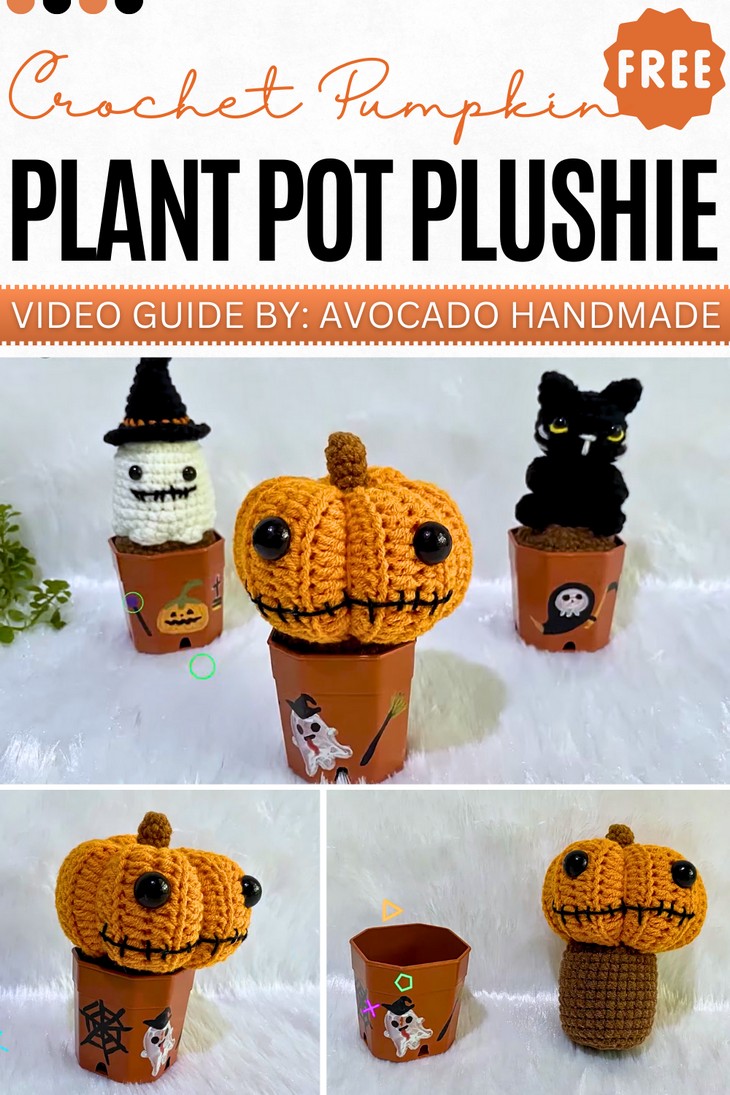
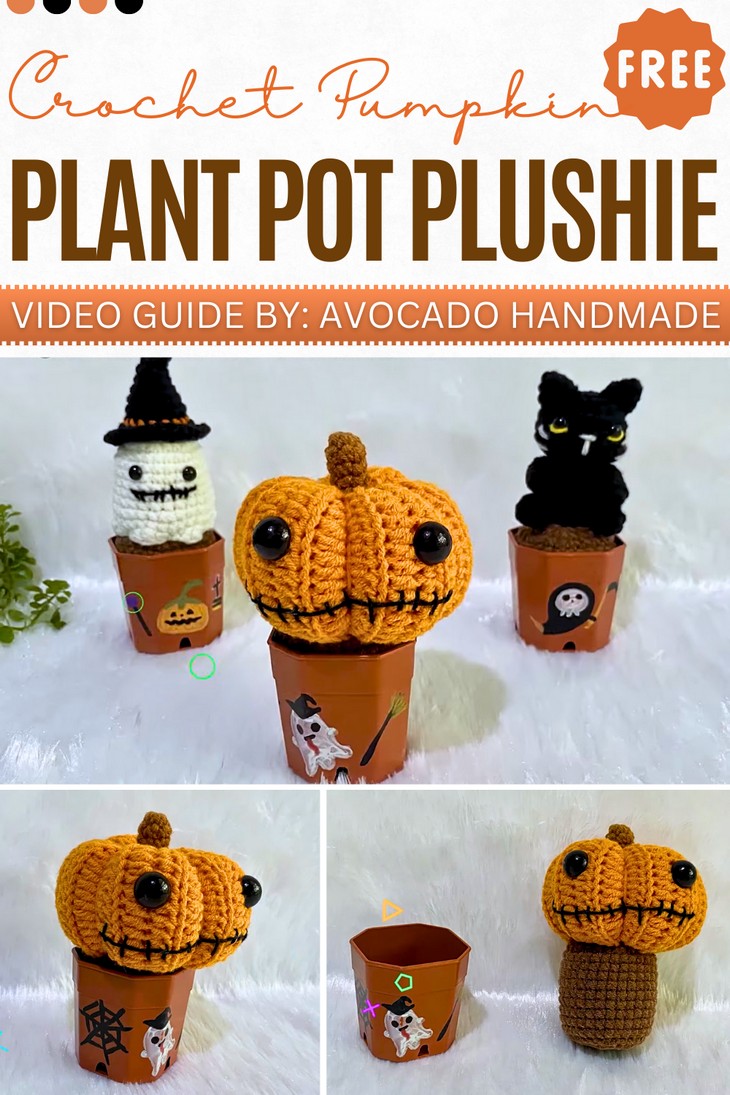
How to Crochet Pumpkin in Plant Pot Amigurumi for Halloween
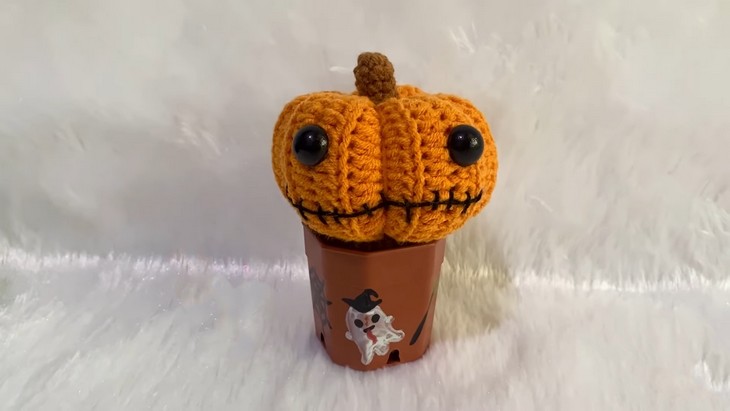
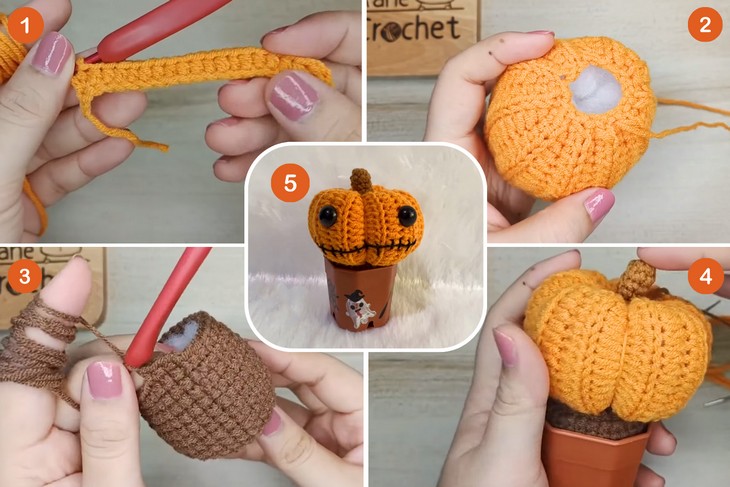
Learn how to crochet a stitched mouth Halloween pumpkin and soil amigurumi that can fit into a small plant pot as a standalone Halloween decoration. You will find instructions to crochet a ribbed, flat piece that is then sewn into a tube and gathered at the top and bottom to form the pumpkin shape. This technique is so easy for even beginners. Crocheting the “soil” base that fits inside the pot and the pumpkin’s stalk, you crochet a unique pumpkin amigurumi that is sure to please.
So, if you have made up your mind to crochet this quick and easy Jack pumpkin decoration, continue reading this post till the end. You can also complete the set of three such designs from Kane Crochet!
About the Designer: The designer behind this kawaii dragon dolls project is @KaneCrochet – she has a vast collection of tutorials including bags, accessories, keychains, and home decor items like hanging plants. She has a whole playlist for crochet fall and Halloween amigurumi that includes lovely hybrids like pumpkin ghost, corpse doll and much more.
Make sure to check her creative ideas. Check her crochet net bag tutorial, crochet laptop bag / granny square book sleeve, crochet hair accessories, crochet popcorn bag, granny square crochet shoulder bag!
Note: In respect for the creator’s pattern rights, there will be no provision of the written pattern. You can watch the tutorial with on-screen written instructions at the end of this post.
Crochet Pumpkin Plant Pot Tutorial
Skill Level: Beginner – Intermediate. The tutorial needs a number of techniques and stitches to make the pumpkin and soil. The pumpkin’s body is created using half double crochet stitches worked in the back loop only to give it a ribbed texture. It is the same as crocheting a pumpkin from a rectangle. The “soil” and stalk are made with single crochet stitches.
The tutorial also demonstrates how to use increase and decrease stitches to shape the pieces. A slip stitch is used to join stitches, and the project begins with a slip knot, a chain, and a magic ring for the circular parts.
Tutorial Timing: Approximately 11 minutes only (as quickly as the Kane Crochet usually offers. This pumpkin amigurumi is perfect for learning how to crochet something 3D using flatwork. Improvement in embroidery makes it special and worth watching, too.)
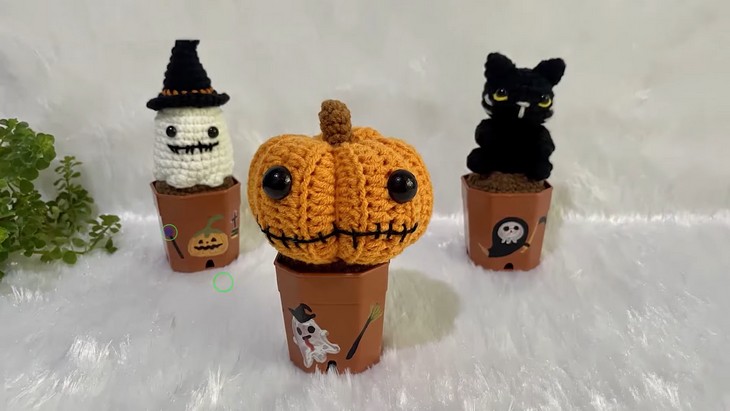
Personalization Tips: The tutor mentions that you can personalize the face of the pumpkin with different-sized eyes and different mouth designs. The pot can also be customized with drawings like ghosts or spiderwebs, and you can create other Halloween characters to go with the pumpkin. You can also crochet the ghost and black cat in a plant pot amigurumi.
Pattern Type: An on-screen written pattern is available if you find written instructions easy to follow along with.
Finished size: Height 12 cm. Width 8 cm. (if you use the same materials and tool specifications).
Materials needed
The following are the crochet materials and tools that the tutor uses for crocheting this pumpkin plant pot amigurumi:
- Cotton yarn, size 2 mm
- A plastic plant pot, size 5 cm
- Eyes, size 14 mm
- Polyester fiber for stuffing
- A crochet hook, size 2.5 mm
- A sewing needle and scissors

Crochet Stitch Guides
| Stitch / Technique | Abbreviation | Description |
|---|---|---|
| Slip Knot | — | Create the initial loop to start your crochet project. |
| Chain | ch | Make a series of loops to form the foundation of your work. |
| Slip Stitch | slst | Join stitches together or move your yarn across stitches without adding height. |
| Half Double Crochet | hdc | Create a stitch taller than a single crochet but shorter than a double crochet. |
| Back Loop Only | blo | Work your stitch by inserting the hook only into the back loop of the previous stitch. |
| Magic Ring | mr | Create a tight, adjustable ring to start your work in the round. |
| Single Crochet | sc | Make a basic, tight stitch, often used for amigurumi. |
| Increase Crochet | inc | Work two stitches into one stitch from the previous row to increase the total stitch count. |
How is it done?
To crochet the pumpkin and pot, you first create the pumpkin body by crocheting a flat piece and then sewing it into a tube. The tube is gathered and stuffed to form the pumpkin shape. Next, you crochet a “soil” base to fit in the pot and a small stalk for the pumpkin. Finally, you assemble all the pieces and add eyes and a mouth.