
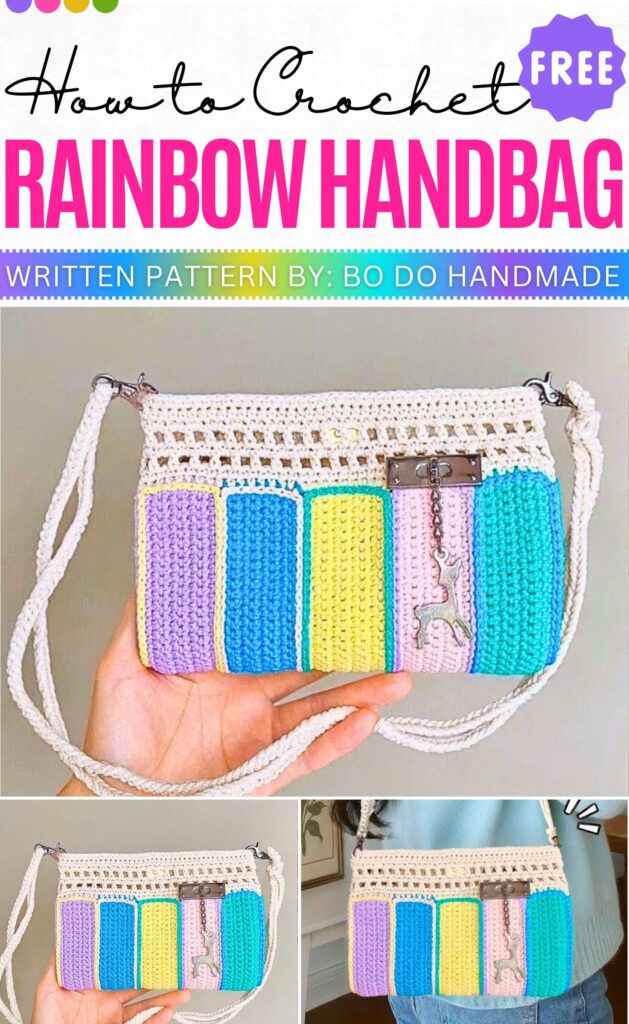
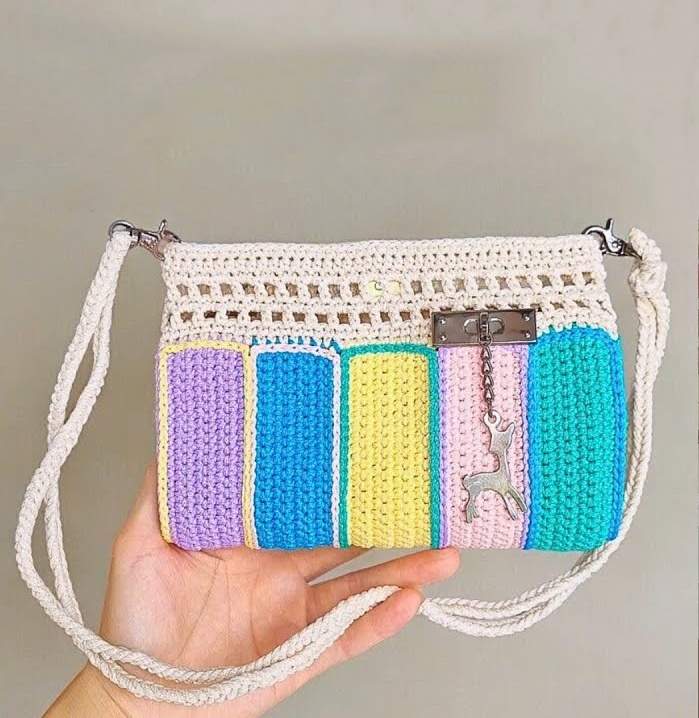
Crochet Rainbow Handbag Pattern For Stylish You
This Rainbow Handbag is a bright and happy bag that looks like a beautiful rainbow. With beautiful color stripes it is enough to complete your attire. It is a medium-sized bag for your phone, wallet, or small toys. The bag is a great for anyone who loves bright colors and wants a unique, handmade accessory to wear.
Crochet Rainbow Handbag Pattern
About The Creator:
Bi do Handmade has been an expert in crocheting and designing crochet amigurumi, bag charms, and pouches. Also visit her YouTube channel for more exciting projects.
How To Crochet Rainbow Handbag
Terminology: US Terms Abbreviations:
-
ch: Chain
-
sl st: Slip Stitch
-
sc: Single Crochet
-
hdc: Half Double Crochet
-
dc: Double Crochet
-
inc: Increase (2 sts in 1)
-
BLO: Back Loop Only
-
st(s): Stitch(es)
Materials: * 2.5mm crochet hook (Body)
-
3.5mm crochet hook (Strap)
-
Polyester/Cotton cord yarn (various colours)
-
2 x Swivel Lobster Clasps
-
Magnetic snap fastener
-
Decorative patch (optional)
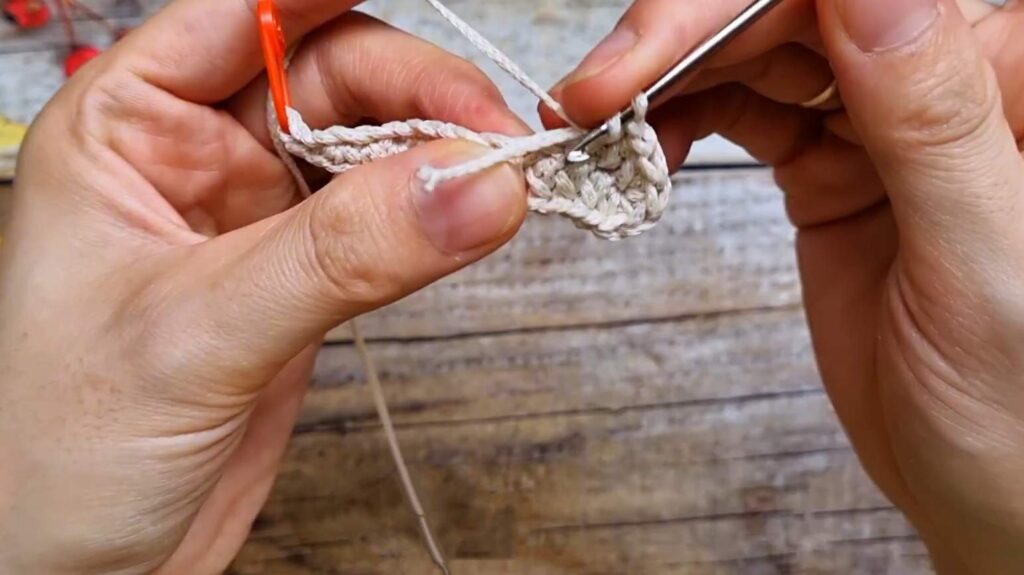
Side Panels (Make 2)
-
Foundation: ch 15.
-
R1: Starting in 2nd ch from hook: 3 sl st, 3 sc, 8 hdc. In the last ch: 5 hdc. Rotate to work on other side: 8 hdc, 3 sc, 3 sl st. [33 sts]
-
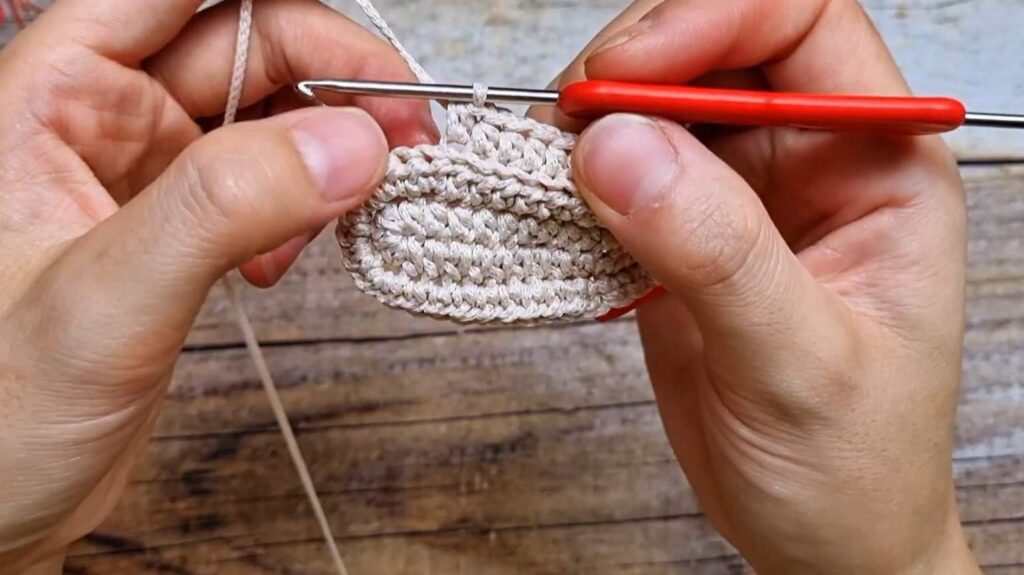
R2: ch 1, turn. BLO 3 sl st, 3 sc, 8 hdc. In the 5-hdc curve: 5 inc-hdc. Working back: 8 hdc, 3 sc, BLO 3 sl st. [38 sts]
-
R3: ch 1, turn. BLO 3 sl st, 3 sc, 8 hdc. In the 10-hdc curve: (1 hdc, inc-hdc) * 5. Working back: 8 hdc, 3 sc, BLO 3 sl st. [43 sts]
-
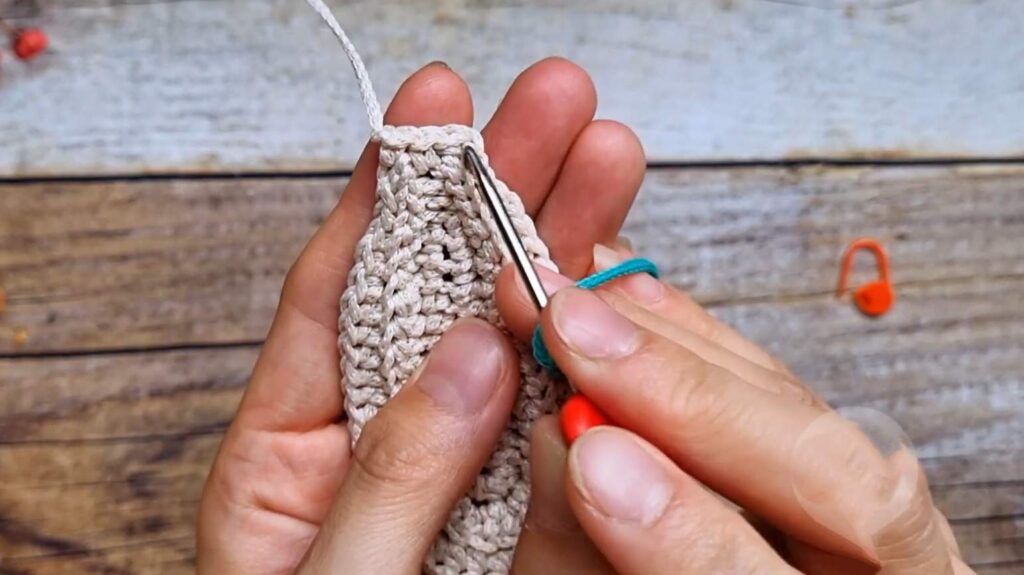
Top Edge: Work 1 sc into the last sl st of R3, 1 sc into the center foundation ch, and 1 sc into the first sl st of the opposite side. [Total edge for joining = 45 sts]
-
Finish: Fasten off.
Main Body (Rainbow Section)
-
Foundation: ch 45.
-
R1: sc in 2nd ch from hook and each ch across. [45]
-
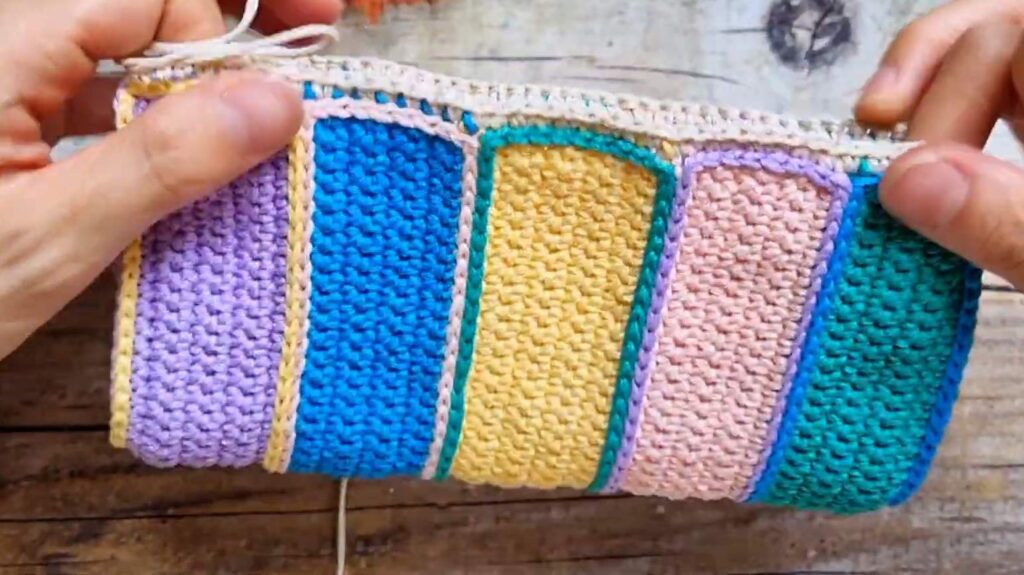
Color 1 (Purple): Work 7 rows of sc.
-
Colors 2, 3, 4 (Blue, Green, Yellow): Work 8 rows of sc for each color.
-
Color 5 (Red): Work 7 rows of sc.
-
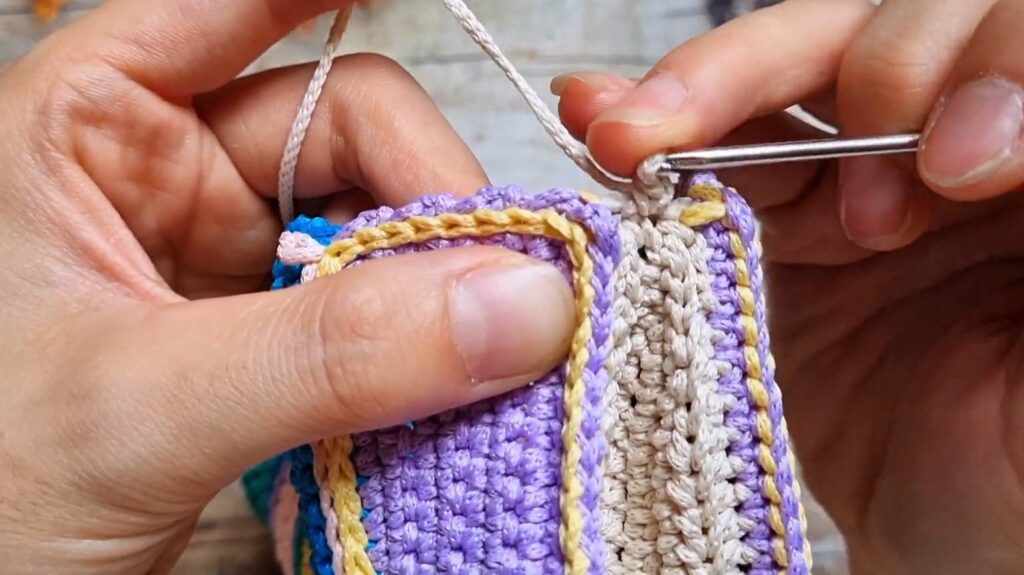
Surface Sl St: Attach accent yarn to the “valleys” between color changes. Work surface slip stitches across the width for the raised ribbing effect.

Assembly
-
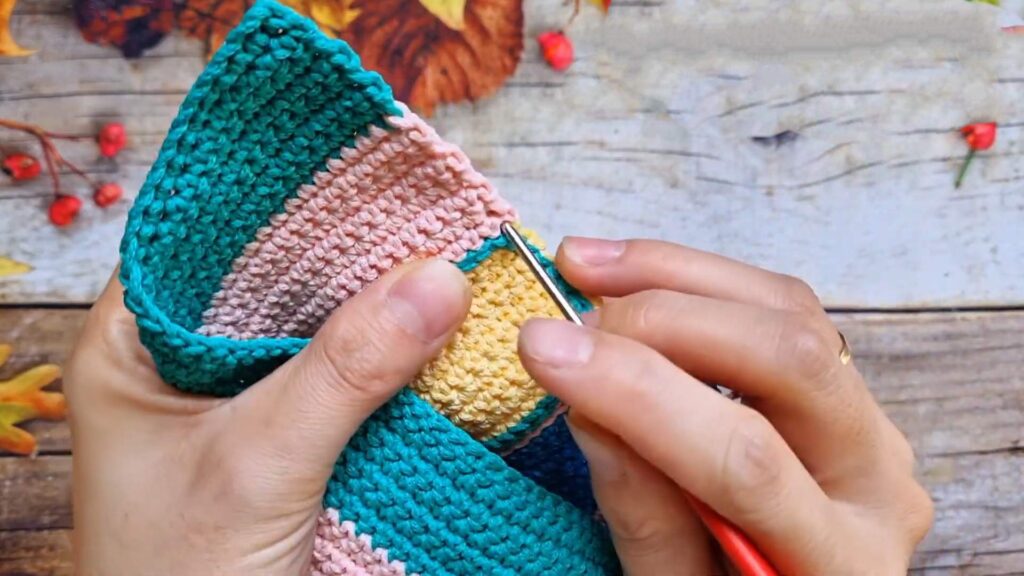
Joining: Place side panel against the main body (right sides out).
-
Attach yarn at the top corner.
-
sc through both layers (panel and body) for all 45 sts.
-
Repeat for the other side.
Bag Mouth (Top Detail)
-
R1: Attach yarn to the center of a side panel. sc in every st around the opening. Sl st to join.
-
R2: ch 1, sc in each st around. Sl st to join.
-
R3 (Mesh): ch 3 (counts as 1 dc + ch 1). Skip first 2 sts, dc in next. ch 1, skip 1 st, dc in next. Repeat from * around. Sl st to join.
-
R4 (Fill): ch 1. Work 2 sc into every ch-1 space around. Sl st to join.
-
R5 (Mesh): Repeat R3.
-
R6–R8: Work 1 row of sc, 1 row of hdc, and 1 final row of sc to finish the brim.
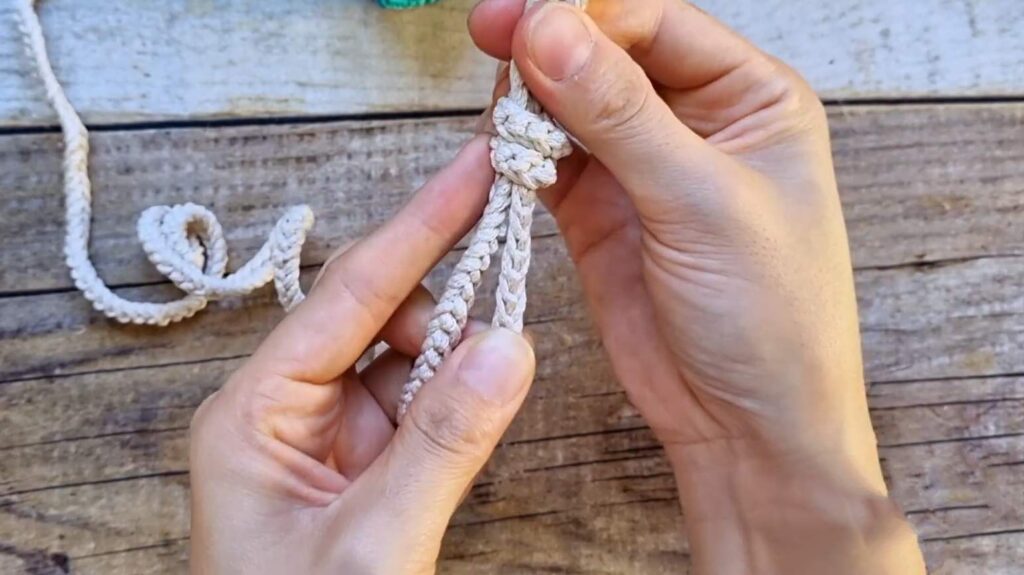
Adjustable Cord Strap
-
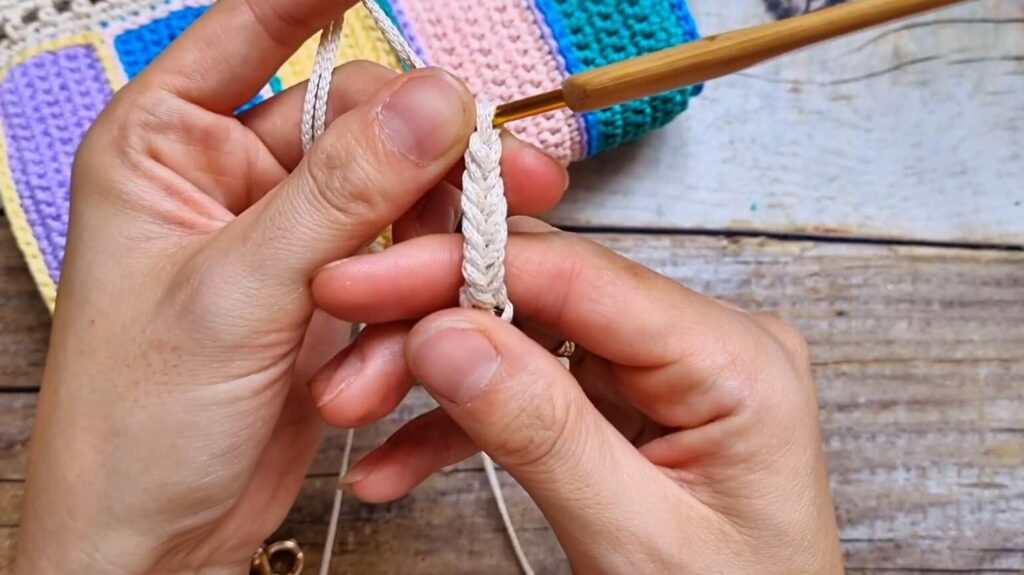
Setup: Use double-stranded yarn and a 3.5mm hook. Attach to a swivel clasp with 1 sc.
-
Step 1: Insert hook into the side loop of the sc just made.
-
Step 2: yo, pull through (2 loops on hook). yo, pull through both loops.
-
Step 3: Rotate slightly, insert hook into the two side loops of the previous st. yo, pull through, yo, pull through 2.
-
Repeat: Continue until strap is 120cm–150cm long.
-
Slider: Thread the strap through the second clasp. Wrap the end of the strap around the main length and tie a secure sliding “fisherman’s” knot to make it adjustable.
Final Details
-
Magnetic Clasp: Sew a magnetic snap to the inside center of the mouth.
-
Decor: Attach a small ribbon or flower to the front as seen in the video tutorial by Bo Do Handmade.
Video Tutorial:
Step By Step Pattern In UK Terms
Abbreviations:
-
ch: chain
-
ss: slip stitch
-
dc: double crochet (US sc)
-
htr: half treble crochet (US hdc)
-
tr: treble crochet (US dc)
-
BLO: back loop only
-
st(s): stitch(es)
-
inc-htr: 2 half treble crochet in one stitch
Side Panels (Make 2)
-
Foundation: ch 15.
-
R1: Starting in 2nd ch from hook: 3 ss, 3 dc, 8 htr. In last ch: 5 htr. Rotate to work other side of foundation: 8 htr, 3 dc, 3 ss. [33 sts]
-
R2: ch 1, turn. BLO 3 ss, 3 dc, 8 htr. (inc-htr) x 5 in the curve. 8 htr, 3 dc, BLO 3 ss. [38 sts]
-
R3: ch 1, turn. BLO 3 ss, 3 dc, 8 htr. (1 htr, inc-htr) x 5 in the curve. 8 htr, 3 dc, BLO 3 ss. [43 sts]
-
Edging: Do not turn. Work 1 dc into the last ss of R3, 1 dc into the center foundation chain point, and 1 dc into the first ss of the opposite side. [Total edge for assembly = 45 sts]
-
Finish: Fasten off.
Main Body (Rainbow Panel)
-
Foundation: ch 45.
-
R1: dc in 2nd ch from hook and each ch across. [45 sts]
-
Colour 1 (Purple): Work 7 rows of dc.
-
Colour 2 (Blue): Work 8 rows of dc.
-
Colour 3 (Green): Work 8 rows of dc.
-
Colour 4 (Yellow): Work 8 rows of dc.
-
Colour 5 (Red): Work 7 rows of dc.
-
Surface Detail: Join yarn between colour blocks and work surface slip stitches across the width to create raised ribs.
Assembly
-
Joining: Align side panel to main body (right sides facing out).
-
Attach yarn at top corner.
-
dc through both layers (panel and body) for 45 sts.
-
Repeat for second side panel.
-
Surface Edging: Work ss over the joining seams for a clean finish.
Bag Mouth (Brim)
-
R1: Join yarn to center of side panel. dc in every st around opening. ss to join.
-
R2: ch 1, dc in each st around. ss to join.
-
R3 (Mesh): ch 3 (counts as 1 tr + ch 1). Skip first 2 sts, tr in next. ch 1, skip 1, tr in next. Repeat from * around. ss to join.
-
R4 (Fill): ch 1. Work 2 dc into every ch-1 space around. ss to join.
-
R5 (Mesh): Repeat R3.
-
R6 (Fill): Repeat R4.
-
R7–R10: Work 1 row dc, 1 row htr, and 2 final rows of dc around. Fasten off.
Adjustable Cord Strap
-
Setup: Use 3.5mm hook and double-stranded yarn.
-
Attach yarn to swivel clasp with 1 dc.
-
Step 1: Insert hook into the side loop of the dc just made.
-
Step 2: yo, pull through (2 loops on hook). yo, pull through both loops.
-
Step 3: Rotate slightly, insert hook into the two side loops of previous st. yo, pull through, yo, pull through both loops.
-
Repeat: Continue until strap is 120cm–150cm long.
-
Sliding Lock: Thread strap through second clasp. Create a loop and tie a sliding fisherman’s knot around the main cord to make it adjustable.
Finishing
-
-
Sew magnetic snap to inside center of the mouth.
-
Attach swivel clasps to the side panel tops.
-
Add decorative patch or ribbon to the front.
-