
Crochet Snake Amigurumi Keychain Pattern
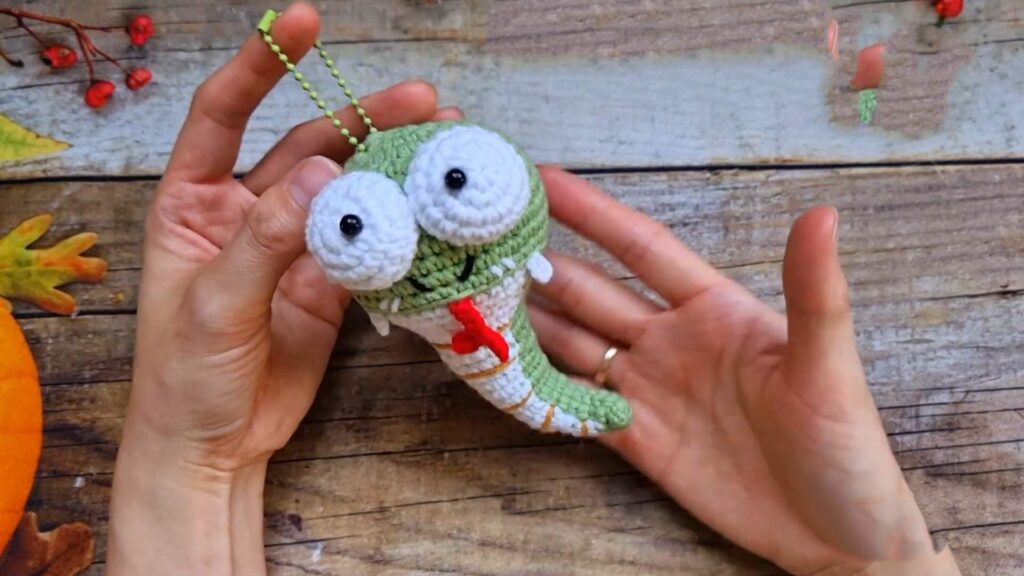
This project is a cute and colorful snake keychain with big, funny eyes. It is made using cotton yarn and a small crochet hook, making it a perfect size to hang on your keys or bag. The snake is a great for using up small scraps of yarn and makes a fun gift for friends.

Bi do Handmade has been an expert in crocheting and designing crochet amigurumi, bag charms, and pouches. Also visit her YouTube channel for more exciting projects.
Crochet Snake Keychain Pattern
Terminology: US Terms
Skill Level: Intermediate
Materials: Milk Cotton 125g, 2.5mm Hook, Fiberfill, Keychain ring, Embroidery thread (black/white/pink).
Part 1: Head & Body
-
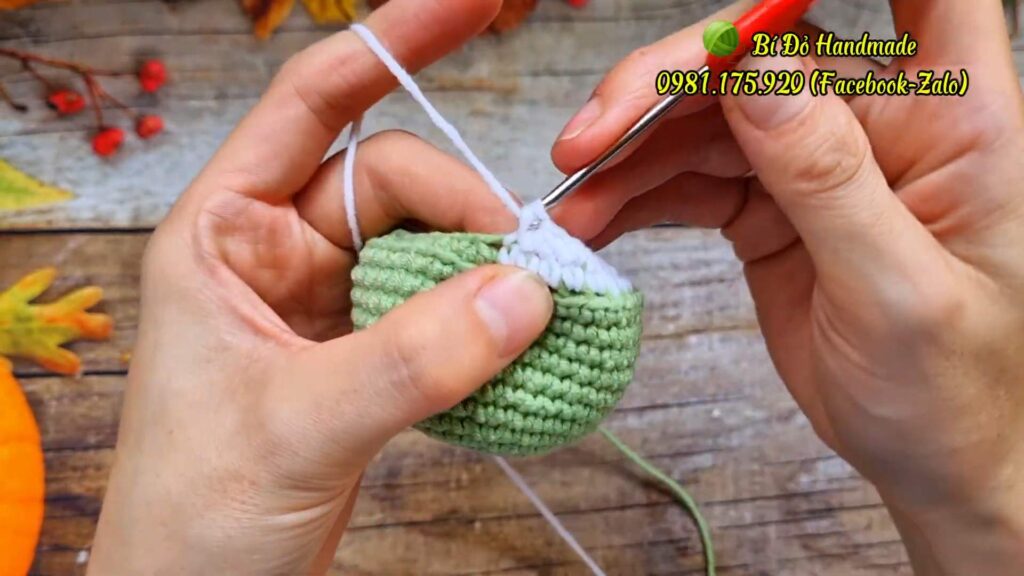
Rnd 1: Magic Ring, 8 sc. Sl st to join, ch 1. [8]
-
Rnd 2: 2 sc in each st around. Sl st, ch 1. [16]
-
Rnd 3: (1 sc, 2 sc in next st) x 8. Sl st, ch 1. [24]
-
Rnd 4: (3 sc, 2 sc in next st) x 6. Sl st, ch 1. [30]
-
Rnd 5: (2 sc, 2 sc in next st, 2 sc) x 6. Sl st, ch 1. [36]
-
Rnd 6: 1 sc in each st around. Sl st, ch 1. [36]
-
Rnd 7: (5 sc, 2 sc in next st) x 6. Sl st, ch 1. [42]
-
Rnd 8–12: 1 sc in each st around. Sl st, ch 1. [42]
-
Rnd 13: (Working in BLO): (5 sc, sc2tog) x 6. Note: Change to white yarn for the belly section (approx. 2 repeats of the pattern). Sl st, ch 1. [36]
-
Rnd 14: (2 sc, sc2tog, 2 sc) x 6. Sl st, ch 1. [30]
-
Rnd 15: (3 sc, sc2tog) x 6. Sl st, ch 1. [24]
-
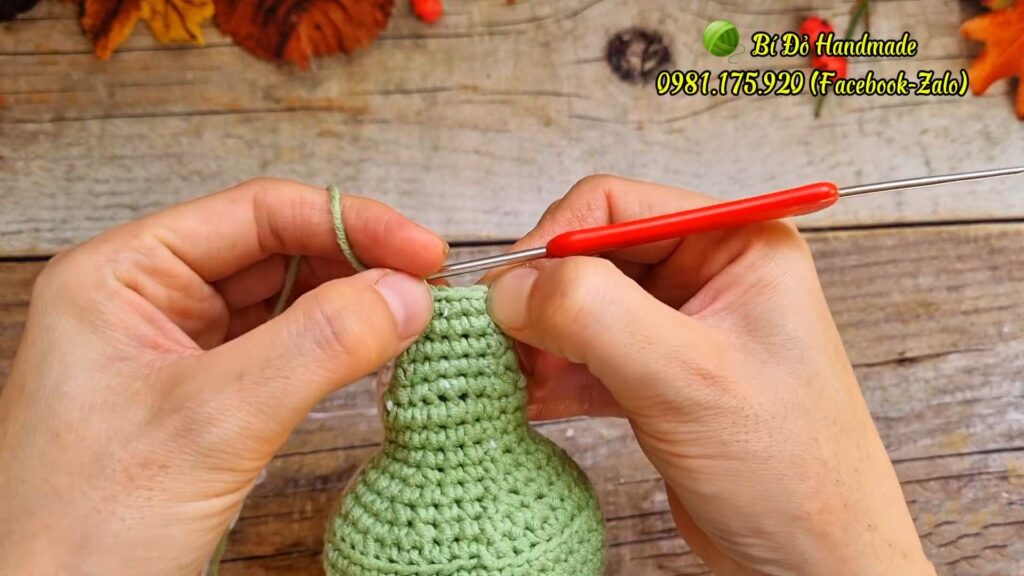
Rnd 16: 1 sc in each st around. Sl st, ch 1. [24]
-
Rnd 17: (2 sc, sc2tog) x 6. Sl st, ch 1. [18]
-
Rnd 18–20: 1 sc in each st around. Sl st, ch 1. [18]
-
Rnd 21: (4 sc, sc2tog) x 3. Sl st, ch 1. [15]
-
Rnd 22–24: 1 sc in each st around. Sl st, ch 1. [15]
-
Rnd 25: (3 sc, sc2tog) x 3. Sl st, ch 1. [12]
-
Rnd 26–28: 1 sc in each st around. Sl st, ch 1. [12]
-
Rnd 29: (2 sc, sc2tog) x 3. Sl st, ch 1. [9]
-
Rnd 30–32: 1 sc in each st around. Sl st, ch 1. [9]
-
Rnd 33: (1 sc, sc2tog) x 3. Sl st, ch 1. [6]
-
Rnd 34: 1 sc in each st around. Fasten off leaving a long tail to sew the tail closed and curve the body.

Part 2: Eyes (Make 2)
-
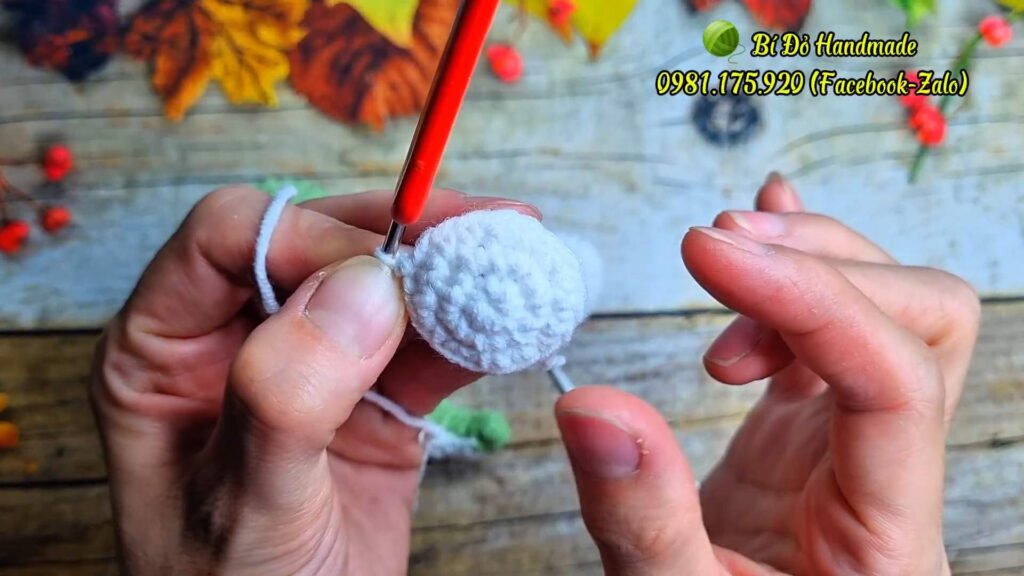
Rnd 1: Magic Ring, 6 sc. Sl st, ch 1. [6]
-
Rnd 2: 2 sc in each st around. Sl st, ch 1. [12]
-
Rnd 3: (1 sc, 2 sc in next st) x 6. Sl st, ch 1. [18]
-
Rnd 4–5: 1 sc in each st around. Sl st, ch 1. [18]
-
Rnd 6: (1 sc, sc2tog) x 6. Sl st, ch 1. [12]
-
Rnd 7: (sc2tog) x 6. [6]
-
Fasten off, stuff lightly, and sew/glue to the top of the head.

Part 3: Accessories
-
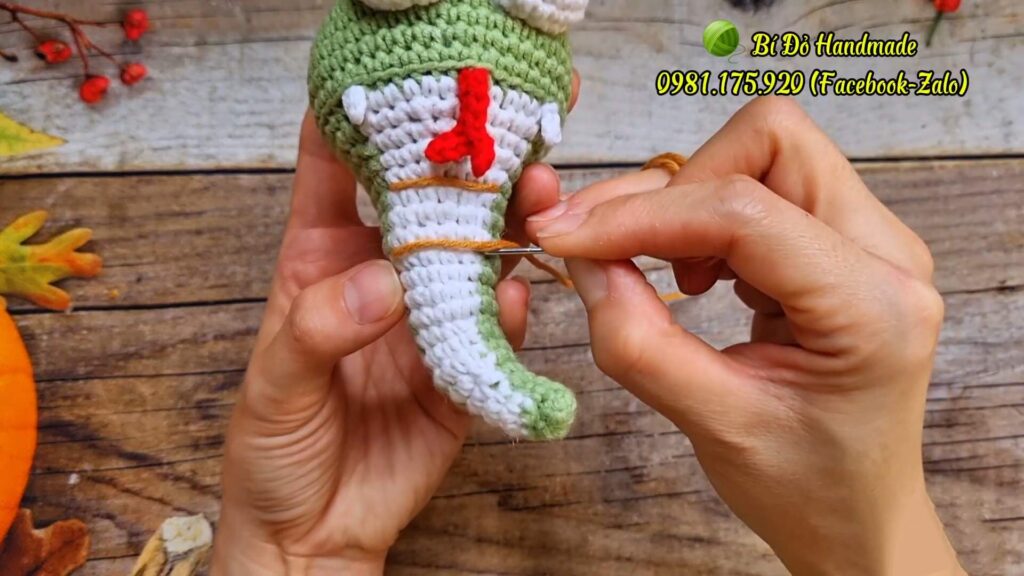
Forked Tongue (Red): Ch 7. Sl st in 7th, 6th, and 5th ch. Ch 3. Sl st in 3rd and 2nd ch. Sl st into the base of the first fork. Sl st in remaining 4 ch. Fasten off.
-
Fangs (White – Make 2): Ch 3. Sl st in 2nd and 1st ch. Fasten off.
-
Belly Details: Use contrasting thread to stitch horizontal lines across the white belly section, spacing them 2–3 rows apart.
Assembly
-
-
Body: Pull the long tail through the center of the body to curve the tail upward.
-
Face: Sew the tongue and fangs at the seam between the green and white sections.
-
Eyes: Add black pupils or safety eyes to the bulging eye pieces.
-
Finishing: Attach the keychain ring to the top of the head.
-
Video Tutorial:
Pattern In UK Terms
Part 1: Head & Body
-
Rnd 1: Magic Ring, 8 dc. ss to join, ch 1. [8]
-
Rnd 2: 2 dc in each st around. ss, ch 1. [16]
-
Rnd 3: (1 dc, 2 dc in next st) x 8. ss, ch 1. [24]
-
Rnd 4: (3 dc, 2 dc in next st) x 6. ss, ch 1. [30]
-
Rnd 5: (2 dc, 2 dc in next st, 2 dc) x 6. ss, ch 1. [36]
-
Rnd 6: 1 dc in each st around. ss, ch 1. [36]
-
Rnd 7: (5 dc, 2 dc in next st) x 6. ss, ch 1. [42]
-
Rnd 8–12: 1 dc in each st around. ss, ch 1. [42]
-
Rnd 13: (Working in BLO): (5 dc, dc2tog) x 6. Note: Change to white yarn for the belly section. ss, ch 1. [36]
-
Rnd 14: (2 dc, dc2tog, 2 dc) x 6. ss, ch 1. [30]
-
Rnd 15: (3 dc, dc2tog) x 6. ss, ch 1. [24]
-
Rnd 16: 1 dc in each st around. ss, ch 1. [24]
-
Rnd 17: (2 dc, dc2tog) x 6. ss, ch 1. [18]
-
Rnd 18–20: 1 dc in each st around. ss, ch 1. [18]
-
Rnd 21: (4 dc, dc2tog) x 3. ss, ch 1. [15]
-
Rnd 22–24: 1 dc in each st around. ss, ch 1. [15]
-
Rnd 25: (3 dc, dc2tog) x 3. ss, ch 1. [12]
-
Rnd 26–28: 1 dc in each st around. ss, ch 1. [12]
-
Rnd 29: (2 dc, dc2tog) x 3. ss, ch 1. [9]
-
Rnd 30–32: 1 dc in each st around. ss, ch 1. [9]
-
Rnd 33: (1 dc, dc2tog) x 3. ss, ch 1. [6]
-
Rnd 34: 1 dc in each st around. Fasten off leaving a long tail to sew the tail closed.
Part 2: Eyes (Make 2)
-
Rnd 1: Magic Ring, 6 dc. ss, ch 1. [6]
-
Rnd 2: 2 dc in each st around. ss, ch 1. [12]
-
Rnd 3: (1 dc, 2 dc in next st) x 6. ss, ch 1. [18]
-
Rnd 4–5: 1 dc in each st around. ss, ch 1. [18]
-
Rnd 6: (1 dc, dc2tog) x 6. ss, ch 1. [12]
-
Rnd 7: (dc2tog) x 6. [6]
-
Fasten off, stuff lightly, and sew/glue to the top of the head.
Part 3: Accessories
-
Forked Tongue (Red): Ch 7. ss in 7th, 6th, and 5th ch. Ch 3. ss in 3rd and 2nd ch. ss into the base of the first fork. ss in remaining 4 ch. Fasten off.
-
Fangs (White – Make 2): Ch 3. ss in 2nd and 1st ch. Fasten off.
-
Belly Details: Use contrasting thread to stitch horizontal lines across the white belly section.
Assembly
-
Body: Pull the long tail through the centre of the body to curve the tail upward.
-
Face: Sew the tongue and fangs at the join between the green and white sections.
-
Finishing: Attach the keychain ring to the top of the head.