
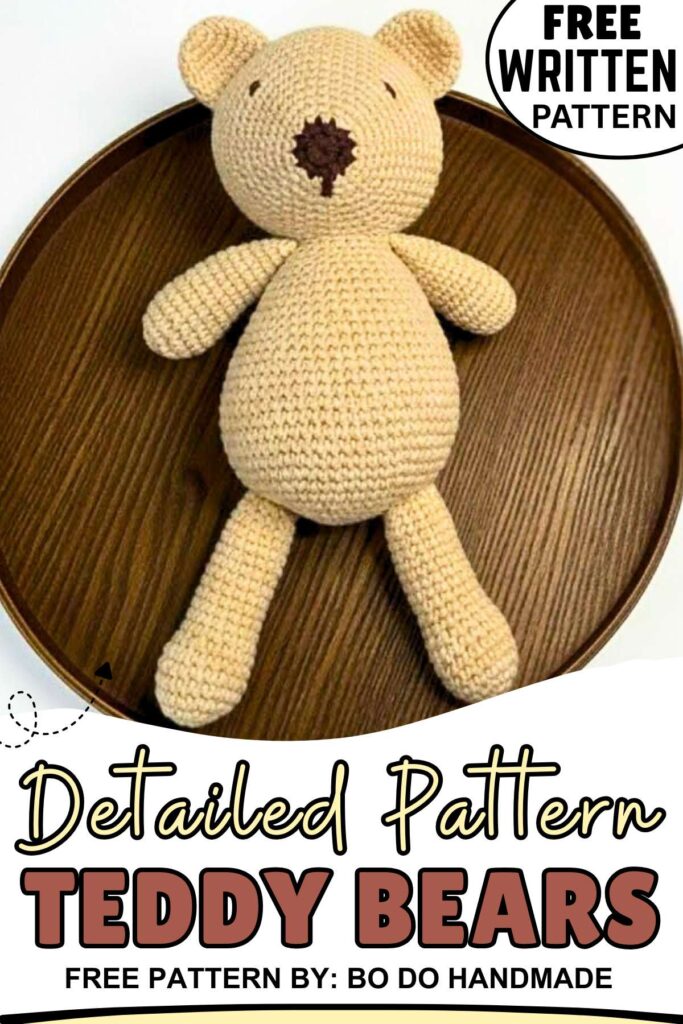
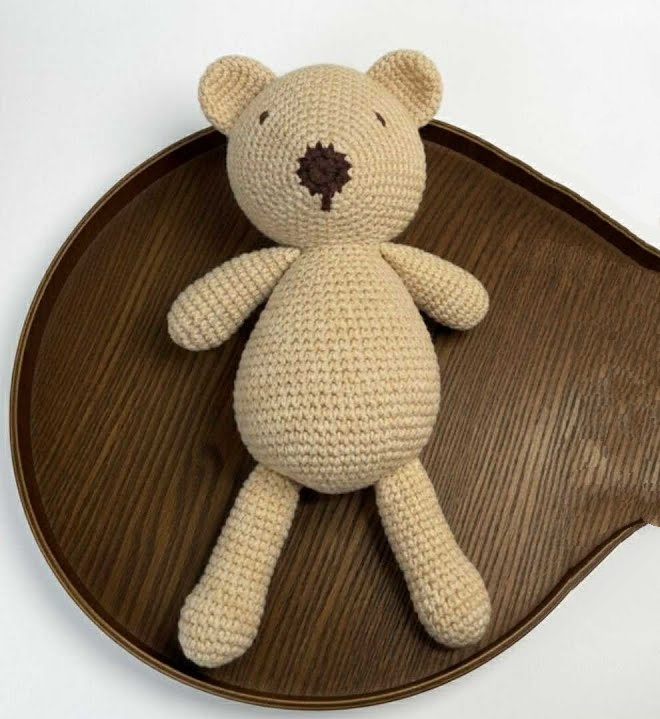
Free Crochet Teddy Bear Toy Pattern for Kids
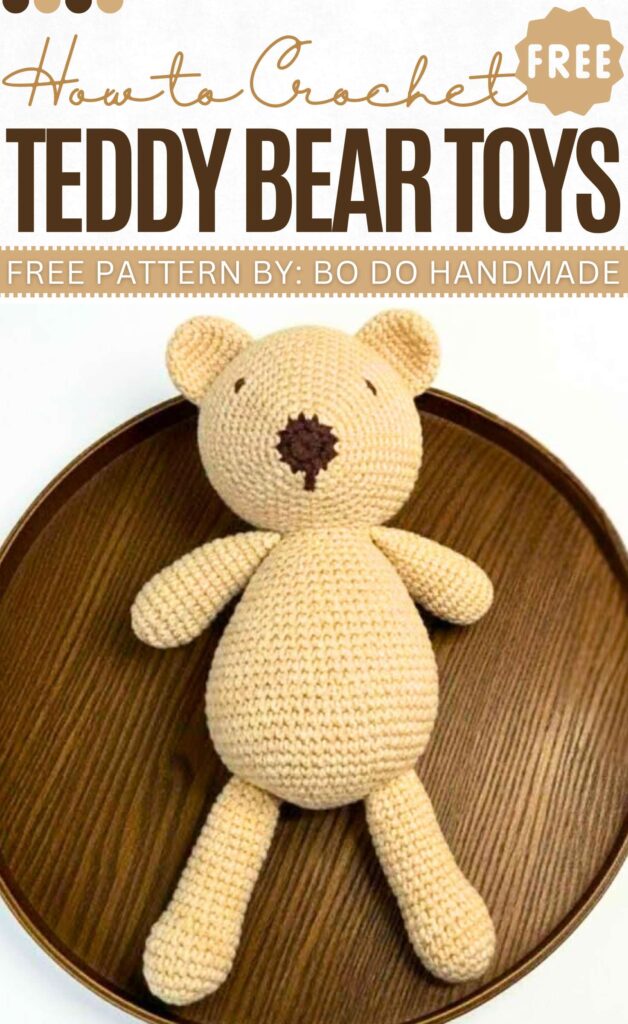
Crochet an easy, large teddy bear toy doll for toddlers with a free written pattern that moms can follow easily. This amigurumi teddy will be worked in many parts, so beginners can easily make it. The face of the bear is also basic, with funny sleeping eyes and a simple muzzle.
The body will be no-sew and needs a basic pattern. The same is for the legs and arms. A little sewing will be needed, and that will be manageable for sure. So, follow through with me as I will provide the pattern in both US and UK terms.
Teddy Bear Doll for Kids
Bi do Handmade is an had been an expert in crocheting and designing crochet amigurumi, bag charms, and pouches.
Note: For this amigurumi in particular, we shall share the written pattern that is complete and checked.
Teddy bear tutorials shared already:
Crochet Teddy Bear Pattern
I will have to write the free crochet teddy bear pattern below in US terms:
Abbreviations
-
MR: Magic Ring
-
Sc: Single crochet
-
Inc: Increase (2 sc in one stitch)
-
Dec: Decrease (Invisible decrease recommended)
-
Sl st: Slip stitch
-
Ch: Chain
-
St(s): Stitch(es)
-
R: Round
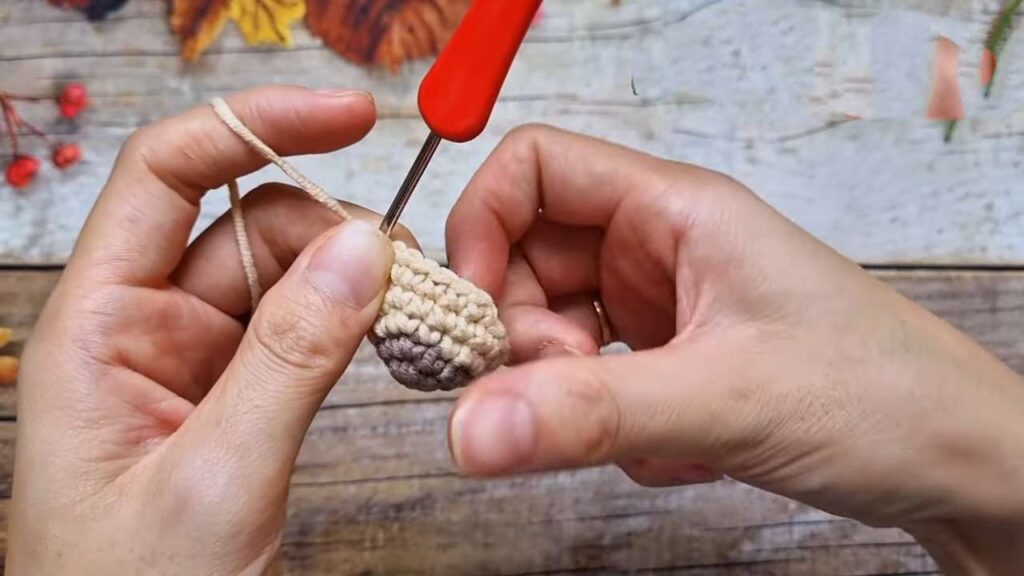
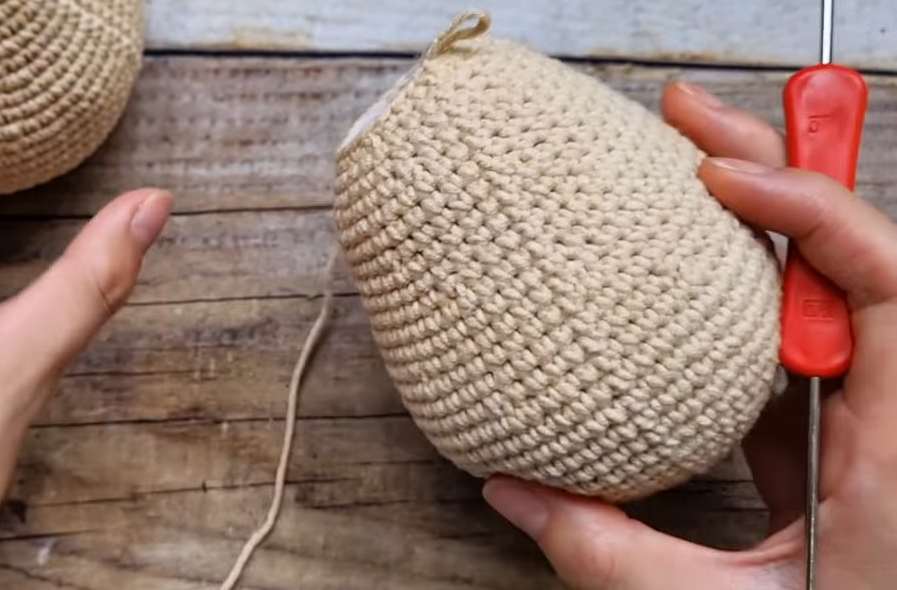
Snout & Head
-
R1: MR, 8 sc. (8)
-
R2: (1 sc, 1 inc) * 4. (12)
-
Change color for head.
-
R3: (2 sc, 1 inc) * 4. (16)
-
R4: (3 sc, 1 inc) * 4. (20)
-
R5: (2 sc, 1 inc, 2 sc) * 4. (24)
-
R6–R13: Continue increasing 4 sts per round (staggering even-numbered inc rounds).
-
R14: (14 sc, 1 inc) * 4. (60)
-
R15–R21: 60 sc. (7 rounds)
-
R22: (4 sc, 1 dec, 4 sc) * 6. (54)
-
R23: (7 sc, 1 dec) * 6. (48)
-
R24: (3 sc, 1 dec, 3 sc) * 6. (42)
-
R25: (5 sc, 1 dec) * 6. (36)
-
R26: (2 sc, 1 dec, 2 sc) * 6. (30)
-
R27: (3 sc, 1 dec) * 6. (24)
-
R28: (1 sc, 1 dec, 1 sc) * 6. (18)
-
R29: (1 sc, 1 dec) * 6. (12)
-
Stuff firmly.
-
R30: 6 dec. (6)
-
Close and weave in ends.
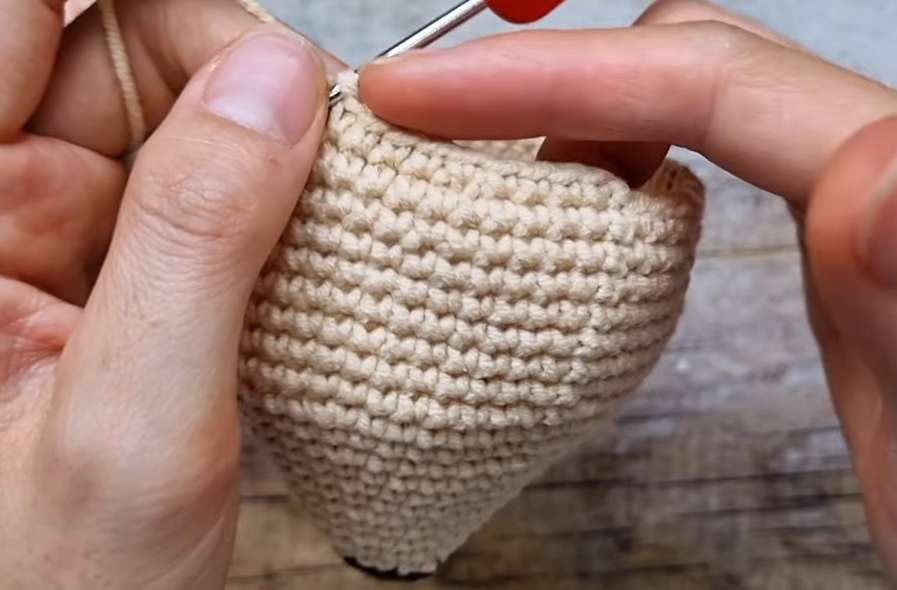
Body
-
R1: MR, 6 sc. (6)
-
R2: 6 inc. (12)
-
R3: (1 sc, 1 inc) * 6. (18)
-
R4: (1 sc, 1 inc, 1 sc) * 6. (24)
-
R5–R9: Continue increasing 6 sts per round until 60 sts.
-
R10: (4 sc, 1 inc, 4 sc) * 6. (60)
-
R11–R15: 60 sc. (5 rounds)
-
R16: (4 sc, 1 dec, 4 sc) * 6. (54)
-
R17–R18: 54 sc.
-
R19: (7 sc, 1 dec) * 6. (48)
-
R20–R21: 48 sc.
-
R22: (3 sc, 1 dec, 3 sc) * 6. (42)
-
R23–R24: 42 sc.
-
R25: (5 sc, 1 dec) * 6. (36)
-
R26–R27: 36 sc.
-
R28: (2 sc, 1 dec, 2 sc) * 6. (30)
-
R29–R30: 30 sc.
-
R31: (3 sc, 1 dec) * 6. (24)
-
Stuff firmly. Fasten off with long tail for sewing.
Ears (Make 2)
-
R1: MR, 6 sc. (6)
-
R2: 6 inc. (12)
-
R3: (1 sc, 1 inc) * 6. (18)
-
R4–R7: 18 sc.
-
Fasten off. Do not stuff. Fold to make a concave shape.
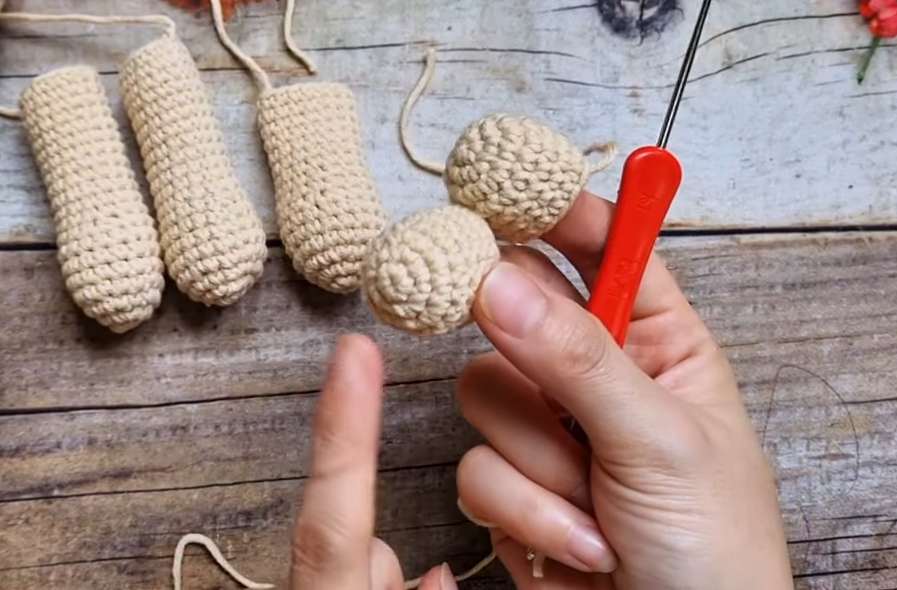
Arms (Make 2)
-
R1–R3: Same as Ears. (18)
-
R4: (4 sc, 1 dec) * 3. (15)
-
R5–R15: 15 sc.
-
Stuff bottom half only. Flatten top and sew to body.
Legs (Make 2)
-
R1–R3: Same as Ears. (18)
-
R4: (4 sc, 1 dec) * 3. (15)
-
R5–R20: 15 sc.
-
Stuff fully. Sew to bottom of body.
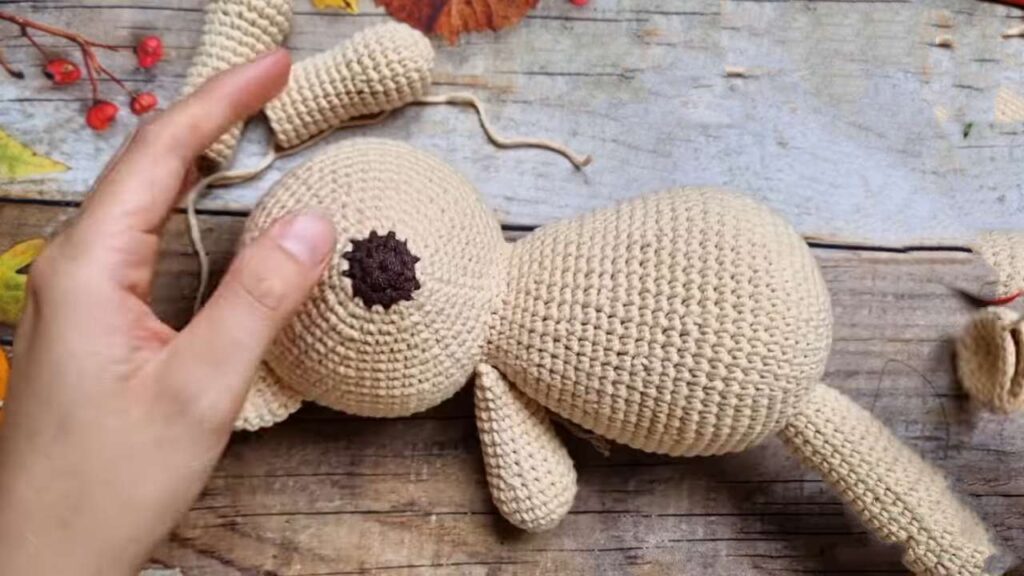
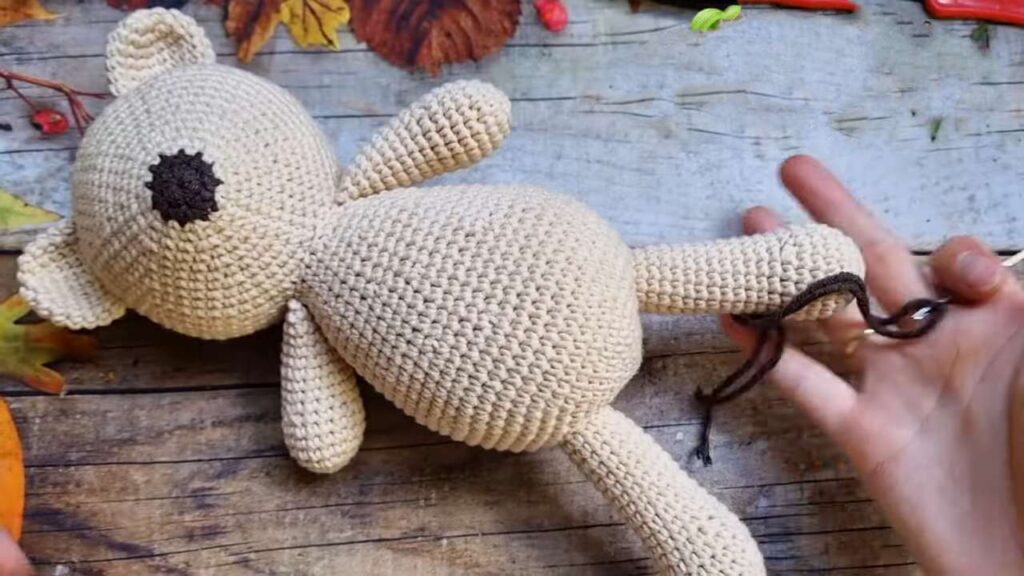
Assembly
-
Head/Body: Sew head to body at a slight forward angle.
-
Ears: Attach between R18–R22 of head.
-
Arms: Attach at the neck junction.
-
Legs: Attach to the base of the body, spaced 3–4 sts apart.
-
Face: Embroider nose and eyes using dark yarn.
Video Tutorial
Pin it
UK Pattern
Head
-
R1: 8 dc in MR (brown).
-
R2: (1 dc, inc) x 4 (12).
-
R3: Change color. (2 dc, inc) x 4 (16).
-
R4–R14: Continue increasing 4 sts per round until 60 dc.
-
R15–R21: dc around (60).
-
R22–R29: Decrease 6 sts per round (e.g., R22: 8 dc, dec) x 6. Stuff firmly.
-
R30: 6 dec. Fasten off and sew closed.
Body
-
R1: 6 dc in MR.
-
R2: 6 inc (12).
-
R3–R10: Continue increasing 6 sts per round until 60 dc.
-
R11–R15: dc around (60).
-
R16: (8 dc, dec) x 6 (54).
-
R17–R18: dc around (54).
-
R19: (7 dc, dec) x 6 (48).
-
R20–R21: dc around (48).
-
R22–End: Repeat cycle (1 dec round, 2 dc rounds) until 24 dc remain. Stuff and sew to head.
Ears, Arms & Legs
-
Base (All): R1–R3 of Body (18 dc).
-
Ears: 4 rounds of dc around (18). Flatten, do not stuff.
-
Arms/Legs Transition: (4 dc, dec) x 3 (15).
-
Arms: ~10 rounds of dc. Stuff bottom half only.
-
Legs: ~14 rounds of dc. Stuff firmly.