
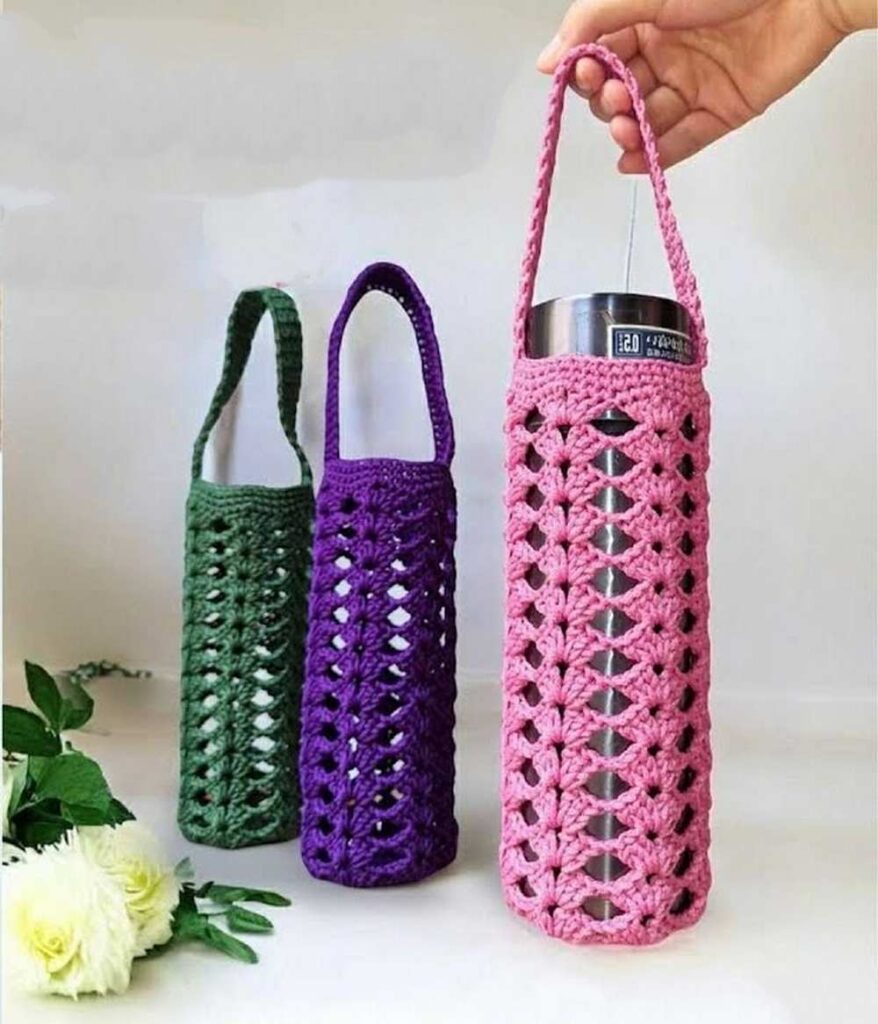
Free Crochet Water Bottle Holder Pattern For Summer
Here is the free pattern for crocheting an elegant water bottle holder with a small handle to hold. It is designed for insulated flasks, but the pattern is repetitive, so you can crochet it any size. There is a beautiful mesh and shell stitch texture all around, while the handle is crocheted from the solid stitch.
You can also turn it into a sling bag by crocheting an I-cord strap instead. Choose from purple, aqua, green, and pink. You can also crochet it with stripes of yarn. I will share both the UK and US patterns for this.

Bi Do Handmade has been an expert in crocheting and designing crochet hats, bag charms, and pouches. Also, visit her YouTube channel for more exciting projects.
Materials Used
Yarn: Solid color woven cord or t-shirt yarn (sợi dệt)
Hook: 2.5 mm crochet hook
Tools: Scissors, yarn needle, lighter (to seal cord ends), measuring tape
Optional: Decorative stickers or patches
Abbreviations (EN)
MR: Magic ring
ch: Chain
sc: Single crochet
dc: Double crochet
inc: Increase (2 sc in the same st)
ss: Slip stitch
st(s): Stitch(es)
sp: Space
Shell: Pattern consisting of (3 dc, ch 2, 3 dc) in the same space
Pattern Instructions
Base (Worked in Rounds)
Rnd 1: MR, ch 1, 8 sc into MR. Join with ss to first sc, ch 1. (8 sts)
Rnd 2: 8 inc around. Join with ss, ch 1. (16 sts)
Rnd 3: [1 sc, inc] 8 times. Join with ss, ch 1. (24 sts)

- Rnd 4: [3 sc, inc] 6 times. Join with ss, ch 1. (30 sts)
Rnd 5: [4 sc, inc] 6 times. Divide even numbers to offset: 2 sc, inc, [4 sc, inc] repeat, 2 sc. (36 sts)
Size Adjustment: Continue increasing by adding 1 sc between increases per round (e.g., 5 sc + inc) until the base diameter × 3.14 matches your bottle’s circumference (approx. 21 cm).
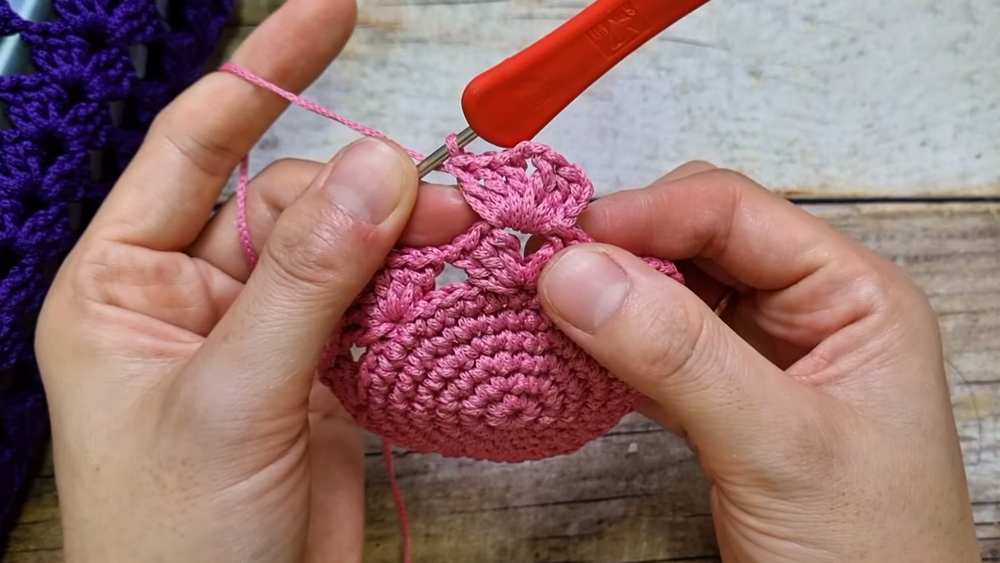
Body (Shell Pattern)
Rnd 1: Ch 3 (counts as 1 dc), 2 dc in same st, ch 2, 3 dc in same st. [ch 1, sk 5 sts, shell in 6th st] repeat around. ch 1, join with ss to 3rd ch.
Rnd 2+: ss into next 2 dc and into ch-2 sp. Ch 3, 2 dc, ch 2, 3 dc in ch-2 sp. [ch 1, shell in next ch-2 sp] repeat around. ch 1, join with ss.
Height: Repeat until the bag is 3–4 cm shorter than the bottle height.
Rim (Finishing)
Rnd 1: Ch 1, sc in each dc of the shell (skipping the ch-1 spaces between shells), and 1 sc in each ch-2 center space of the shells. Join with ss.
Rnd 2–4: Ch 1, sc in each st around. Join with ss.
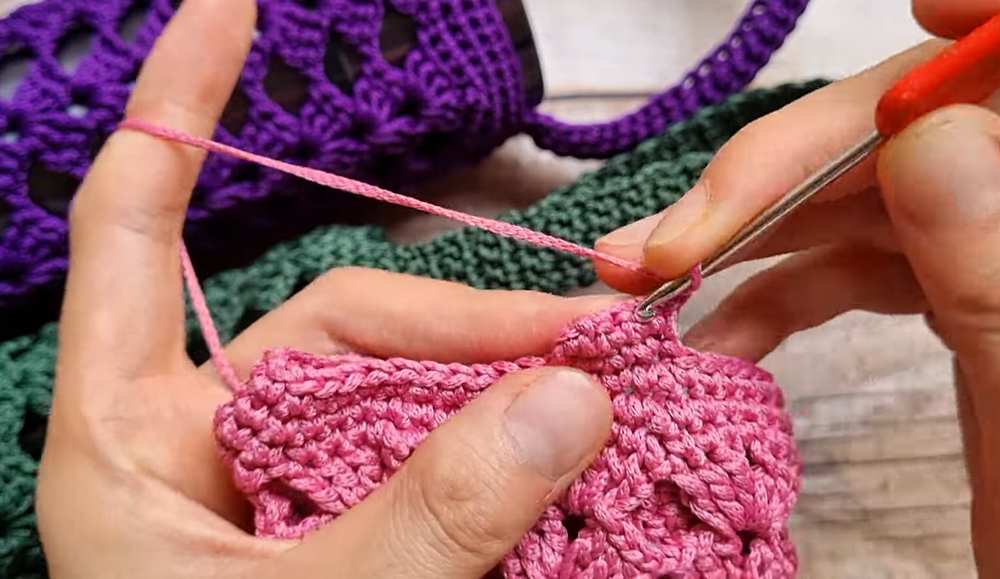
Handle
Row 1: 4 sc.
Row 2: Ch 1, turn. Sk 1st st, sc in next 3 sts, sc into the starting ch-1 space.
Repeat: Repeat Row 2 until the handle reaches the desired length.
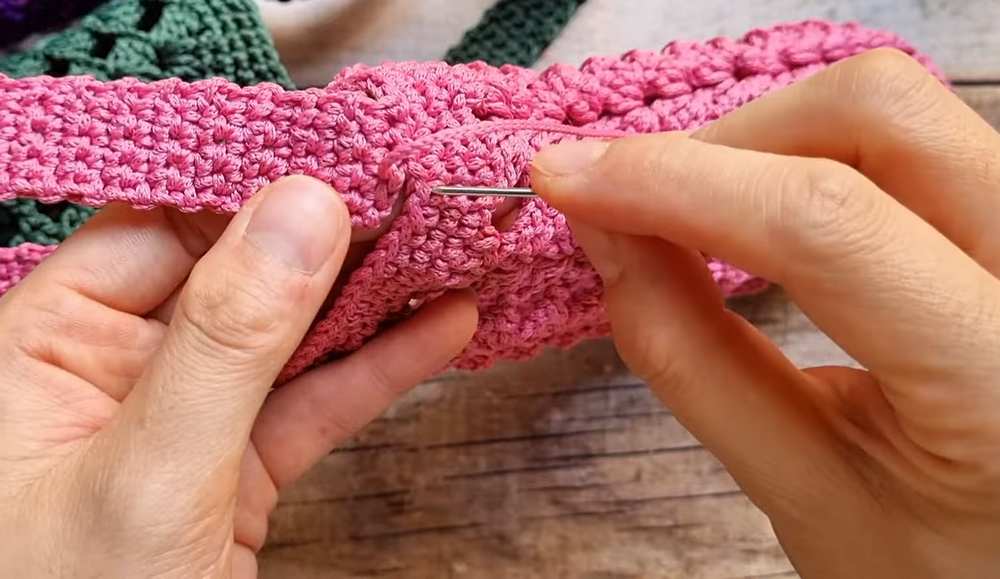
Assembly in Detail
Alignment: Fold the bag rim flat to find the exact opposite point of the handle’s starting side. Count the stitches to ensure the handle is centered.
Marking: Identify 5 stitches on the rim for attachment (4 sc stitches of handle width + 1 extra for turning logic).
Sewing: Using a yarn needle and the long tail left from the handle, sew the end of the handle to the marked stitches on the rim. Use a whip stitch or mattress stitch, passing through both the handle edge and rim stitches. Pull tight to secure.
Reinforcement: Pass the needle through the join twice at the edges for extra strength.
Finishing: Weave the yarn tail into the inside of the bag. Carefully melt the tip with a lighter to prevent fraying.
Decorating: Attach stickers or patches to the center of the shell pattern if desired. Insert the bottle to allow the crochet fabric to stretch and settle into its final shape.
Video Tutorial:
UK Pattern:
Base (Worked in Rounds)
Rnd 1: MR, ch 1, 8 dc into MR. Join with ss to first dc, ch 1. (8 sts)
Rnd 2: 8 inc around. Join with ss, ch 1. (16 sts)
Rnd 3: [1 dc, inc] 8 times. Join with ss, ch 1. (24 sts)
Rnd 4: [3 dc, inc] 6 times. Join with ss, ch 1. (30 sts)
Rnd 5: [4 dc, inc] 6 times. Divide even numbers to offset: 2 dc, inc, [4 dc, inc] repeat, 2 dc. (36 sts)
Size Adjustment: Continue increasing by adding 1 dc between increases per round (e.g., 5 dc + inc) until the base diameter × 3.14 matches your bottle’s circumference (approx. 21 cm).
Body (Shell Pattern)
Rnd 1: Ch 3 (counts as 1 tr), 2 tr in same st, ch 2, 3 tr in same st. [ch 1, sk 5 sts, shell in 6th st] repeat around. ch 1, join with ss to 3rd ch.
Rnd 2+: ss into next 2 tr and into ch-2 sp. Ch 3, 2 tr, ch 2, 3 tr in ch-2 sp. [ch 1, shell in next ch-2 sp] repeat around. ch 1, join with ss.
Height: Repeat until the bag is 3–4 cm shorter than the bottle height.
Rim (Finishing)
Rnd 1: Ch 1, dc in each tr of the shell (skipping the ch-1 spaces between shells), and 1 dc in each ch-2 center space of the shells. Join with ss.
Rnd 2–4: Ch 1, dc in each st around. Join with ss.
Handle
Row 1: 4 dc.
Row 2: Ch 1, turn. Sk 1st st, dc in next 3 sts, dc into the starting ch-1 space.
Repeat: Repeat Row 2 until the handle reaches desired length.