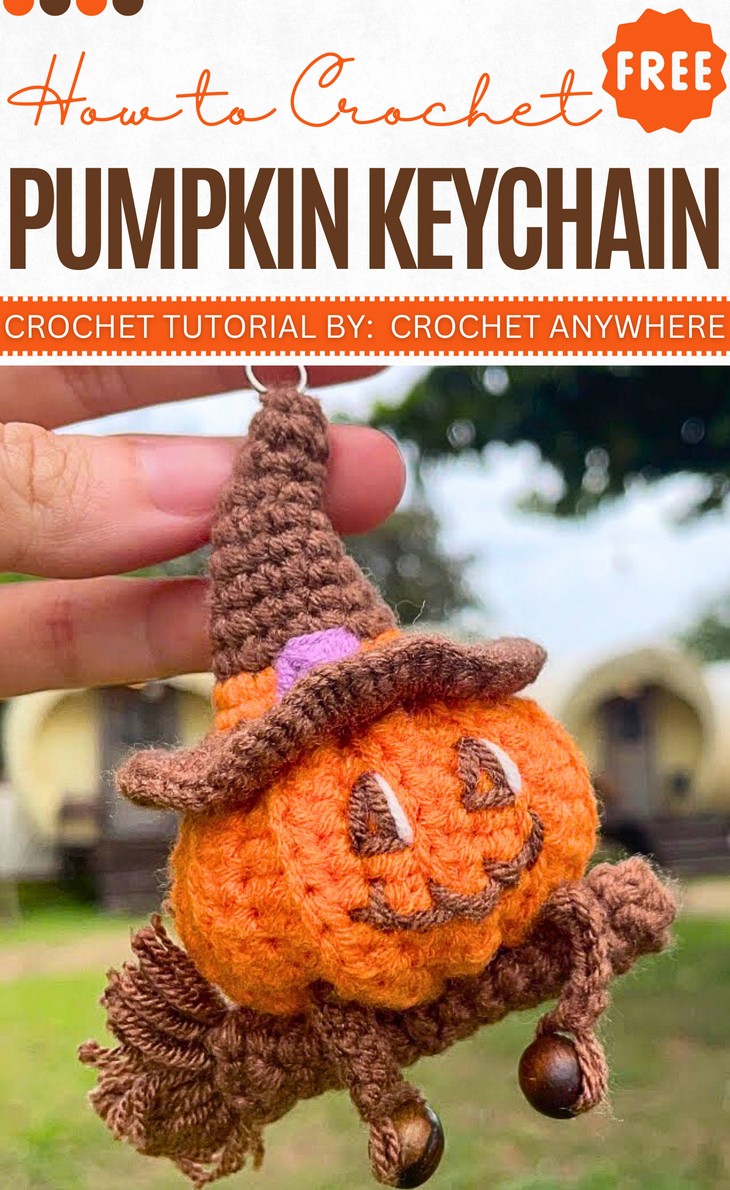
How to Crochet Witch Pumpkin on Witchcraft Amigurumi for Halloween
Here is a stitch-by-stitch tutorial on how to crochet a mini witch pumpkin amigurumi + a crochet witchcraft presented by Crochet Anywhere. This is undeniably the coolest Halloween amigurumi and can be finished within 1 hour. The pumpkin wears a long witch hat, has beaded legs, and a well-detailed embroidered face. You can crochet this witch pumpkin set as a bag charm with a feel of flying all around.
The tutorial will be easy to follow even for beginners. So, if you are interested in crocheting this pumpkin amigurumi for Halloween, continue reading this post till the end!
About the Designer: The designer of this Halloween pumpkin in sitting pose is @Crochetanywhere – she always tries to include the themes quirky in crochet accessories from the animals to flowers and much more. She also crochet the vibrant and beautiful bag charms and keychains. She keeps her library fresh with the fall occasions and Christmas. You will love her crochet pumpkin basket and bunny keyholder.
Note: In respect for the creator’s pattern rights, there will be no provision of the written pattern. You can watch the tutorial with on-screen written instructions at the end of this post.

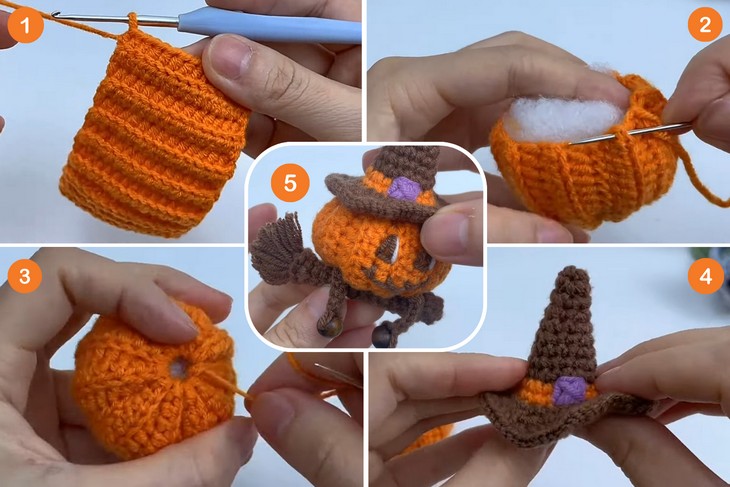
Crochet Witchcraft & Pumpkin Charm Tutorial
Skill Level: Beginner. You will need the basic amigurumi stitches and techniques like the slip knot (yes, flat amigurumi!), working in the rounds, single crochet and more like half-double crochet, slip stitches, increase and decrease, plus some basic sewing. The pattern is written in the US instructions. Like the crochet pumpkin from a rectangle, this pattern is also worked in flat rows with ribbing. Color change will be used in the witch hat and BLO, too.
Much more focus is on embroidering the face and adding the tassels to the legs of the witch pumpkin, and making the legs curly.

Tutorial Timing: Approximately 28 minutes only. (perfect for purifying your embroidery and perfecting the non-amigurumi skills. The crochet pumpkin from a flat is a clever skill that can also be used to crochet a slipper from a rectangle.)
Personalization Tips: Each part in this crochet witch pumpkin set can be crocheted as a separate toy like the witch hat for your amigurumi dolls and pumpkin for fall decor. It will look much adorable if you use the plush yarn (not necessarily bulky one!).

Pattern Type: An on-screen written pattern is available if you find written instructions easy to follow along with.
Supplies Needed
Here’s the list of materials and tools for crocheting this witch pumpkin for Halloween:
Cotton yarn DROPS SAFRAN is a 100% cotton yarn although the tutor uses Milk Cotton yarn
Crochet hook (size 2mm)
Needle (for weaving in ends and joining)
Scissors
Glue (for securing parts if needed)
- Colors: orange, brown, white and purple.

Techniques Used
Learn the following crochet techniques for crocheting this Halloween pumpkin project for trick-or-treating bag:
- Chain (ch) Yarn over and pull through the loop on your hook to form a single chain.
- Slip Stitch (sl st) Insert hook into the stitch, yarn over, and pull through both the stitch and the loop on your hook in one step.
- Single Crochet (sc): Insert hook into the stitch, yarn over, pull through, yarn over again, and pull through both loops.
- Half Double Crochet (hdc) Yarn over, insert hook into stitch, yarn over and pull through, then yarn over and pull through all three loops on your hook.
- Double Crochet (dc) Yarn over, insert hook into stitch, yarn over and pull through, yarn over and pull through two loops, yarn over and pull through the last two loops.
- Treble Crochet (tr) Yarn over twice, insert hook into stitch, yarn over and pull through, yarn over and pull through two loops (repeat twice).
- Double Treble Crochet (dtr) Yarn over three times, insert into stitch, yarn over and pull through, yarn over and pull through two loops (repeat three times).
- Increase (inc/2sc inc) Work two stitches into the same stitch to add to the total stitch count.
- Decrease (dec/2sctog) Insert hook into the next stitch, yarn over and pull through, insert into the following stitch, yarn over and pull through, yarn over and pull through all loops on the hook.
- Magic Ring/Magic Circle Wrap yarn into a loop, pull a new loop through with your hook, and work your initial stitches into the adjustable ring.
- Front Loop Only (FLO) Work into only the front half of the stitch (the loop closest to you).
- Back Loop Only (BLO) Work into only the back half of the stitch (the loop furthest from you).
- Popcorn (pop) Work 4-5 stitches into the same stitch, drop the loop, reinsert the hook into the first stitch of the group, pull the dropped loop through to pop and secure.