
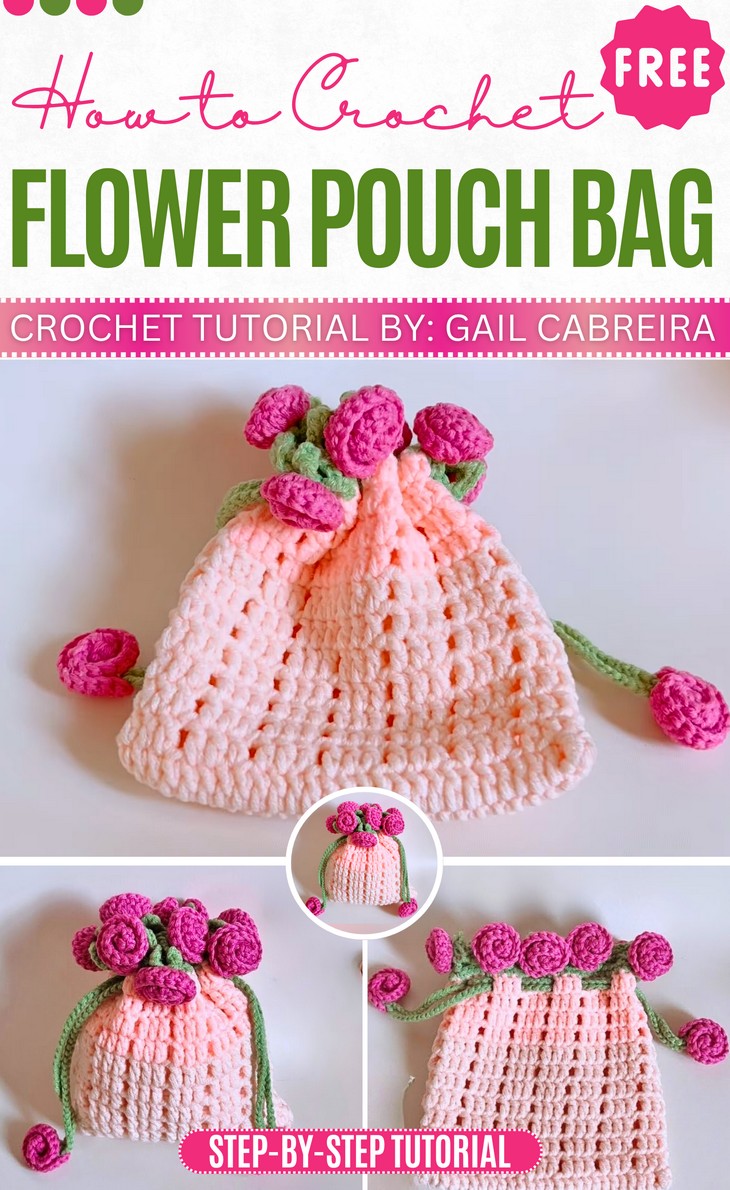
How to Crochet Trendy Rose Bouquet Drawstring Pouch for Gifting
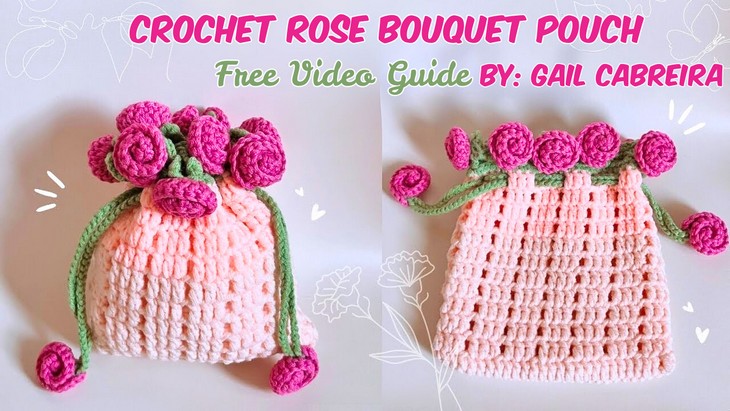
The brightest and worth-gifting to a dear one flower pouch project is here! So, learn how to crochet this easy and quick rose bouquet drawstring pouch that is equally pleasant to use the whole year. The finished pouch is a pink drawstring with green and pink crocheted roses all around the edges of the opening and a double drawstring with roses, too. This crochet pouch also features little chain spaces for mesh texture and mostly follows an easy pattern. With a stitch-by-stitch tutorial from Gail Cabreira, you can learn crocheting one within 45 minutes.
Crocheting the rose will actually be much easier than you think. So, whether for spring or fall gifting, if you have made up your mind to crochet this rose bouquet pouch bag, continue reading this post till the end. There you will find the complete tutorial!
About the Designer: The designer behind this rose flower bag project is @GailCabreira – she always crochets small amigurumi, bag charms and keychains using so many bright colors. She has Disney amigurumi: Tutorials for characters like Stitch and Lilo from Lilo & Stitch. Flower-themed items: Videos on how to crochet roses, bouquets, and flower-shaped keychains and pouches. Other accessories: Tutorials for items like bags, keychains, and coasters. You will love her crochet library!
Note: In respect for the creator’s pattern rights, there will be no provision of the written pattern. You can watch the tutorial with on-screen written instructions at the end of this post.
Crochet Rose Bag Tutorial Features
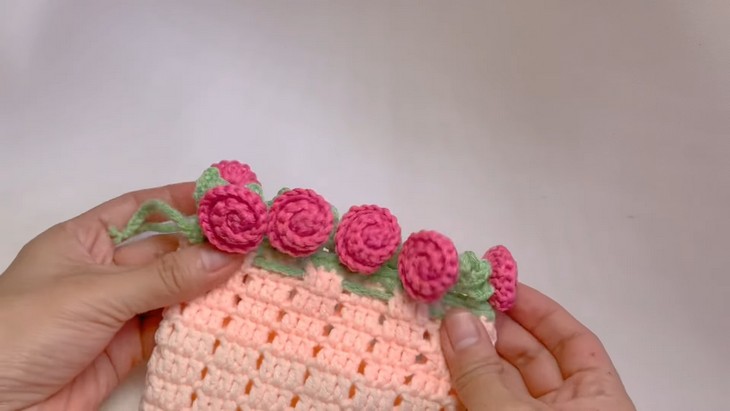
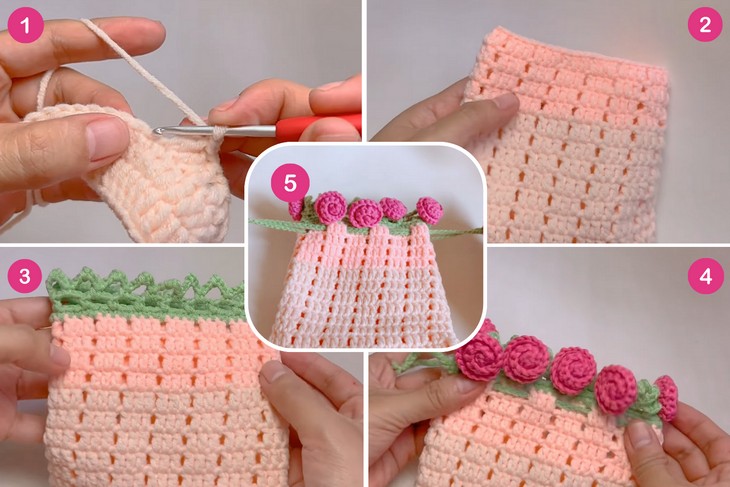
Skill Level: Intermediate. First, the pouch tutorial shows how to crochet the main body of the pouch, starting with a slip knot and 29 chains. The base of the pouch is created with a series of double crochet stitches. The sides of the bag are then worked in subsequent rounds, creating a series of small holes. After completing the main pouch, the video shows how to make the individual pink crocheted roses and the long green string for the closure.
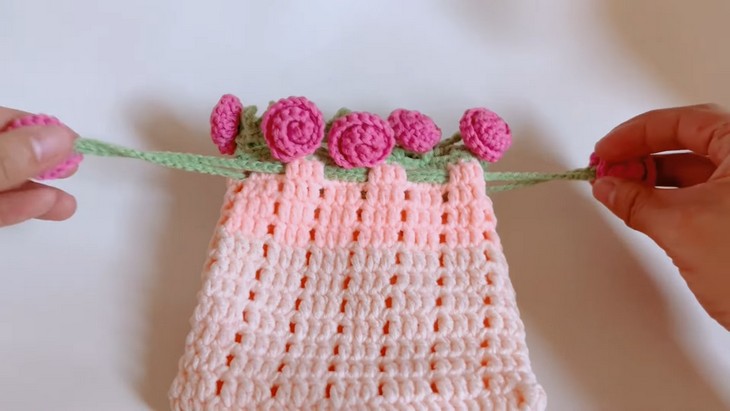
Finally, the video instructs on how to assemble all the pieces by attaching the roses to the pouch and weaving the string through the holes to create the drawstring closure.
Tutorial Timing: Approximately 18 Minutes Only (perfect for learning the fastest and easiest way to crochet the rose flower, mesh texture, and how to make drawstring holes. You will also learn how to crochet a basic drawstring pouch.)

Personalization Tips: You can wear the pouch as a shoulder or cross-body bag by adding a long strap. You can also arrange the roses in various patterns to create a “bouquet” effect when the flower pouch is closed so larger the number, the better the bouquet effect it is. The video mentions that the roses can be either sewn or glued onto the pouch.
Pattern Type: An on-screen written pattern is available if you find written instructions easy to follow along with.
Materials and Tools
Gather the following crochet supplies that the tutor suggested for crocheting this flower bouquet bag:
Milk Cotton Yarn 5ply (Color of your choice). This is the main yarn for crocheting the pouch and flowers. 5-ply milk cotton is soft, durable, and slightly stretchy, making it great for bags. You’ll need at least two colors: one for the pouch body and the others for flowers/leaves.
3mm Crochet Hook: Small enough to create tight stitches, but still comfortable for 5-ply yarn. Ensures your pouch has structure and doesn’t become too loose or floppy.
Scissors
Hot Glue
Optional: Stitch Marker: Especially useful when working on the pouch body or repetitive flower motifs.
Darning Needle (Yarn Needle): Used to weave in yarn ends securely. Also helps join crocheted parts if you prefer sewing instead of hot gluing.
Techniques in the Pouch Tutorial
Learn the following crochet techniques and stitches for crocheting this mini pouch for all ages:
- Slip Knot: Create a slip knot to begin and secure the starting loop on your hook.
- Chains (Ch): Crochet 29 chains to form the foundation chain for the pouch.
- Double Crochet (dc): Yarn over, insert hook into the stitch, yarn over, pull through, yarn over again, pull through two loops, yarn over, pull through remaining two loops (used for the base and sides).
- Rounds with Holes: Skip specific stitches and chain between double crochet stitches to create decorative holes.
- Magic Ring (MR): Form an adjustable ring to begin the flower base.
- Half Double Crochet (hdc): Yarn over, insert hook into stitch, yarn over, pull through, yarn over again, pull through all loops (used for petal formation).
- Increasing Petals: Work multiple stitches (e.g., hdc or dc) into the same stitch to shape larger petals for the rose.
- Chains (Ch): Crochet a long chain to form the string for the pouch closure mechanism.
- Slip Stitches (sl st): Work slip stitches along the chain if needed to add reinforcement or texture.
How is it done?
First, the video demonstrates how to crochet the main body of the pouch, starting with a slip knot and 29 chains. The base of the pouch is created with a series of double crochet stitches. The sides of the bag are then worked in subsequent rounds, creating a series of small holes.
After completing the main pouch, the video shows how to make the individual pink crocheted roses and the long green string for the closure.
Finally, the video instructs on how to assemble all the pieces by attaching the roses to the pouch and weaving the string through the holes to create the drawstring closure.
Complete Video Guide
Questions You May Ask
How big is the finished rose bouquet pouch?
The final size depends on your yarn weight and hook size, but most DIY crochet pouch projects like this result in a small, hand-held drawstring pouch—perfect for coins, jewelry, or small gifts.
How can I adjust the size of the pouch?
To make the pouch larger or smaller, you can:
Increase/decrease the base rounds (keep expanding the circle until you reach your desired width).
Add/remove body rounds (this changes the height of the pouch).
Use thicker/thinner yarn and an appropriately sized hook to scale the whole project up or down.
Do I need to line the pouch?
A lining is optional but recommended if you plan to carry small items like coins or jewelry. You can hand-sew or machine-stitch a fabric lining and insert it before attaching the drawstring.
How do I make the drawstring sturdier?
Instead of just chaining, you can:
Crochet an i-cord or use a braided yarn cord for durability.
Thread a ribbon or leather cord for a decorative finish.