
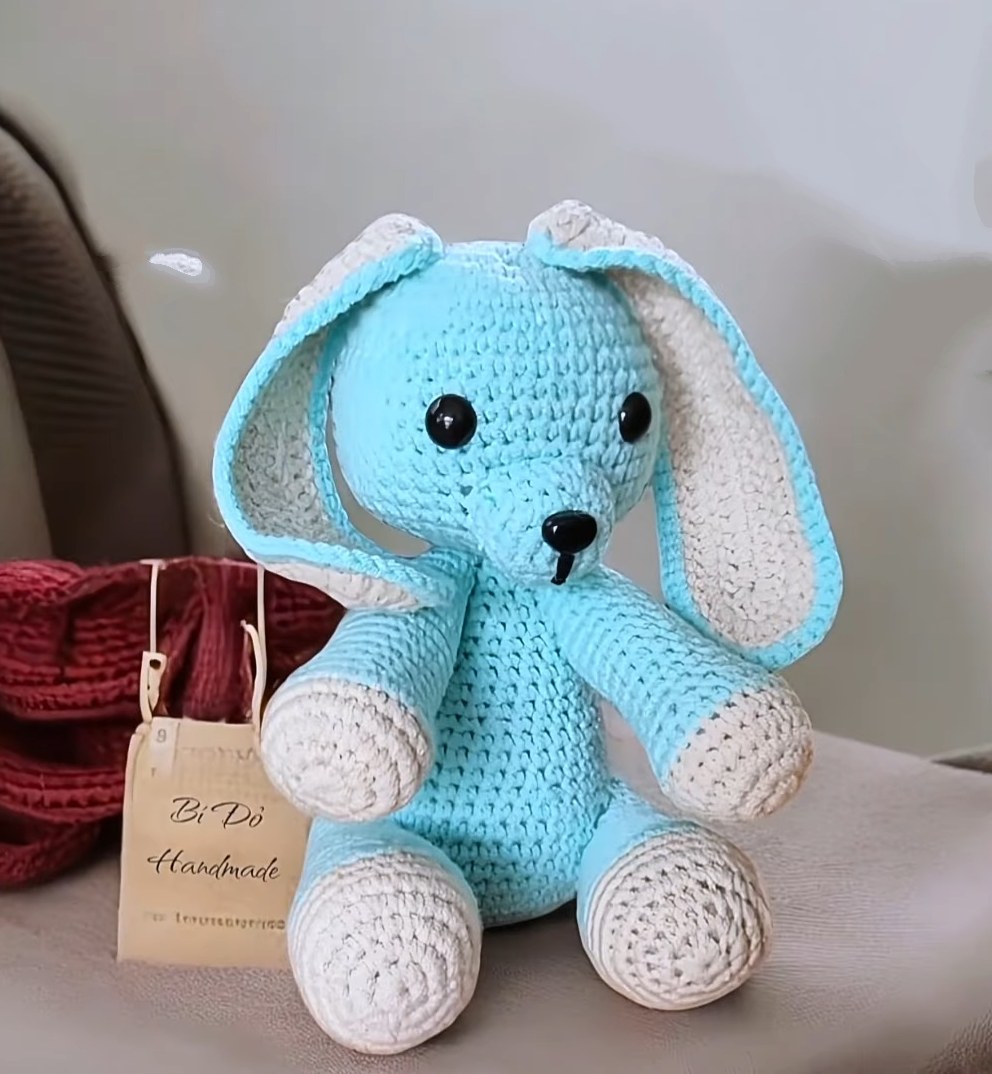
Free Crochet Long Ear Bunny Amigurumi Pattern
The long ear crochet bunny is probably the most popular amigurumi bunny. In this post, I will share a complete, free written pattern for crocheting a big amigurumi bear with long ears.
It will be easy for a beginner because it only has the usual and basic animal doll parts. Crochet this rabbit doll for a toddler with the same flat base that allows it to sit without support.
The colors are unique, as we will be using the blue and the beige. I love especially the muzzle of the doll and the eyes. You can finish it within two hours or so.
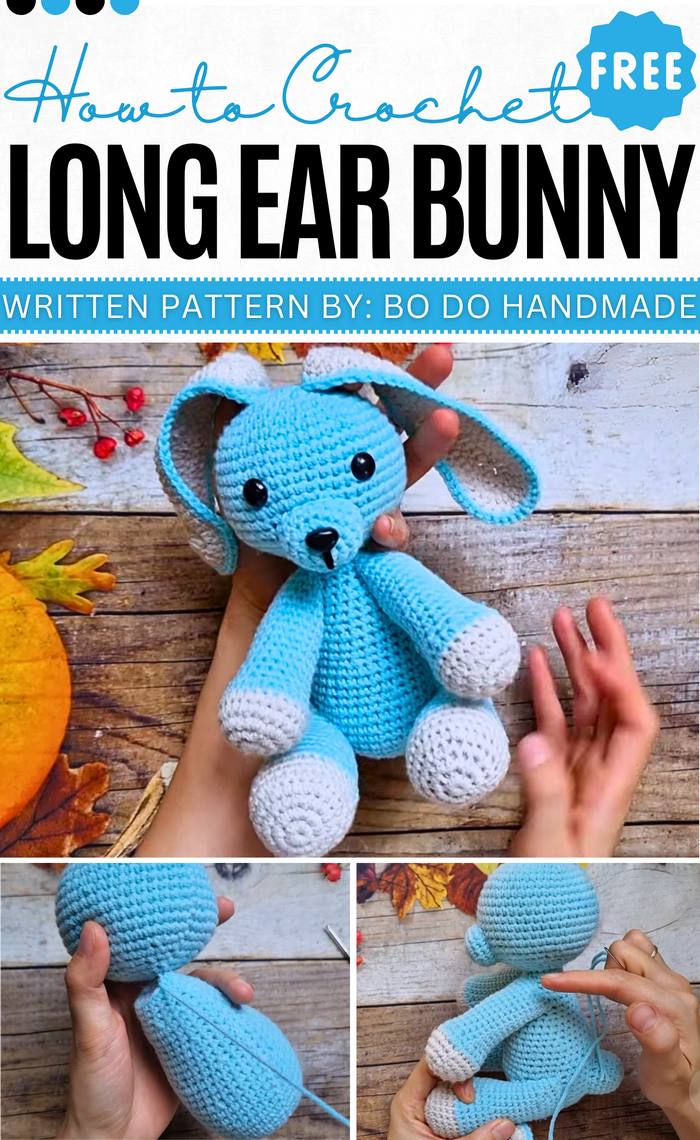
Crochet Long Ear Bunny Amigurumi
Bi do Handmade has been an expert in crocheting and designing crochet amigurumi, bag charms, and pouches. Also visit her YouTube channel for more exciting projects.
Shared Already:
Step-by-step Pattern
Materials
-
Yarn: Milk Cotton (125g)
-
Hook: 2.5 mm
-
Other: Fiberfill, Yarn needle, Safety eyes (optional), Stitch markers
Abbreviations (US Terms)
-
MR: Magic Ring
-
ch: Chain
-
sc: Single Crochet
-
inc: Increase (2 sc in one stitch)
-
dec: Decrease (sc 2 together)
-
sl st: Slip Stitch
-
hdc: Half Double Crochet
-
dc: Double Crochet
-
st(s): Stitch(es)
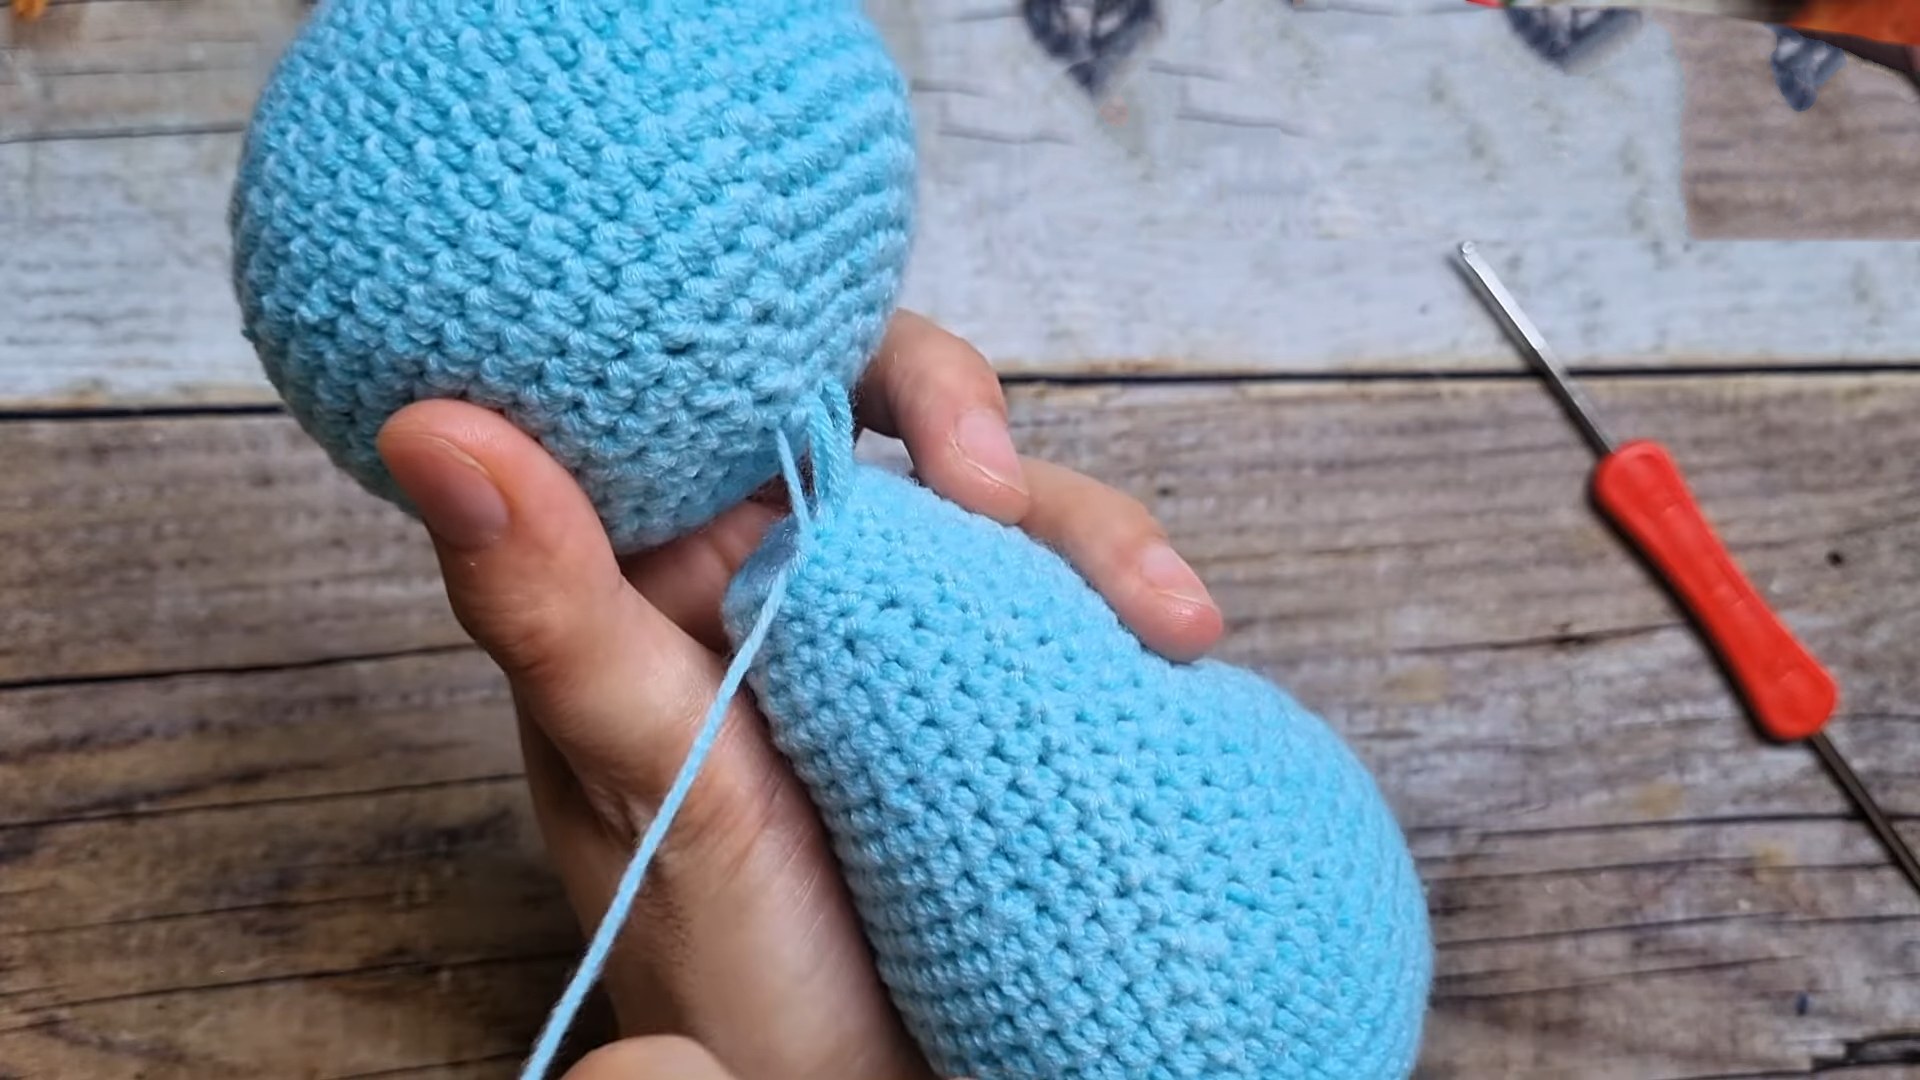
Head
-
R1: MR, 8 sc. Join. (8)
-
R2: 8 inc. (16)
-
R3: (1 sc, inc) x 8. (24)
-
R4: (3 sc, inc) x 6. (30)
-
R5: (4 sc, inc) x 6. (36)
-
R6: (2 sc, inc, 2 sc) x 6. (42)
-
R7: (5 sc, inc) x 6. (48)
-
R8 – R16: sc in each st around. (48)
-
R17: (6 sc, dec) x 6. (42)
-
R18: (5 sc, dec) x 6. (36)
-
R19: (4 sc, dec) x 6. (30)
-
R20: (3 sc, dec) x 6. (24)
-
R21: (2 sc, dec) x 6. (18)
-
R22: (1 sc, dec) x 6. (12)
-
Stuff firmly.
-
R23: 6 dec. (6)
-
Fasten off and sew hole closed.
Body
-
R1: MR, 8 sc. Join. (8)
-
R2: 8 inc. (16)
-
R3: (1 sc, inc) x 8. (24)
-
R4: (3 sc, inc) x 6. (30)
-
R5: (4 sc, inc) x 6. (36)
-
R6: (2 sc, inc, 2 sc) x 6. (42)
-
R7 – R12: sc in each st around. (42)
-
R13: (5 sc, dec) x 6. (36)
-
R14 – R16: sc in each st around. (36)
-
R17: (4 sc, dec) x 6. (30)
-
R18 – R20: sc in each st around. (30)
-
R21: (3 sc, dec) x 6. (24)
-
R22 – R24: sc in each st around. (24)
-
R25: (2 sc, dec) x 6. (18)
-
R26 – R28: sc in each st around. (18)
-
Fasten off, leave long tail for sewing. Stuff firmly.
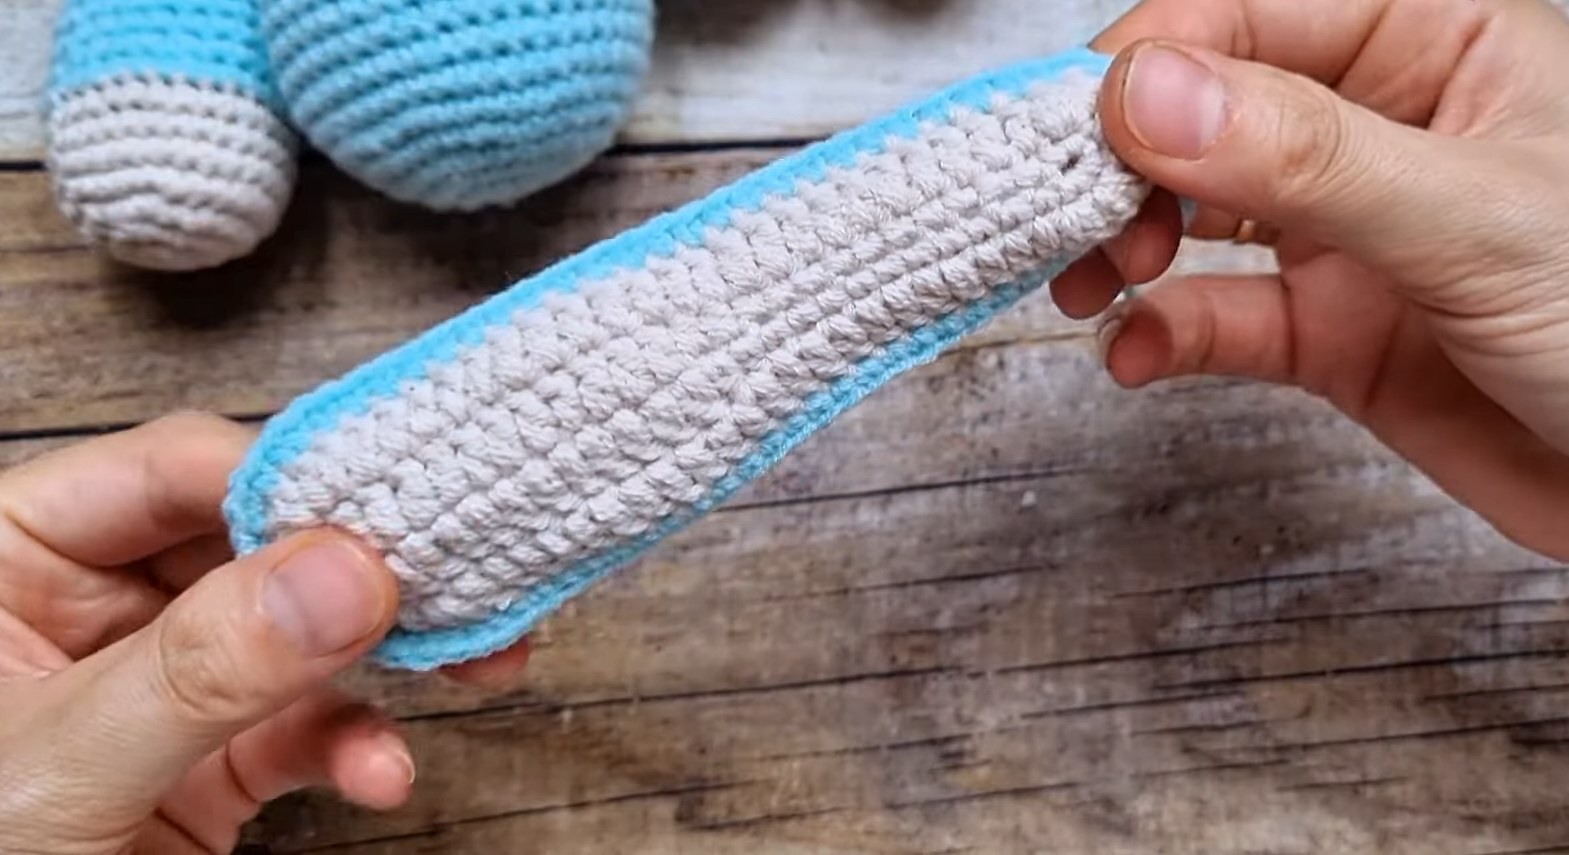
Legs (Make 2)
-
R1 – R4: Follow Head pattern R1–R4. (30)
-
R5 – R8: sc in each st around. (30)
-
R9: (3 sc, dec) x 6. (24)
-
R10 – R12: sc in each st around. (24)
-
R13: (2 sc, dec) x 6. (18)
-
R14 – R16: sc in each st around. (18)
-
Fasten off, leave a tail for sewing. Stuff.
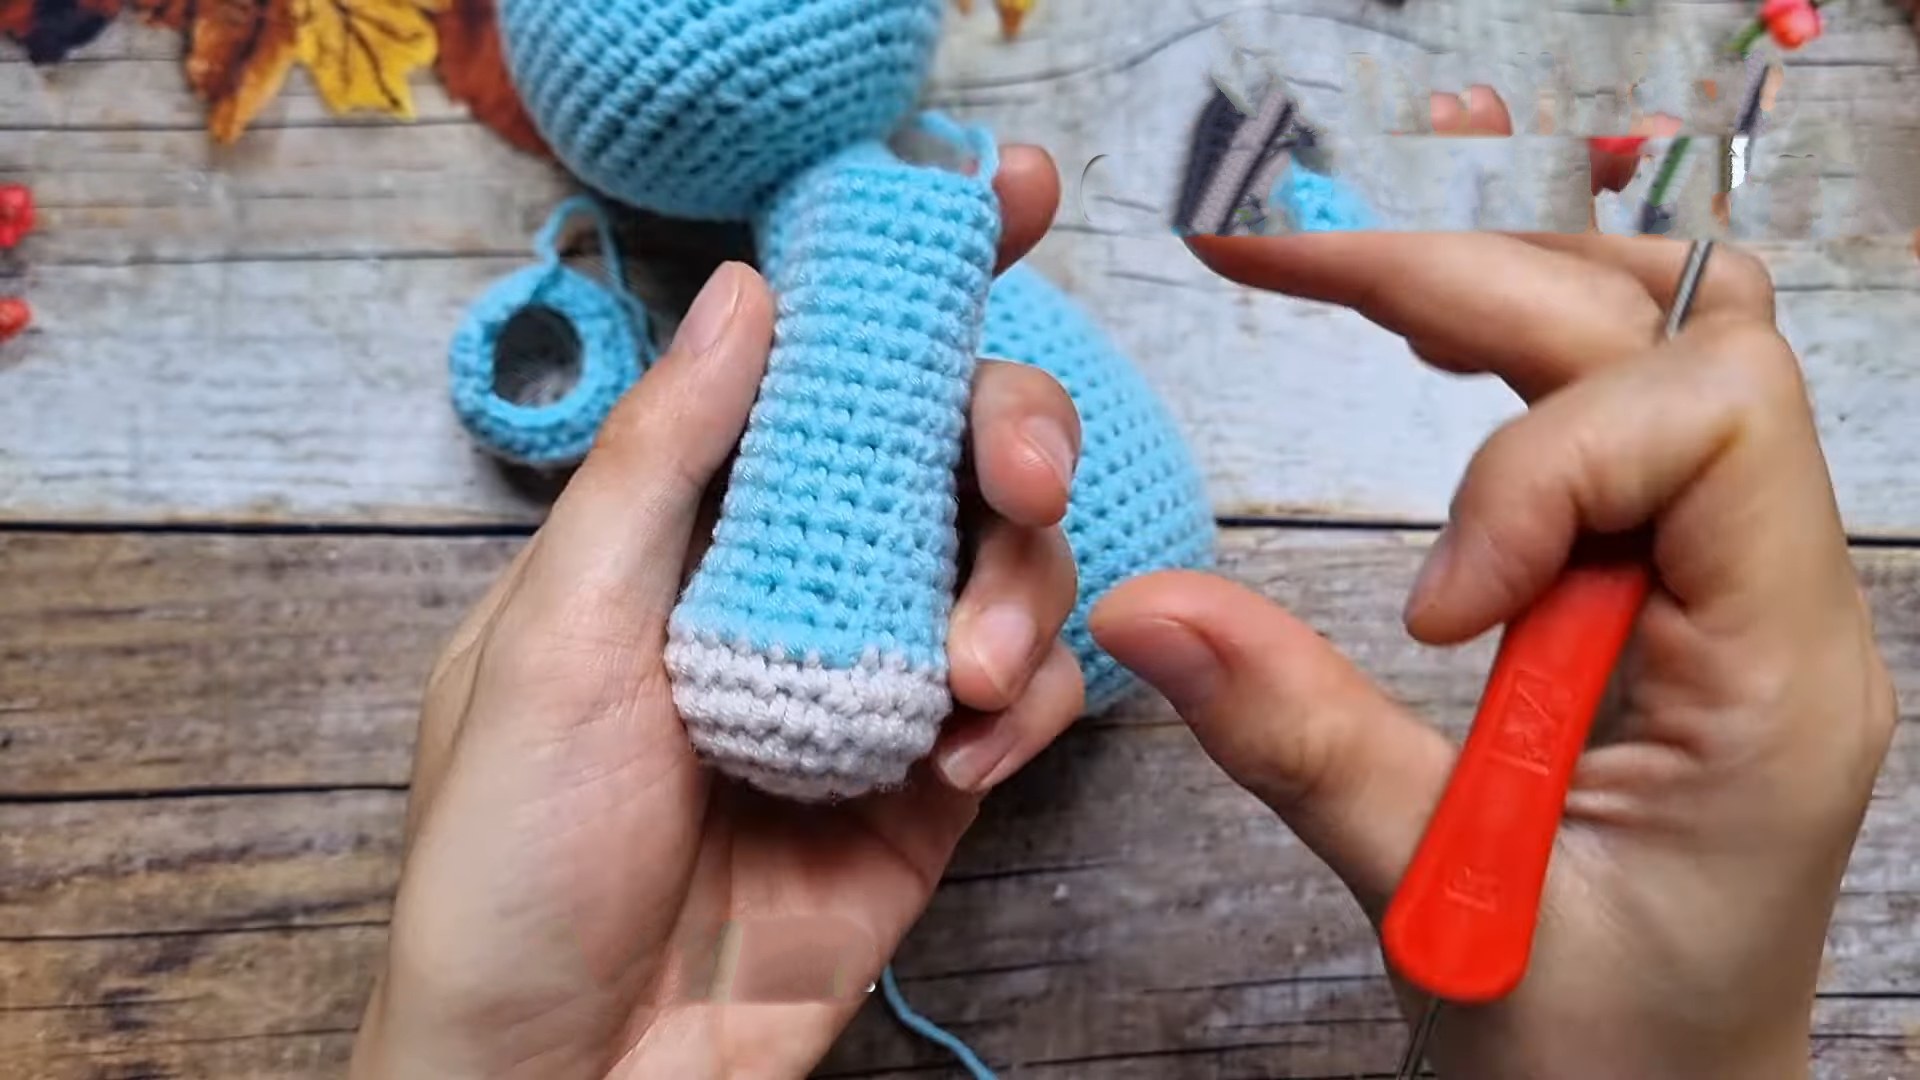
Arms (Make 2)
-
R1: MR, 8 sc. (8)
-
R2: 8 inc. (16)
-
R3: (1 sc, inc) x 8. (24)
-
R4 – R6: sc in each st around. (24)
-
Note: Change color in the last st of R6 for sleeve detail if desired.
-
-
R7: (1 sc, dec) x 8. (16)
-
R8 – R20: sc in each st around. (16)
-
Fasten off, leave tail for sewing. Stuff lightly.
Long Ears (Make 2)
-
Foundation: Ch 24.
-
R1:
-
Skip 1st ch, inc in next ch.
-
10 sc, 2 hdc, 9 dc.
-
6 dc in last ch (rotate to work opposite side).
-
9 dc, 2 hdc, 10 sc.
-
inc in last st. Join.
-
-
R2:
-
2 inc.
-
10 sc, 2 hdc, 9 dc.
-
6 inc (over the 6 dc curve).
-
9 dc, 2 hdc, 10 sc.
-
2 inc. Join.
-
-
R3 (Border):
-
Change color if desired.
-
Sc around entire ear. At the top curve (the 6 inc section), work (1 sc, inc) pattern or just sc evenly to keep it flat.
-
-
Fasten off, fold base, and sew to Head (between R2 and R3).
Tail
-
R1: MR, 6 sc. (6)
-
R2: 6 inc. (12)
-
R3: (1 sc, inc) x 6. (18)
-
R4 – R7: sc in each st around. (18)
-
Fasten off, leave tail. Stuff lightly.
Muzzle
-
R1: MR, 6 sc. (6)
-
R2: 6 inc. (12)
-
R3: (1 sc, inc) x 6. (18)
-
R4 – R5: sc in each st around. (18)
-
Fasten off, leave tail.
Assembly
-
Head/Body: Sew Head to Body.
-
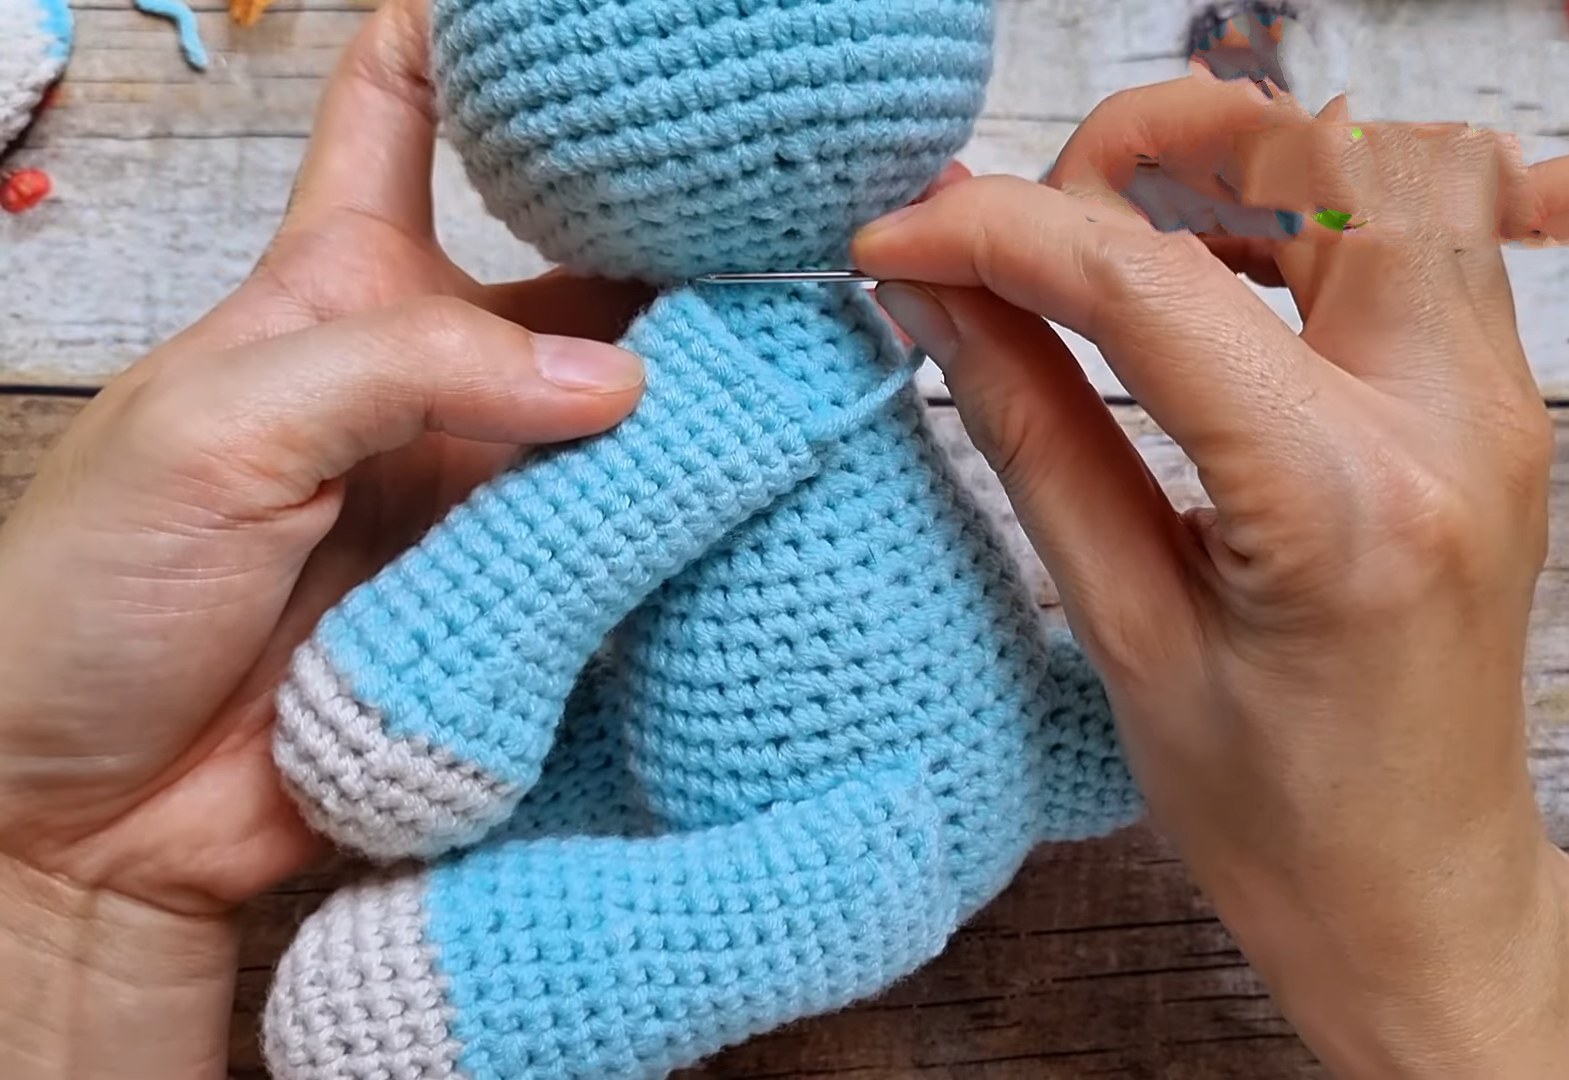
Limbs:
-
Sew Legs to the bottom of Body (approx R5-R10 of body).
-
Sew Arms to the sides of the body near the neck (approx R2-R3 from top of body).
-
-
Tail: Sew to back of the body (approx R5-R10).
-
Face:
-
Sew Muzzle to face (approx 4 rows up from neck). Stuff before closing.
-
Embroider nose and eyes.
-
Attach Ears to top of the head.
-
Video Tutorial:
Pattern In UK Terms:
Head
-
R1: MR, 8 dc. Join. (8)
-
R2: 8 inc. (16)
-
R3: (1 dc, inc) x 8. (24)
-
R4: (3 dc, inc) x 6. (30)
-
R5: (4 dc, inc) x 6. (36)
-
R6: (2 dc, inc, 2 dc) x 6. (42)
-
R7: (5 dc, inc) x 6. (48)
-
R8 – R16: dc in each st around. (48)
-
R17: (6 dc, dec) x 6. (42)
-
R18: (5 dc, dec) x 6. (36)
-
R19: (4 dc, dec) x 6. (30)
-
R20: (3 dc, dec) x 6. (24)
-
R21: (2 dc, dec) x 6. (18)
-
R22: (1 dc, dec) x 6. (12)
-
Stuff firmly.
-
R23: 6 dec. (6)
-
Fasten off and sew hole closed.
Body
-
R1: MR, 8 dc. Join. (8)
-
R2: 8 inc. (16)
-
R3: (1 dc, inc) x 8. (24)
-
R4: (3 dc, inc) x 6. (30)
-
R5: (4 dc, inc) x 6. (36)
-
R6: (2 dc, inc, 2 dc) x 6. (42)
-
R7 – R12: dc in each st around. (42)
-
R13: (5 dc, dec) x 6. (36)
-
R14 – R16: dc in each st around. (36)
-
R17: (4 dc, dec) x 6. (30)
-
R18 – R20: dc in each st around. (30)
-
R21: (3 dc, dec) x 6. (24)
-
R22 – R24: dc in each st around. (24)
-
R25: (2 dc, dec) x 6. (18)
-
R26 – R28: dc in each st around. (18)
-
Fasten off, leave long tail for sewing. Stuff firmly.
Legs (Make 2)
-
R1 – R4: Follow Head pattern R1–R4. (30)
-
R5 – R8: dc in each st around. (30)
-
R9: (3 dc, dec) x 6. (24)
-
R10 – R12: dc in each st around. (24)
-
R13: (2 dc, dec) x 6. (18)
-
R14 – R16: dc in each st around. (18)
-
Fasten off, leave tail for sewing. Stuff.
Arms (Make 2)
-
R1: MR, 8 dc. (8)
-
R2: 8 inc. (16)
-
R3: (1 dc, inc) x 8. (24)
-
R4 – R6: dc in each st around. (24)
-
Note: Change colour in the last st of R6 for sleeve detail if desired.
-
-
R7: (1 dc, dec) x 8. (16)
-
R8 – R20: dc in each st around. (16)
-
Fasten off, leave tail for sewing. Stuff lightly.
Long Ears (Make 2)
-
Foundation: Ch 24.
-
R1:
-
Skip 1st ch, inc in next ch.
-
10 dc, 2 htr, 9 tr.
-
6 tr in last ch (rotate to work opposite side).
-
9 tr, 2 htr, 10 dc.
-
inc in last st. Join.
-
-
R2:
-
2 inc.
-
10 dc, 2 htr, 9 tr.
-
6 inc (over the 6 tr curve).
-
9 tr, 2 htr, 10 dc.
-
2 inc. Join.
-
-
R3 (Border):
-
Change colour if desired.
-
Dc around entire ear. At the top curve (the 6 inc section), work (1 dc, inc) pattern or just dc evenly to keep it flat.
-
-
Fasten off, fold base, and sew to Head (between R2 and R3).
Tail
-
R1: MR, 6 dc. (6)
-
R2: 6 inc. (12)
-
R3: (1 dc, inc) x 6. (18)
-
R4 – R7: dc in each st around. (18)
-
Fasten off, leave tail. Stuff lightly.
Muzzle
-
R1: MR, 6 dc. (6)
-
R2: 6 inc. (12)
-
R3: (1 dc, inc) x 6. (18)
-
R4 – R5: dc in each st around. (18)
-
Fasten off, leave tail.

Assembly
-
Head/Body: Sew Head to Body.
-
Limbs:
-
Sew Legs to bottom of Body (approx R5-R10 of body).
-
Sew Arms to sides of Body near the neck (approx R2-R3 from top of body).
-
-
Tail: Sew to back of Body (approx R5-R10).
-
Face:
-
Sew Muzzle to face (approx 4 rows up from neck). Stuff before closing.
-
Embroider nose and eyes.
-
Attach Ears to top of Head.
-