
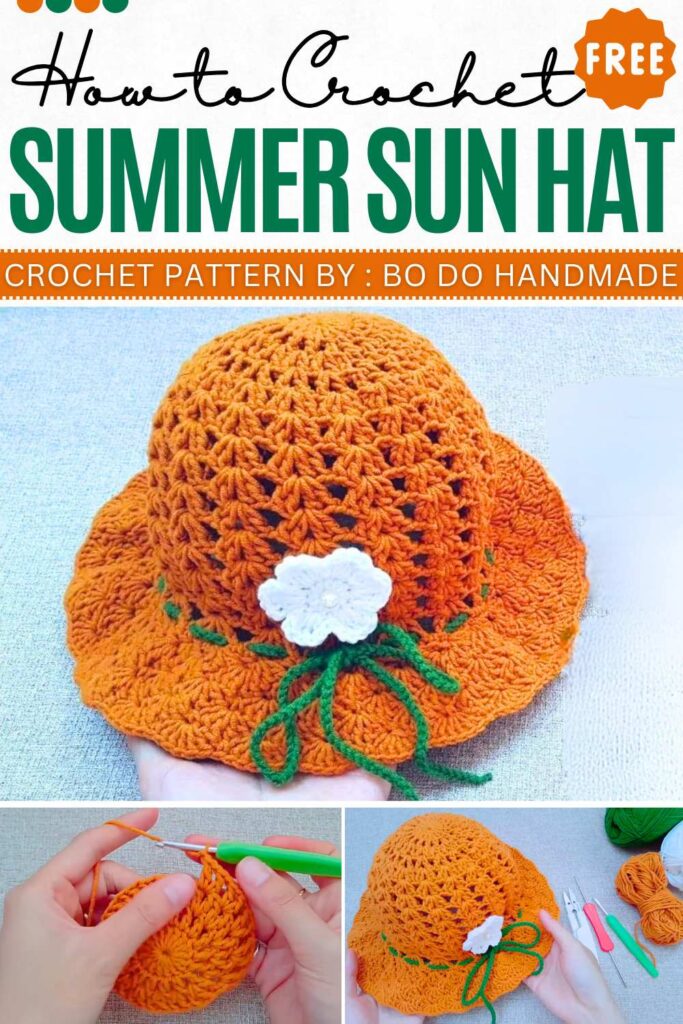
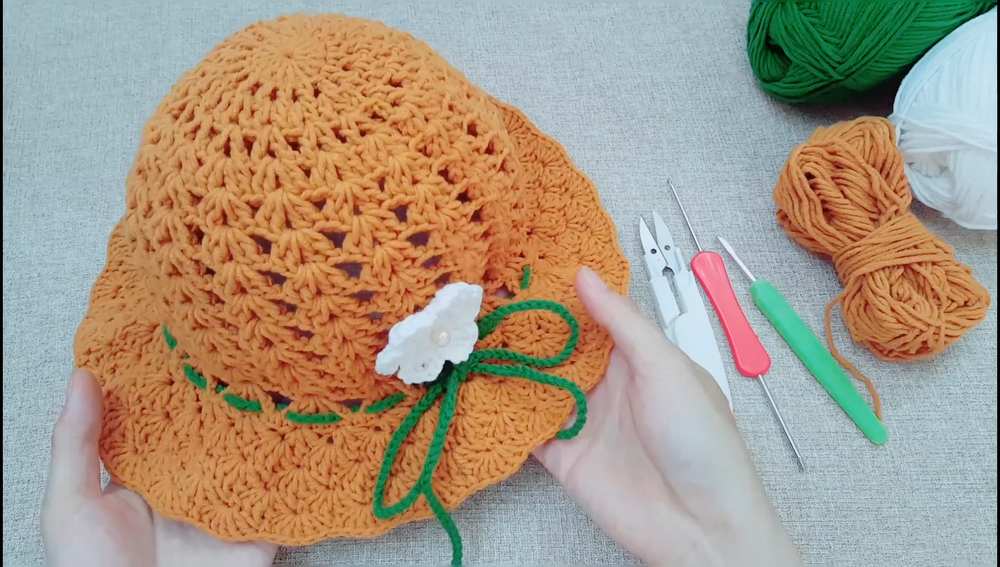
Free Crochet Beach Summer Sun Hat Pattern
Shell stitch is indeed the nicest stitch for making crochet accessories. Today, we will use it to make a beautiful sun hat for your 3-year-old child (approximately 48–50 cm head circumference). This hat pattern is made for kids, but you can easily customize it to make a matching one for you.
The drawstring ties keep it firm to the head, so there will be no falling off during jiggles and fun. You can adjust the brim length according to your need, but you must add the six-petal flower for more charm. So, follow the simplest pattern and protect yourself and your loved ones from the sun in style!
Free Crochet Beach Summer Sun Hat
Bi Do Handmade has been an expert in crocheting and designing crochet hats, bag charms, and pouches. Also, visit her YouTube channel for more exciting projects.
Materials
- Yarn: Milk Cotton (e.g., Vinamilk Cotton Japan)
- Hooks: 3.0 mm (Body) and Head #4 / 2.5 mm (Brim edging for stiffness)
- Tools: Scissors, tapestry needle
- Decorations: 6-petal crochet flower, long chain-stitch cord
Abbreviations (English)
- MR: Magic Ring
- ch: Chain
- sl st: Slip stitch
- sc: Single crochet
- dc: Double crochet
- sp: Space
- Shell: Group of dc stitches in one space
Pattern Instructions
Crown
- Rnd 1: MR, ch 2, 16 dc into ring. Sl st to 1st dc to join. (16 dc)
- Rnd 2: Ch 3 (counts as dc + ch 1), [dc in next st, ch 1] repeat around. Sl st to 2nd ch of starting ch-3. (16 dc, 16 ch-1 sp)
- Rnd 3: Sl st into ch-1 sp. Ch 3 (counts as dc + ch 1), dc in same sp. [In next ch-1 sp: (dc, ch 1, dc)] repeat around. Join with sl st.
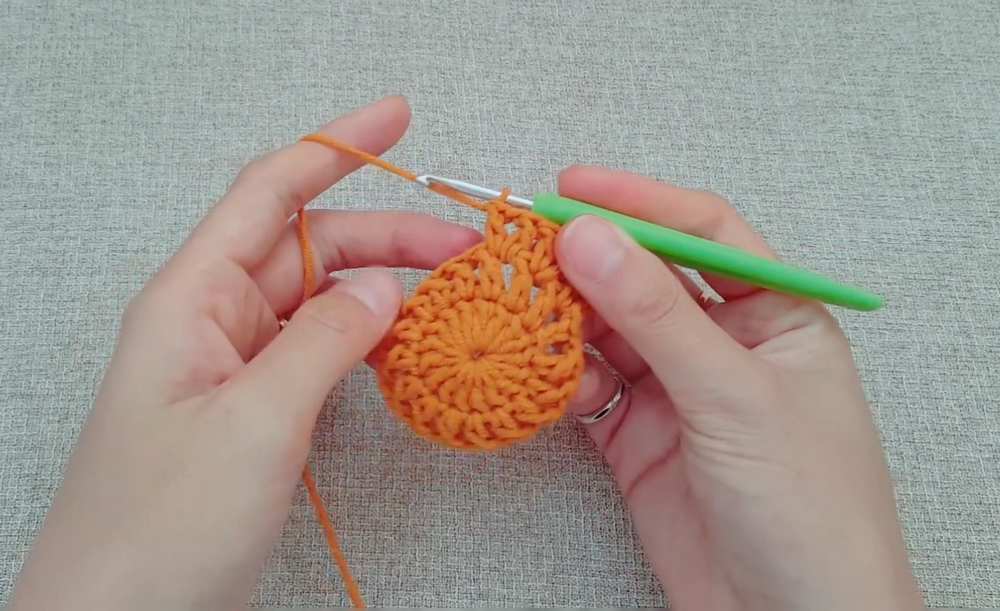
- Rnd 4: Sl st into ch-1 sp. Ch 3 (counts as dc + ch 1), dc in same sp, ch 1. [In next shell’s ch-1 sp: (dc, ch 1, dc), ch 1] repeat around. Join with sl st.
- Rnd 5: Sl st into ch-1 sp. Ch 2, 3 dc in same sp. [In next shell’s ch-1 sp: 4 dc] repeat around. Join with sl st.
- Rnd 6: Sl st to center of 4-dc shell (between 2nd and 3rd dc). Ch 2, dc in same sp, ch 1, 2 dc in same sp. [In center of next 4-dc shell: (2 dc, ch 1, 2 dc)] repeat around. Join with sl st.
- Rnd 7: Sl st into ch-1 sp. Ch 2, dc in same sp, ch 1, 2 dc in same sp, ch 1. [In next shell’s ch-1 sp: (2 dc, ch 1, 2 dc), ch 1] repeat around. Join with sl st.
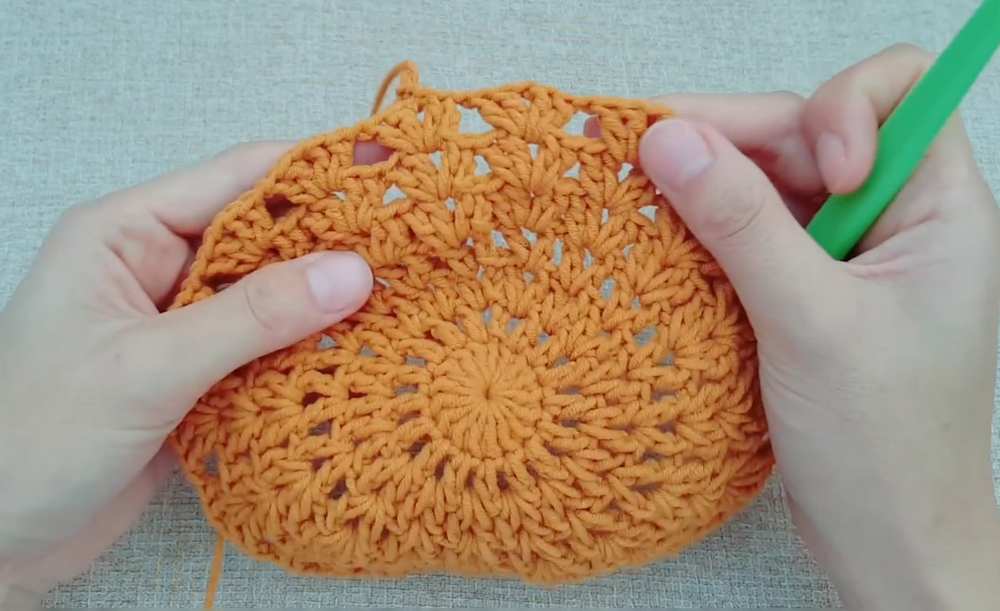
Body
- Rnd 8–Depth: Repeat Rnd 7 until hat reaches the top of the ears. Do not increase further.
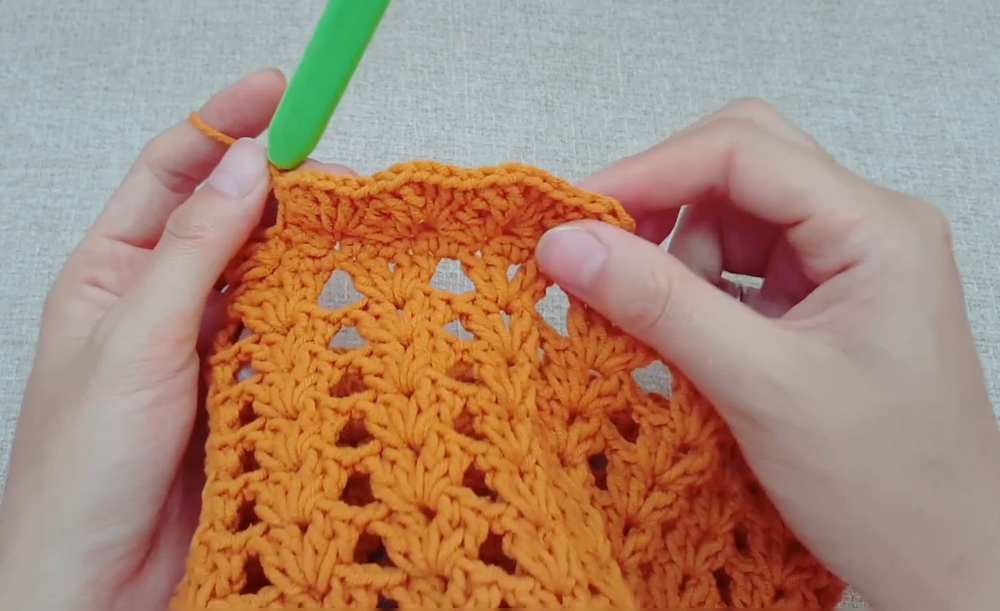
Brim
- Prep Rnd: Sc in each st and ch-sp around to stabilize edge. (Adjust sc count as needed for fit).
- Brim Rnd 1: [Sc in next st, ch 2, 2 dc in same st, skip 2 sts] repeat around. Join.
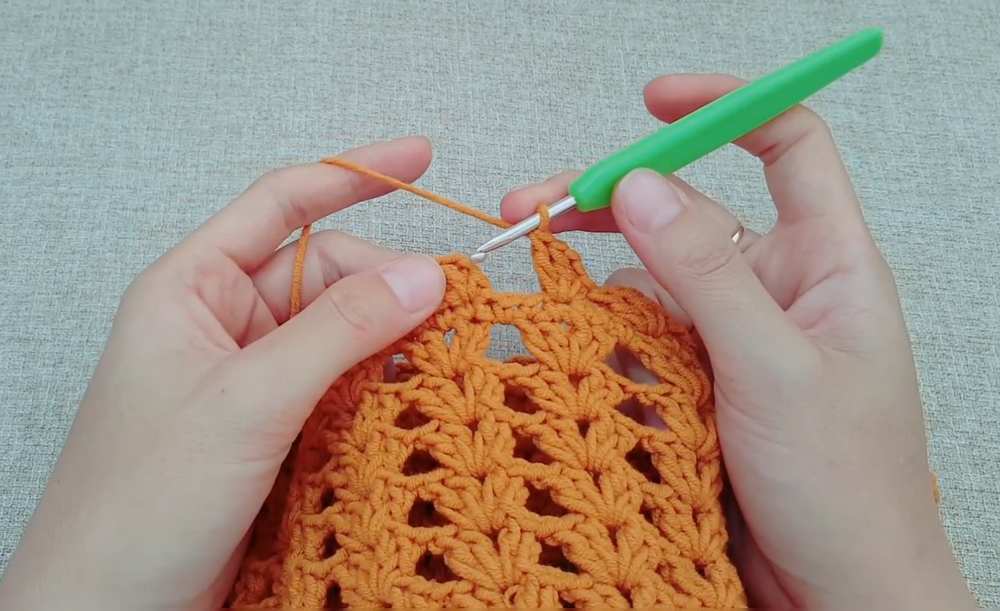
- Brim Rnd 2: Sl st to ch-2 sp. Ch 2, dc in same sp, ch 1, 2 dc in same sp. [Sc in next sc from R1, (2 dc, ch 1, 2 dc) in next ch-2 sp] repeat around.
- Brim Rnd 3+: Alternate shells and sc to reach desired width.
Assembly in Detail
- Edging the Brim: Switch to the smaller hook (Head #4 or 2.5 mm). This ensures the ruffle is stiff and holds its shape. In each ch-1 space of the final shell row, work 5 dc (closed shell without the ch-1 center). Sc into the center of the previous row’s sc to anchor the shell. Repeat around the entire perimeter and fasten off.
- Finishing the Weaving: Use a tapestry needle to weave in the yarn tail from the MR at the top. Pull tightly to close the hole, then weave through the base dc stitches. Weave in the final brim tail on the underside of the stitches.
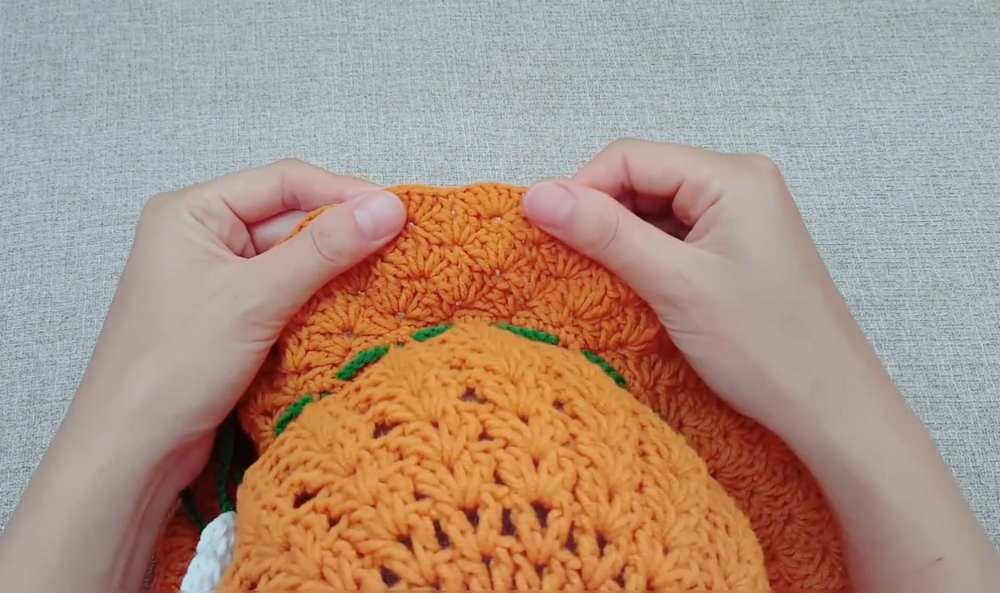
- Adjustable Cord: Crochet a long string of chain stitches (long enough to wrap around the hat and tie a bow). Thread this cord through the gaps in the shell pattern at the last row of the body (just above the brim). This allows the parent to tighten or loosen the hat to fit the child’s head perfectly.
- Flower Decoration: Position a pre-made 6-petal crochet flower on the front or side of the hat, typically overlapping the row where the adjustable cord is threaded. Use a needle and matching yarn to sew the flower firmly in place through all layers,
Video Tutorial for Assembly:
Pattern Instructions (UK Terms)
Crown
- Rnd 1: MR, ch 2, 16 tr into ring. Sl st to 1st tr to join. (16 tr)
- Rnd 2: Ch 3 (counts as tr + ch 1), [tr in next st, ch 1] repeat around. Sl st to 2nd ch of starting ch-3. (16 tr, 16 ch-1 sp)
- Rnd 3: Sl st into ch-1 sp. Ch 3 (counts as tr + ch 1), tr in same sp. [In next ch-1 sp: (tr, ch 1, tr)] repeat around. Join with sl st.
- Rnd 4: Sl st into ch-1 sp. Ch 3 (counts as tr + ch 1), tr in same sp, ch 1. [In next shell’s ch-1 sp: (tr, ch 1, tr), ch 1] repeat around. Join with sl st.
- Rnd 5: Sl st into ch-1 sp. Ch 2, 3 tr in same sp. [In next shell’s ch-1 sp: 4 tr] repeat around. Join with sl st.
- Rnd 6: Sl st to center of 4-tr shell (between 2nd and 3rd tr). Ch 2, tr in same sp, ch 1, 2 tr in same sp. [In center of next 4-tr shell: (2 tr, ch 1, 2 tr)] repeat around. Join with sl st.
- Rnd 7: Sl st into ch-1 sp. Ch 2, tr in same sp, ch 1, 2 tr in same sp, ch 1. [In next shell’s ch-1 sp: (2 tr, ch 1, 2 tr), ch 1] repeat around. Join with sl st.
Body
- Rnd 8–Depth: Repeat Rnd 7 until hat reaches the top of the ears. Do not increase further.
Brim
- Prep Rnd: Dc in each st and ch-sp around to stabilise edge. (Adjust dc count as needed for fit).
- Brim Rnd 1: [Dc in next st, ch 2, 2 tr in same st, skip 2 sts] repeat around. Join.
- Brim Rnd 2: Sl st to ch-2 sp. Ch 2, tr in same sp, ch 1, 2 tr in same sp. [Dc in next dc from R1, (2 tr, ch 1, 2 tr) in next ch-2 sp] repeat around.
- Brim Rnd 3+: Alternate shells and dc to reach desired width.
Assembly in Detail
- Edging the Brim: Switch to the smaller hook (Head #4 or 2.5 mm). This ensures the ruffle is stiff and holds its shape. In each ch-1 space of the final shell row, work 5 tr (closed shell without the ch-1 centre). Dc into the centre of the previous row’s dc to anchor the shell. Repeat around the entire perimeter and fasten off.
- Finishing the Weaving: Use a tapestry needle to weave in the yarn tail from the MR at the top. Pull tightly to close the hole, then weave through the base tr stitches. Weave in the final brim tail on the underside of the stitches.
- Adjustable Cord: Crochet a long string of chain stitches (long enough to wrap around the hat and tie a bow). Thread this cord through the gaps in the shell pattern at the last row of the body (just above the brim). This allows the parent to tighten or loosen the hat to fit the child’s head perfectly.
- Flower Decoration: Position a pre-made 6-petal crochet flower on the front or side of the hat, typically overlapping the row where the adjustable cord is threaded. Use a needle and matching yarn to sew the flower firmly in place through all layers.