
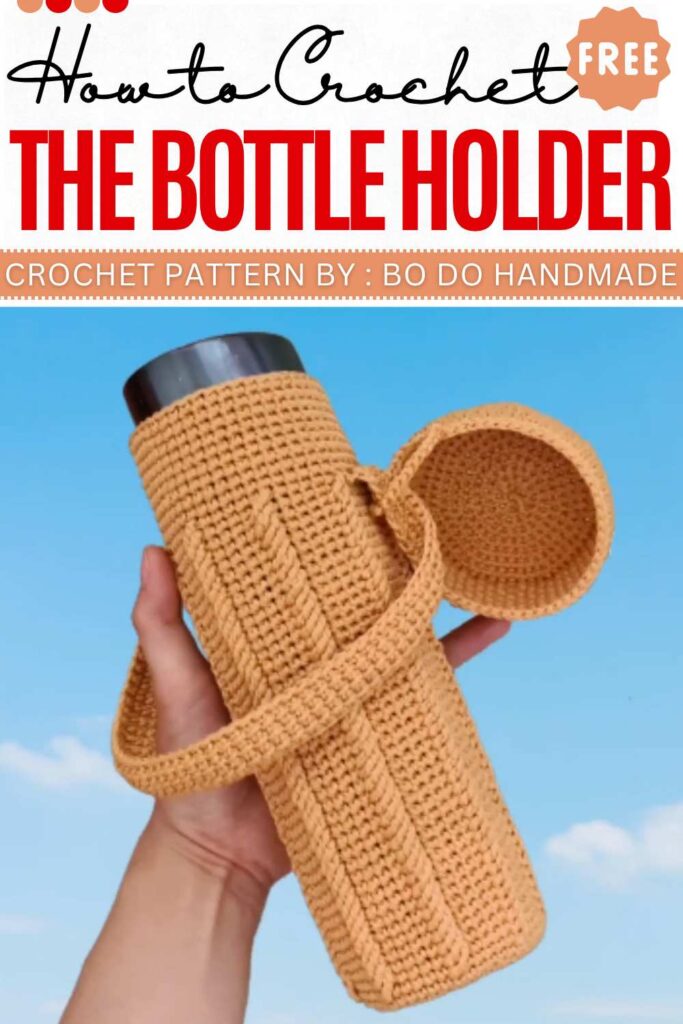
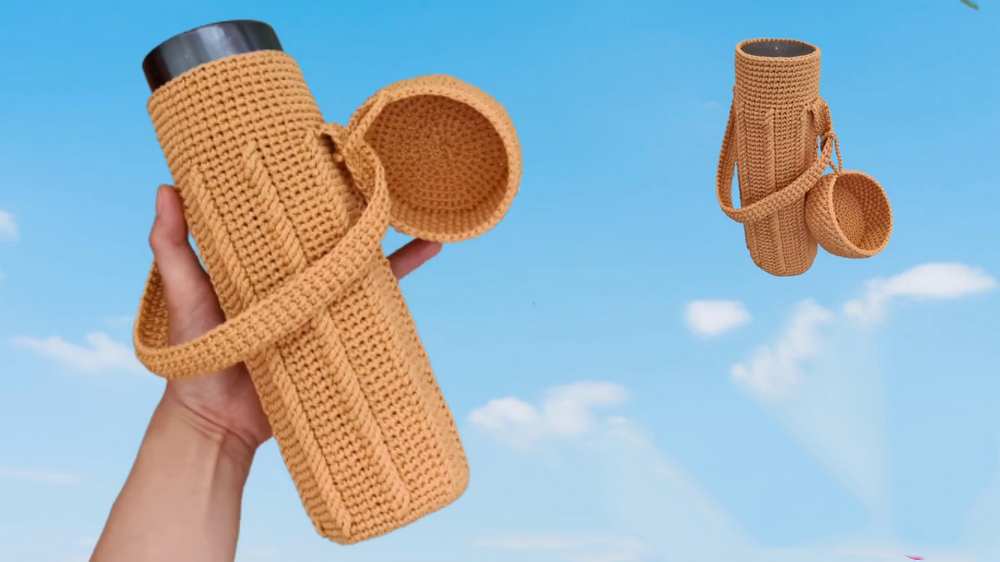
Crochet Water Bottle Holder Pattern For Summer
Staying hydrated is quite important in summers but carrying a water bottle alone is a hustle. This crochet water bottle holder solves this problem in a stylish way. The crochet holder is quite traditional in look but ensures the complete safety of bottle and insulation. The best part is that it has an attached lid cover adding more protection.
This pattern is designed for the traditional water bottle but you can alter the design according to your. So, choose your favorite color yarn and starting personalizing your water bottles!
Bi Do Handmade has been an expert in crocheting and designing crochet hats, bag charms, and pouches. Also, visit her YouTube channel for more exciting projects.
Free Crochet Beach Summer Sun Hat Pattern
https://mycraftybasket.com/summer-sun-hat/
Materials
- Yarn: Solid cord yarn (approx. 1.75mm – 2.0mm thickness)
- Hook: 2.5mm (Size 4/0)
- Tools: Scissors, yarn needle, stitch markers, measuring tape
- Item: Thermos/Vacuum bottle (Example: 6.5cm diameter x 24cm height)
Abbreviations (US Terms)
- MR: Magic Ring
- ch: Chain
- sc: Single crochet
- sl st: Slip stitch
- inc: Increase (2 sc in same st)
- BLO: Back Loop Only
- dtr: Double treble crochet (used as a post stitch)
- st(s): Stitch(es)
- rep: Repeat
- lp(s): Loop(s)
Pattern Instructions
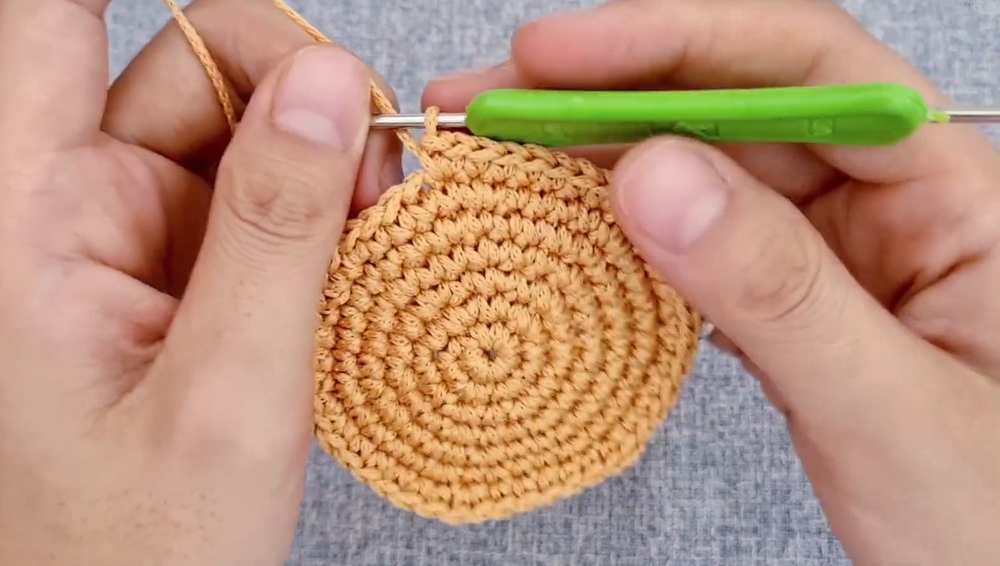
Bag Base (Worked in Spiral)
- R1: MR, 7 sc (7)
- R2: 7 inc (14)
- R3: [1 sc, inc] rep 7x (21)
- R4: [inc, 2 sc] rep 7x (28)
- R5: [3 sc, inc] rep 7x (35)
- R6-7: Continue inc pattern until base matches bottle diameter.
- End Base: sl st in next st, ch 1.
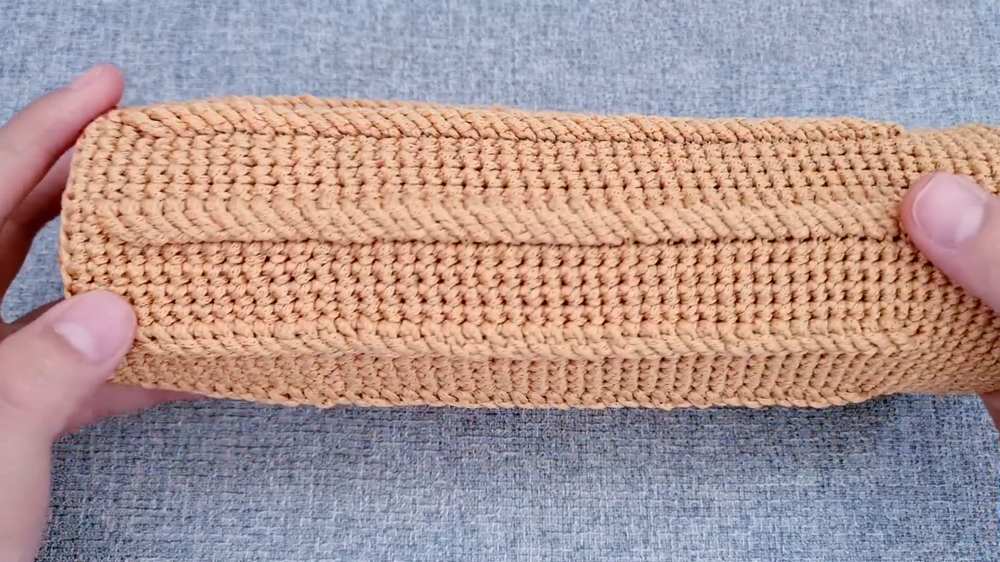
Bag Body
- R1: BLO sc around. Join with sl st to first sc.
- R2-4: sc around in both lps.
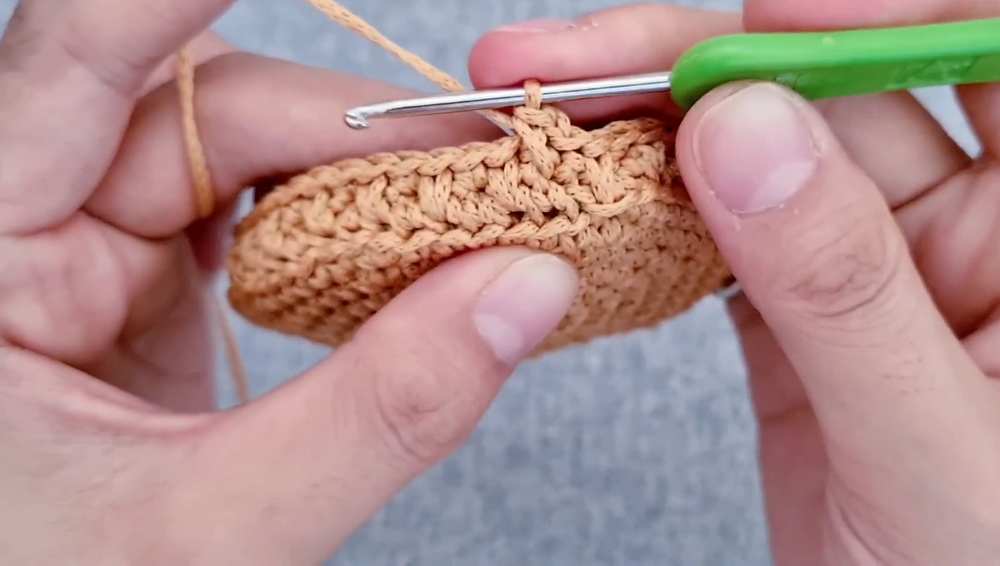
- R5 (Texture Round): 5 sc, [yo 2x, insert hook around post 2 rows below, dtr, skip 1 st on current row, 5 sc] rep around.
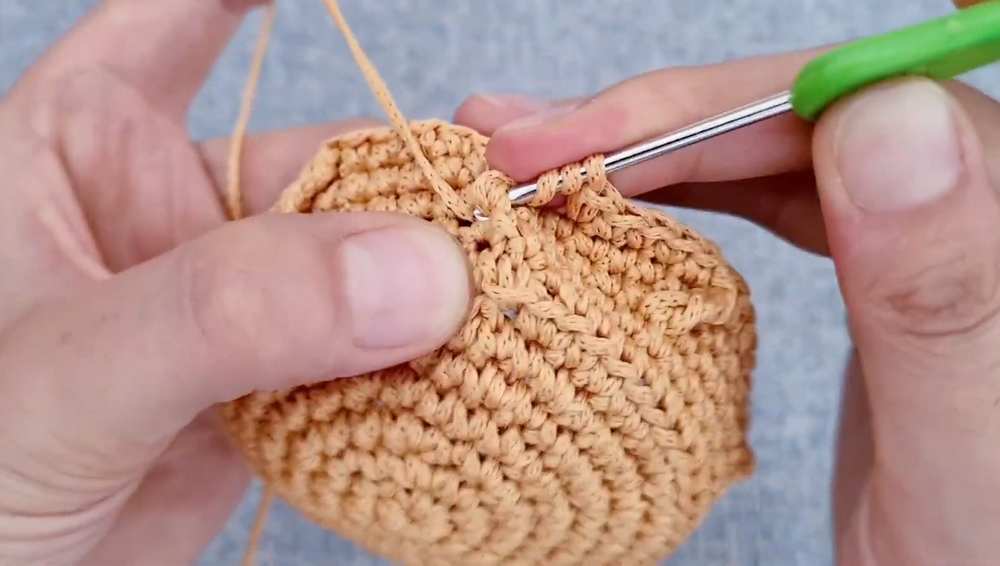
- R6-Height: Rep texture rounds, stacking dtr post sts. Continue until body is 3-5cm below bottle top.
- Final Rounds: sc around (no texture) until reaching bottle height.
- Finish: Fasten off and weave in ends.
Lid
- Base: Rep Bag Base steps, adding 1 extra round so it is slightly wider than the bag.
- Sides R1: BLO sc around. Join with sl st.
- Sides R2: [1 sc, 1 long sc into st 1 row below] rep around.
- Edge: sl st around entire rim.
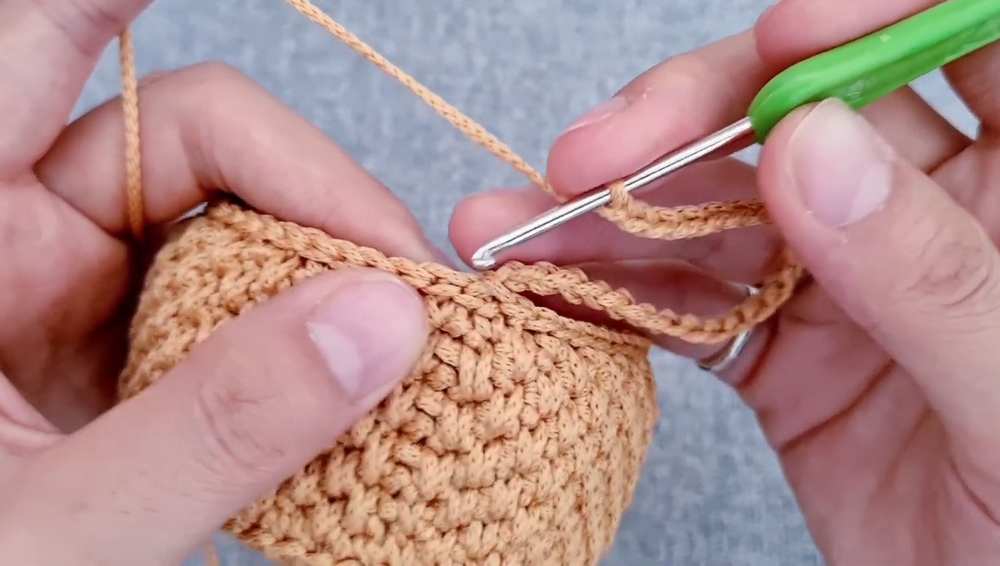
- Attachment Loop: ch 35, sl st back into same starting st. Fasten off.
Handle
- Row 1: ch 5. Insert hook in 2nd ch from hook, pull up lp. Rep in each ch (5 lps on hook).
- Row 2: yo, pull through 1 lp. [yo, pull through 2 lps] rep until 1 lp remains.
- Row 3: Insert hook into vertical bars of previous row, pull up lps (5 lps on hook).
- Rep: Continue until handle reach desired length. Fasten off, leaving long tail.
Detailed Assembly Instructions
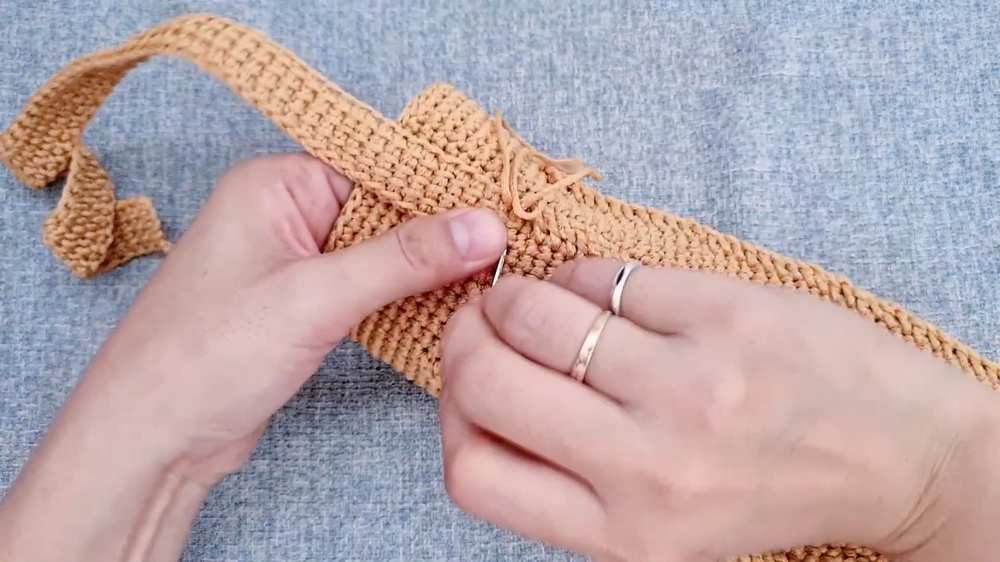
- Lid Attachment: Take the finished lid with the 35-chain loop. Before attaching the handle to the bag, slide the handle through the chain loop of the lid. This ensures the lid remains tethered to the bag and cannot be lost.
- Positioning the Handle: Identify the 8 textured ribs on the bag body. Divide the bag into two halves (4 ribs per side). Center the handle ends between the ribs on opposite sides of the bag opening.
- Sewing: Use a yarn needle and the long yarn tails from the handle. Sew each handle end securely to the inside rim of the bag body. Match the 5 stitches of the handle width to 5 stitches on the bag rim for a clean join.
- Securing: Pass the needle through the stitches multiple times to ensure the handle can support the weight of a full bottle.
- Finishing: Once both ends are sewn, weave the remaining yarn tails through the interior stitches of the bag to hide them. Cut any excess yarn.
- Usage: Place the thermos inside. To drink, remove the lid (it will hang from the handle) and push the bottom of the bag upward with your thumb to slide the bottle out partially for easy access.
Video Pattern:
Pattern Instructions (UK Terms)
Bag Base (Worked in Spiral)
- R1: MR, 7 dc (7)
- R2: 7 inc (14)
- R3: [1 dc, inc] rep 7x (21)
- R4: [inc, 2 dc] rep 7x (28)
- R5: [3 dc, inc] rep 7x (35)
- R6-7: Continue inc pattern until base matches bottle diameter.
- End Base: sl st in next st, ch 1.
Bag Body
- R1: BLO dc around. Join with sl st to first dc.
- R2-4: dc around in both lps.
- R5 (Texture Round): 5 dc, [yo 3x, insert hook around post 2 rows below, trtr, skip 1 st on current row, 5 dc] rep around.
- R6-Height: Rep texture rounds, stacking trtr post sts. Continue until body is 3-5cm below bottle top.
- Final Rounds: dc around (no texture) until reaching bottle height.
- Finish: Fasten off and weave in ends.
Lid
- Base: Rep Bag Base steps, adding 1 extra round so it is slightly wider than the bag.
- Sides R1: BLO dc around. Join with sl st.
- Sides R2: [1 dc, 1 long dc into st 1 row below] rep around.
- Edge: sl st around entire rim.
- Attachment Loop: ch 35, sl st back into same starting st. Fasten off.
Handle
- Row 1: ch 5. Insert hook in 2nd ch from hook, pull up lp. Rep in each ch (5 lps on hook).
- Row 2: yo, pull through 1 lp. [yo, pull through 2 lps] rep until 1 lp remains.
- Row 3: Insert hook into vertical bars of previous row, pull up lps (5 lps on hook).
- Rep: Continue until handle reach desired length. Fasten off, leaving long tail.