
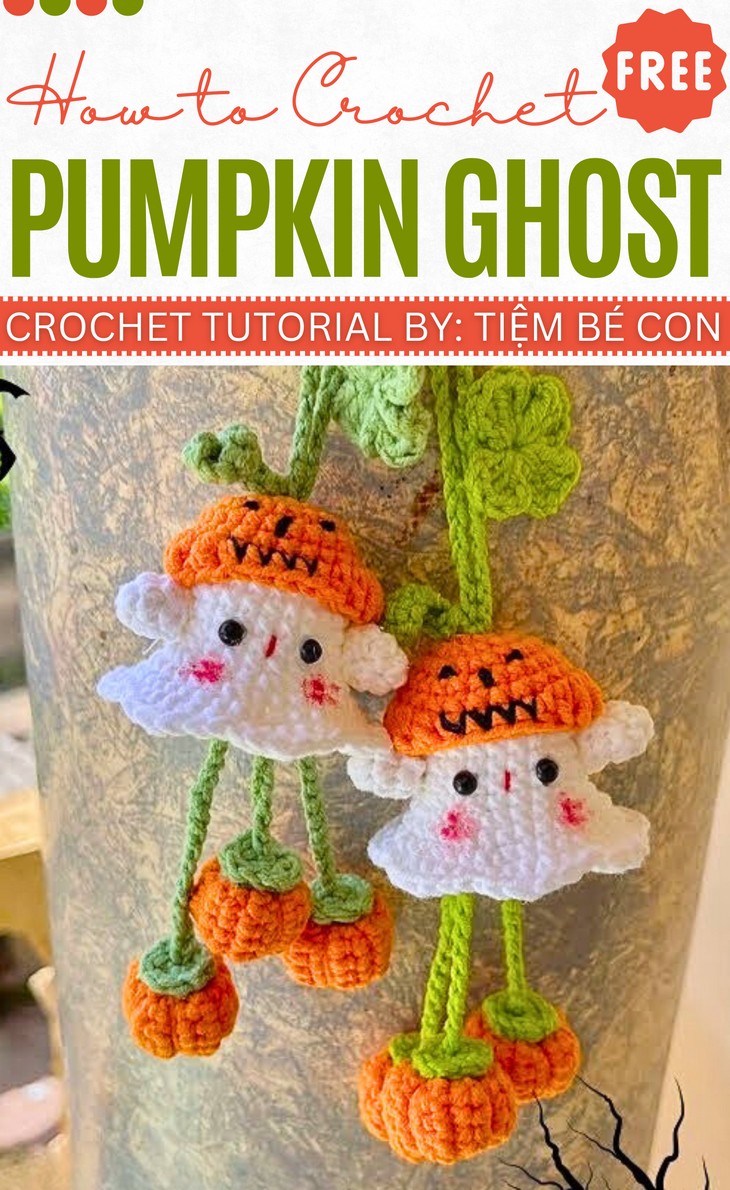
How to Crochet Pumpkin Ghost Hanger With Clover Leaf
Last time, we shared a tutorial on crocheting a mini pumpkin ghost keychain. But if you wanna make your Halloween car rides special with the same amigurumi, here is an extended project. With a stitch-by-stitch tutorial from @TiemBeCon, learn how to crochet this oh-so-cute pumpkin ghost car hanger and bag charm.
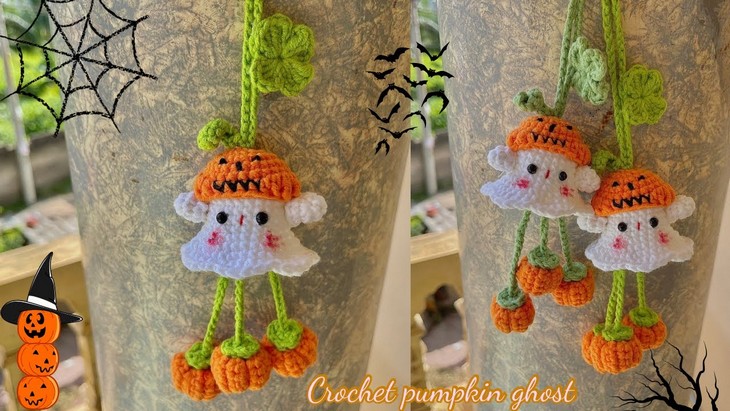
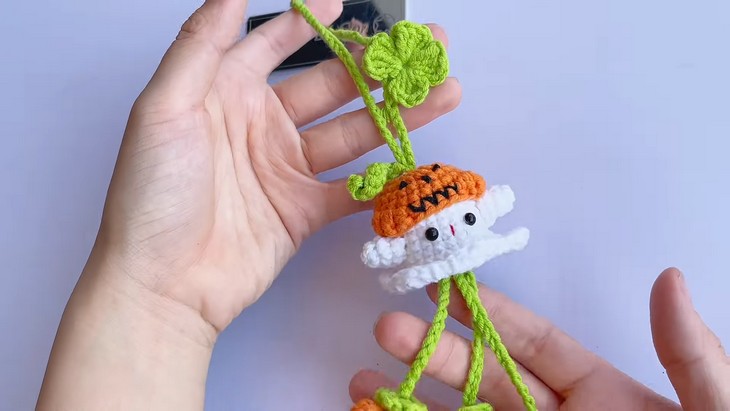
It features the same ghost with a pumpkin hat, but strings that hang mini amigurumi pumpkins and a clover leaf.
These strings make the project so interesting and versatile. Whether you hang it on the wall, with a bag, or from car interior, it works well.
So, if you have made up your mind to crochet this pumpkin ghost and pumpkin hanger by yourself, continue reading this post!
About the Designer: The designer behind this crochet fumpkin and ghost project is @TiemBeCon – she can be rightly called “The most creative crochet designer” since she always adapts the themes in a unique way while crocheting any amigurumi and accessory like a witch capybara and Reindeer watch. Her crochet projects are always so colorful and never miss to be seasonal and celebration-special. So, you can find the fall, Christmas, and Halloween projects in her channel. You will find her flower swings and bouquets much more appealing.
Note: In respect of the creator’s rights, there will be no provision of the written pattern. You can watch the tutorial with on-screen written instructions at the end of this post.
Crochet Mini Ghost & Pumpkin Hanger Tutorial
Skill Level: Intermediate. (You’ll need magic ring, chain stitch, single crochet, double crochet, half double crochet, triple crochet, increases, decreases, slip stitch, and working in back and front loops only, which she calls FLO and BLO. You will also need sewing and working with the glue gun.)
Tutorial Timing: Approximately 30 minutes only. (You will learn everything from crocheting a pumpkin to clover leaves and ghosts, plus working with the small parts, so the tutorial is worth the time.)
Personalization Tips: You will need three pumpkins and one clover leaf to crochet. You can also use a different color for the pumpkin, like yellow, brown, and green.
Pattern Type: An on-screen written pattern is available if you find written instructions easy to follow along with.
Materials Needed
The following are the materials and tools that the tutor used in crocheting this car hanger ghost and pumpkin:
- Hook: 2 mm
- Yarn: cotton milk 125 g
- Stuffing
Crochet Stitch and Technique Guide
The following are the crochet techniques and stitches that the tutor uses for crocheting ghost car hanger:
- Single Crochet (sc): Insert the hook into the stitch, yarn over, pull through, yarn over again, and pull through both loops on the hook.
- Increase (inc): Work two stitches into the same stitch to increase the stitch count in your round or row.
- Chain (ch): Yarn over and pull through the loop on the hook to create a chain stitch for foundation or spacing.
- Double Crochet (dc): Yarn over, insert the hook into the stitch, yarn over again, pull through, yarn over, pull through two loops, yarn over, and pull through the final two loops.
- Triple Crochet (tr)
Yarn over twice, insert the hook into the stitch, yarn over again, pull through, yarn over, pull through two loops at a time until only one loop remains. - Half Double Crochet (hdc): Yarn over, insert the hook into the stitch, yarn over again, pull through (three loops on the hook), yarn over, and pull through all three loops.
- Slip Stitch (slst): Insert the hook into the stitch, yarn over, pull through the stitch and the loop on the hook for joining, finishing, or moving to the next stitch.
- Decrease (des): Insert the hook into the stitch, yarn over, pull through, insert into the next stitch, yarn over, pull through again (three loops on the hook), yarn over, and pull through all three loops to merge two stitches into one.
- Front Loop Only (flo): Insert the hook under the front loop of the stitch (closest to you) only and work your stitch as instructed.
- Back Loop Only (blo): Insert the hook under the back loop of the stitch (farthest from you) only and work your stitch as instructed.
- Skip (skip): Bypass the next stitch in the row or round by jumping directly into the following stitch as directed.

Complete Video Guide
Me gustan todos los trabajos que realizas son muy prácticos y bien explicados gracias 😊 Dios te bendiga siempre 🙏 y que tengas mucho éxito
Thanks a lot, you appreciated my effort in finding the patterns. Always support the creator for thier work, I am just a source.
Muchas gracias, apreciaste mi esfuerzo por encontrar los patrones. Siempre apoya al creador por su trabajo; yo solo soy una fuente.