
16 Free Crochet Pig Plushie Patterns with Outfits
Last time, I shared many of the big pig plushies and the outfit patterns for the single 48 cm pig doll base. Now, we shall learn two more pig plushie bases along with the five more crochet outfit ideas.
So, learn how to crochet your favorite pig plushie variation following these crochet patterns for all beginners. All of them are low-sew, need the super bulky yarn, and are so cute enough for toddlers.
You can crochet most of them in less than an hour. So, find inspiration for your next plushie project for your little one.
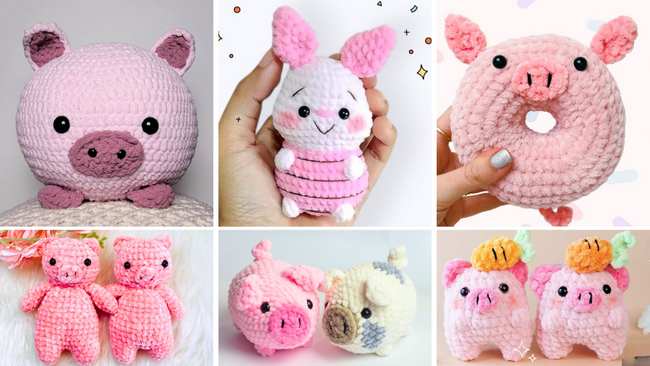
Crochet Pig Plushies and Variations
Check the previous page plushie compilations:
01 of 16 Crochet Sitting Pig Plushie
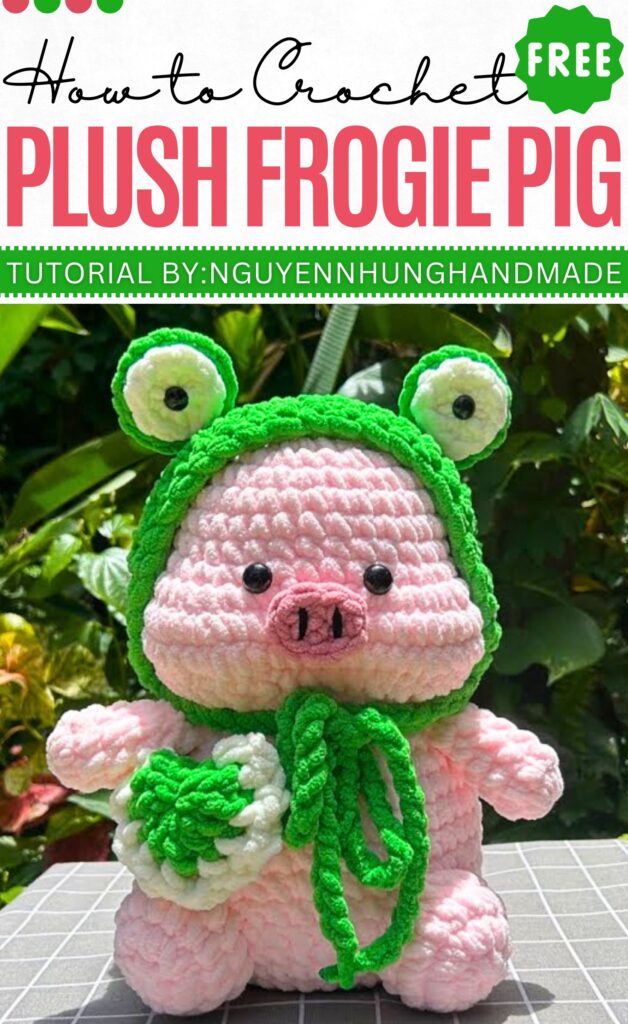
Learn how to crochet a sitting big but baby pig plushie that can be accessorized with bread, a rabbit, or a frog outfit. This pig plushie is no-sew, but only the ears will be sewn onto the face of the pig plushie. The finished pig will measure about 28 cm when sitting.
When you are done, there will be other parts to crochet the frog outfit, a bread that it wears like a tube, and a bunny outfit. Use big safety eyes.
02 of 16 Crochet Bread Outfit for Sitting Pig

Follow this tutorial to crochet a large bread plushie that can be used as an outfit for the sitting pig plushie. You will use two shades of brown and work the bread plushie as one piece.
Stuff it in the end with the cotton and make it like how you will crochet the donut plushie. If you are using this for the other doll, always make sure to measure the neck of the plushie.
03 of 16 Crochet Pig In Jumper Plushie
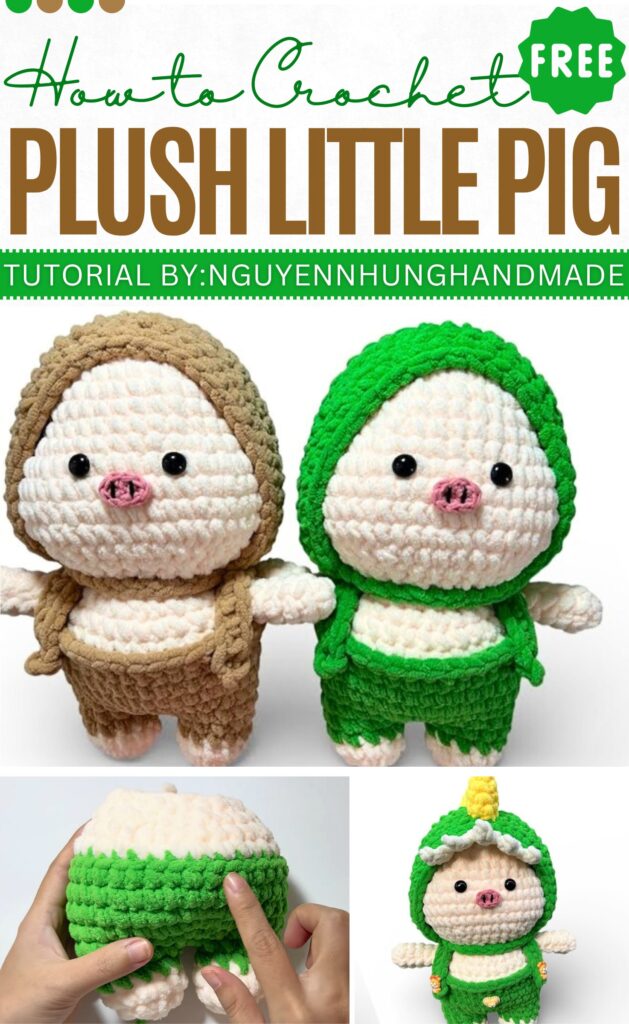
This is a tutorial to crochet a large pig plushie in a hooded onesie with a removable hood. You will crochet it without ears, with some part of the onesie crocheted as you go along with the body.
This hooded pig will act as a base for the next two pig outfits. These are a dinosaur hooded bear and a capybara pig. Once you have the base pig, you will only sew few small crochet things on it.
04 of 16 Crochet Dino Pig Plushie Outfit
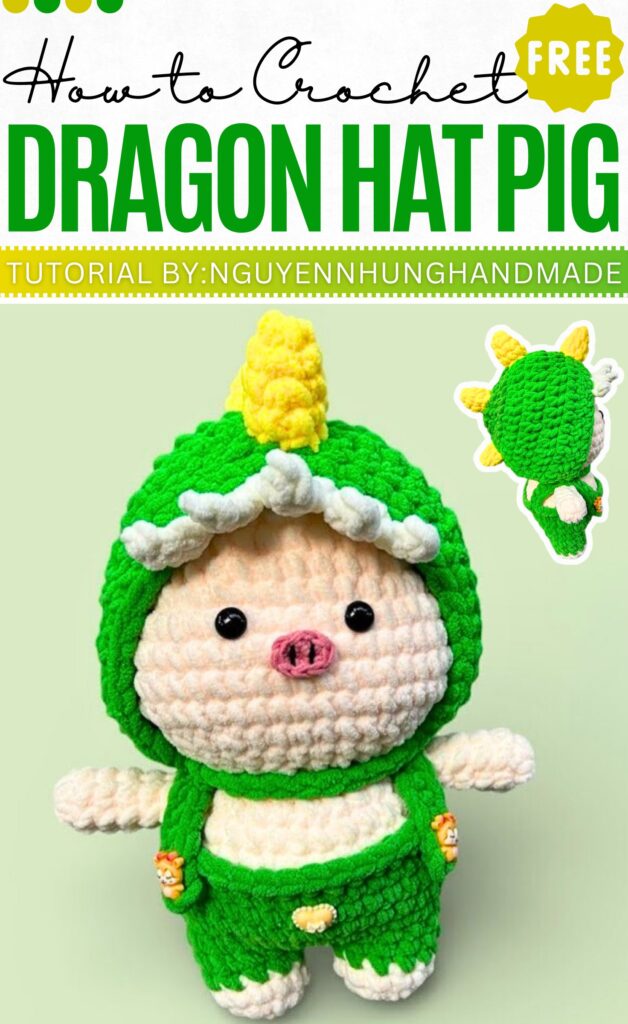
The dinosaur onesie looks so cute, featuring the dinosaur yellow spikes all over upto the back. The kids will simply love this plushie. If you crocheted your pig with the green hood, this will demand simple additions.
05 of 16 Crochet Capybara Pig Plushie Outfit
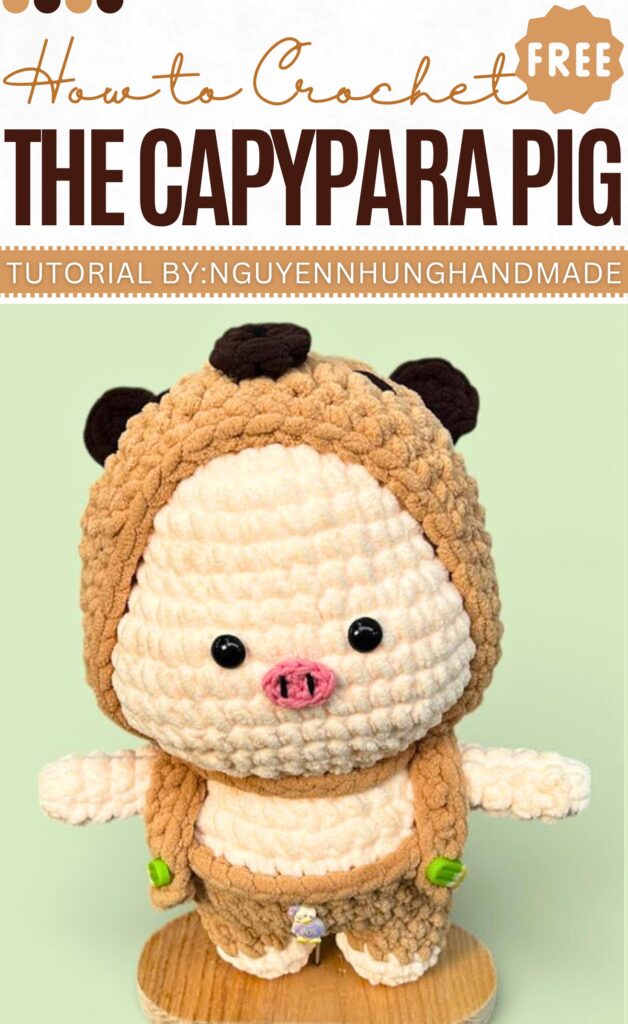
The base of this capybara pig plushie is the same as the previous hooded pig. Just make the ears, snout, and assemble the face.
Use the light brown and dark brown colors for crocheting a sleepy capybara outfit. The finished capybara will be a great gift for a toddler as a buddy.
06 of 16 Crochet Frog and Rabbit Pig
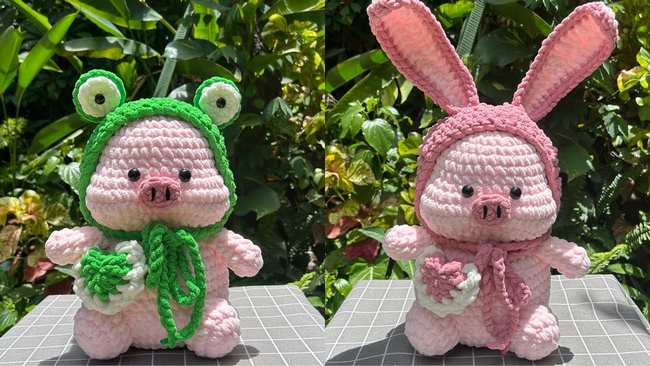
In this variation of the sitting pig plushie, you will crochet the frog and a bunny hood. The pattern is so easy and explained cleverly in the single stitch-by-stitch tutorial. That is, you will first crochet the hood with the earflap that will be common to both.
Separately crochet the googly eyes for the frog hood hat and long bunny ears for the rabbit hood. Both are easy to crochet.
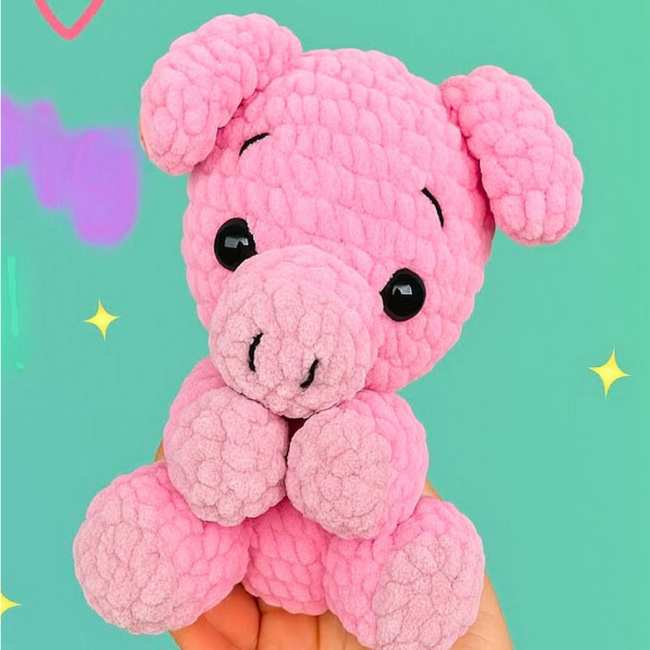
07 of 16 Crochet Mini Pig Plushie
Here is how to crochet a “no-sew” mini plushie pig, a quick and easy project for beginners. It starts with a magic ring for the muzzle and builds the body in one continuous piece using single and half-double crochet stitches.
The creator emphasizes techniques for a professional finish, such as working in the “third loop” of stitches to separate the muzzle from the body. You can also crochet the other version.
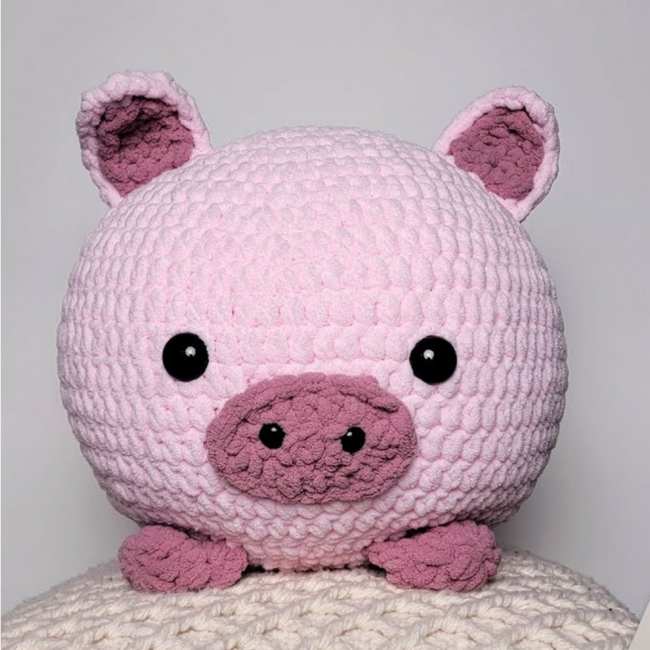
08 of 16 Crochet Pig Plushie Amigurumi
This is the part of crocheting a cute, long amigurumi pig. You will learn how to crochet the main body and head of the pig, starting from the snout and working backward toward the tail. It needs the chunky plush yarn to crochet a soft, oversized look and adds extra “shift stitches” to keep the rounds centered on the underside.
By the end, you will have the entire stuffed torso and head, including the attachment of safety eyes and basic facial placement.
09 of 16 Crochet Pig Plushie With Flower
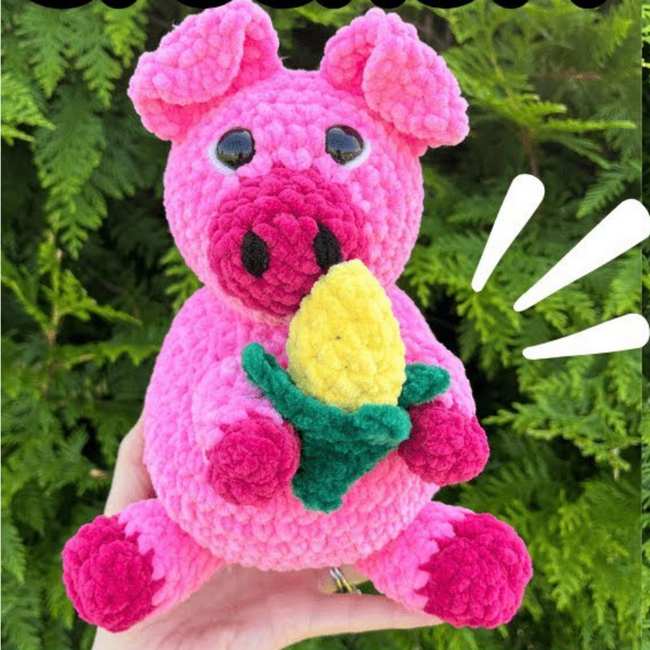
Here is how to crochet a no-sew Cornelius the Pig plushie, a market-friendly plushie featuring a unique removable corn-on-the-cob accessory. It is designed for advanced beginners to intermediate crocheters and uses chunky chenille-style yarn for a soft, professional finish.
The tutorial is structured to be “low-sew,” as the legs and arms are crocheted directly into the body to save time.
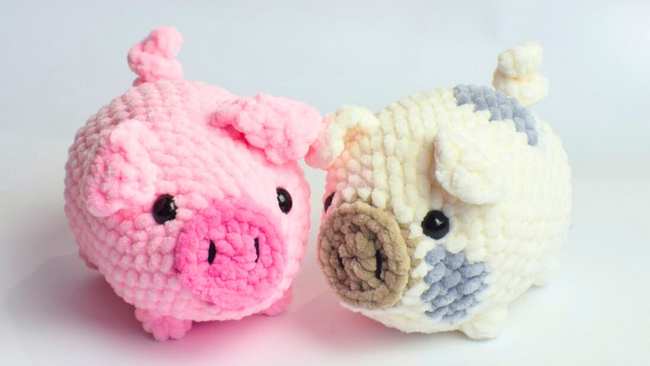
10 of 16 Crochet Pig Plushie Donut
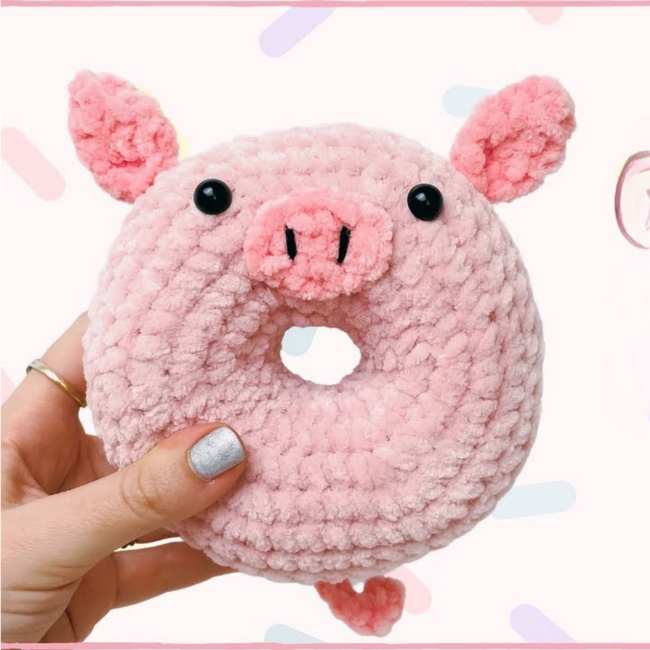
This tutorial demonstrates how to transform a standard crochet donut pattern into an adorable amigurumi pig. It needs crocheting a light pink donut body and then crocheting and attaching specific features, including a darker pink snout, ears, and a curly tail, finished with embroidered nostrils.
You need a darker pink for the features, black yarn for embroidery, a 9mm crochet hook, and 9mm safety eyes.
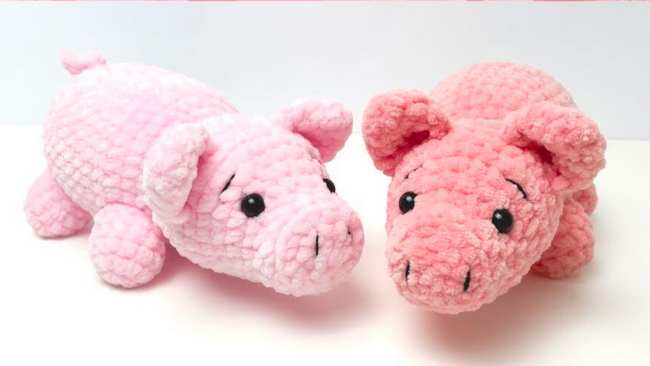
11 of 16 Crochet Big Pig Plushie Free
Here is how to crochet a Pig Squish measuring 10 inches, including its corkscrew tail, snout, ears, and feet. It uses Blanket yarn (size 6) and an 8mm hook to achieve a soft, “squishy” texture.
The tutorial is designed to complement a free pattern available on the Moogly website, guiding viewers through specific construction techniques like seamless joins, chainless starting double crochets, and working in spirals.
12 of 16 Crochet Pig Plushie Amigurumi Doll
Here is how to crochet a cute pig amigurumi doll using soft velvet yarn. You will crochet the head, ears, nose, hands, legs, body, and tail, using a 4.0 mm crochet hook for velvet yarn or a 3.5 mm hook for acrylic yarn.
The project is worked primarily in a spiral, requiring a stitch marker to track rounds, and concludes with the assembly of all parts and the addition of embroidered nose details and safety eyes.
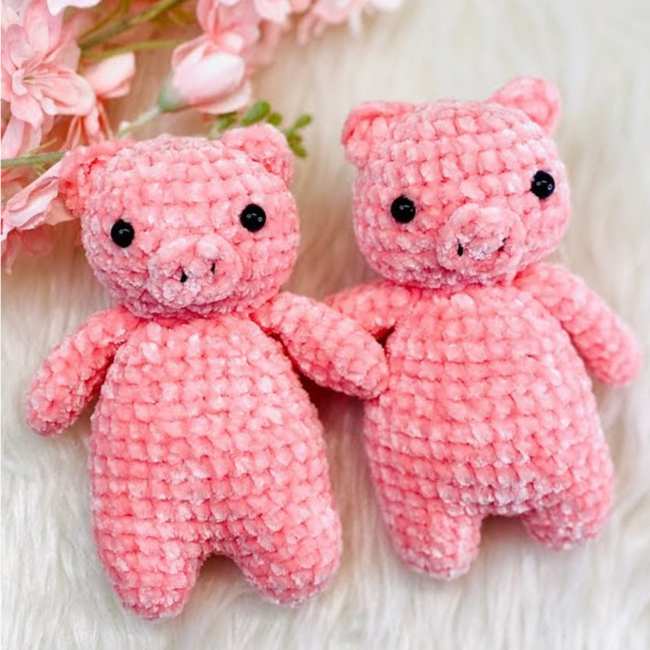
13 of 16 Crochet Stuffed Pig Plushie
Try this guide to crochet an adorable crocheted sitting plush pig. You can use it as a desk buddy and a small teddy gift. It will be perfect for beginners. This will be a baby pig plushie and quite large. You will simply love it.
14 of 16 Crochet Mini Pig Plushie
Here is how to crochet a Mini Piglet plush amigurumi. It picks up from the previous part, crocheting the remaining body parts from the ears and legs, and assembling the plushie.
The tutorial uses clear visual demonstrations and on-screen text instructions, such as “MR: Magic Ring” and “sc: Single Crochet,” to help novices follow the pattern. It will be a sitting pig plushie and can be used as a desk buddy.
15 of 16 Crochet Pig Plushie For Beginners
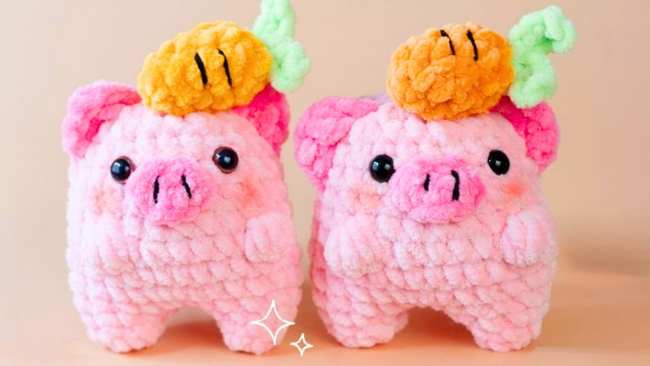
Here is how to crochet a cute Chibi pig plushie holding a carrot on the head. With the puff stitch, it is quite low-sew. But you still might have to attach the mizeela dn ears separately. You can crochet it in minutes.
16 of 16 Crochet Pig Plushie Ice cream
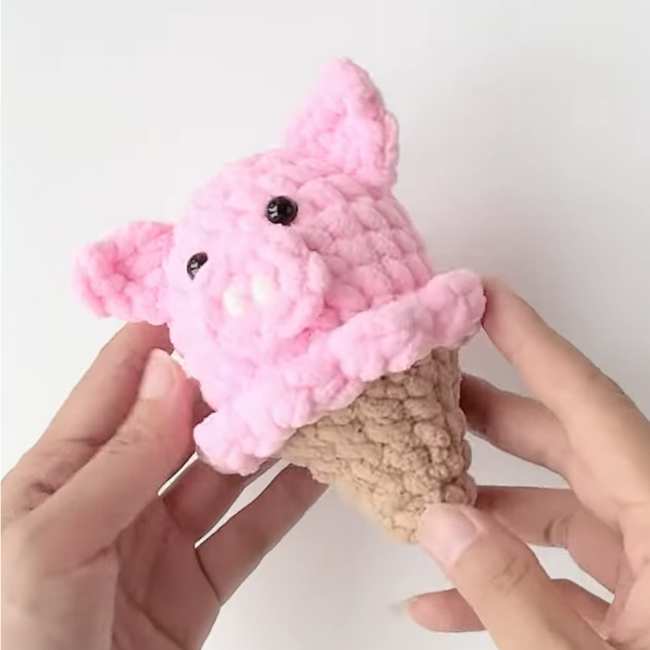
Learn how to crochet an ice-cream pig plushie, featuring a clear, on-screen pattern. It starts with the pig’s head, created using a magic ring and pink yarn, progressively increasing and then decreasing to form a round shape.