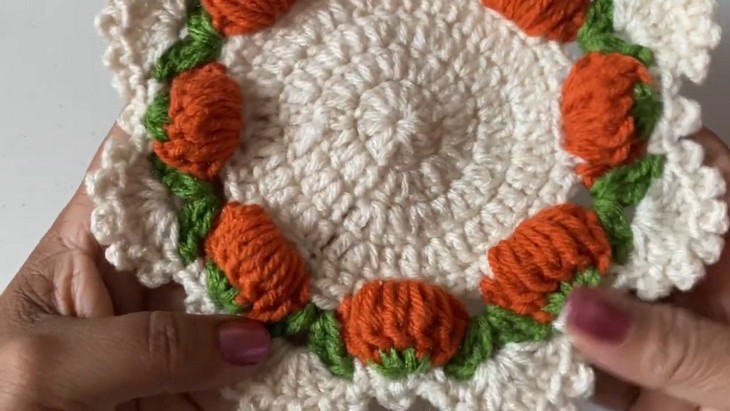
How to Crochet Pumpkin Stitch Coaster for Fall Celebrations
Looking for a quick and easy pumpkin stitch project? With a stitch-by-stitch tutorial, learn how to crochet this 20-minute pumpkin coaster that features three different textures from single crochet to pumpkin stitch and wavy one. You can crochet one for all fall festivities from Halloween to Thanksgiving and even for daily use. Each coaster has a super bulky pumpkin stitch, and the size is pretty large, perfect for even bowls. This crochet fall coaster has a nice balance of detail, perfect for even beginners.
So, if you are ready for learning the pumpkin stitch through this fall project, continue reading this post till the end. There you will find the complete tutorial!
About the Designer: The designer of this pumpkin project is @CrochetMili – her channel provides step-by-step guides for crocheting a wide variety of crochet projects, including 3D floral coasters, granny squares, and animal items like ladybugs, butterflies, and birds. She has a very promising collection of crochet fall patterns, including the popular character in the granny square project. Make sure to check at least one of them this fall!
In respect for the creator’s pattern rights, there will be no provision of the written pattern. You can watch the tutorial with on-screen written instructions at the end of this post.
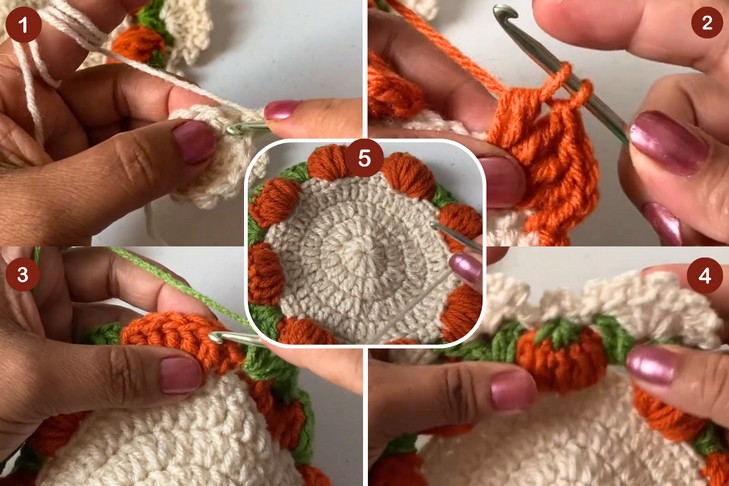
Crochet Pumpkin Coaster Tutorial
Skill Level: Beginner – Intermediate. The pumpkin stitch contains the 5 puff stitch crochet clusters, color-change, chain skip, and working into the chain space using double crochet. You will be working the crochet rounds and using basic stitches from the slip stitch to the chain stitch. Overall, this pumpkin stitch coaster is easy for intermediates but takes time for completion.
Tutorial Timing: 26 Minutes Only (You can use the pumpkin stitch in so many other projects like crocheting a tote bag, clutch, and even a basket. Pumpkin stitch is basically the best way to get the fall theme without turning your piece into a pumpkin amigurumi.)

Personalization Tips: You can also increase the number of pumpkin stitch rows and even turn this crochet coaster project for fall into a doily and even a placemat by continuing to work in the round using the pattern extension method.
Pattern Type: The on-screen written pattern is available if you find written instructions easy to follow along with.
Materials Needed
You can gather the following crochet supplies for crocheting this pumpkin basket by yourself. These will work best:
3 colored yarns (shown: beige/cream, green, and orange)
Crochet hook: 4.0 mm
Scissors (for cutting yarn)
Needle (for weaving in ends)
Beige/cream yarn for the base circle and lace edge.
Green yarn for leaf accents.
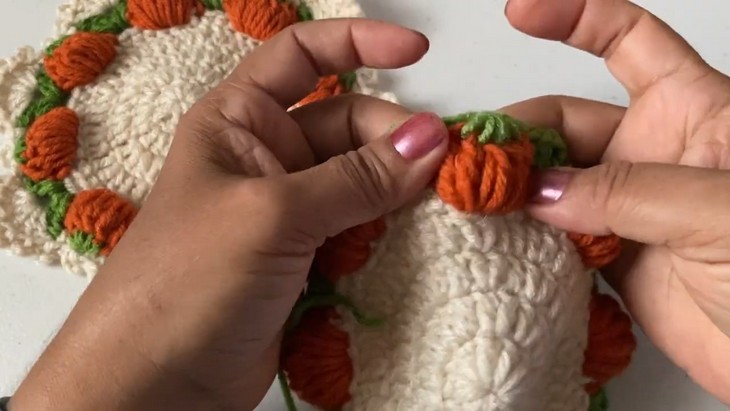
Orange yarn for puff stitches (pumpkin/petal-like details).
Stitches and Techniques Guide
| Stitch Name | Abbreviation | How to Make It | Use / Texture |
|---|---|---|---|
| Chain | Ch | Wrap yarn over hook, pull through loop to form a chain. | Foundation for most crochet projects. |
| Slip Stitch | Slst | Insert hook into stitch, yarn over, pull through stitch + loop on hook. | Joins rounds, creates smooth edges. |
| Single Crochet | Sc | Insert hook, yarn over, pull up a loop (2 loops), yarn over, pull through both. | Compact, dense texture. |
| Half Double Crochet | Hdc (Half Cr) | Yarn over, insert hook, pull up loop (3 loops), yarn over, pull through all 3. | Medium height, solid texture. |
| Double Crochet | Dc | Yarn over, insert hook, pull up loop (3 loops), yarn over, pull through 2, yarn over, pull through last 2. | Taller, versatile stitch. |
| Puff Stitch | Puff | Yarn over, insert hook, pull up a long loop (repeat 3–5 times in same stitch), yarn over, pull through all loops. | Creates raised, puffy texture (good for petals/pumpkins). |
| Chain Skip | Sk Ch | Skip the next chain or stitch instead of working into it. | Creates spacing, lace effect, or shaping. |