
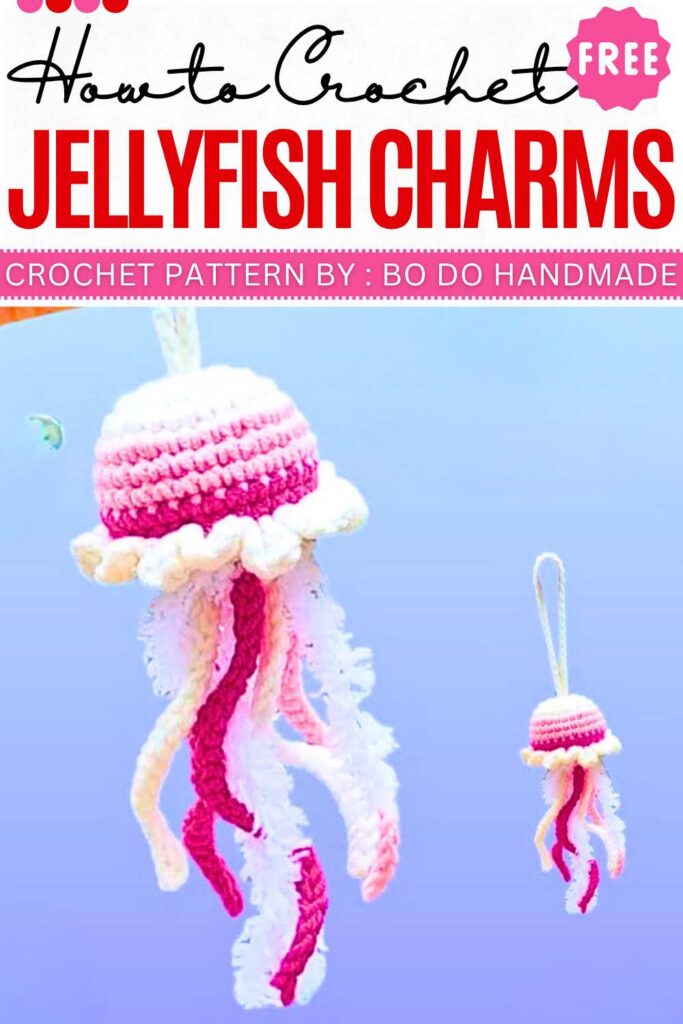
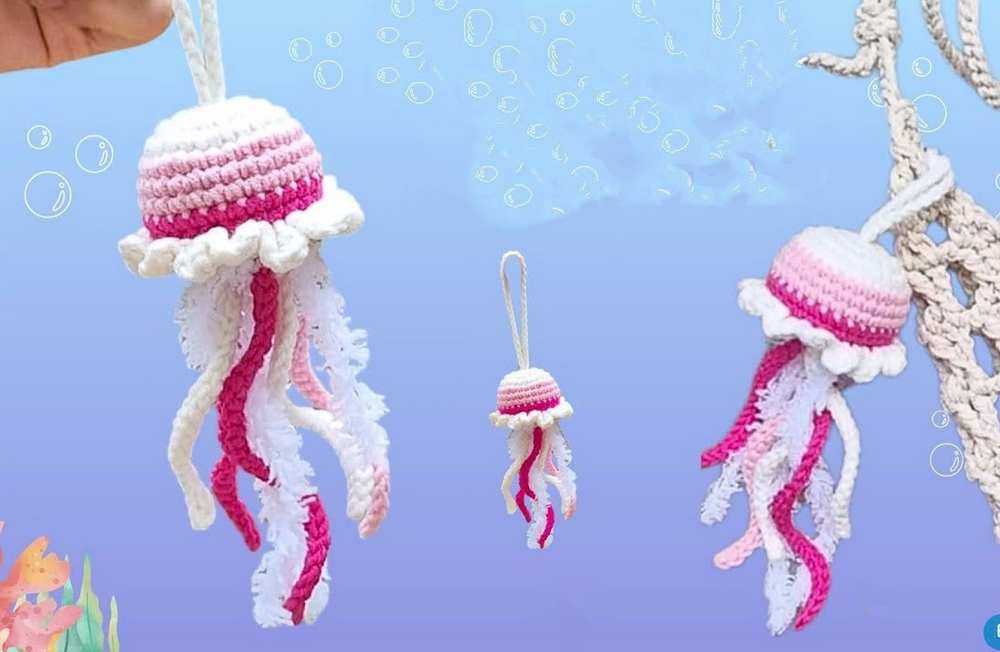
Crochet Jellyfish Keychain Pattern For Summer
We all have those simple mesh tote bags but nothing to enhance their simple look. Today, we are here with the crochet jellyfish bag charm and keychain to do so. It is a small toy with a round, squishy head and long, curly tentacles that hang down from the bottom and swirl in wind. It has a long string on top, so it is perfect to use as a keychain or a fun charm to hang on a beach bag.
Crochet Jellyfish Amigurumi Bag Charm Pattern
Bi Do Handmade has been an expert in crocheting and designing crochet hats, bag charms, and pouches. Also, visit her YouTube channel for more exciting projects.
Crochet Jellyfish Pattern & Assembly
Materials
Yarn: Milk Cotton (125g) in 3 colors
Hook: 2.5 mm
Fiberfill (stuffing)
Yarn needle
Scissors
Fuzzy yarn (optional for decoration)
Abbreviations
MR: Magic Ring
Ch: Chain
Sl st: Slip stitch
Sc: Single crochet
Inc: Increase (2 sc in 1 st)
Dec: Decrease (sc2tog)
Dc: Double crochet
BLO: Back loop only
FLO: Front loop only
St(s): Stitch(es)
Rnd: Round
Pattern Summary
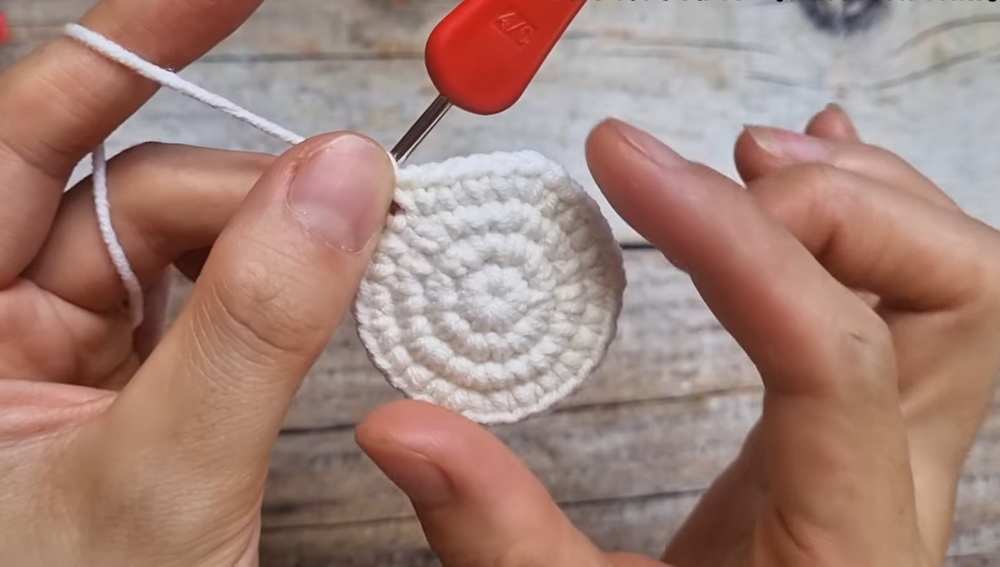
Rnd 1: MR, 8 sc (8)
Rnd 2: 8 inc (16)
Rnd 3: (1 sc, inc) * 8 (24)
Rnd 4: (3 sc, inc) * 6 (30)
Rnd 5–9: 30 sc (30). Note: Change colors between Rnd 7 and 9 for stripes.
Rnd 10: BLO (3 sc, dec) * 6 (24)
Rnd 11: (1 sc, dec) * 8 (16)
Stuff firmly with fiberfill.
Rnd 12: 8 dec (8)
Detailed Assembly
Closing the Body
Cut yarn, leave 10 cm tail.
Thread needle with tail.
Locate 8 remaining sts of Rnd 12.
Insert needle into FLO of st 2, st 4, st 6, and st 8 (skip every other st).
Pull tail firmly to cinch hole closed.
Knot to secure.
Insert needle through center, pull through side of body, cut flush to hide tail.
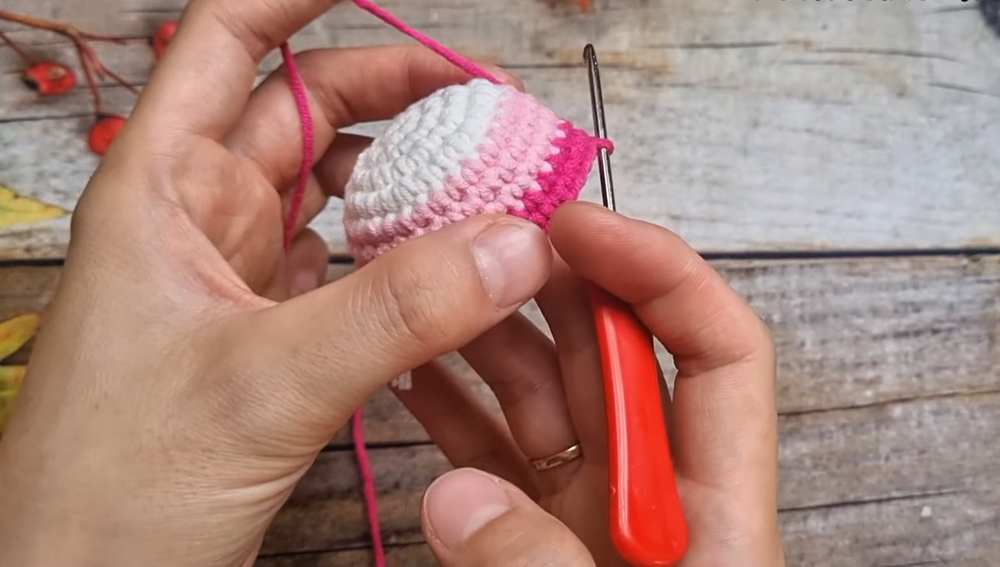
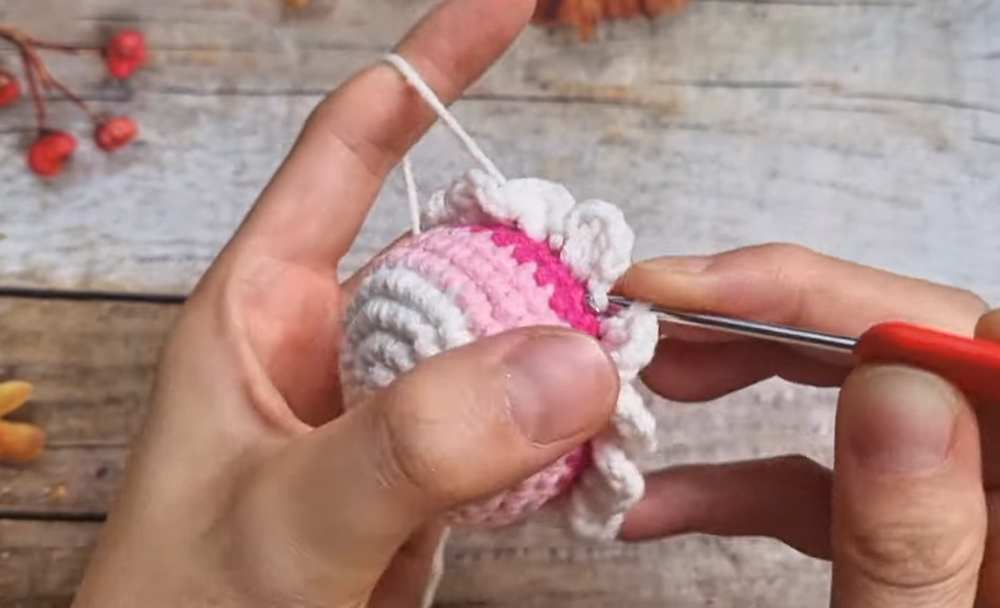
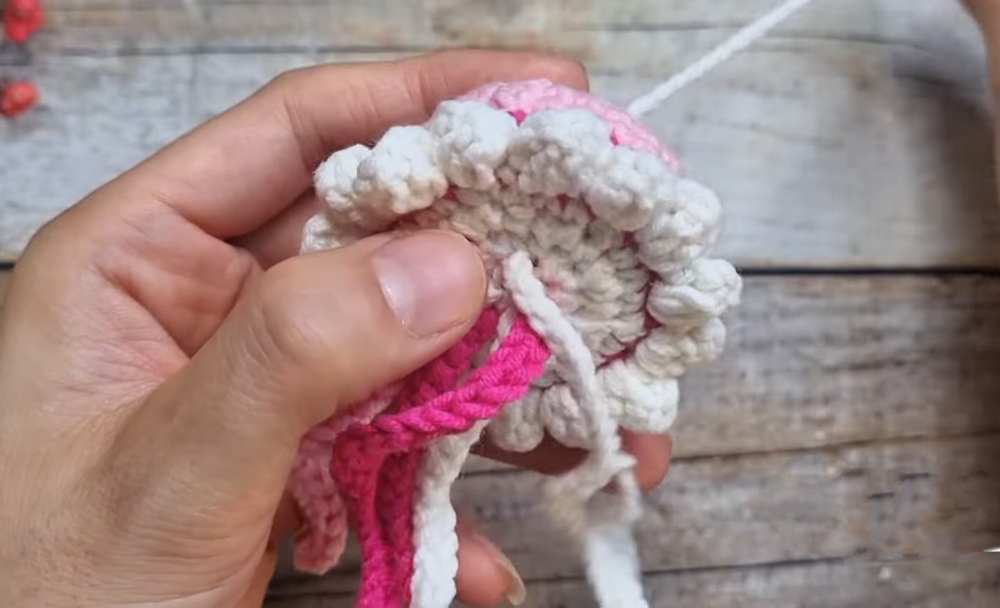
Working the Ruffle
Locate unworked FLO from Rnd 10 on the body surface.
Insert hook into any FLO st.
Join new yarn with sl st.
Ch 2.
Work 2 dc into the same st.
Ch 2, sl st into next st.
Repeat [Ch 2, 2 dc in same st, ch 2, sl st in next st] in every st around the circumference.
Sl st to first st to join.
Fasten off and weave in ends inside the body.
Tentacles (Curly Strands)
Ch 20–30 (vary length for natural look).
Ch 1 to turn.
Sl st in each ch across.
Constraint: Keep sl sts loose to allow the chain to spiral/curl naturally.
Fasten off, leave 5 cm tails.
Repeat to make 3–5 tentacles.
Attaching Tentacles & Hanging Loop
Tentacles: Use hook to pull both tails of a tentacle through the bottom center of the jellyfish. Tie a double knot inside. Pull tails into the body with a needle to hide.
Hanging Loop: Ch 45–50. Fasten off. Use hook to pull one end through the MR at the top of the head and out through the bottom center. Pull the other end through a stitch adjacent to the MR and out through the bottom. Tie ends together at the bottom near the tentacles. Hide knot inside.
Final Decor
Cut 10 cm lengths of fuzzy yarn.
Fold fuzzy yarn in half.
Insert hook into a stitch on the bottom base.
Pull the folded loop through the stitch.
Pull the loose ends through the loop (lark’s head knot).
Repeat 2–3 times around the center for texture.
Video Pattern:
Pattern Instructions (UK Terms)
Closing the Body
- Cut yarn, leave 10 cm tail.
- Thread needle with tail.
- Locate the 8 remaining stitches of Rnd 12.
- Insert needle into FLO of st 2, 4, 6, 8 (skip every other st).
- Pull tail firmly to cinch hole closed.
- Knot to secure.
- Insert needle through center, pull through side of body, cut flush to hide tail.
Working the Ruffle
- Locate unworked FLO from Rnd 10 on body surface.
- Insert hook into any FLO st.
- Join new yarn with sl st.
- Ch 2.
- Work 2 dc into the same st.
- Ch 2, sl st into next st.
- Repeat [Ch 2, 2 dc in same st, Ch 2, Sl st in next st] around the circumference.
- Sl st to first st to join.
- Fasten off and weave in ends inside the body.
Tentacles (Curly Strands)
- Ch 20–30 (vary length for natural look).
- Ch 1 to turn.
- Sl st in each ch across.
Constraint: Keep sl sts loose to allow chain to spiral/curl naturally. - Fasten off, leave 5 cm tails.
- Repeat to make 3–5 tentacles.
Attaching Tentacles & Hanging Loop
- Tentacles: Use hook to pull both tails of a tentacle through the bottom center of the jellyfish. Tie a double knot inside. Pull tails into the body with a needle to hide.
- Hanging Loop: Ch 45–50. Fasten off. Use hook to pull one end through the MR at the top of the head and out through the bottom center. Pull the other end through a stitch adjacent to the MR and out through the bottom. Tie ends together at the bottom near the tentacles. Hide knot inside.
Final Decor
- Cut 10 cm lengths of fuzzy yarn.
- Fold fuzzy yarn in half.
- Insert hook into a stitch on the bottom base.
- Pull the folded loop through the stitch.
- Pull the loose ends through the loop (lark’s head knot).
- Repeat 2–3 times around the center for texture.