
Free Crochet Much Stylish Top Patterns for Beginners
This summer, try these 5 free crochet top patterns to make beautiful tops: 4 sleeveless, cropped tops, and 1 lightweight mesh top. The last one has full sleeves, but with the basic mesh pattern, you can crochet it quickly, and it is also pretty breezy and summer-ready. You can crochet these tops up to XXL size with easy pattern changes. We shall begin with a ruffle bottom colorwork top, then to a shell stitch striped sleeveless top.
Crochet Much Stylish Top Patterns
I have also included two granny square tops, but don’t worry, we are not repeating the same classic granny square, but unique ones. You can crochet a boho and sunflower top, too. Be sure to support the creators. All these require the cotton yarn, which makes them the best fit for the summer. I will soon extend this series, so be sure to stay updated.
01 of 05 Crochet Lisa Top
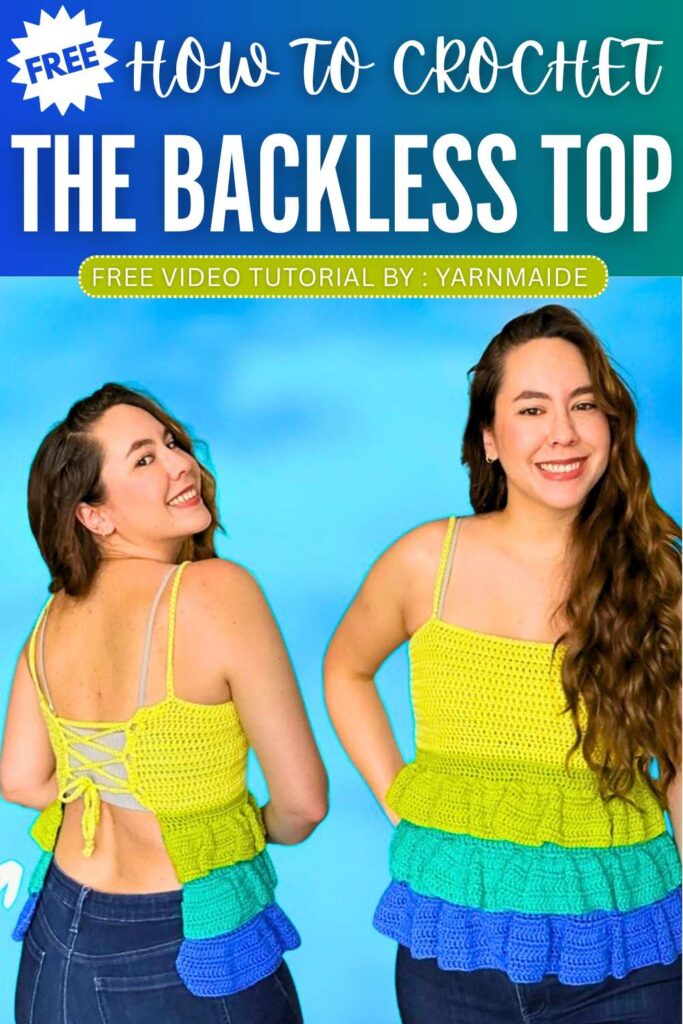
The Lisa Top is a colorful, ruffled crochet top featuring a lace-up back and adjustable straps. The following guide outlines the materials and steps for a size medium, though it can be customized for any size.
Quick Guide: Crochet Lisa Top
The Body: Start with a magic ring or a chain of 100 and work 14 rows of double crochet to create a rectangular tube that covers the bust.
The Ruffles: Work one row with two double crochets in every stitch to create a wavy effect, then add five regular rows to finish the first layer.
The Layers: Crochet a second separate ruffle panel and sew it onto the back loops of the first ruffle’s increase row for a stacked look.
The Straps: Chain 50 and work half-double crochets back down the chain, then attach them about 8 inches apart between the front and back.
The Back: Create three evenly spaced lace-up holes on each side of the back opening by chaining and skipping stitches.
The Tie: Crochet a long 60-inch cord using single crochets and thread it through the back holes to secure the top.
Video Pattern:
02 of 05 Crochet Shell Stitch Summer Top
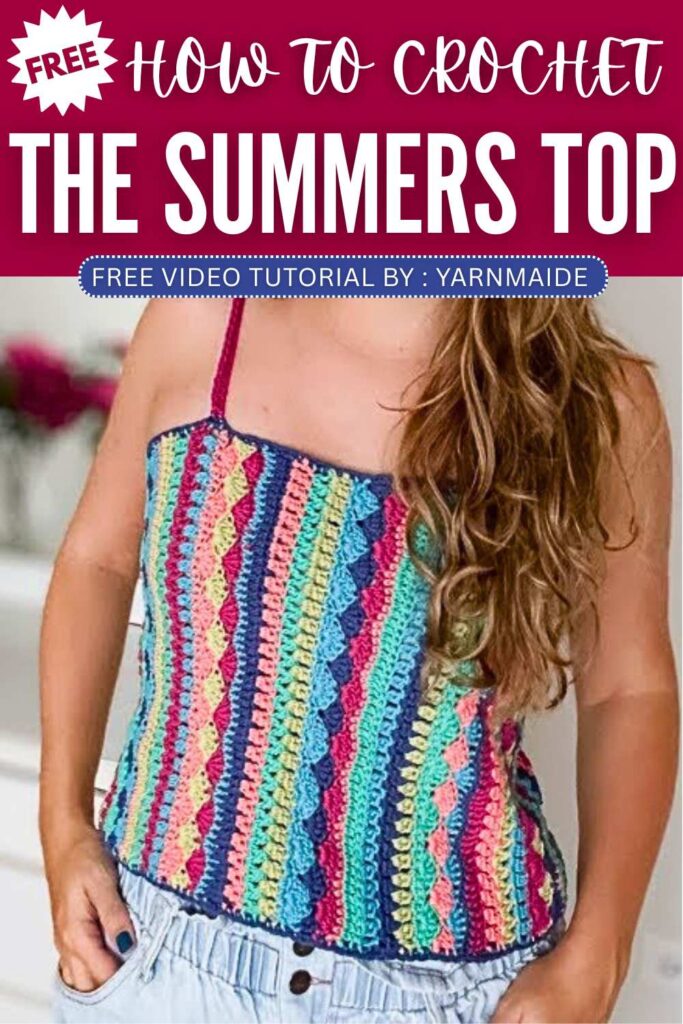
The Lola Top is a multi-stitch, colorful summer top that uses a pattern repeat of shells, V-stitches, and basic stitches. This tutorial uses worsted weight cotton yarn and a 4.5 mm hook.
Quick Guide: Lola Top
The Foundation: Chain a multiple of 6 + 2 and work one row of single crochet.
The Shells: Crochet 5 double crochets into one stitch, then anchor it with a single crochet three stitches away.
The Offset: Start the next row with 3 double crochets, then place your shells into the single crochets of the row below.
The V-Stitch: Work two double crochets together with a chain-1 space, then stack them to form “V” shapes in the next row.
The Body: Repeat the stitch patterns until the piece is long enough to wrap around your torso.
The Assembly: Slip stitch the ends together on the wrong side to form a tube and add a single crochet border to the top and bottom.
The Straps: Chain 50, attach to the opposite side, and work half-double crochets back down the chain for thickness.
Video Pattern:
03 of 05 Crochet Daisy Square Top
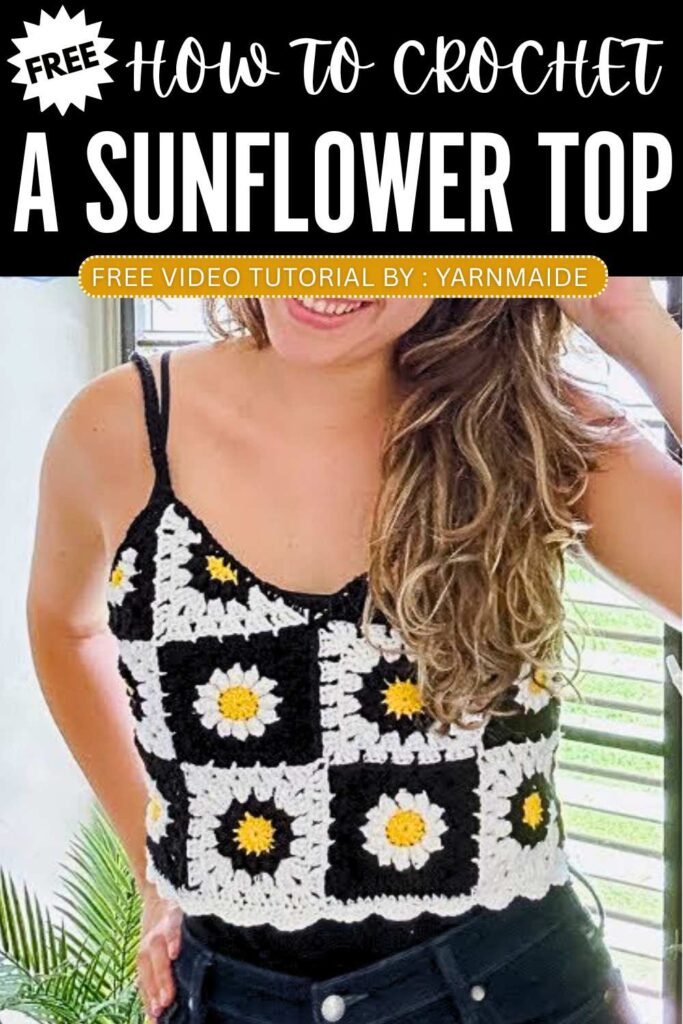
This chic black-and-white daisy top uses a join-as-you-go method to turn floral motifs into a custom-fit summer staple. It features a combination of full square and half-triangle daisy patterns to create its unique shape.
Quick Guide: Granny Top
The Flower Center: Crochet 12 double crochets into a magic ring using yellow yarn.
The Petals: Work 12 white popcorn stitches around the center, separated by chain-2 spaces.
The Square: Use black yarn to work rounds of 3-dc groups and treble-crochet corners.
The Triangles: Make half-daisy motifs to fill in the sides and shape the top edge.
The Assembly: Slip stitch the pieces together through the corners and edges while finishing the last rounds.
The Borders: Add a single crochet edge to the top and a decorative shell stitch to the bottom.
The Straps: Chain 55–60 from the front peaks and work half-double crochets back to the rear.
Video Pattern:
04 of 05 Crochet Boho Summer Top
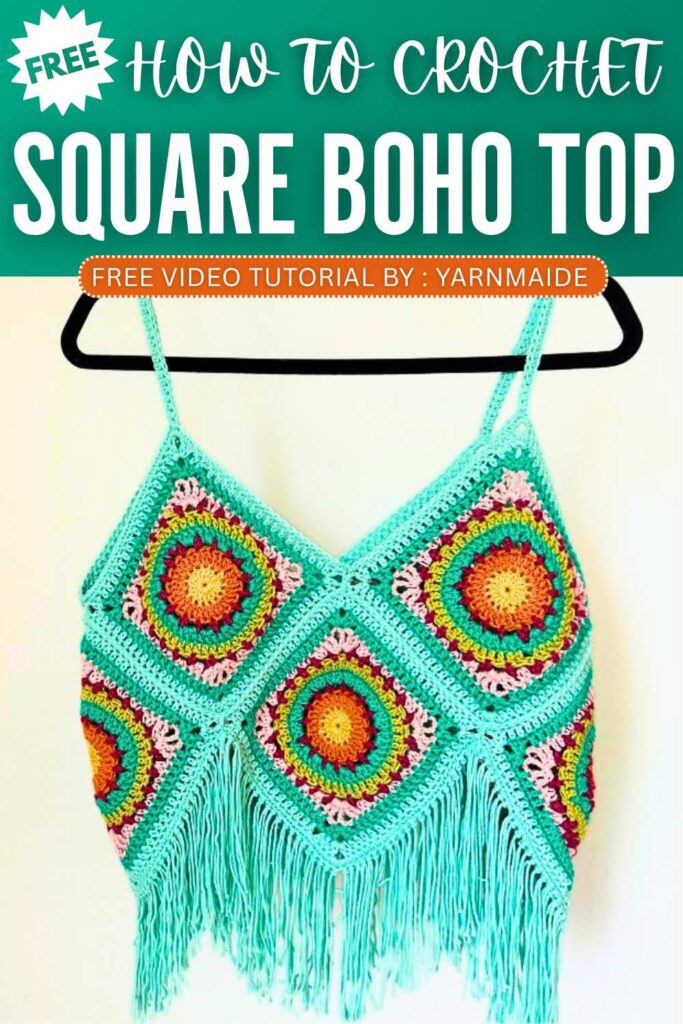
This Boho Summer Top is a customizable, beginner-friendly project made of eight colorful granny squares. It features an optional tassel fringe and adjustable straps for a perfect summer fit.
Quick Guide: Boho Summer Top
The Squares: Crochet 8 granny squares starting with a 16-double crochet magic ring. Work rounds of double crochets and chain-3 spaces to build the circle, then use treble crochets to create corners and turn it into a square.
The Assembly: Lay out the squares and join them using slip stitches. Fold the joined squares to form a tube-like body with pointed peaks at the top for the straps.
The Edging: Work a single crochet border around the top and bottom of the garment. Use three single crochets in each corner stitch to keep the edges crisp.
The Fringe: For a boho look, attach 6-inch yarn tassels to every stitch along the bottom edge. Trim the tassels with large scissors to ensure a straight, even finish.
The Straps: Chain approximately 40 stitches from the front peaks to the back. Work a row of half-double crochets back along the chain to create thick, sturdy straps.
Video Pattern:
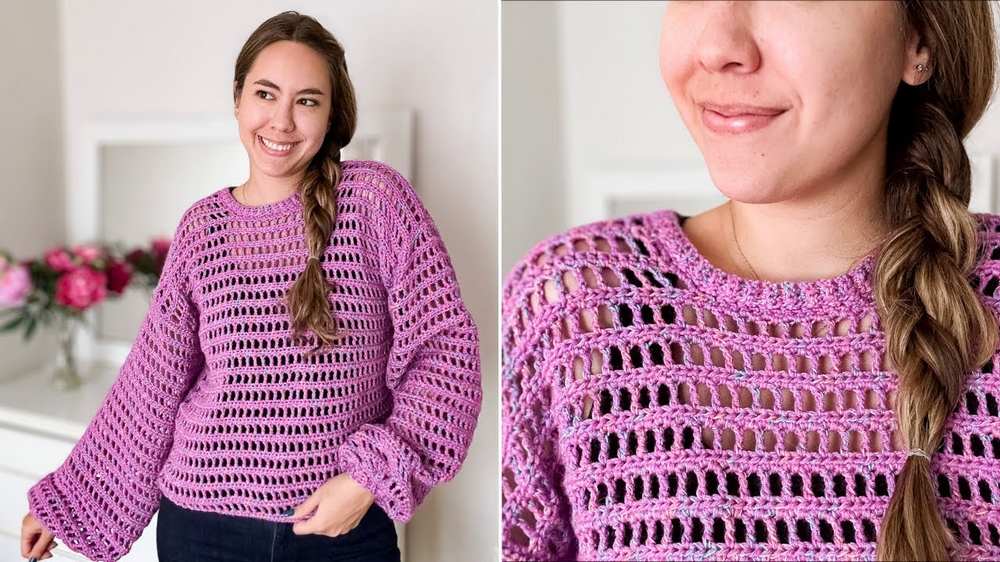
05 of 05 Crochet Mesh Stitch Top
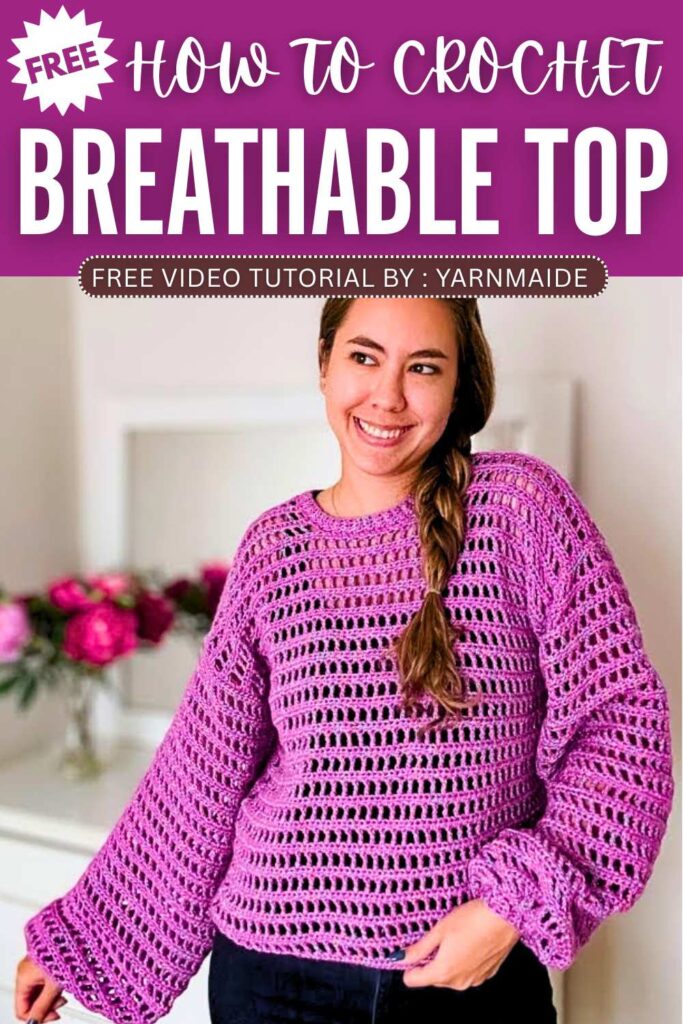
This airy, layered sweater uses a simple pattern of treble crochets and chain spaces to create a quick mesh texture. It features wide, puffy sleeves with a tight ribbed cuff for a stylish silhouette.
Quick Guide: Mesh Stitch Top
. Main Panels
Foundation: Chain a multiple of $2 + 3$ to reach your shoulder-to-shoulder measurement.
Stitch: Alternate one row of half-double crochet with one row of “mesh” made of treble crochets and chain-1 spaces.
Quantity: Crochet two identical rectangular panels for the front and back.
2. Neckline & Sleeves
Neckline: Mark the center for the head opening and work each shoulder separately for three rows, reducing stitches to curve the neck.
Sleeve Panels: Crochet two wide mesh rectangles, approximately 21 inches wide for a size medium.
3. Ribbing & Cuffs
Ribbing: Create narrow strips using single crochet in the back loops only.
Cuffs: Sew the wide sleeve edges to the smaller ribbed cuffs to create a gathered, puffy effect.
4. Assembly
Shoulders: Join the front and back panels at the shoulder seams using single crochet.
Sleeves: Attach the sleeve panels to the main body panels.
Sides: Seam from the wrist all the way down the sides of the sweater to close the garment.
Video Pattern: