
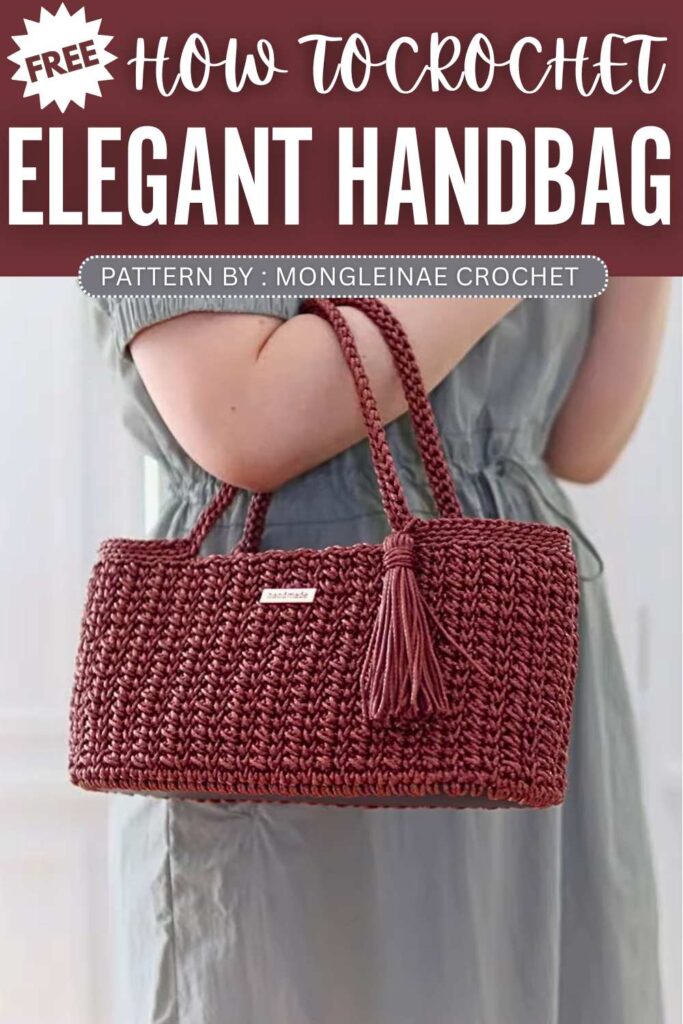
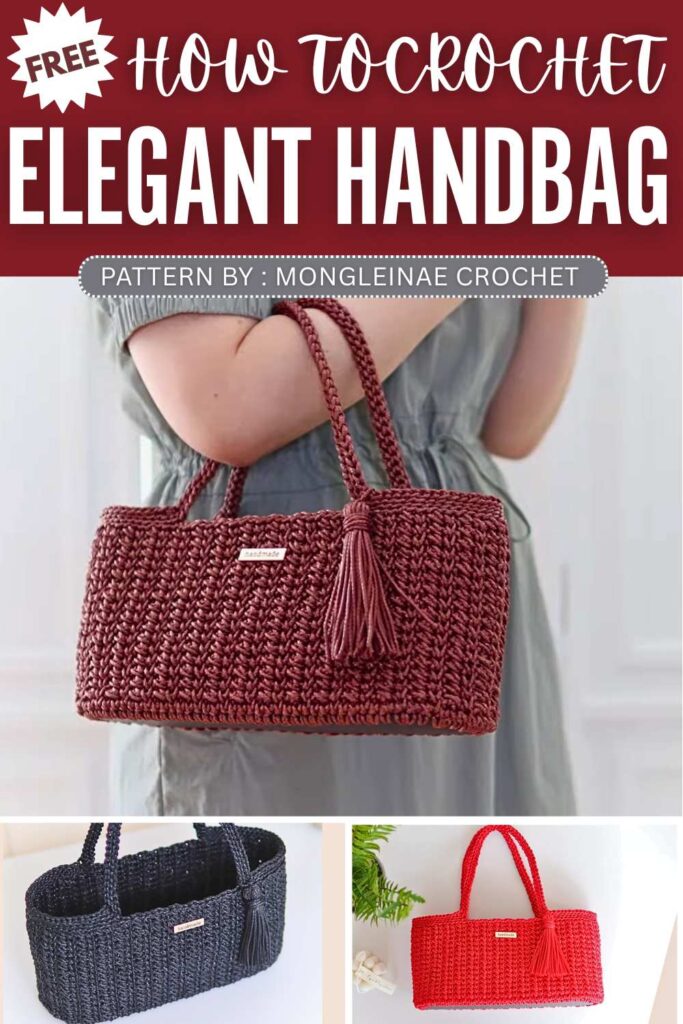
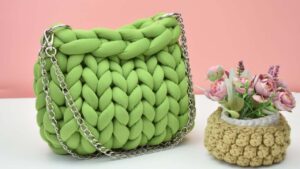
Stylish Crochet Handbag Pattern For Summer
Upgrade your handmade style with the elegant Mona Bag, a crochet project that looks like real leather. It is made using special yarn and starts from a pre-punched leather base for a strong and firm shape. The design uses simple textured stitches to create a neat, classy pattern. After building several rows, the bag becomes sturdy and stylish, making it perfect for daily use or a premium handmade accessory.
Leather-look Crochet Handbag Pattern
The designer of this pattern is @mongleinae. She makes themed crochet pouches and little decorations that are always elegant and gift-ready. In one word, she is among the most CREATIVE crochet designers whose work I have covered so far. Just take a look at her octopus pouch!
Be sure to subscribe to her channel for more of creative crochet patterns and to support her
Step by Step Pattern:
Materials Needed
Yarn: 3 balls of “Next Leather” yarn (or similar leather-feel polyester/PVC yarn).
Hooks: 3.0mm (Size 5) for the base and 4.0mm (Size 7) for the body.
Accessories: Slim oval leather base (66 holes), metal label, stitch markers, scissors, and a tapestry needle.
Tassel Materials: Rubber band and a 10.5cm piece of cardboard.
Abbreviation List
ch: Chain
sc: Single crochet
sl st: Slip stitch
inc: Increase (2 stitches in the same hole/stitch)
blo: Back loop only
deep sc: Waistcoat stitch (sc worked into the “V” post of the stitch below)
st(s): Stitch(es)
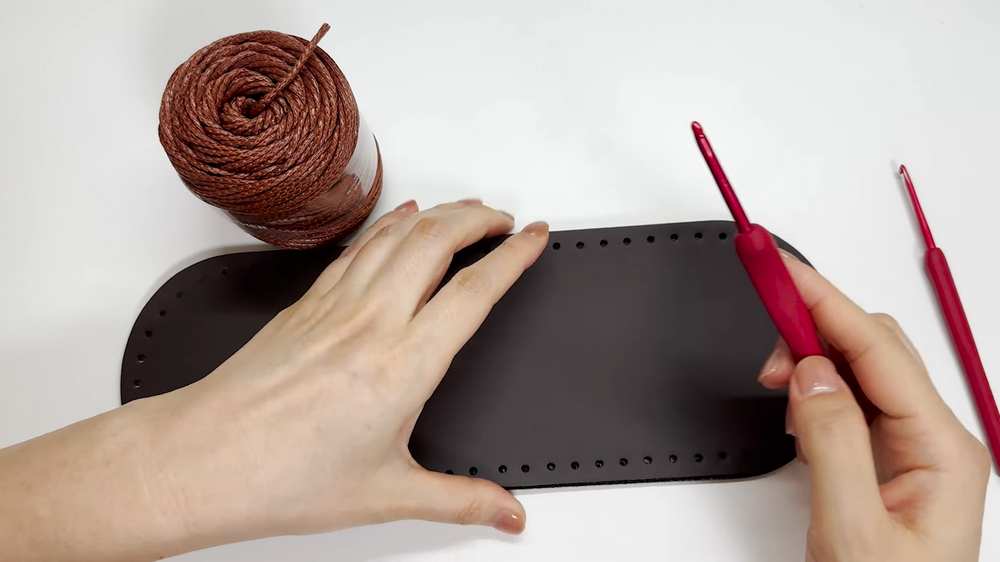
Step 1: The Foundation
Hole Prep: Use an awl or a thick hook to widen the holes in the leather base if needed.
Base Round (3.0mm Hook): Start on a straight side of the oval. Work a pattern of [1 sc, 1 inc] in each hole around the base. With 66 holes, you will finish with 99 stitches.
Join: Sl st to the first sc and switch to the 4.0mm hook.
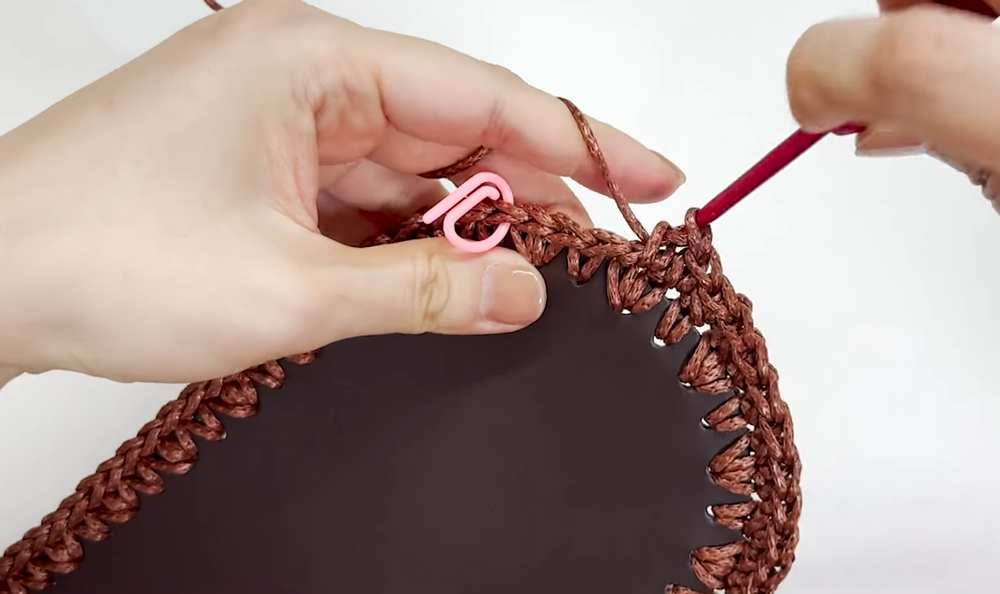
Step 2: Shaping the Body
Round 1: Ch 1. Sc in each stitch around.
Corner Increases: Identify the 4 “corners” of the oval. Work an inc (2 sc) into each of these 4 corner stitches to ensure the bag stands upright and expands correctly.
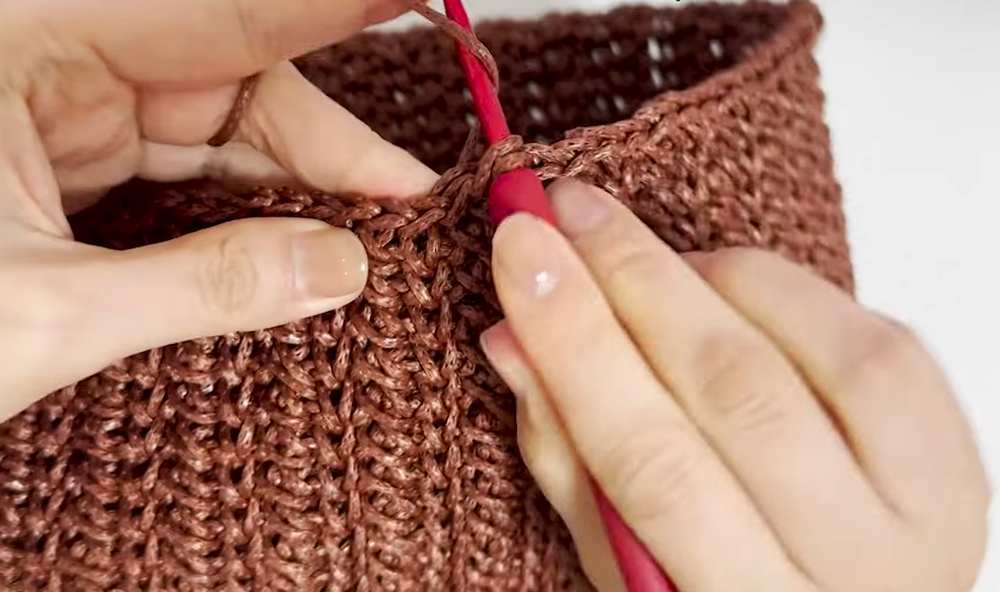
Step 3: The Mona Stitch Pattern
This pattern uses a 3-stitch repeat. Maintain a slightly loose tension as leather yarn does not stretch.
The Sequence:
Skip the first stitch, work 1 sc into the second stitch.
Work 1 sc back into the skipped stitch (this creates the criss-cross effect).
Work 1 Deep Sc into the “V” post of the third stitch from the previous row.
Repeat this 3-stitch sequence for 17 rounds total. You will see vertical columns of knit-like stitches (the deep sc) separated by textured crosses.
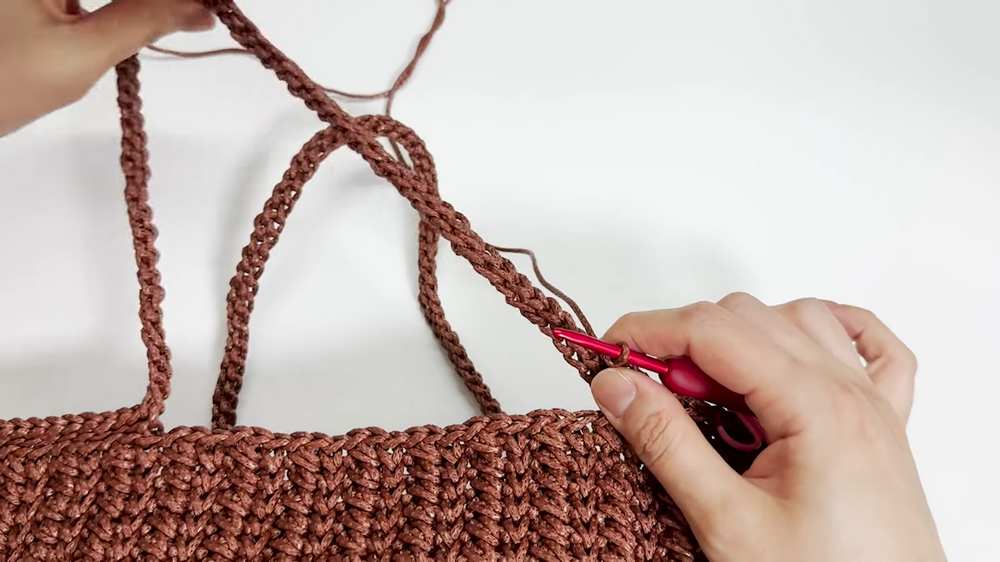
Step 4: The Handles
Setup: Flatten the bag. Mark the center of the front and back. Place markers 9 stitches to the left and 9 stitches to the right of the center (an 18-stitch gap for the handle).
Handle Round 1: Sl st in the blo until you reach the first marker. Ch 55 (for a shoulder/hand carry length). Skip the 18-stitch gap and sl st into the blo of the next marker. Repeat for the back side.
Handle Round 2: Sl st into the blo of every stitch around, including each individual chain of the handles. This adds thickness.
Handle Round 3: For extra stability, work one final round of blo sl sts. At the four points where the handles meet the bag, sl st 3 together to create a neat, reinforced “hinge.”
Step 5: Assembly & Tassel
Finishing: Cut the yarn and use a tapestry needle to create an “invisible join.” Weave in all ends inside the bag.
Label: Center the metal label on the front, roughly three rows down from the top, and secure the tabs.
Tassel: Wrap yarn around your cardboard 25 times. Tie the top with a strand of yarn. Slide a rubber band over the bundle to create the “neck” of the tassel, then wrap yarn over the rubber band to hide it. Cut the bottom loops even and tie it to the handle base.
Video Tutorial:
You may also like

17 Free Crochet Handbag Patterns for Kids
Free Crochet Handbag Pattern & Video Tutorial
Crochet Cherry Wallet & Handbag Pattern
How to Crochet Tube Yarn Handbag by Hand-Knitting
Crochet Rainbow Handbag Pattern For Stylish You


