
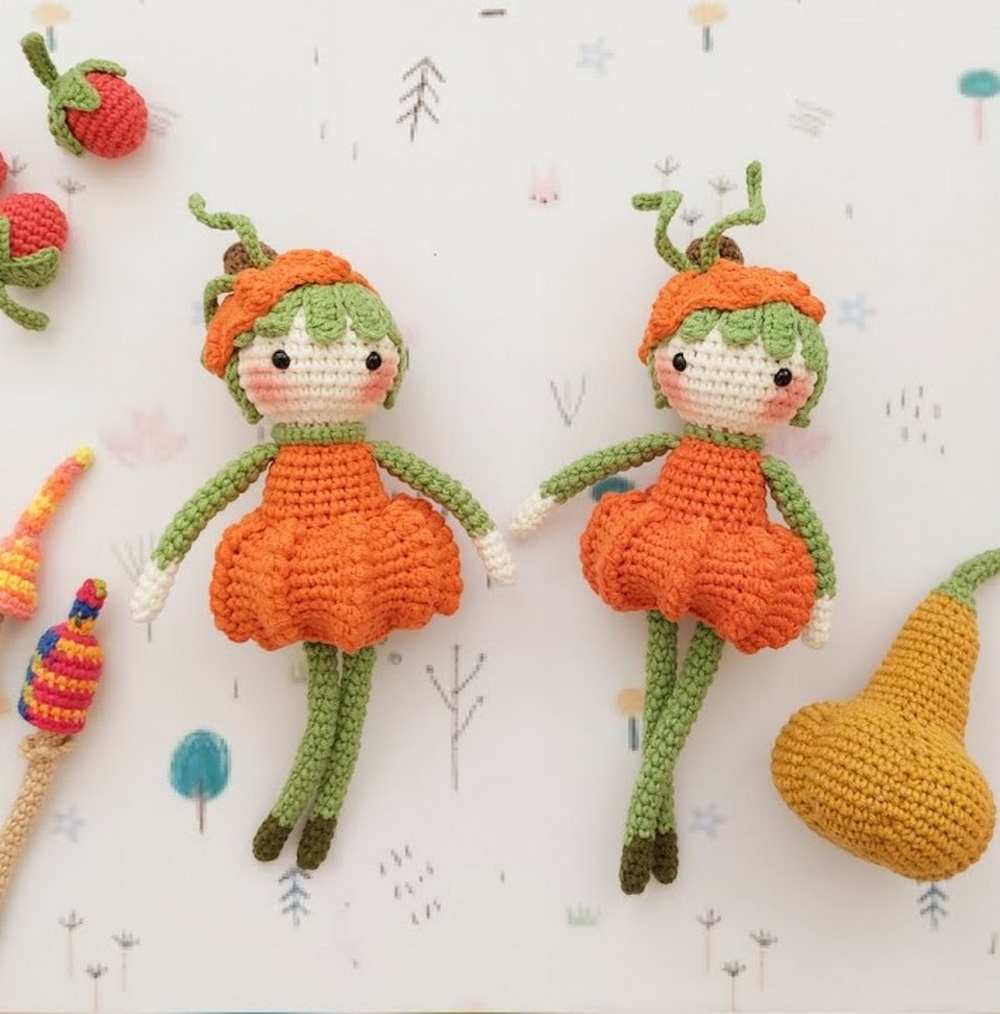
ToysIryna: Crochet Pumpkin Girl Doll Amigurumi Pattern for Fall & Halloween
Learn how to crochet a UNIQUE pumpkin doll for fall with this FREE written pattern & a tutorial, as well. This gorgeous crochet doll wears a flared pumpkin dress and a pumpkin hat with a brown stem. Her green hairstyle also includes two curly hairs that represent the pumpkin vines. Kids will love to snuggle up with this crochet fall doll that is actually quick and easy to crochet for even beginners.
Crochet Pumpkin Girl Doll Amigurumi Pattern

The pumpkin doll also has blush on the cheeks and you can confidently give it as a gift to a little girl. Crocheting this pumpkin doll won’t take more than 1 hour to be finished. Now, continue reading for the full crochet pumpkin doll pattern for this Halloween and fall.
About the designer: The designer behind this crochet pumpkin cat is @CrochetToysIryna – she always crochets an amigurumi from a unique angle and I love it!
How to Crochet Doll Wearing a Pumpkin Skirt and Hat Pattern
This project is an adorable, autumn-inspired “Pumpkin Doll” that stands approximately 21 cm tall. The design features a charming girl doll.
It is wearing a uniquely textured skirt and matching hat designed to look exactly like plump pumpkins, complete with vertical bobble lines, a brown stem, and winding green vine tendrils.
Her whimsical green hair is styled with playful short bangs in the front and longer curled strands framing her face.
This project transforms a basic long-legged doll structure into a festive, high-quality holiday piece using clever texture patterns and simple assembly steps.
Materials Needed
YarnArt Jeans yarn (or any equivalent sport/weight yarn) in the following colors:
- milky color (03)
- green color (69)
- dark green color (82)
- orange color (85)
- brown color (40)
2.0 mm crochet hook
5 mm safety eyes
Toy stuffing (fiberfill/holofiber)
Yarn needle for embroidery and assembly
Stitch markers and pins
Cosmetic blush for the doll’s cheeks
Abbreviations (US Terms)
MR: Magic Ring
ch: chain
sc: single crochet
dc: double crochet
inc: increase (2 single crochets in one stitch)
dec: decrease (crochet 2 stitches together)
bo: bobble / puff stitch (specifically made of 3 unfinished double crochets worked into the same stitch, then pulled together with a single shared loop)
BLO: back loops only
FLO: front loops only
sl st: slip stitch
st/sts: stitch/stitches
Full Crochet Pattern
Arms (Make 2)
Start with skin color yarn.
Rnd 1: 6 sc in MR (6)
Rnd 2-5: 6 sc (6)
Change to dress color yarn.
Rnd 6-15: 6 sc (6)
Fold the opening flat and close it by crocheting 3 sc through both layers. Fasten off. (Do not stuff the arms).
Legs (Make 2)
Start with dress color yarn.
Rnd 1: 6 sc in MR (6)
Rnd 2-5: 6 sc (6)
Change to tights color yarn.
Rnd 6-25: 6 sc (6)
Fasten off the first leg. Do not cut the yarn on the second leg; you will use it to continue directly into the body. (Do not stuff the legs).
Body
Continue from the second leg and ch 3.
Rnd 26: 6 sc around the first leg, 3 sc along the chain, 6 sc around the second leg, 3 sc along the opposite side of the chain (18)
Rnd 27: (1 sc, inc) x 9 (27)
Rnd 28-31: 27 sc (27)
Change to dress color yarn.
Rnd 32: (7 sc, dec) x 3 (24)
Rnd 33: In BLO, 24 sc (24) — the unworked front loops will be used for the skirt later.
Rnd 34: 24 sc (24)
Rnd 35: (6 sc, dec) x 3 (21)
Rnd 36-37: 21 sc (21)
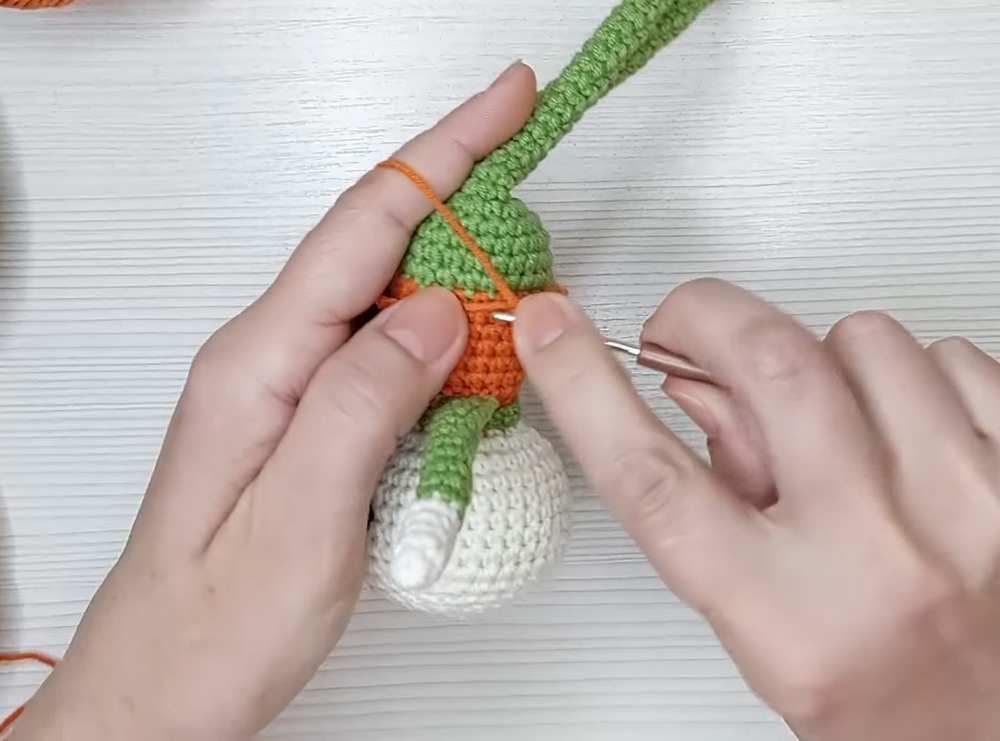
Rnd 38 (Attach Arms): 4 sc, 3 sc (crocheting through both the arm and body), 8 sc, 3 sc (crocheting through the second arm and body), 3 sc (21)
Rnd 39: (dec, 1 sc) x 7 (14)
Stuff the body firmly, making sure the neck is well-stuffed.
Rnd 40: In BLO, 14 sc (14)
Change to skin color yarn.
Rnd 41: In both loops, 14 sc (14)
Head
Continue directly from the body.
Rnd 42: inc in every stitch (28)
Rnd 43: (3 sc, inc) x 7 (35)
Rnd 44-49: 35 sc (35)
Insert 5 mm safety eyes between Rnd 46 and 47, leaving 7 stitches between them.
Rnd 50: (dec, 5 sc) x 5 (30)
Rnd 51: (dec, 4 sc) x 5 (25)
Rnd 52: (dec, 3 sc) x 5 (20)
Rnd 53: (dec, 2 sc) x 5 (15)
Stuff the head firmly.
Rnd 54: (dec, 1 sc) x 5 (10)
Rnd 55: dec x 5 (5)
Fasten off, weave the tail through the remaining front loops, and pull tight to close the hole.
Hair Cap
Use the tights color (or a base hair color).
Rnd 1: 6 sc in MR (6)
Rnd 2: inc x 6 (12)
Rnd 3: In BLO, (1 sc, inc) x 6 (18)
Rnd 4: In both loops, (2 sc, inc) x 6 (24)
Rnd 5: In BLO, (3 sc, inc) x 6 (30)
Rnd 6: In both loops, (4 sc, inc) x 6 (36)
Rnd 7: In BLO, (5 sc, inc) x 6 (42)
Rnd 8: In both loops, 42 sc (42)
Rnd 9: In BLO, 42 sc (42)
Fasten off, leaving a long tail for sewing.
Curly Hair
Attach your variegated hair color yarn to the center front loops of the hair cap.
Working in a continuous spiral, crochet into every unworked front loop left behind on the hair cap:
(Ch 5, sl st into the next front loop). Repeat this sequence until you have covered all the exposed front loops on the cap.
Fasten off. Pin the hair cap to the head (positioning the front edge about two rounds above the eyes) and sew it securely in place.
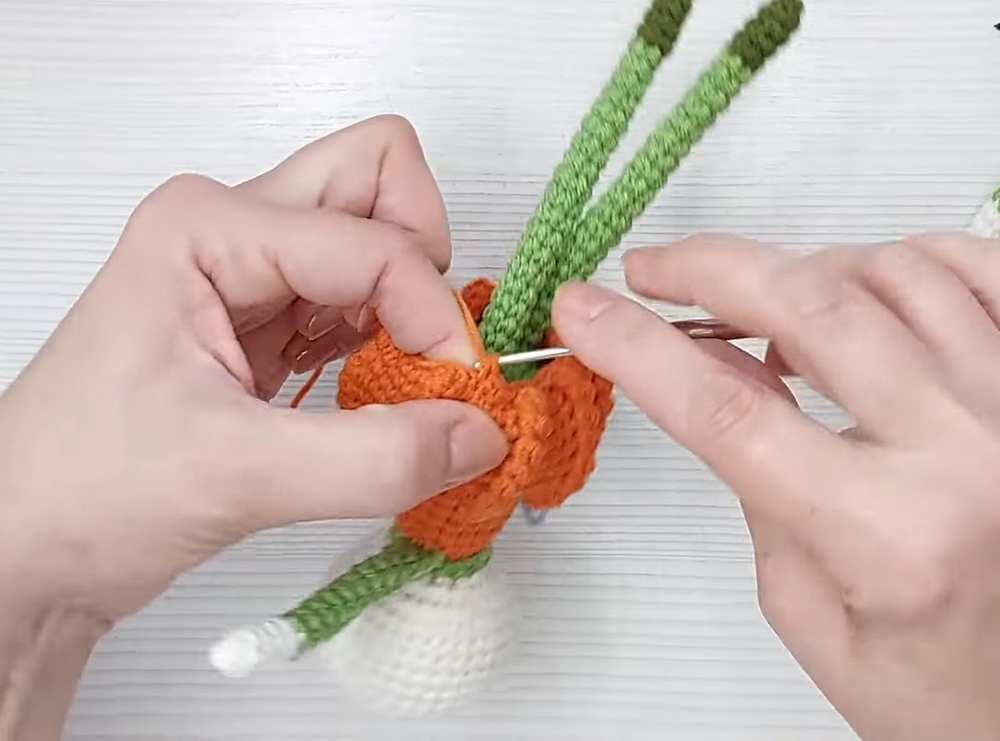
Part 1: The Pumpkin Skirt
Note: The builds the skirt directly onto an existing basic long-legged doll body base. Attach your orange yarn to the unworked FLO loops around the midsection/waist of the doll, starting at the center back.
Round 1: Ch 1, work 2 sc into every FLO loop around. (48 sts)
Round 2: 1 bo, 5 sc. Repeat this sequence around to the end of the row. (You will have 8 bobbles total, forming the start of the pumpkin’s vertical sections).
Round 3 – 9: Repeat the Round 2 sequence (1 bo, 5 sc) for 7 more rows. Make sure the bobble stitches align directly over each other row by row to create defined vertical ridge stripes.
Round 10: [1 dec, 4 sc] repeat around. (40 sts)
Round 11: [1 dec, 3 sc] repeat around. (32 sts)
Fasten off, pull the tail through to the inside of the skirt, tie a secure knot, and weave in your ends.
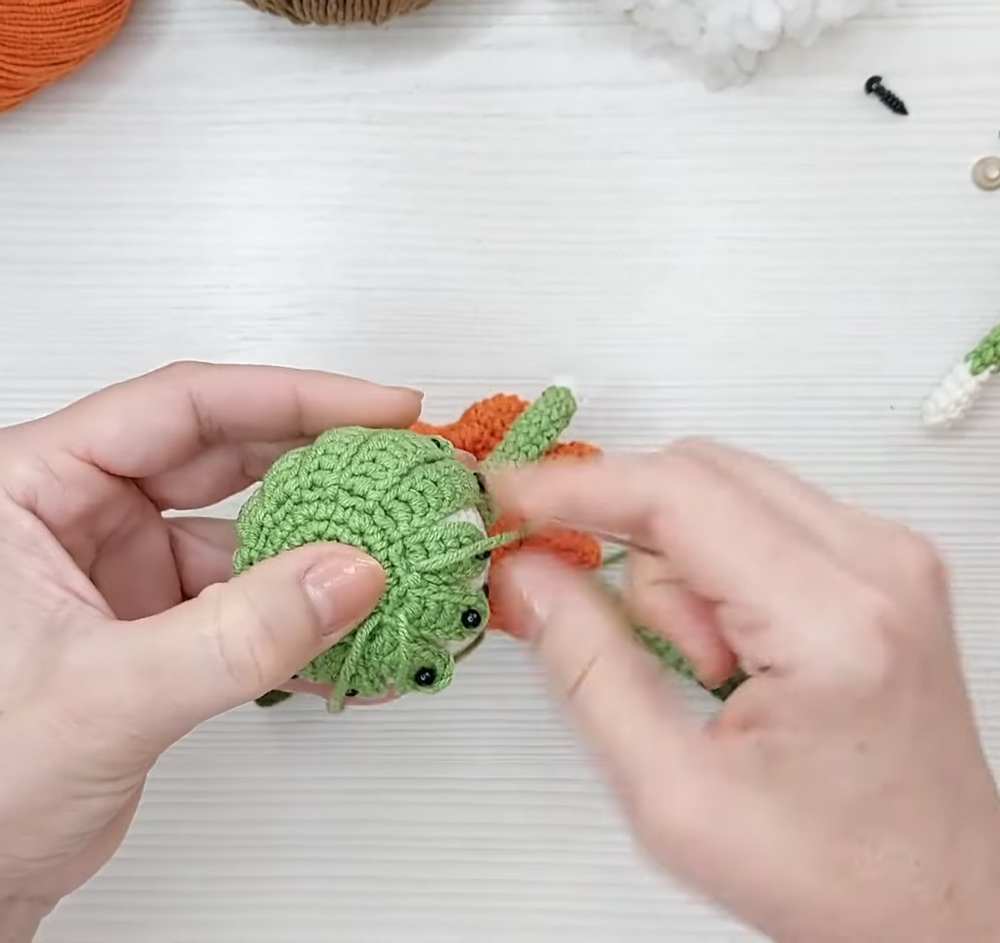
Part 2: The Hair Cap & Strands
Using Grass Green Yarn:
Round 1: 6 sc in a MR. (6 sts)
Round 2: 6 inc. (12 sts)
Round 3: [1 sc, inc] 6 times. (18 sts)
Round 4: [2 sc, inc] 6 times. (24 sts)
Now begin crafting the individual hair strands directly from the edge of the cap base:
Strands 1 – 5 (Short Bangs): Ch 7, starting in the 3rd ch from the hook, crochet 5 dc down the chain. Skip 1 base stitch on the cap, and sl st into the next base stitch. Repeat until you have 5 short strands.
Strands 6 – 12 (Long Side Strands): Ch 12, starting in the 3rd ch from the hook, crochet 10 dc down the chain. Skip 1 base stitch on the cap, and sl st into the next base stitch. Repeat until you have 7 long strands.
Fasten off, leaving an extra-long tail for sewing the hair piece onto the doll’s head.
Part 3: The Pumpkin Hat
Start using Brown Yarn for the top stem:
Round 1: 6 sc in a MR. (6 sts)
Round 2: 6 inc. (12 sts)
Round 3: Working in BLO, sc in each st around. (12 sts)
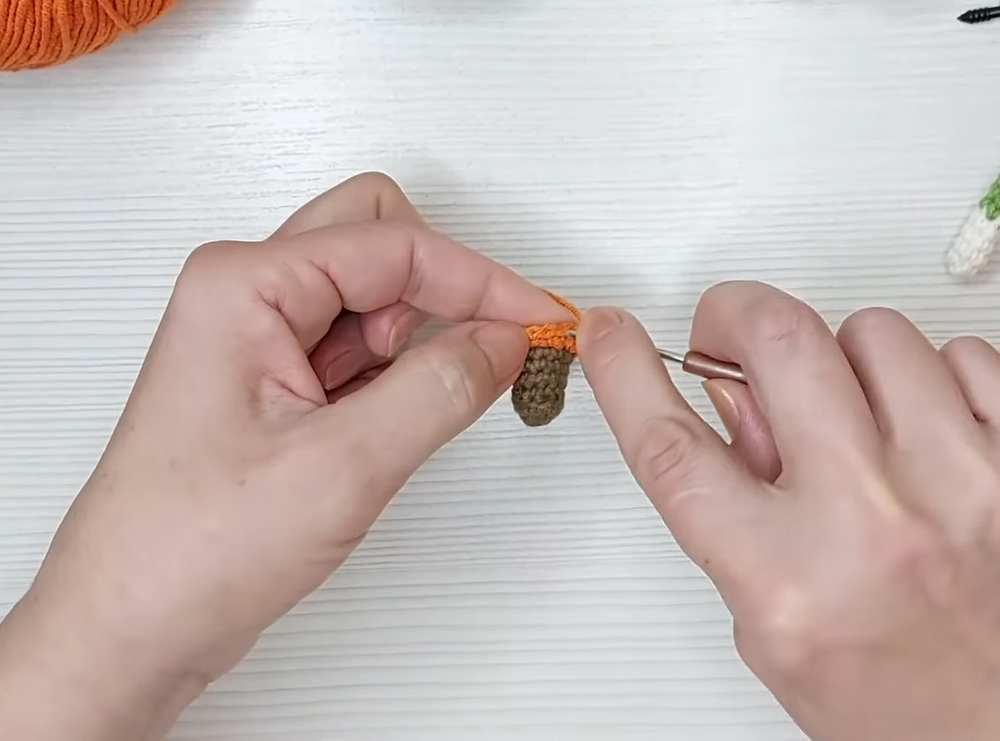
Round 4 – 6: Working through both loops normally, sc in each st around. (12 sts for 3 rounds)
Change to Orange Yarn on the last stitch of Round 6.
Round 7: [1 sc, inc] 6 times. (18 sts)
Round 8: [1 bo, 1 sc, inc in next st] repeat around. (24 sts, 6 bobbles total)
Round 9: [1 bo, 2 sc, inc in next st] repeat around. (30 sts)
Round 10: [1 bo, 3 sc, inc in next st] repeat around. (36 sts)
Round 11: [1 bo, 4 sc, inc in next st] repeat around. (42 sts)
Round 12: [1 bo, 5 sc, inc in next st] repeat around. (48 sts)
Fasten off, leaving a long yarn tail for assembly. Pop and align the bobbles outward so they stack vertically.
Part 4: Vine Tendrils (Make 2)
Using Grass Green Yarn:
Leave a tail at the beginning, then ch 18.
Starting from the 2nd chain from your hook, work 17 sl st back down the chain. Pull slightly firmly on the outer edge as you work to encourage the strand to naturally twist into a spiral.
Fasten off, leaving a tail to tie it to the hat.
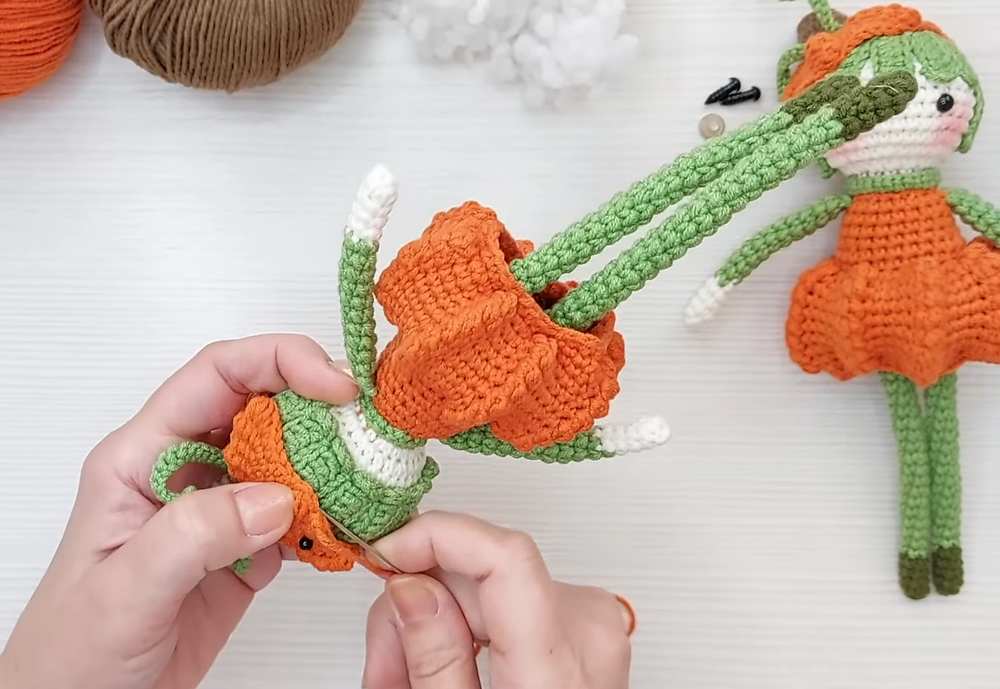
Part 5: Assembly & Finishing Touches
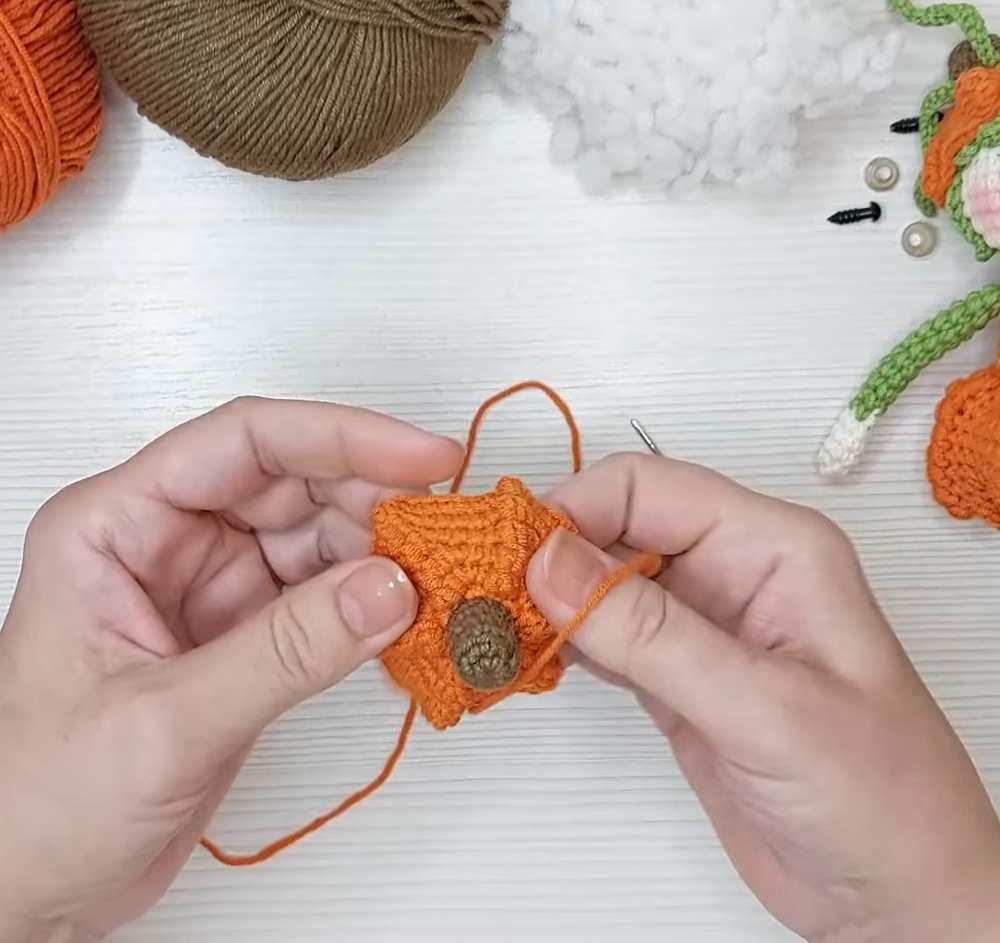
Hat Details: Take the two green vine tendrils and pull their yarn tails through the base of the brown stem on the hat (around Round 6/7). Secure them tightly on the inside of the hat with a few knots. Add a tiny pinch of fiberfill stuffing inside the brown cavity of the stem.
Attaching Hair: Position the green hair piece onto the cream head cap. Center the short bangs directly between the eyes, leaving a space of about 4 stitches above the eyes. Pin all the strands flat against the head so no white spaces show through, then sew down the perimeter of the hair cap and along each individual strand with small, invisible stitches.
Attaching Hat: Place the completed pumpkin hat slightly tilted on the doll’s head, covering the back edge where the hair cap ends. Secure it using straight stitches along the inner row of the hat rim so the outer edge stays textured and dimensional.
Final Touch: Use a small makeup brush or cotton swab with pink cosmetic blush to gently color the doll’s cheeks directly under her safety eyes.