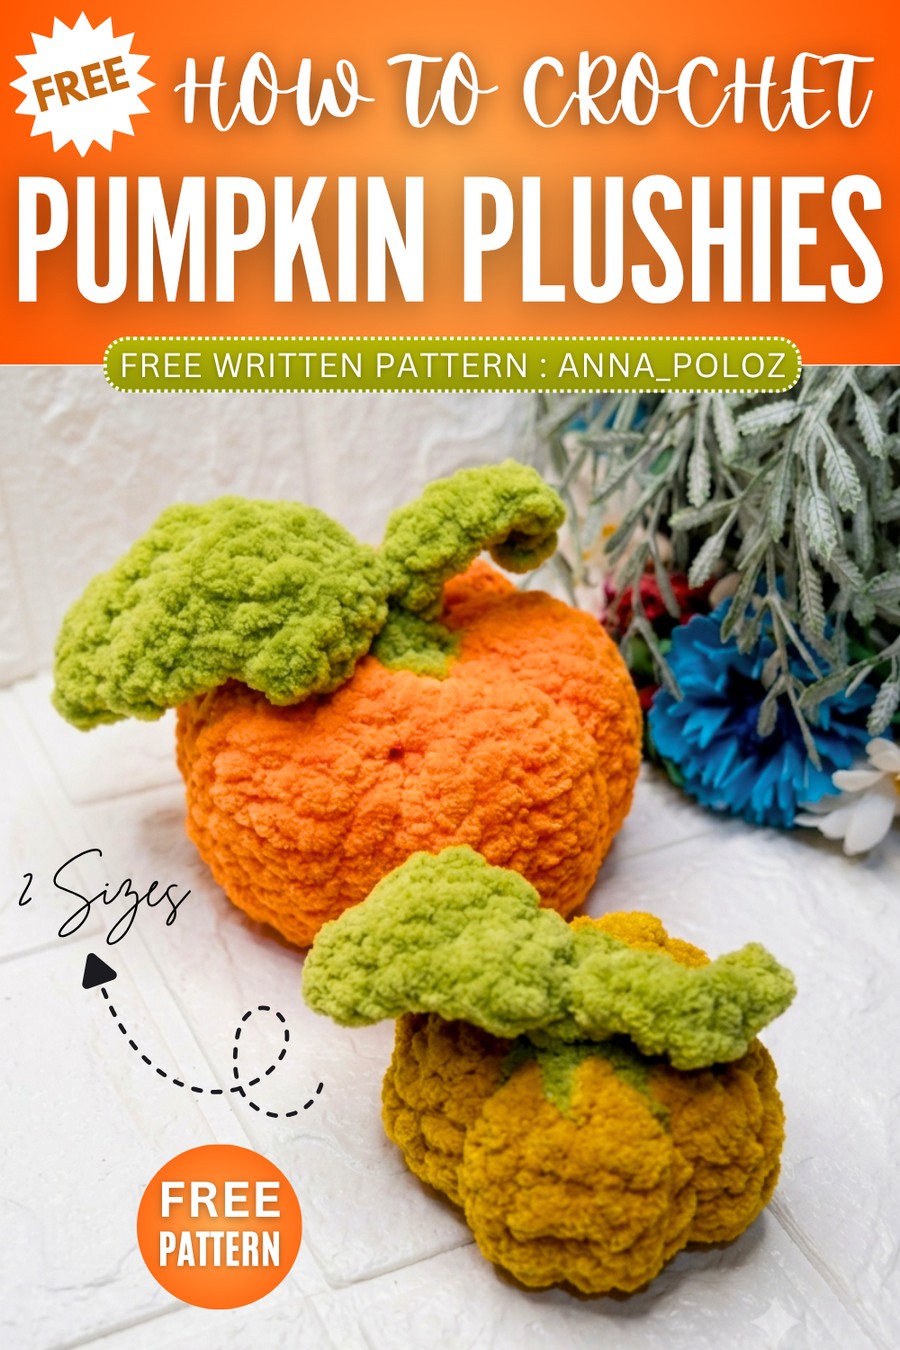
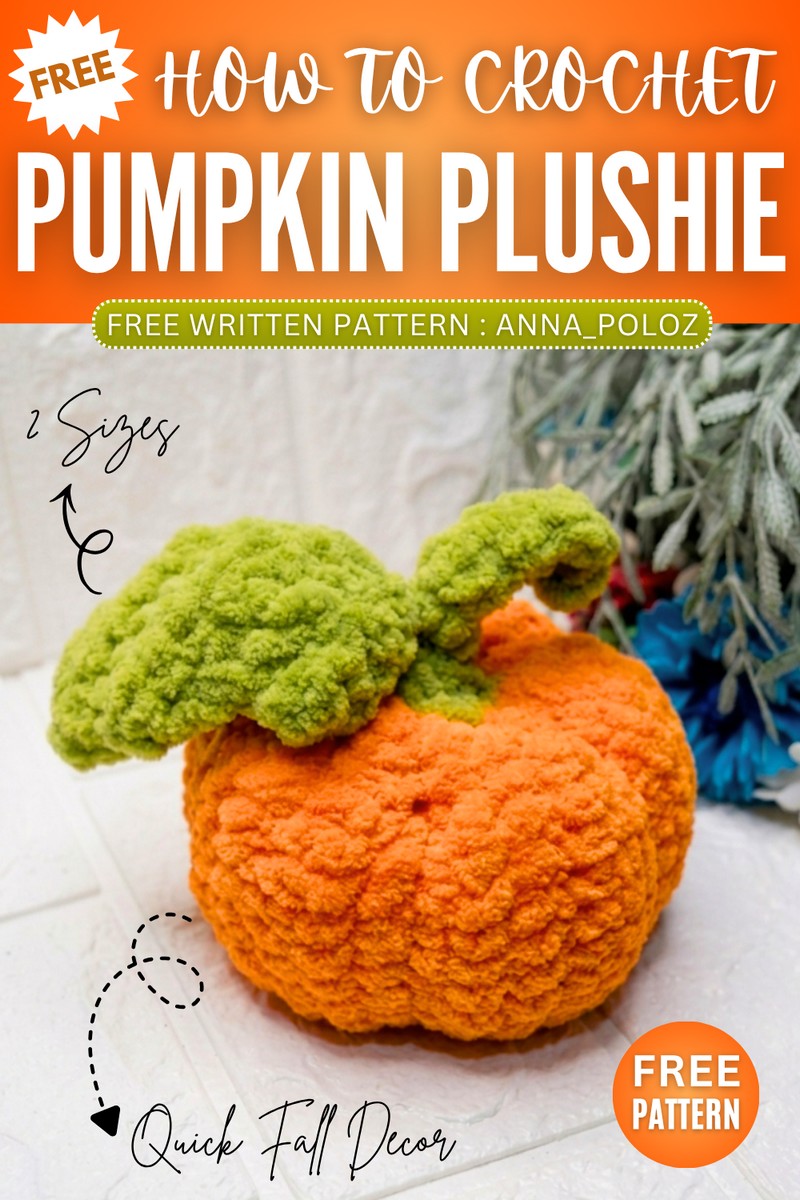
Free Crochet Pumpkin Plushie Pattern for Fall & Halloween
Learn how to crochet a medium-sized pumpkin plushie out of a ribbed plush rectangle with this FREE pattern. The construction method to crochet this pumpkin is the same as the ribbed fall pumpkin amigurumi. This is a last-minute crochet pumpkin that you can crochet in any size (small to XL) and any fall color. You will also learn crocheting the pumpkin leaf following this pattern.
Sewing is definitely needed for crocheting this pumpkin unlike the crochet glow-in-dark pumpkin amigurumi. However, once you are used to sewing it after stuffing, you can prepare a whole inventory of crochet pumpkins following this pattern. Let’s get started to the pattern.
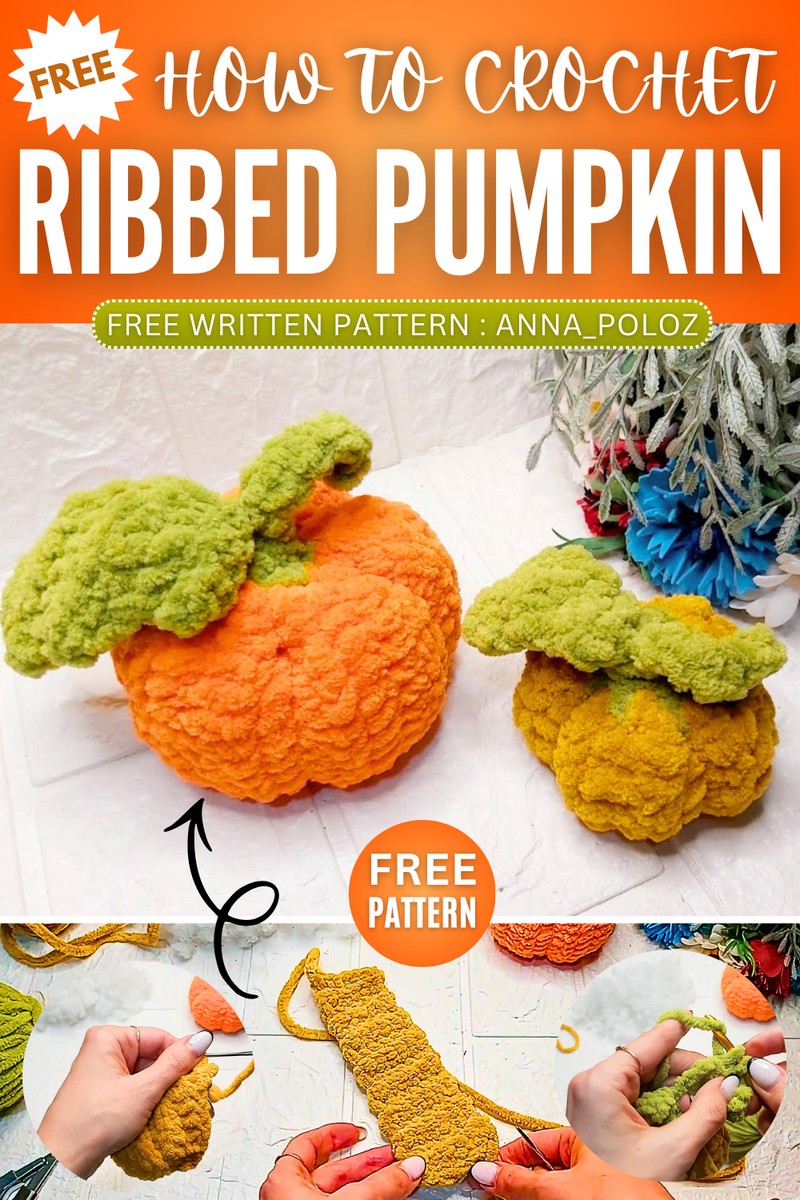
Crochet Plush Pumpkin Pattern for Fall
This is a quick and simple crochet tutorial for making a soft, plush pumpkin without complicated increasing or decreasing in the round.
The pumpkin body is worked flat in rows using the back loops to create a ribbed texture, then seamed together to form a tube and cinched at the bottom.
After lightly stuffing the body, the stem and a small leaf are crocheted directly onto the top opening to close it seamlessly.
Finally, a yarn needle is used to wrap yarn around the outside of the body to pull it inward, sculpting the classic sections of a pumpkin.
Materials
Plush yarn (such as Alize Velluto or Softy) in a main color (orange) and an accent color (green or brown for the stem/leaf)
Crochet hook suitable for your yarn thickness
Hollow fiber stuffing (Fiberfill)
Yarn needle (for cinching and sculpting)
Scissors
Abbreviations
ch – chain
sc – single crochet
sl st – slip stitch
BLO – back loop only
dec – decrease
Full Pattern
Pumpkin Body (Orange Yarn)
Leave a long starting tail (about 20-25 cm) before making your slip knot.
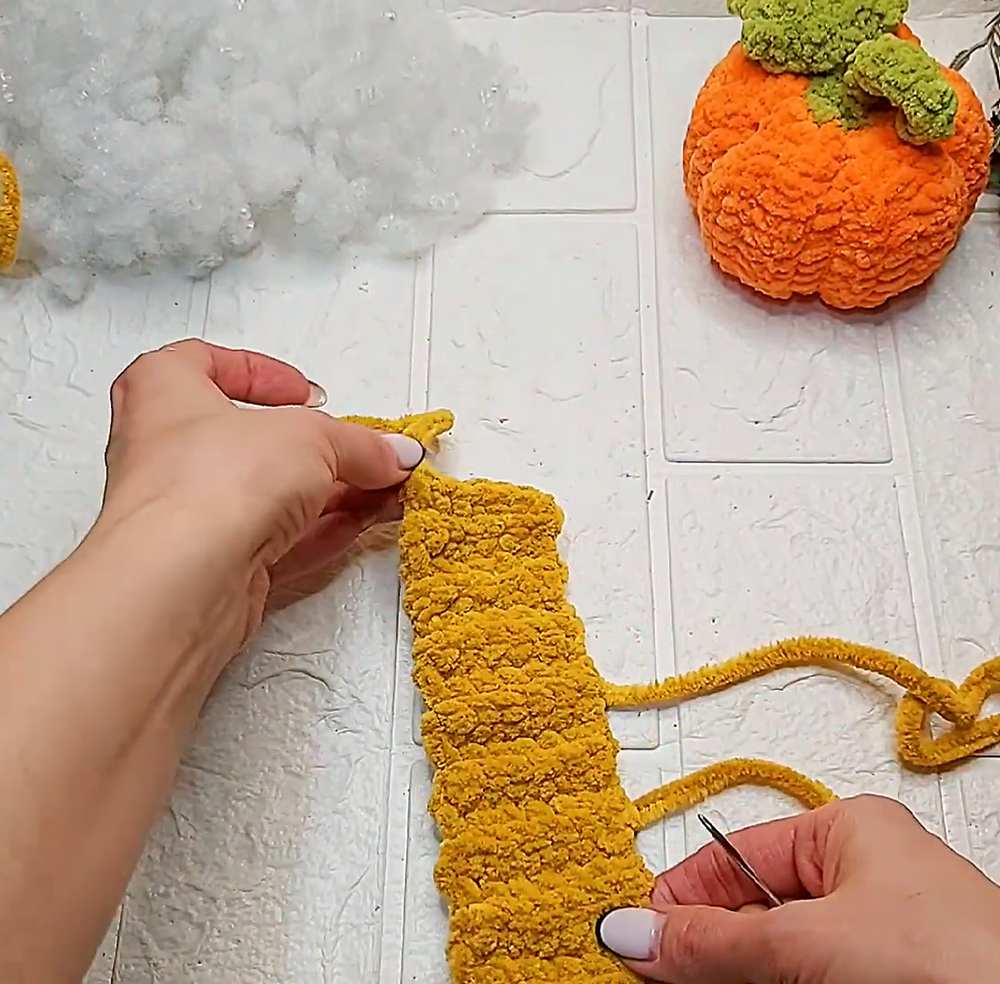
Foundation: Chain 7. (Note: For a larger pumpkin, you can chain more, up to 20).
Row 1: Starting in the 2nd ch from the hook, make 6 sc. (6)
Row 2: Ch 1, turn. Make 6 sc in BLO. (6)
Rows 3-16: Repeat Row 2.
Note: Ensure your total row count is a multiple of 4 (e.g., 16 rows makes 4 pumpkin sections, 20 rows makes 5 sections).
Fasten off, leaving another long tail for the final sculpting step.
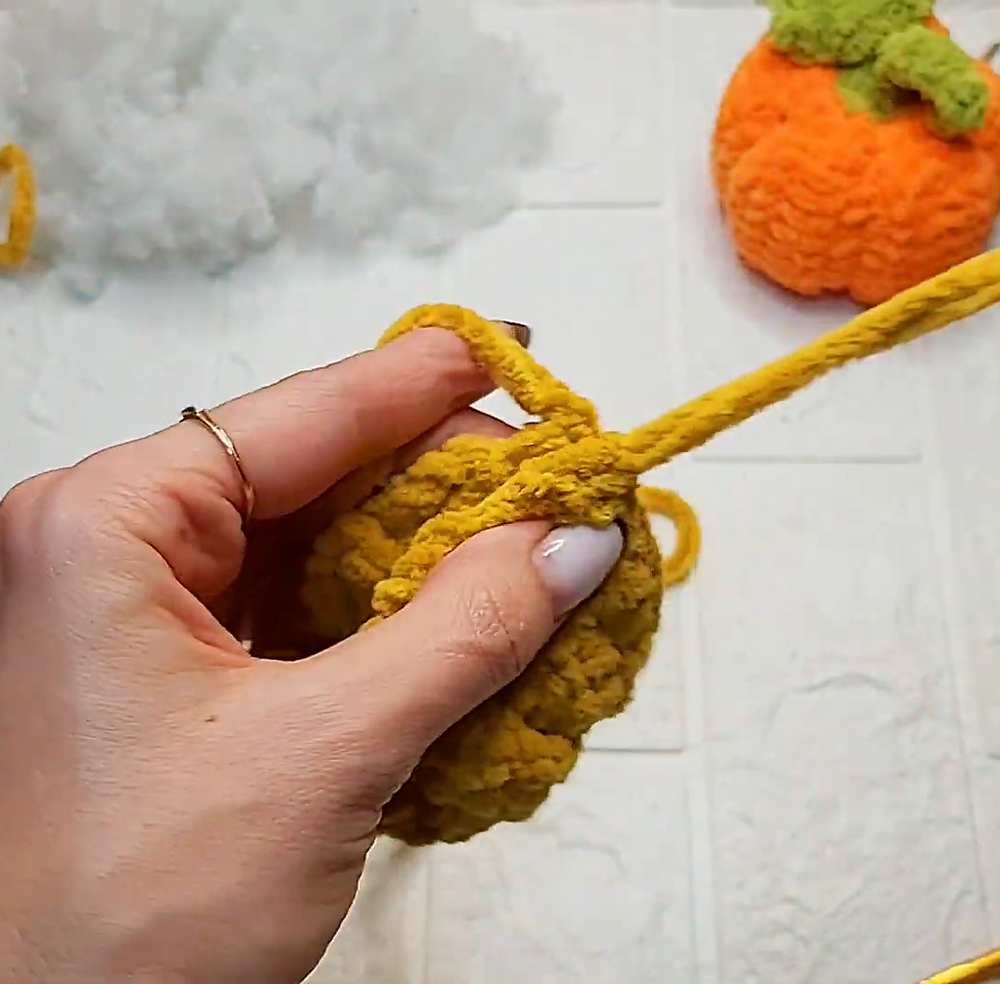
Assembly and Bottom Cinching
Thread your needle with the long starting tail you left at the very beginning.
Weave the needle in and out through the stitches along the bottom edge of your flat piece.
Pull the yarn tightly to cinch the bottom completely closed. Go around the circle a second time to secure it.
Fold the piece so the two short ends (Row 1 and Row 16) meet.
Sew these two edges together to form a tube. Tie off and hide the remaining starting tail inside. Turn the pumpkin right side out so the seam is hidden.
Top, Stem, and Leaf (Green Yarn)
Attach the green yarn to the top opening of the pumpkin, right at the seam.
Rnd 1: Ch 1. Sc evenly around the top opening by placing your stitches into the “valleys” (the rows that dip inward). This naturally gathers the top edge.
Rnd 2: Work dec stitches all the way around the opening.
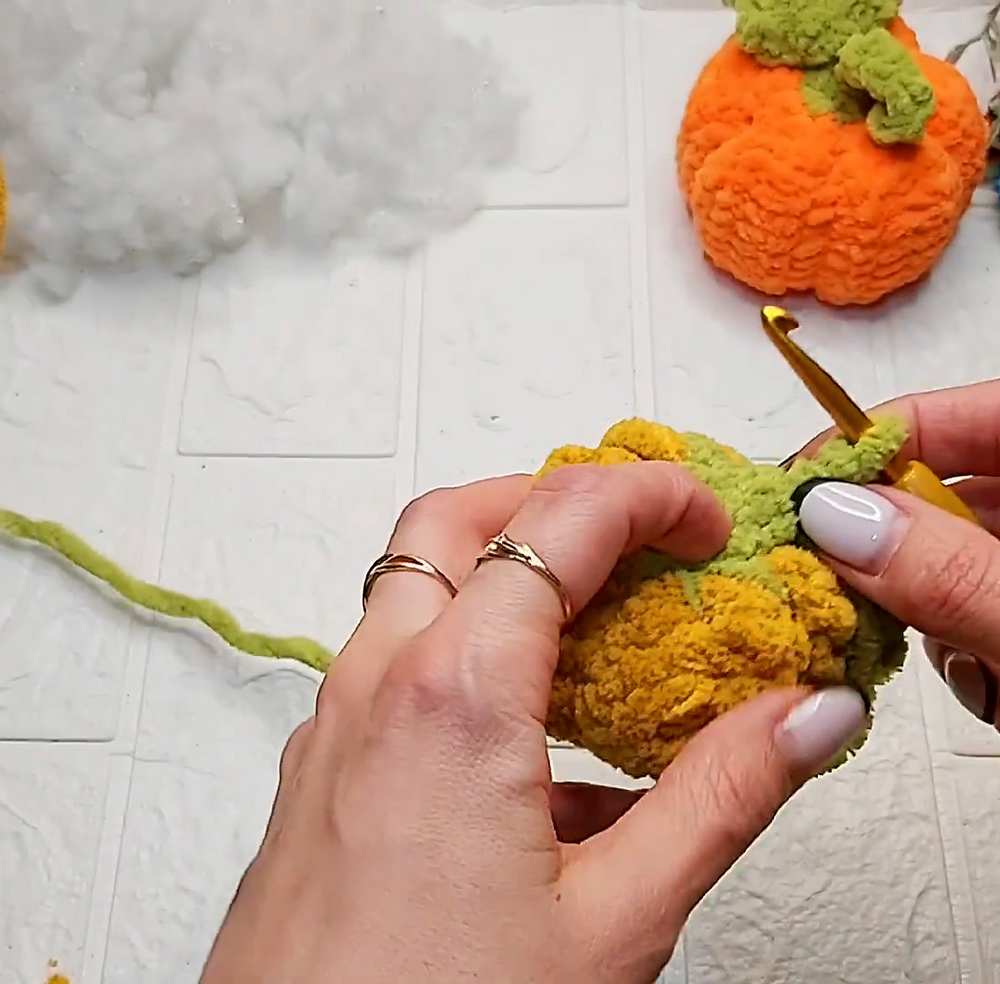
Stem: Ch 7. Starting in the 2nd ch from the hook, make 6 sl st back down the chain.
Stuff the pumpkin now. Keep it very soft and squishy so the yarn wrapping later can easily shape the ridges.
Rnd 3: Continue making dec stitches around the top opening to close it further.
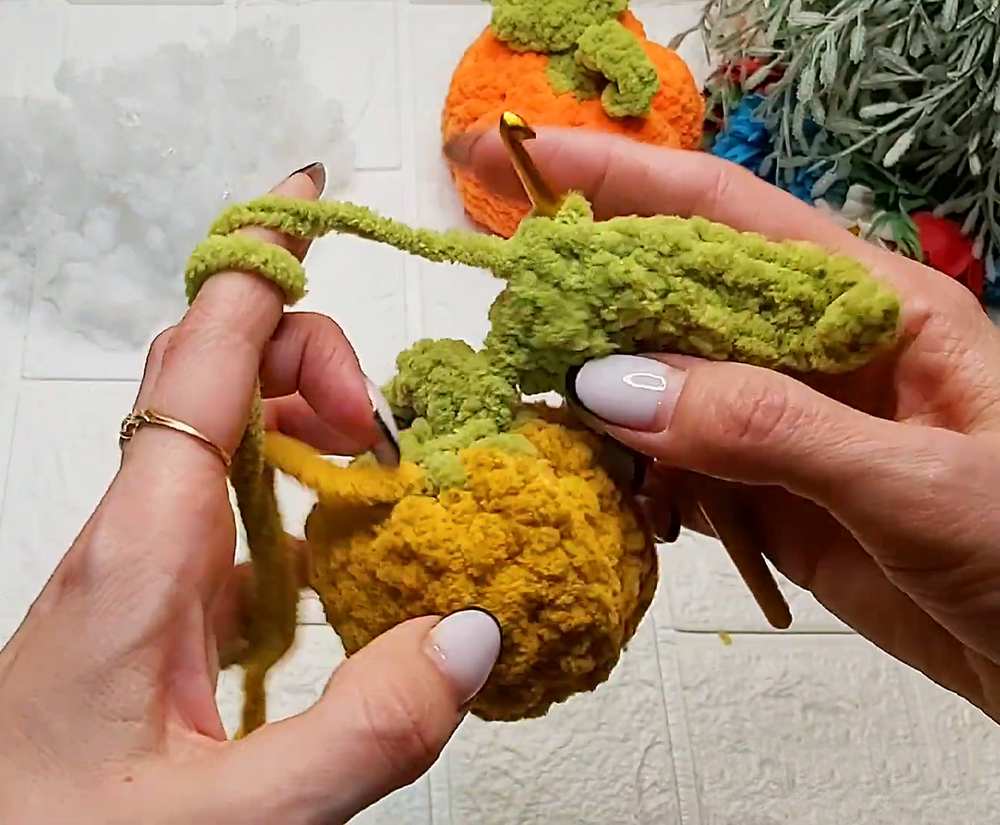
Leaf: Ch 4. Starting in the 2nd ch from the hook, make 2 sc.
Ch 1, turn. Make 2 sc in BLO.
Ch 3, turn. Starting in the 2nd ch from the hook, make 2 sc down the chain, then 2 sc in BLO along the leaf edge. (4 stitches total)
Ch 1, turn. Make 4 sc in BLO.
Gather the base of the leaf with a sl st to secure it to the top of the pumpkin.
Fasten off, leaving a tail. Use the needle to weave the tail through the remaining tiny hole at the top, pull tight to close completely, and hide the end.
Sculpting the Pumpkin
Thread your needle with the long orange tail you left after finishing the ribbed body.
Wrap the yarn around the outside of the pumpkin, bringing the needle from the center bottom straight up to the center top.
Space these wraps evenly, placing one wrap every 4 rows (4 rows equals one pumpkin segment).
Pull the yarn tightly on each pass to indent the plush fabric and create the deep ridges of the pumpkin.
Once all sections are formed, knot the yarn securely at the top or bottom and hide the tail inside the pumpkin.
Save for Later!