
Handmade-top: Free Crochet Cat Holding Heart Applique for Halloween
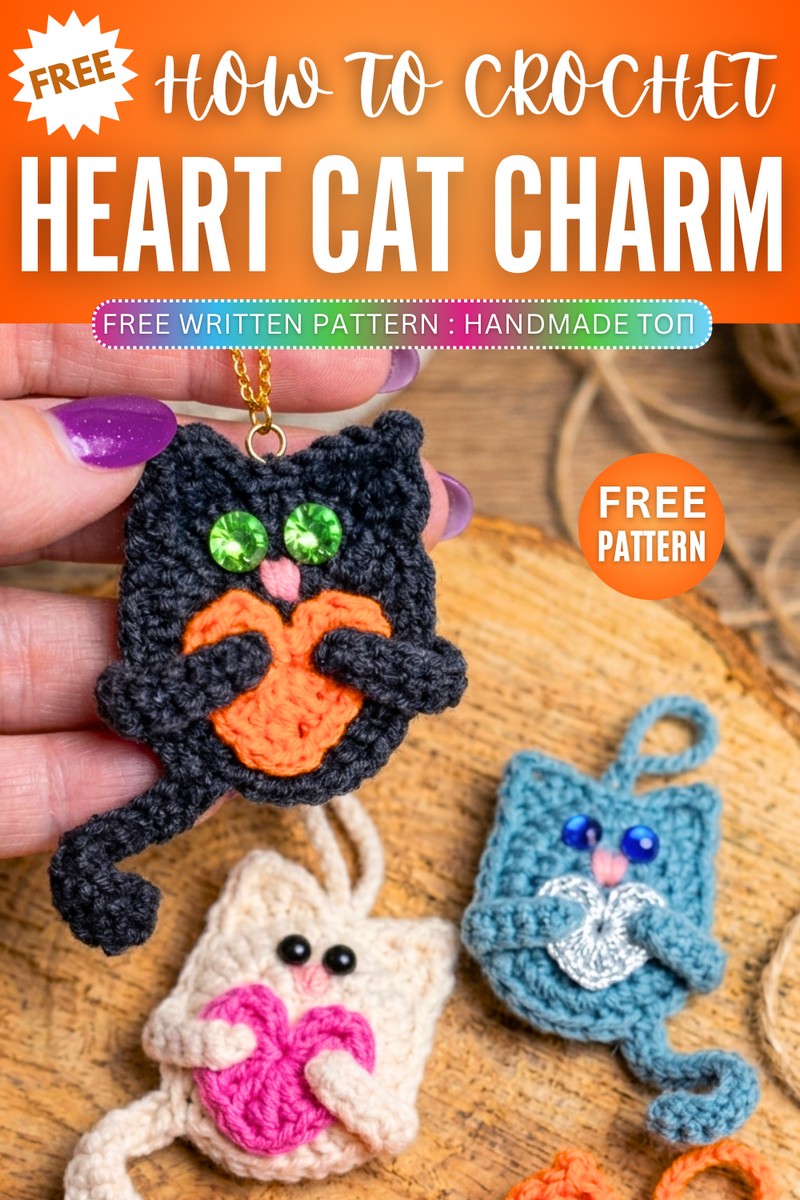
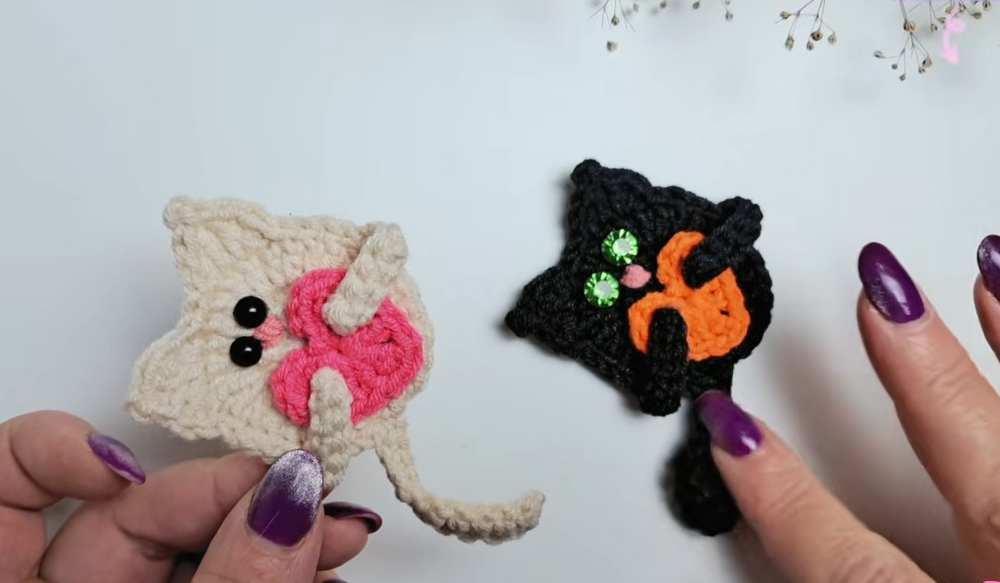
Looking for a heartfelt crochet charm for your Halloween gift boxes? I will recommend crocheting this black cat holding a heart applique that will also work as a lovely trick-or-treating bag charm. Crochet this Halloween applique with a FREE pattern as well as a step-by-step tutorial, here! You can also crochet different color versions of this applique aside from black & orange.
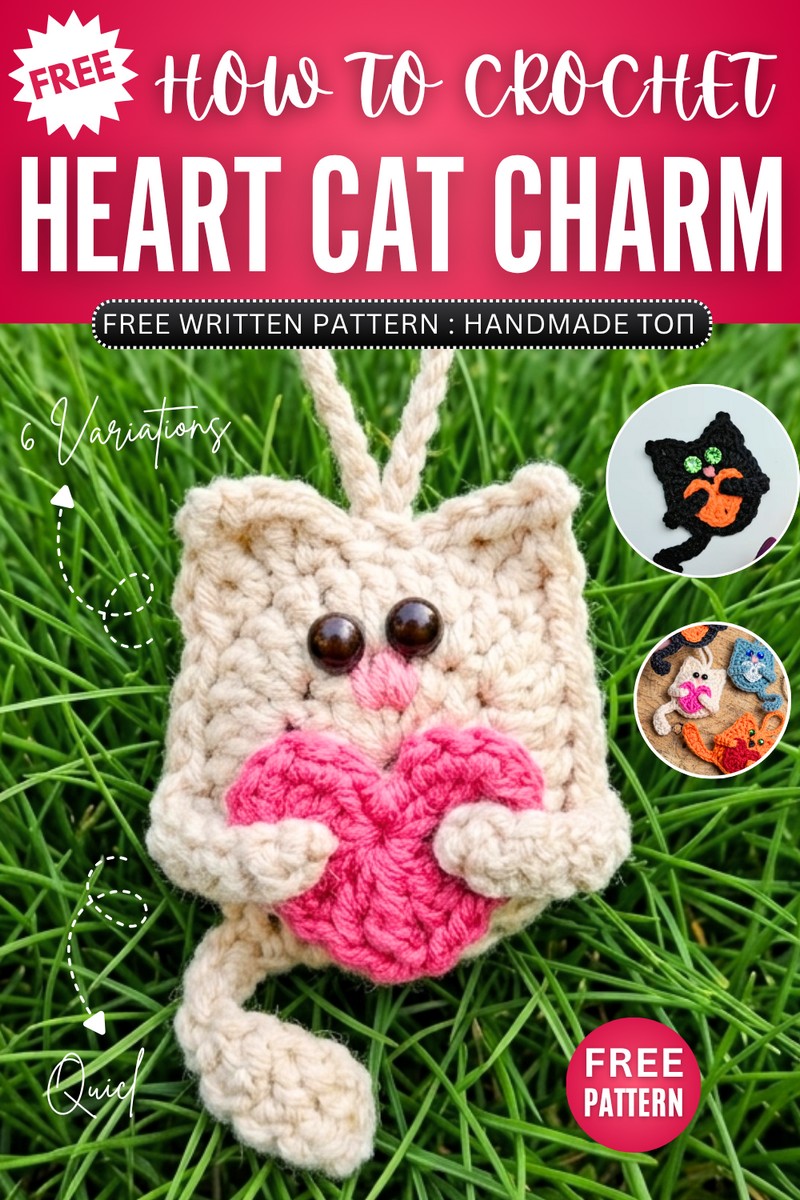
Such as the beige and pink, orange and red and more. Crocheting one of these kitties holding a heart applique won’t take more than 30 minutes. And you can also crochet a small hanging loop. Anyway, below is the full crochet pattern to make this Halloween keychain!
The designer behind this crochet cat keychain is @HandMade-top – she always crochets the kawaii amigurumi with special focus on the face. I like that idea to give character to different object when crocheted as amigurumi and combine many themes and that’s what she does.
How to Crochet Heart-Holding Cat Applique
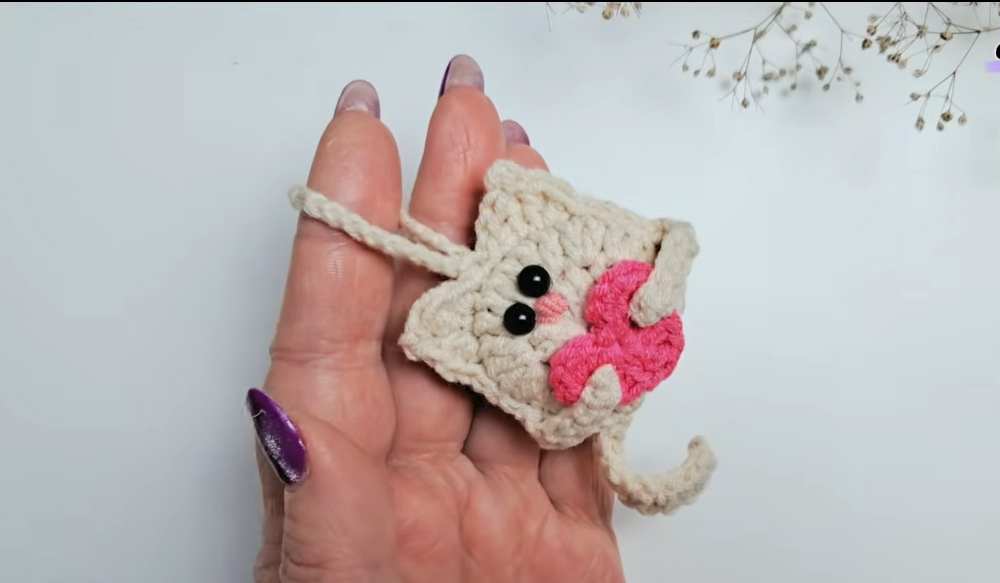
Note: After making the main piece, you crochet a separate tiny heart, attach it to the cat’s belly, and fold the arms inward so it looks like the cat is giving the heart a warm hug.
By making a second plain piece for the back, sewing them together with a small bit of soft stuffing, you can easily turn this project into a cute keychain charm.
Materials Needed
Cotton or acrylic yarn in your chosen Main Color (MC) for the cat (such as orange, grey, or white) and a contrasting color for the heart (such as pink or red).
Small amount of contrasting embroidery floss or thin yarn (like peach or pink) for the nose.
A crochet hook matching your yarn thickness.
Two 5 mm safety eyes, flat-backed glue-on eyes, or small black beads.
A small amount of toy stuffing (holofiber or polyfill).
Hot glue gun or fabric craft glue.
A yarn needle and sharp scissors.
Optional attachments: A keychain ring/carabiner, a brooch pin backing, or a flat flexible magnet strip.
Abbreviations (US Terms)
MR: Magic Ring
ch: chain
sc: single crochet
hdc: half double crochet
dc: double crochet
tr: treble crochet (triple crochet)
inc: increase (work 2 stitches into the same base stitch)
sl st: slip stitch
st/sts: stitch or stitches
Full Crochet Pattern
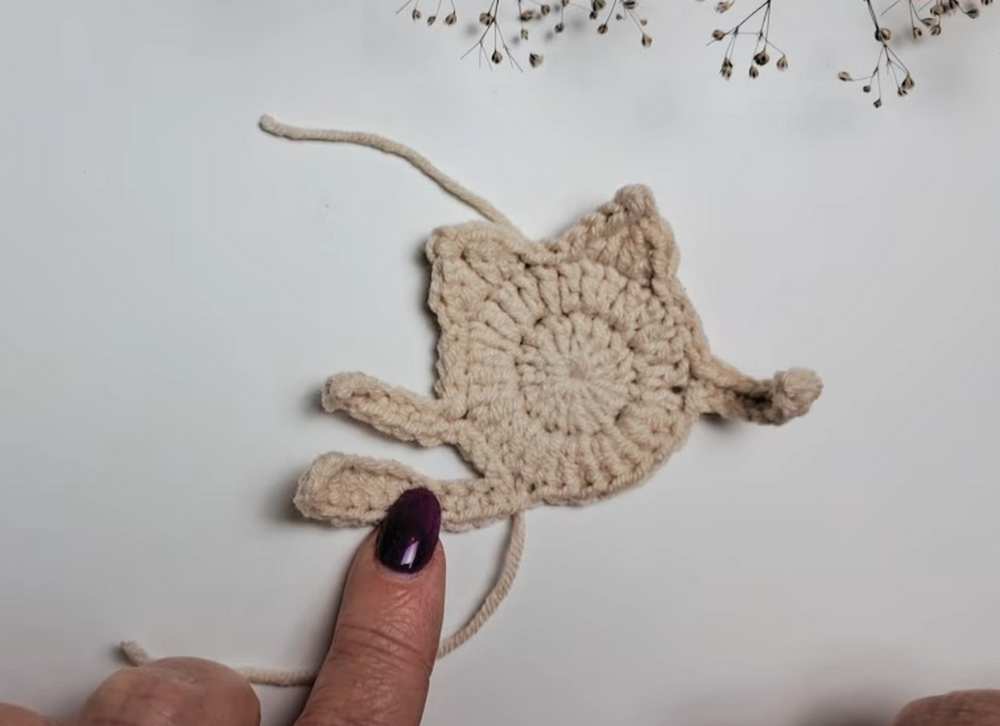
Part 1: Main Front Body (The Cat)
Round 1: In a MR, ch 3 (counts as your first stitch), then work 14 dc into the ring. Sl st to the top of the initial ch-3 to close the round. Pull the ring tight. (15 sts total)
Round 2: ch 3, work 1 dc directly into the base of that chain. Then, work a dc inc in each of the remaining 14 stitches around. Sl st to the top of the ch-3 to close. (30 sts total)
Round 3 (Adding Features):
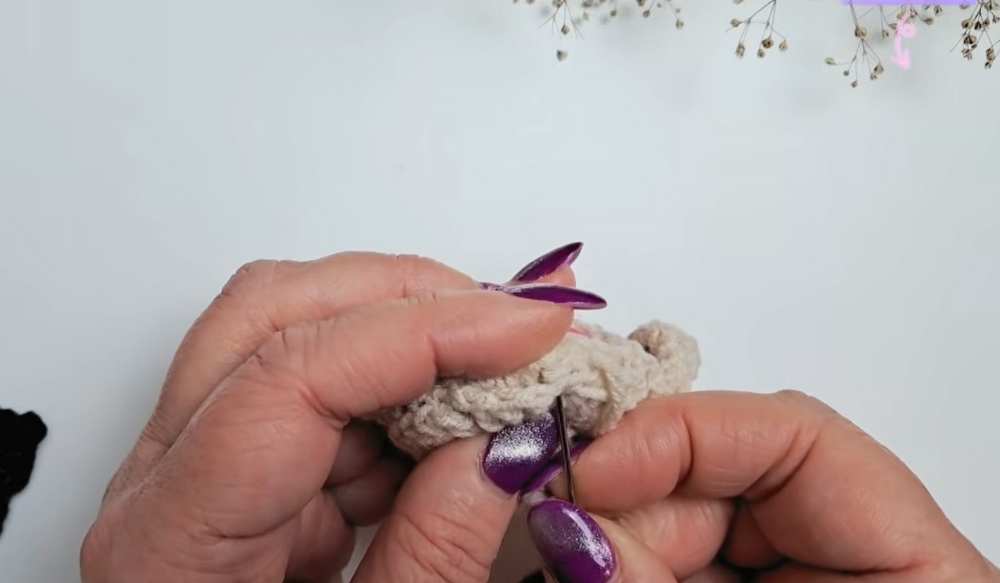
First Arm: ch 7. Starting in the 2nd ch from your hook, work 1 sc in each of the 6 chains back down. Sl st directly back into the same base stitch on the body circle where you started the chain.
Work 1 sl st into each of the next 4 stitches along the circle edge.
First Ear: In the next stitch, work a dc inc (2 dc in that same stitch). ch 2, then sl st into the 2nd chain from your hook to create a pointed tip. In the very next stitch along the circle, work 1 tr and 1 hdc together.
Work 1 sl st into each of the next 3 stitches along the circle edge.
Second Ear: In the next stitch, work 1 hdc and 1 tr together. ch 2, then sl st into the 2nd chain from your hook. In the very next stitch along the circle, work a dc inc (2 dc in that same stitch).
Work 1 sl st into each of the next 5 stitches along the circle edge.
Second Arm: ch 7. Starting in the 2nd ch from your hook, work 1 sc in each of the 6 chains back down. Sl st back into the same base stitch on the body circle.
Work 1 sl st into each of the next 3 stitches along the circle edge.
The Tail: ch 12. Starting in the 4th chain from your hook, work 1 dc into each of the next 5 chains. Then, work 1 sc into each of the remaining 4 chains down to the body. Sl st into the base stitch on the circle. Fasten off and weave in the ends neatly.
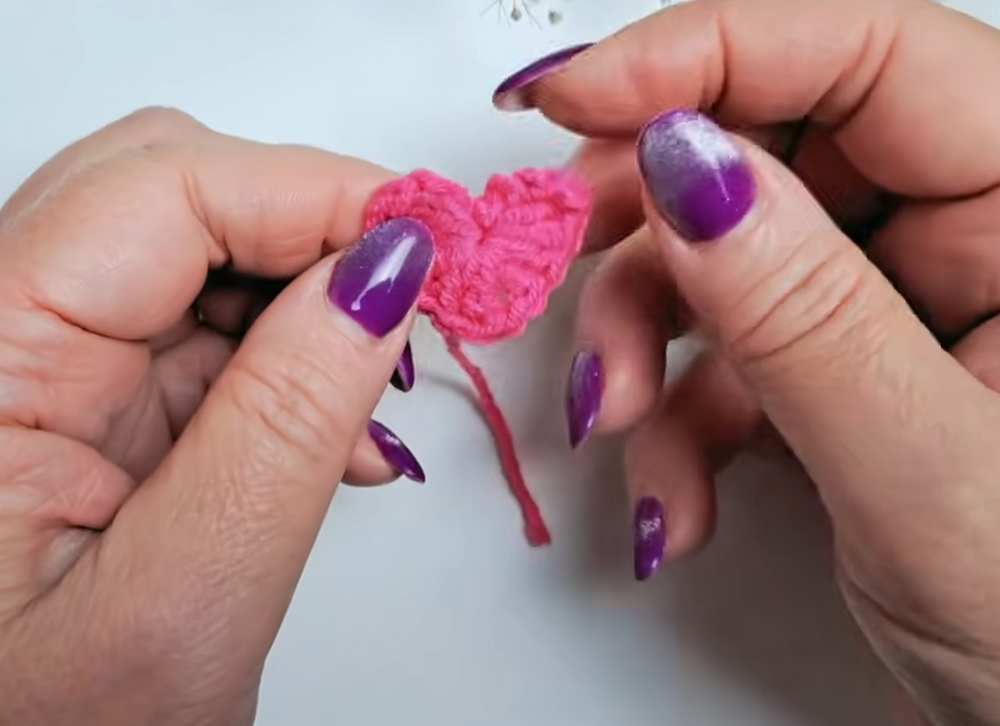
Part 2: The Heart
Round 1: In a MR, ch 3.
Work 2 tr into the ring.
Work 2 dc into the ring.
ch 1, work 1 tr, ch 1.
Work 2 dc into the ring.
Work 2 tr into the ring.
ch 3, then sl st directly into the center of the ring.
Pull the magic ring tight to form the heart shape. Fasten off, knot the yarn tails securely at the back, and trim the excess.
Part 3: The Circular Backing Piece (For the 3D Option)
Round 1: In a MR, ch 3, work 14 dc into the ring. Sl st to close. (15 sts)
Round 2: ch 3, 1 dc in the base stitch. Work a dc inc in each of the remaining 14 stitches around. Sl st to close. (30 sts) Fasten off, leaving a very long yarn tail for assembly.
Assembly and Customization
Face Details: Use your needle and peach yarn to embroider a small triangular nose just slightly above the center of the front piece’s magic ring using a few flat horizontal stitches. Glue the two 5 mm eyes tightly on either side of the nose.
Attaching the Heart: Place a tiny dot of glue on the back of the heart and press it firmly onto the center of the cat’s belly. Take the two crocheted arms, fold them over the front edges of the heart, and secure them with a tiny drop of glue so the cat appears to be holding it tightly.
Sewing the 3D Body: Place the completed front cat piece and the plain circular backing piece wrong-sides together. Using your yarn needle and the long tail from the backing piece, stitch the two circles together around the outer rim.
Stuffing: Just before closing the circle completely, push a small pinch of toy stuffing inside to give the cat a cute, chubby, 3D shape. Finish sewing the circle closed and secure your knot.
Finishing Touches: Depending on how you want to use it, you can crochet a simple chain loop directly out of the top to attach a keychain carabiner, glue a flat crafting magnet to the back panel, or stitch on a metal safety brooch pin!
Learn with the Video Tutorial Even Better