Tranglamcrochet: Crochet Halloween Red Monster Plushie & Amigurumi Pattern
Find her: Trang lam Crochet
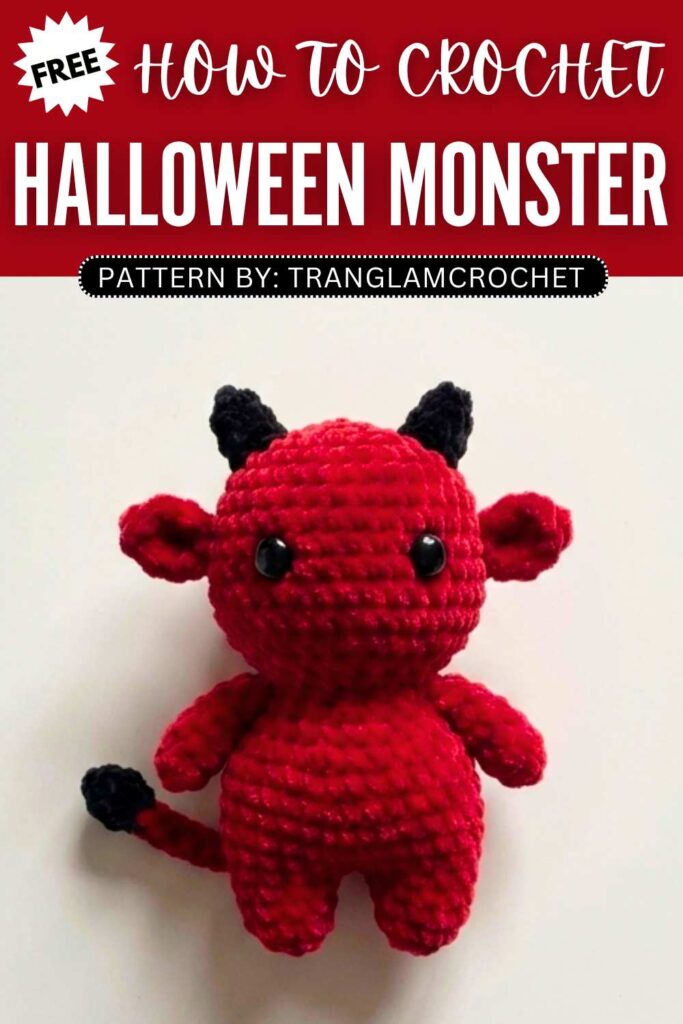
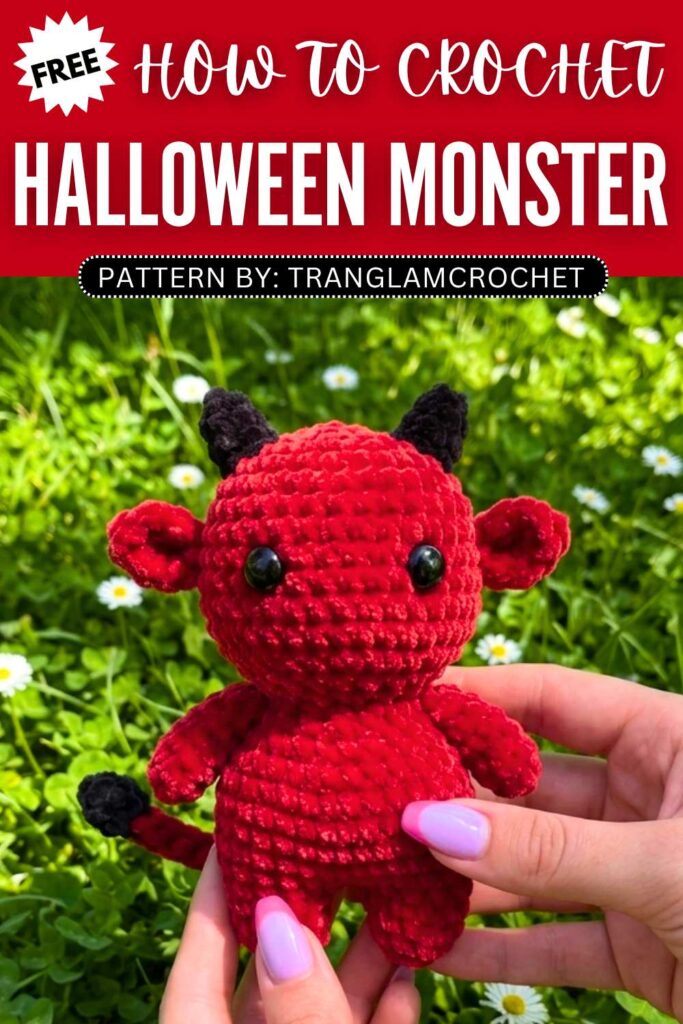
Learn how to crochet a CUTE red & black baby monster plush for Halloween with this FREE pattern. This is an easy low-sew crochet Halloween monster plushie without any face expression making it perfect mood-lifting plush and snuggler for Halloween. It has tiny horns and a long tail too. Crocheting this red monster plush is easier than ever as it requires a traditional doll base.
You can definitely crochet this monster plush with a smiling mouth or use this base for crocheting any other doll whether be animal or a girl doll. We shall use the joined-legs construction to crochet this viral monster plushie and that makes it low-sew. So, continue reading for the full crochet pattern to make monster plush.
How to Crochet Baby Red Munster Plushie
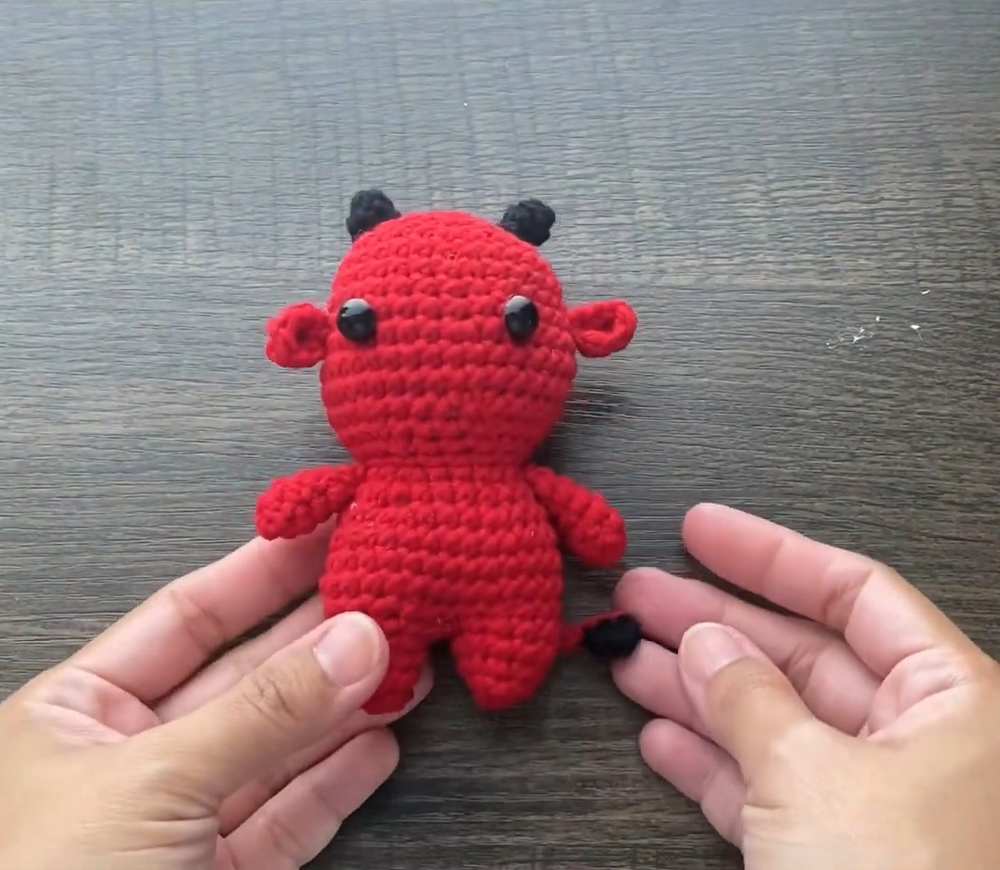
This project guides you through making an adorable mini crochet baby devil.
You will start by crocheting the head and body in one continuous piece using red yarn, and then split the bottom to form two little legs.
After adding stuffing, you will crochet the tiny arms, pointy ears, black horns, and a cute tail with a spade tip separately.
Finally, you sew all the small pieces onto the main body to complete your little stuffed toy.
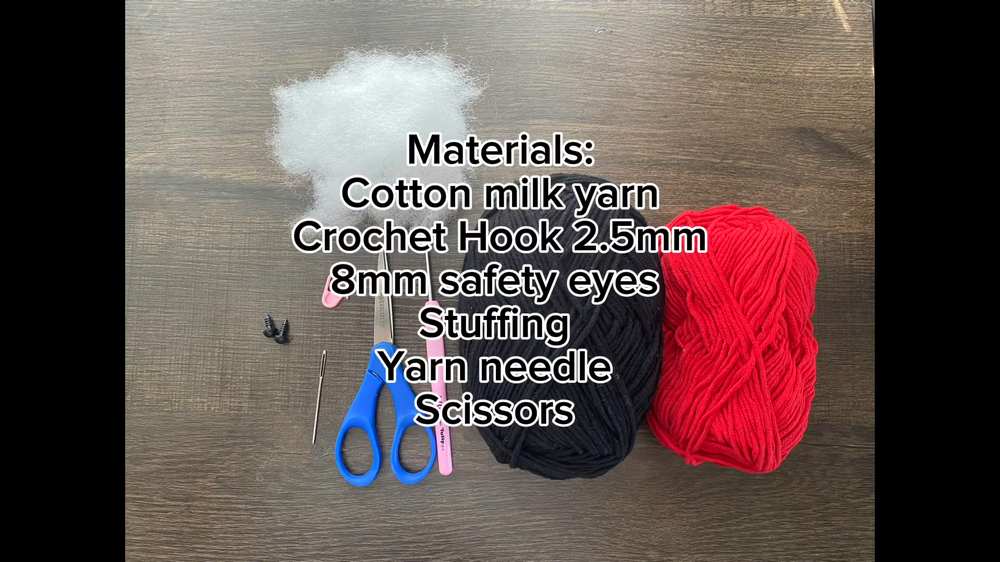
Materials Needed:
Cotton milk yarn (Red and Black) or super bulky plush yarn
Crochet Hook 2.5mm
8mm (or 6mm) safety eyes
Stuffing
Yarn needle
Scissors
Abbreviations:
MR: Magic Ring
ch: chain
sc: single crochet
hdc: half double crochet
dc: double crochet
tr: treble crochet
inc: increase
dec: decrease
slst: slip stitch
R: Round / Row
sts: stitches
FO: Fasten off
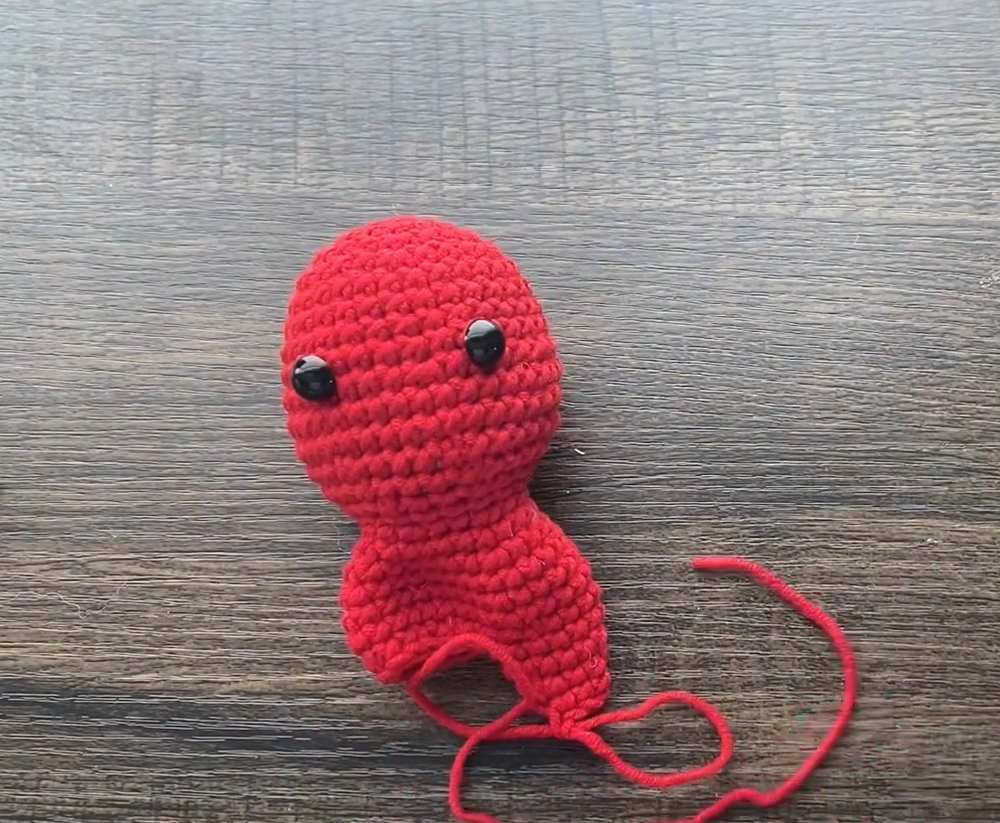
Pattern – Head (in Red):
R1: In a MR, 6sc (6)
R2: inc around (12)
R3: (sc, inc) x 6 (18)
R4: (sc 2, inc) x 6 (24)
R5: (sc 3, inc) x 6 (30)
R6-R9: sc around (30)
R10: (sc 4, inc) x 6 (36)
R11-R12: sc around (36)

Attach safety eyes between R9-R10, 6 sts apart.
R13: (sc 4, dec) x 6 (30)
R14: (sc 3, dec) x 6 (24)
R15: (sc 2, dec) x 6 (18)
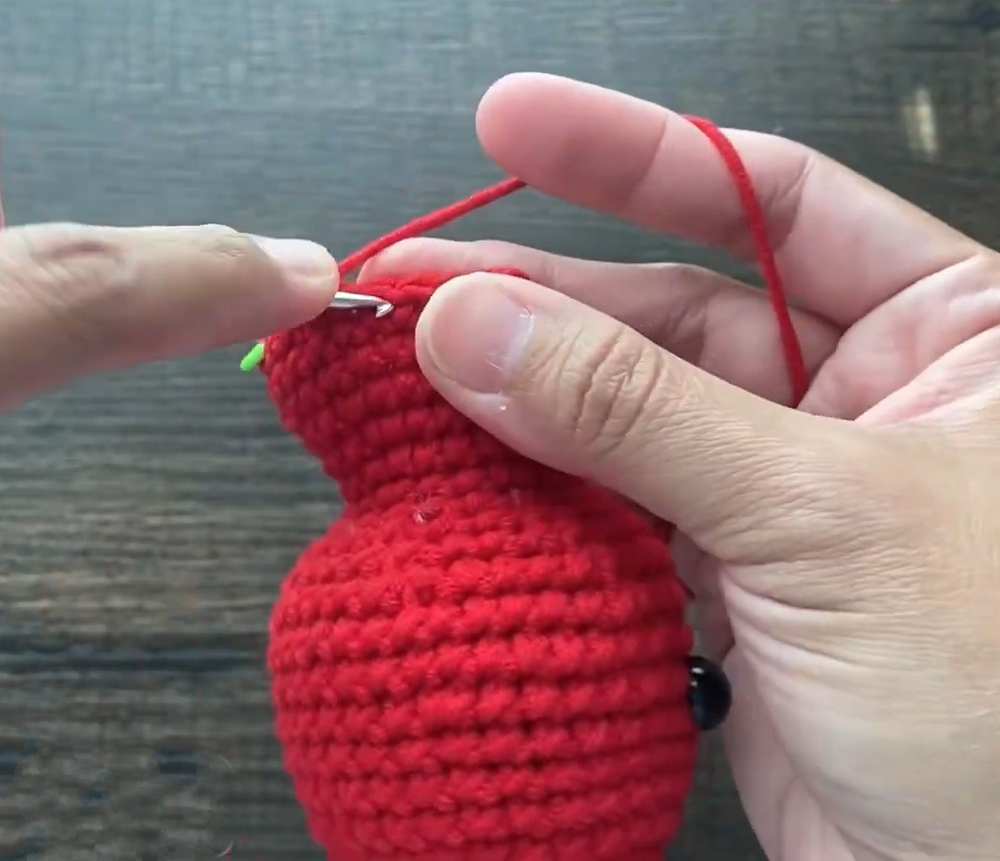
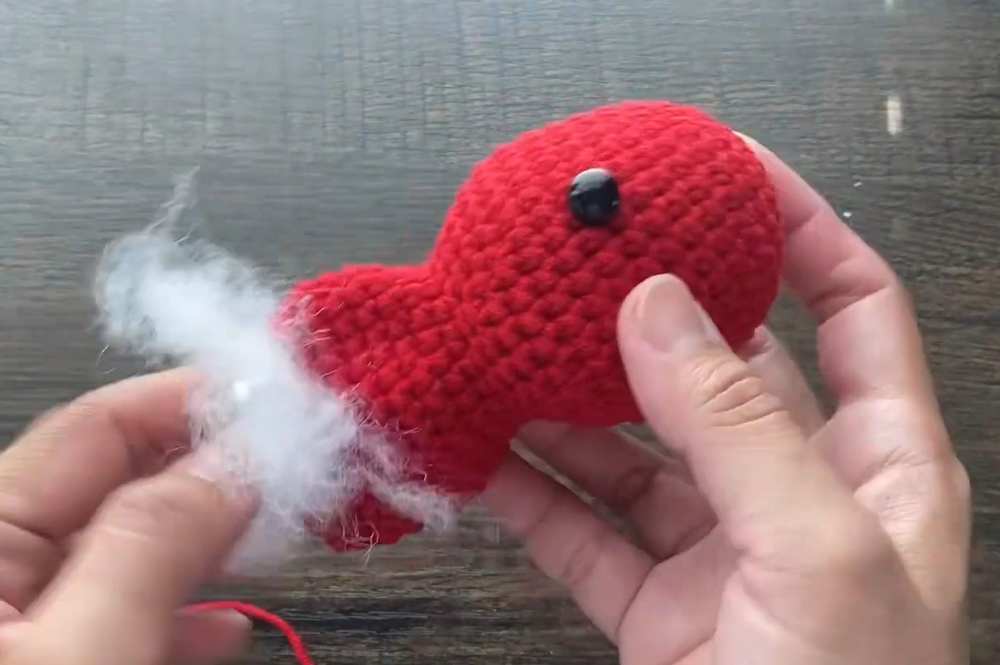
Stuff the head firmly and continue stuffing the body as you work along.
Pattern – Body (Continue from Head in Red):
R16: sc around (18)
R17: (sc 2, inc) x 6 (24)
R18: sc around (24)
R19: (sc 3, inc) x 6 (30)
R20-R22: sc around (30)
R23: (sc 3, dec) x 6 (24)
Pattern – Legs:
Fold the body in half.
R1: sc around the 12 sts on one side of the body (12)
R2: sc around (12)
R3: (sc 2, dec) x 3 (9)
R4: sc around (9)
FO with a yarn tail to sew the hole shut later. Stuff the leg first.
Attach red yarn to the other side to make the second leg and repeat R1-R4.
Pattern – Ears (Make 2 in Red):
R1: In a MR: sc, hdc, dc, tr, dc, hdc, sc. Pull ring tight.
Pattern – Horns (Make 2 in Black):
R1: In a MR, 6sc (6)
R2: sc around (6)
FO with a long tail for sewing.
Pattern – Arms (Make 2 in Red):
R1: In a MR, 7sc (7)
R2-R6: sc around (7)
FO with a long tail for sewing.
Pattern – Tail:
Make 15 chains with red yarn.
Switch to black yarn, chain 1.
hdc, dc, hdc in the 2nd ch from hook.
Switch back to red yarn, slst in each ch back to the starting yarn tail.

Assembly:
Sew the horns to the top of the head.
Sew the ears to the sides of the head.
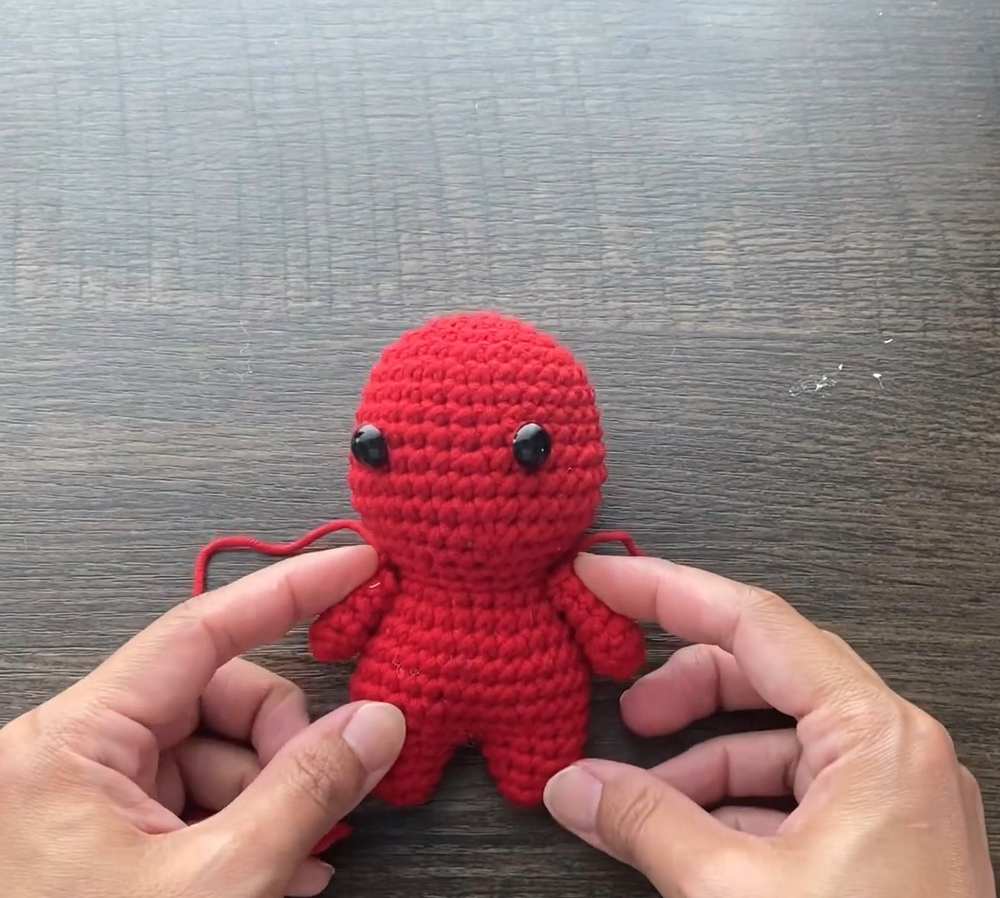
Sew the arms to the sides of the body.
Sew the tail to the back of the body.
Video Tutorial to Learn Even Better
Save for Later!