
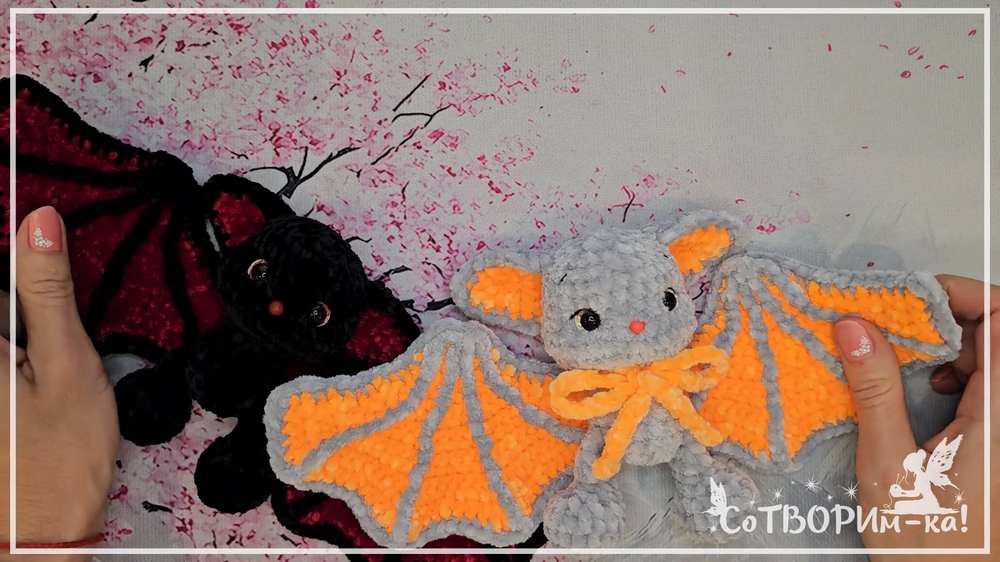
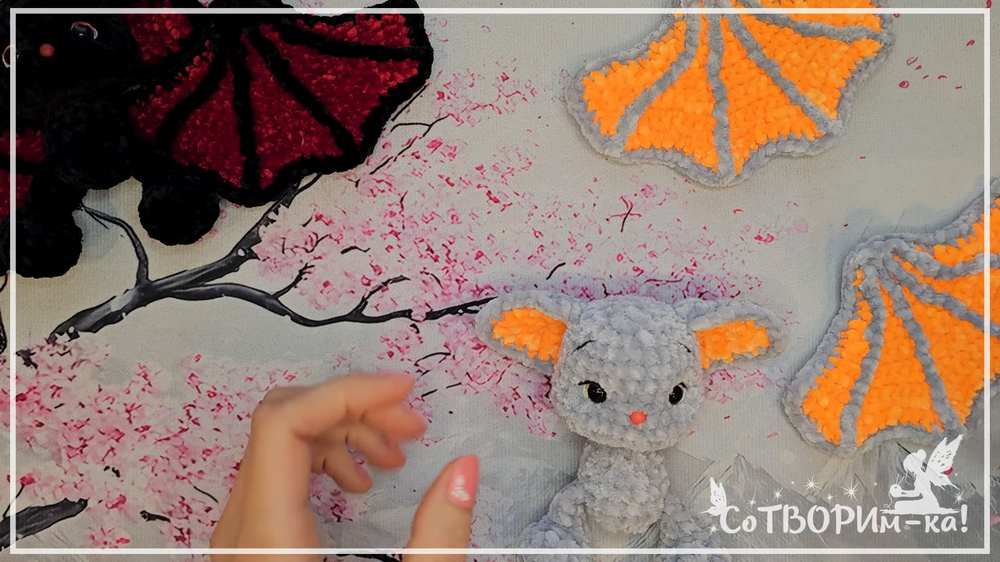
How to Crochet Orange & Grey Large Bat Plushie for Halloween
This is the part 3 of the crochet moveable wings baby bat plushie! Today, let’s crochet the orange and grey version of the crochet bat plush especially for fall & Thanksgiving. This crochet bat plush version does not look spooky at all but you can definitely crochet it as a Halloween present. You can also call this the “Pumpkin Version Bat plush.”
Crochet Orange & Grey Large Bat Plushie

We will start by crocheting the same base as we crocheted for the cat, fox and the other bat plush. You only have to choose the relevant colors of the super bulky yarn. Now, continue reading for the full crochet bag plush pattern.
About the designer: The designer behind this orange and grey version of Halloween bat plush is @sotvorimka – She designs the CUTEST character and animal plushie and I fell in love with her crochet plushies immediately. You will love her seasonal crochet plushies, in particular.
Materials
Yarn in a main color
Yarn in a contrasting color
4 mm crochet hook
Small crochet hook (specifically used to attach the nose bead)
10 mm safety eyes
One bead for the nose
Fiberfill stuffing
Black thread for facial details
White thread for facial details
Sewing needle
Abbreviations
MR: Magic ring
ch: Chain
sc: Single crochet
dc: Double crochet
inc: Single crochet increase (two single crochets in one stitch)
dec: Single crochet decrease (two single crochets together)
sl st: Slip stitch
st: Stitch
Written Bat Plush Pattern
Legs (Make 2)
Use the main color yarn.
Round 1: 8 sc in MR (8)
Round 2: 8 inc (16)
Rounds 3-4: 16 sc (16)
Round 5: 2 sc, 6 dec, 2 sc (10)
Round 6: 2 sc, 3 dec, 2 sc (7)
Rounds 7-8: 7 sc (7)
Add stuffing to the bottom portion of the leg.
Round 9: 3 sc, 1 dec, 2 sc (6)
Flatten the top edge. Work 3 sc through both layers simultaneously to close the opening. Fasten off.
Ears (Make 2)
Inner Ear (Make 2 using contrast color):
Row 1: 3 sc in MR, ch 1, turn.
Row 2: 1 sc, inc, 1 sc, ch 1, turn. (4)
Row 3: 4 sc, ch 1, turn. (4)
Row 4: inc, 2 sc, inc, ch 1, turn. (6)
Row 5: 6 sc, ch 1, turn. (6)
Row 6: inc, 4 sc, inc. (8) Fasten off.
Outer Ear (Make 2 using main color):
Repeat Rows 1 through 6 exactly, but do not cut the yarn at the end.
Ear Assembly:
Place one inner ear and one outer ear piece together.
Crochet through both layers around the outer border using sc to join them.
Work 3 sc into the exact stitch at the top tip.
Fasten off and leave a long yarn tail for sewing.
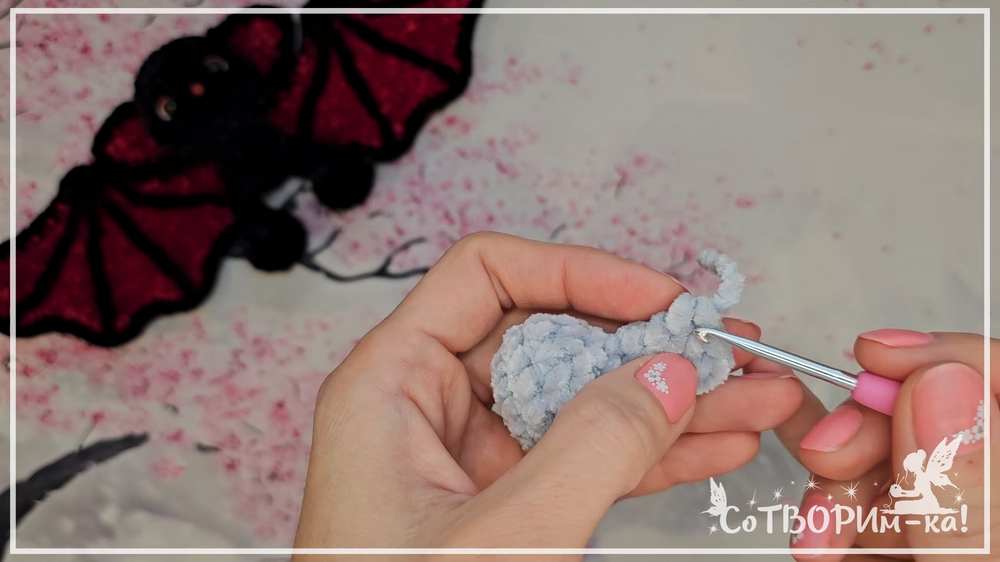
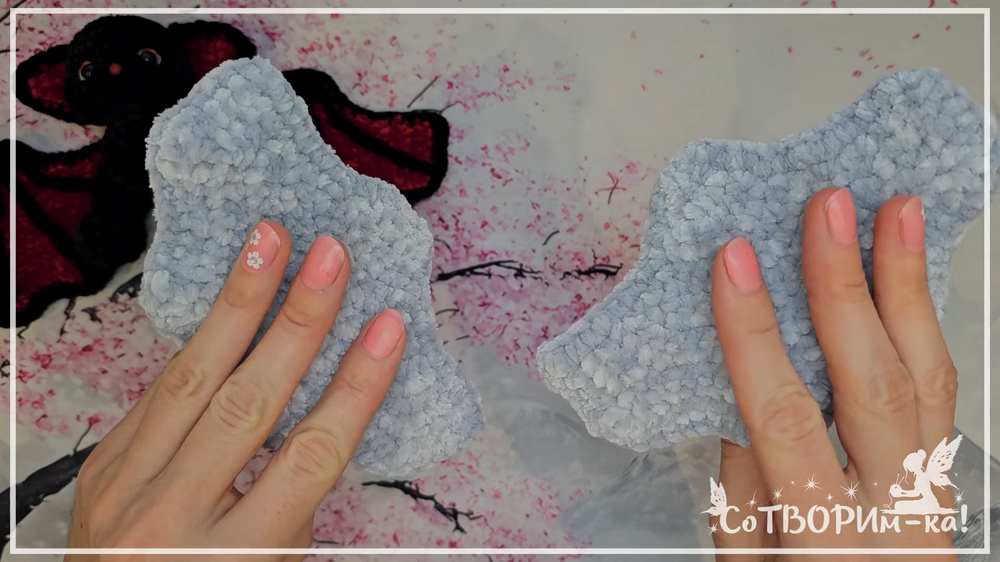
Wings (Make 2)
Inner Wing (Make 2 using contrast color):
Row 1: 4 sc in MR, ch 1, turn. (4)
Row 2: 4 sc, ch 1, turn. (4)
Row 3: 1 sc, 2 inc, 1 sc, ch 1, turn. (6)
Row 4: (1 sc, inc) 3 times, ch 1, turn. (9)
Row 5: 9 sc, ch 1, turn. (9)
Row 6: inc, (3 sc, inc) 2 times, ch 1, turn. (12)
Row 7: 1 sc, (inc, 2 sc) 3 times, inc, 1 sc, ch 1, turn. (16)
Row 8: 16 sc, ch 1, turn. (16)
Row 9: 2 sc, (inc, 3 sc) 3 times, inc, 1 sc, ch 1, turn. (20)
Row 10: 2 sc, (inc, 4 sc) 3 times, inc, 2 sc, ch 1, turn. (24)
Row 11: 3 sc, (inc, 5 sc) 3 times, inc, 2 sc, ch 1, turn. (28)
Row 12: 3 sc, (inc, 6 sc) 3 times, inc, 3 sc, ch 1, turn. (32)
Row 13: 4 sc, (2 dc in next st, 7 sc) 3 times, 2 dc in next st, 3 sc, ch 1, turn. (36)
Row 14: 4 sc. Repeat the bracketed sequence 3 times: [3 dc in the same st, 3 sc, dec, 3 sc]. Work 3 dc in the next st, then 4 sc. Fasten off.
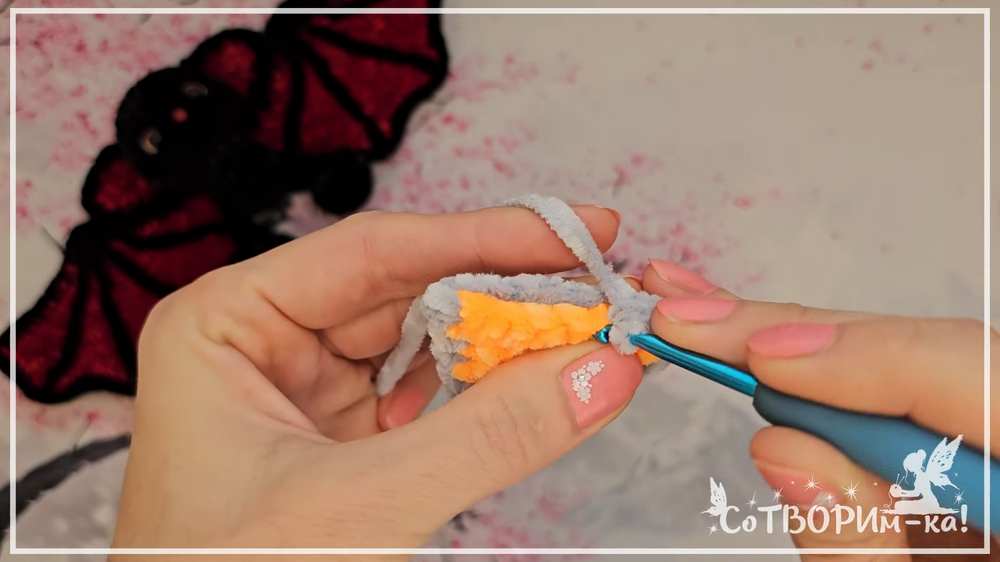
Outer Wing (Make 2 using main color):
Repeat Rows 1 through 14 exactly, but do not cut the yarn at the end.
Wing Assembly:
Layer the inner wing and outer wing together.
Crochet through both pieces around the perimeter using sc to join them, adding extra sc stitches at the sharp points to preserve the shape.
Fasten off and leave a long yarn tail for sewing.
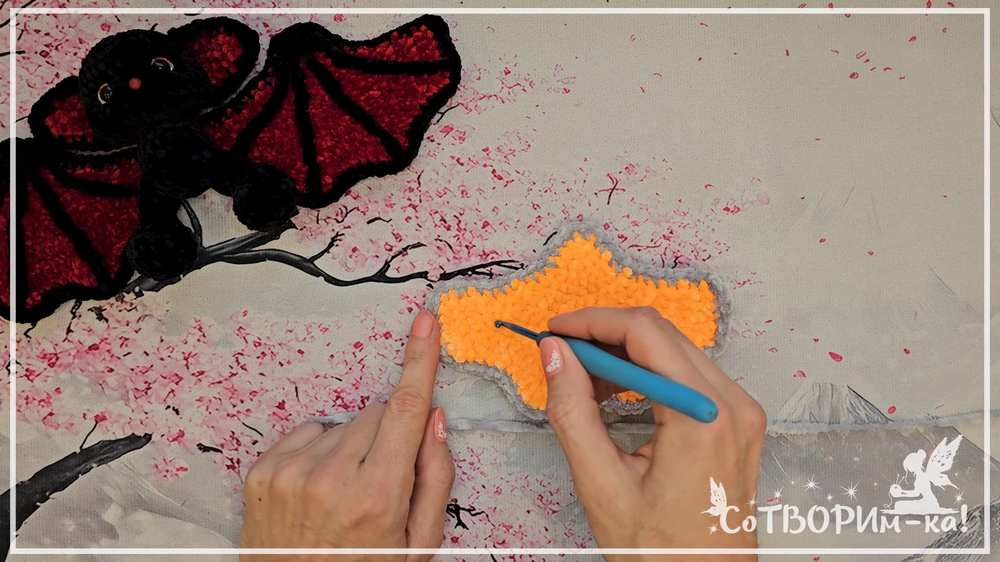
Use a yarn needle to embroider decorative stitch lines on the contrasting inner side of the wings.
Body and Head
Work this section in one continuous piece using the main color yarn.
Round 1: 8 sc in MR (8)
Round 2: 8 inc (16)
Round 3: 16 sc (16)
Round 4 (Leg Attachment): Crochet 3 sc through the first leg and the body simultaneously. Crochet 6 sc along the body alone. Crochet 3 sc through the second leg and the body simultaneously. Crochet 4 sc along the body. (16)
Rounds 5-6: 16 sc (16)
Round 7: 3 sc, 3 dec, 7 sc (13)
Round 8: 3 sc, 2 dec, 6 sc (11)
Round 9: 11 sc (11) Do not cut the yarn; proceed directly to the head.
Round 10 (Head R1): 11 inc (22)
Round 11 (Head R2): (1 sc, inc) 11 times (33)
Rounds 12-13 (Head R3-4): 33 sc (33)
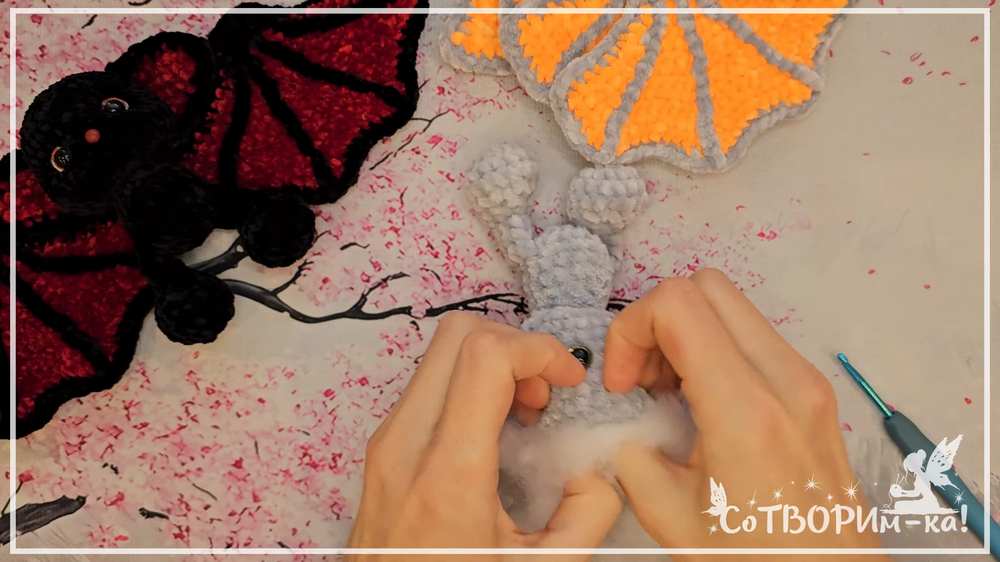
Round 14 (Head R5): Work 3 dec on the left side of the head. Work 3 dec on the right side of the head. At the center front stitch, use the small hook to pull the yarn loop through the nose bead, then make a sl st to secure the bead in place. Crochet sc in all remaining stitches of the round. (27)
Rounds 15-18 (Head R6-9): 27 sc (27)
Round 19 (Head R10): (7 sc, dec) 3 times (24)
Eye Installation: Insert the 10 mm safety eyes 1 row above the bead nose, leaving a space of 5 stitches between them. Firmly stuff the body section with fiberfill.
Round 20 (Head R11): (2 sc, dec) 6 times (18)
Round 21 (Head R12): (1 sc, dec) 6 times (12)
Stuffing: Pack the head firmly with fiberfill stuffing.
Round 22 (Head R13): 6 dec (6)
Fasten off, weave the tail through the remaining stitches, and pull tight to close the top hole.
Final Assembly
Sew the completed ears securely to the top of the head.
Sew the wings diagonally onto the back of the body.
Use a length of thread to sculpt the face by pulling the safety eyes slightly inward toward each other.
Embroider white thread accents along the outer sides of the safety eyes.
Embroider black thread details above the eyes to create eyebrows and eyelashes.
Video Tutorial to Learn Even Better