
5 Free Crochet Sea Creature Amigurumi Patterns for Summer
Here are more free crochet summer amigurumi se creature patterns, including the seashorse amigurumi, too. Looking for a CUTE sark stress softie? I will share a tutorial for a quick chubby shark amigurumi that can be used as a keychain. Or maybe follow a no-sew plushie while crocheting one of the most beloved sea creatures? You will find that miniature axolotl plushie with glitter eyes and a kawaii face. I also hoped some of you might not have enough time and wanted something basic and quick?
Crochet Sea Creature Amigurumi Patterns
For those, I have shared the no-sew crab plushie and also the miniature fish keychain for traditional amigurumi lovers. For now, I have these amigurumi patterns to share, but soon there will be a lot more to discover. Be sure to follow on the relevant platforms to stay updated. Now, let’s get started!
Sea creature patterns and tutorials shared already:
01 of 05 Crochet Seahorse Amigurumi
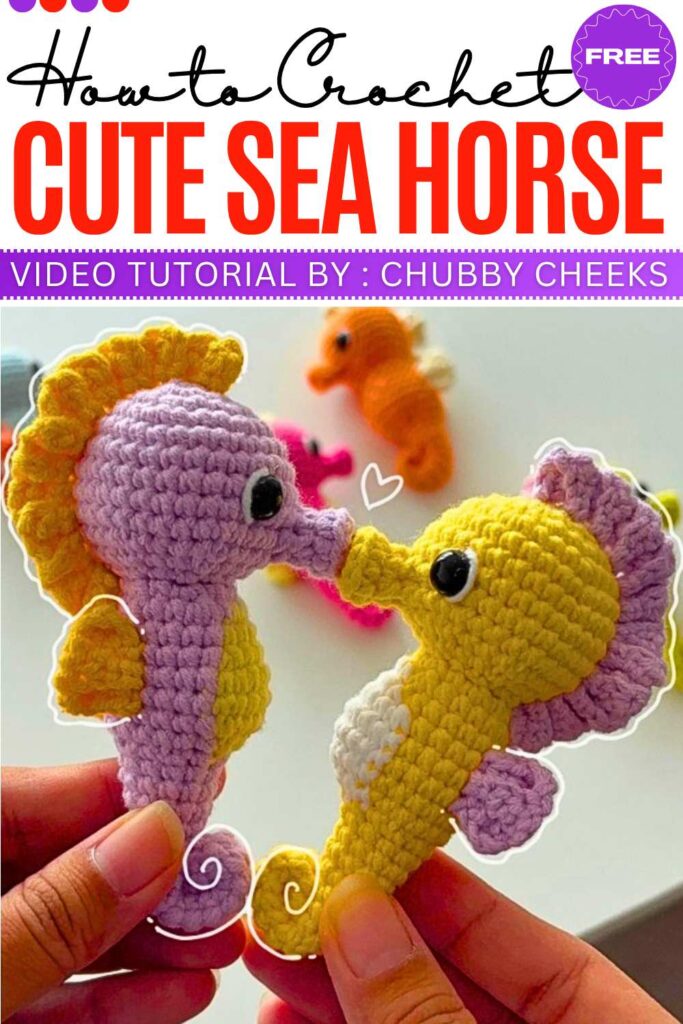
The Seahorse has a long, skinny tail that you roll up and sew into a permanent spiral so it looks like it’s really curling. The middle of the body uses frequent color swaps to make a bright belly that stands out against the rest of the skin.
General Making:
Crochet the head and body in one long piece, narrowing it down to just a few stitches at the very tip of the tail. After you stuff it, curl that thin tail into a circle and pin it in place with a needle. The nose is a separate tiny tube sewn between the eyes, and the fins are crocheted right onto the back using different stitch heights to get a ridged, fan-like look.
Video Tutorial:
02 of 05 Crochet Whale Keychain Pattern
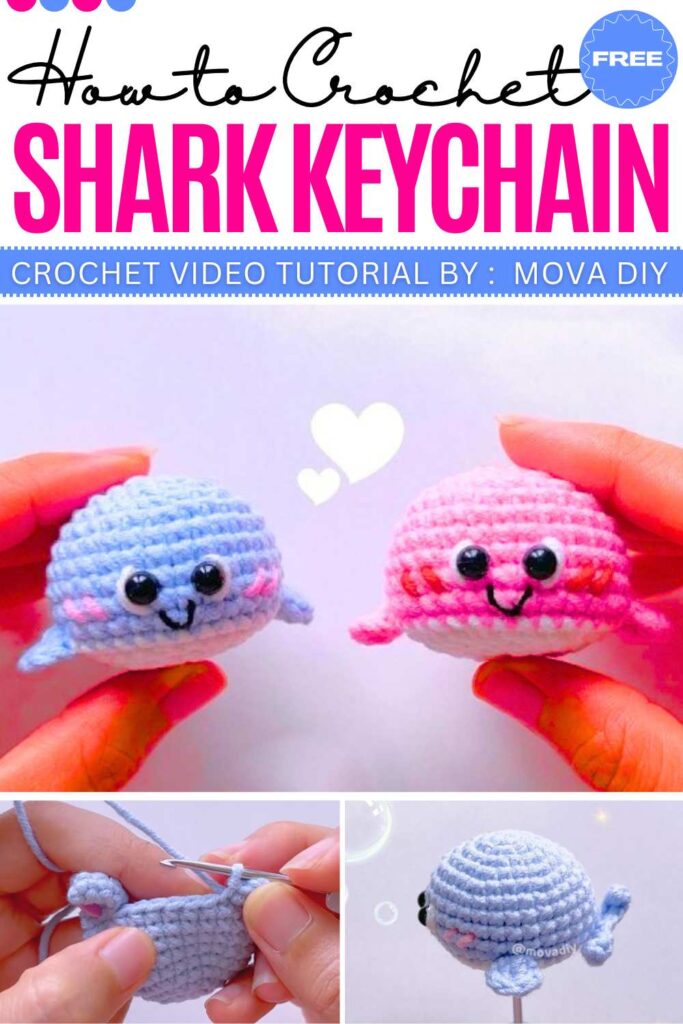
This baby whale amigurumi is a simple project for beginners, using blue and white yarn to create the body and belly. The tail and fins are crocheted directly into the body rounds, which saves time on sewing later.
General Making:
Start with blue yarn to crochet the top of the whale in rounds, increasing until you reach a 30-stitch diameter. In round 10, create the tail by chaining out from the back of the body, then work into the front loops only to make the side fins. Switch to white yarn to crochet the flat belly, stuff it with fiberfill, and decrease to close the bottom. Finish by gluing on 6 mm eyes between rounds 8 and 9 and adding a small pink blush and a black mouth.
Video Tutorial:
03 of 05 Crochet Axolotl Plushie
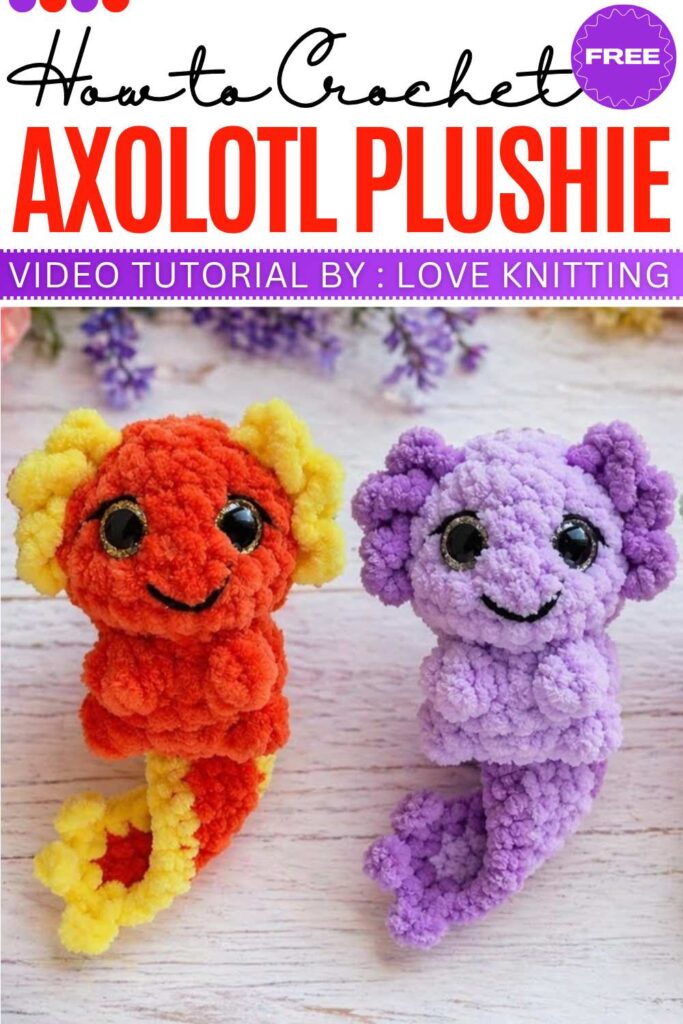
This plush axolotl is made using soft chenille yarn, giving it a very squishy and professional finish. It’s worked as one main piece from the bottom up, so there is very little sewing involved.
General Making:
Crochet the tail first as a flat, two-colored piece that curls naturally. Next, start the body in rounds, crocheting the tail directly into the third round and using bobble stitches to create the legs and arms as you go. Work upward to form the head, insert 12 mm safety eyes, and stuff it firmly before closing. Finish by joining a contrasting color yarn to the sides of the head to crochet the frilly gills using simple chain loops.
Video Tutorial:
04 of 05 Crochet Crochet Tiny Crab
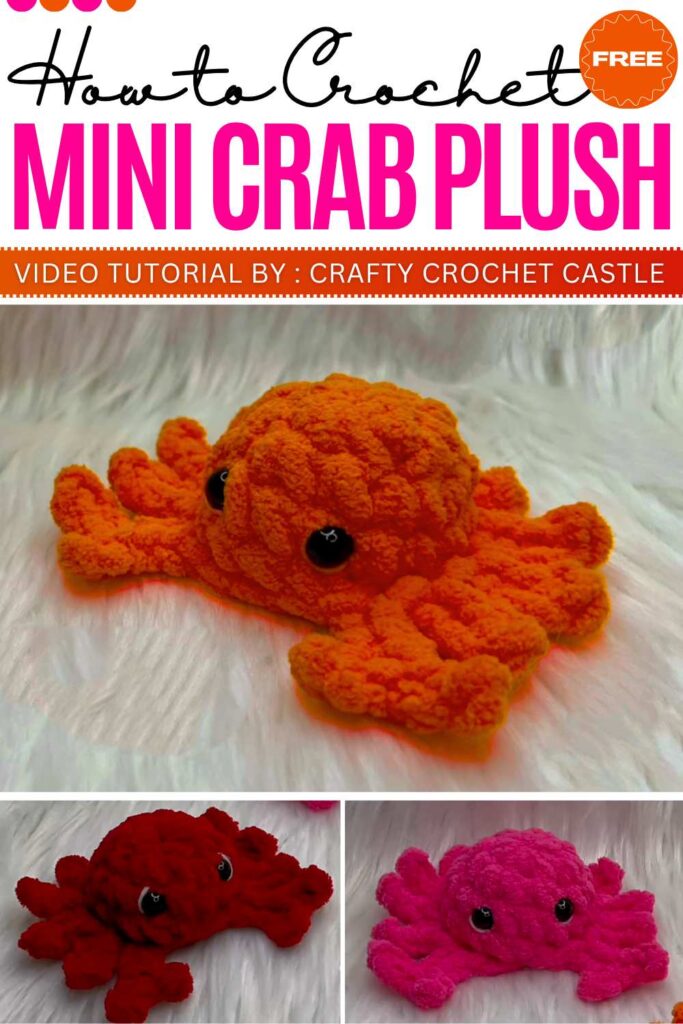
This tiny crab is a “no-sew” pattern, meaning all the legs and claws are crocheted directly onto the body. It’s a very fast project that works well with scrap yarn and can be used as a keychain or a desk mascot.
General Making:
Start by crocheting a small circular body in rounds, increasing until you have 16 stitches. In round 5, work in the front loops only to create the legs and claws by chaining out and slip-stitching back toward the body. Insert safety eyes between rounds 3 and 4, then switch to the back loops of round 4 to crochet the bottom and close the crab with a series of decreases. Finish by stuffing it lightly and weaving in the tail to pull the bottom shut.
Video Tutorial:
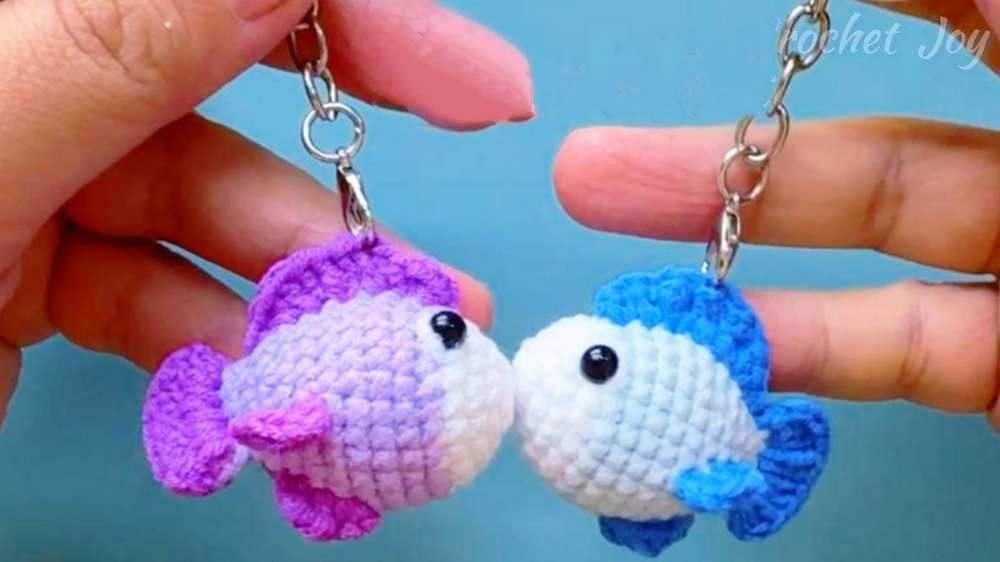
05 of 05 Crochet Crochet Fish Sea Creature
The little fish has a classic “goldfish” silhouette and is a great way to practice simple shaping for keychains. The pattern relies on basic increases and decreases to create a tapered body that looks great in bright, solid colors.
General Making:
You’ll start by crocheting the body in the round, beginning at the nose and widening out toward the middle before narrowing it back down for the tail. To make the fins, join your yarn directly to the sides of the body and work a few quick stitches for a seamless look. The large tail fin is worked onto the back end using taller stitches like double crochets to give it that wide, flowing appearance. Finish the project by adding small safety eyes or stitching on black dots for a simple face.
Video Tutorial: