6 Free Crochet Special Ice Cream Amigurumi Patterns for Summer
Here are the most special crochet ice cream cone, cupcake, and popsicle patterns I am gonna share this summer. While I have already shared many of the written patterns for the ice cream pouches that I call the special, these are really the most colorful and delicious amigurumi. We shall start with an ice cream bouquet plushie, which is perfect for exchanging between lovers. Then the mini cupcake set, which has more than 6 variations each.
Crochet Special Ice Cream Amigurumi Patterns
Then two regular ice cream keychains, but they are special in the respect that they are colorful and spring-ready! Before the extension of this list, we shall end with an ice cream cone and a popsicle lip balm holder. These amigurumi patterns will make the best bag charms, gifts, and summer keychains!
Ice Cream Tutorials shared already:
[postur]https://mycraftybasket.com/crochet-icecream-pouch-bag/[/posturl]
[postur]https://mycraftybasket.com/crochet-ice-cream-bag/[/posturl]
01 of 05 Crochet Ice Cream Flower
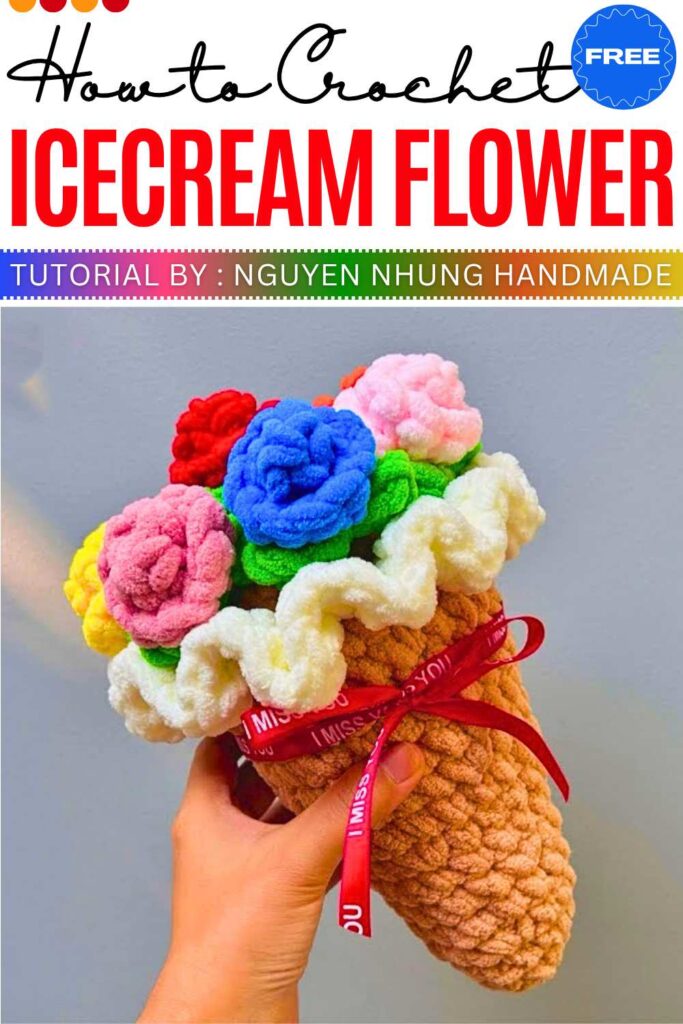
This is a fun project where you make a big, soft ice cream cone out of yarn and fill the top with crochet roses instead of scoops of ice cream. It makes a sweet, unique gift.
The Making
Cone: Crochet a cone shape using thick yarn, making it wider as you go up.
Top: Make a flat circle with a wavy white edge to look like melted cream.
Flowers: Crochet 8 small roses by making “curly” strips of yarn.
Finish: Stuff the cone, sew the lid on, and glue the flowers to the top.
Video Tutorial:
02 of 05 Crochet Ice Cream Cupcake Set for All
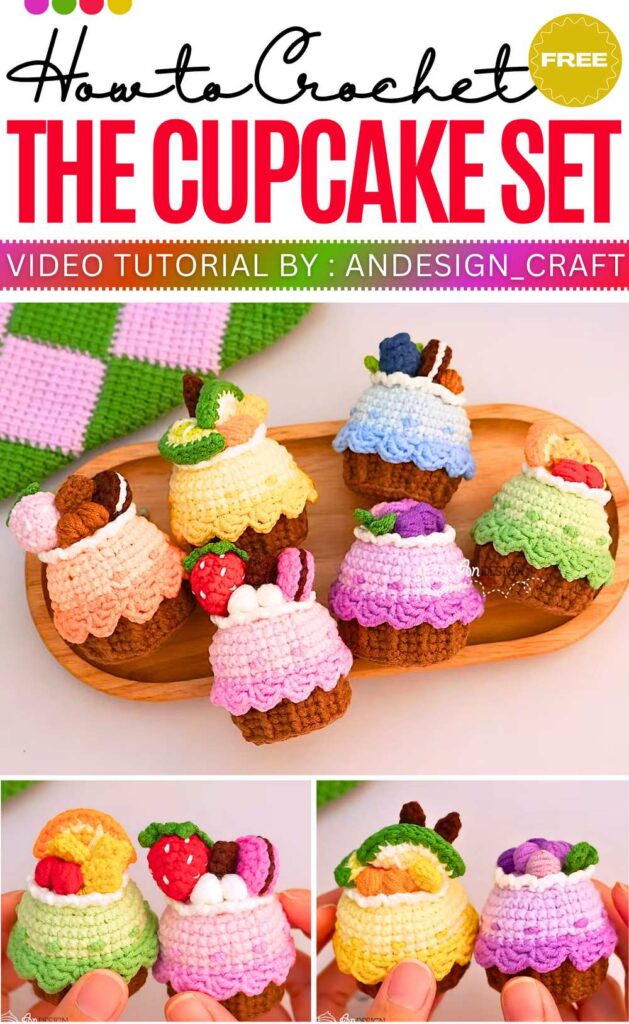
Learn how to make a tiny cupcake that you can decorate however you want. You can make a whole set with different “flavors” and toppings like fruit or chocolate.
The Making
Base: Crochet a round top for the cake and a ribbed bottom that looks like a paper cupcake liner.
Stuffing: Sew the two parts together and fill them with fluffy stuffing.
Toppings: Crochet tiny decorations like strawberries, lemon slices, or chocolate sticks.
Finish: Glue or sew your favorite toppings onto the cake to finish your dessert.
Video Tutorial:
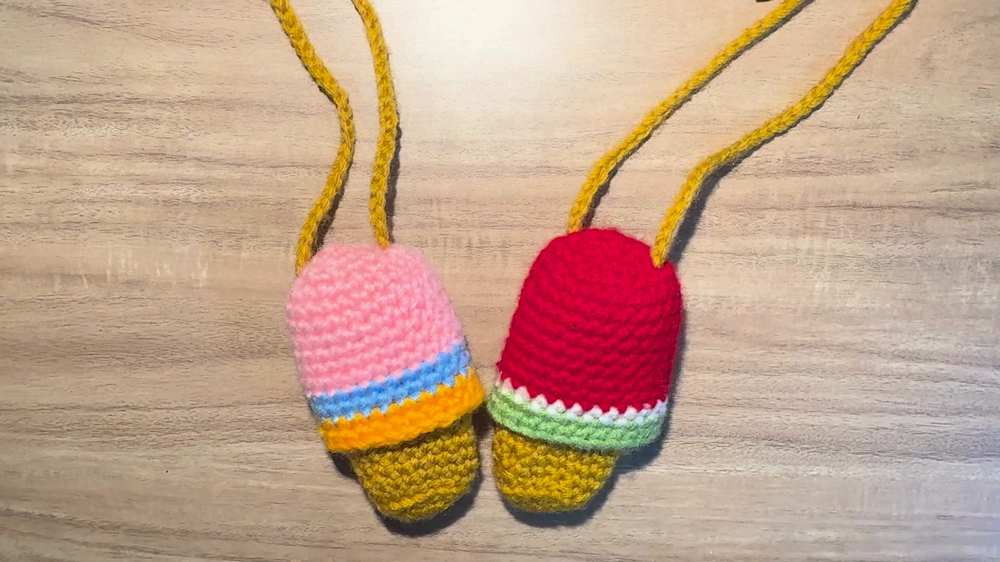
03 of 05 Crochet Ice Cream Cone Bouquet
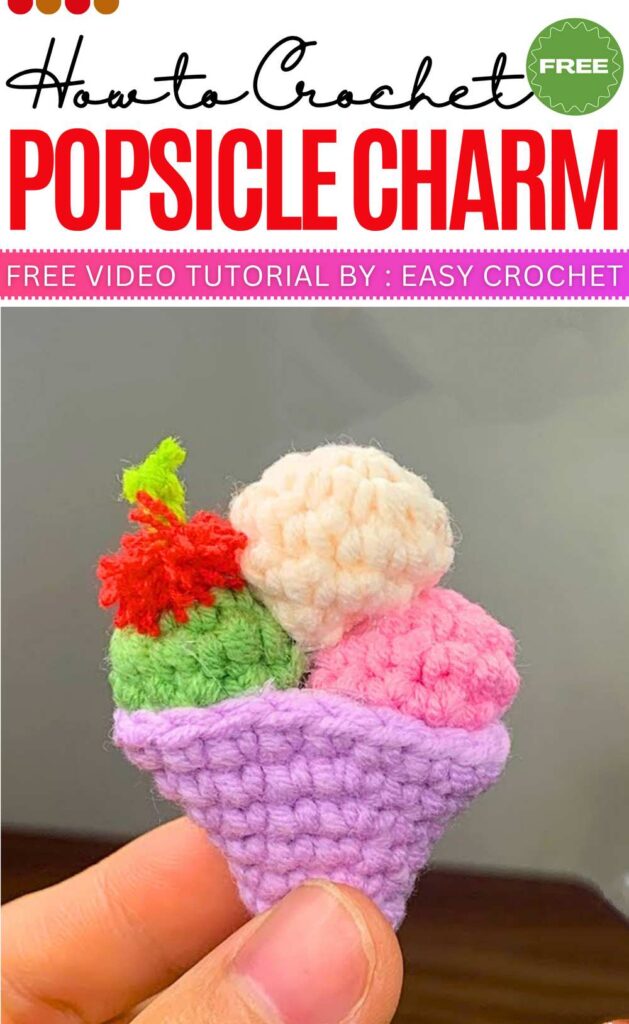
This project is all about making a fun popsicle-style ice cream cone that’s surprisingly quick to finish. It’s a great project for beginners because the shapes are very simple, and you can stack different “flavors” (yarn colors) to make a tall, delicious-looking treat!
The Making
Cone: Crochet a small brown cone, starting narrow and getting wider until it’s the right size for your scoops.
Scoops: Make small round balls in your favorite colors (like strawberry pink or mint green) and stuff them with cotton.
Connect: Sew the scoops together and then attach them to the top of your cone.
Finish: You can repeat the scoop steps to make your ice cream as tall as you like!
Video Tutorial:
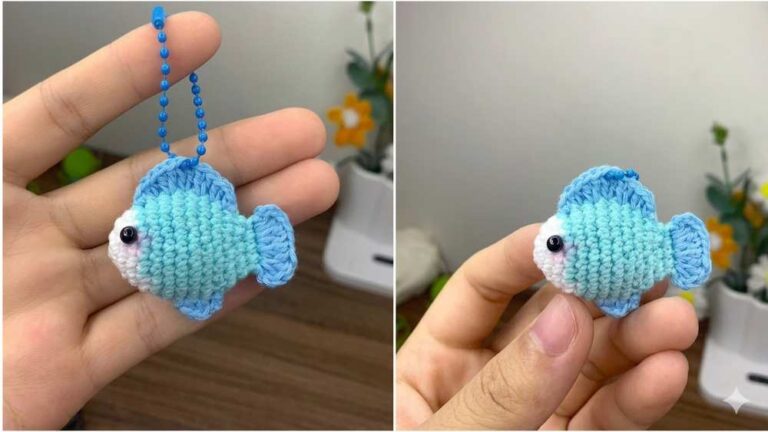
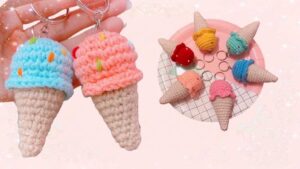
04 of 05 Crochet Ice Cream Cone Keychain
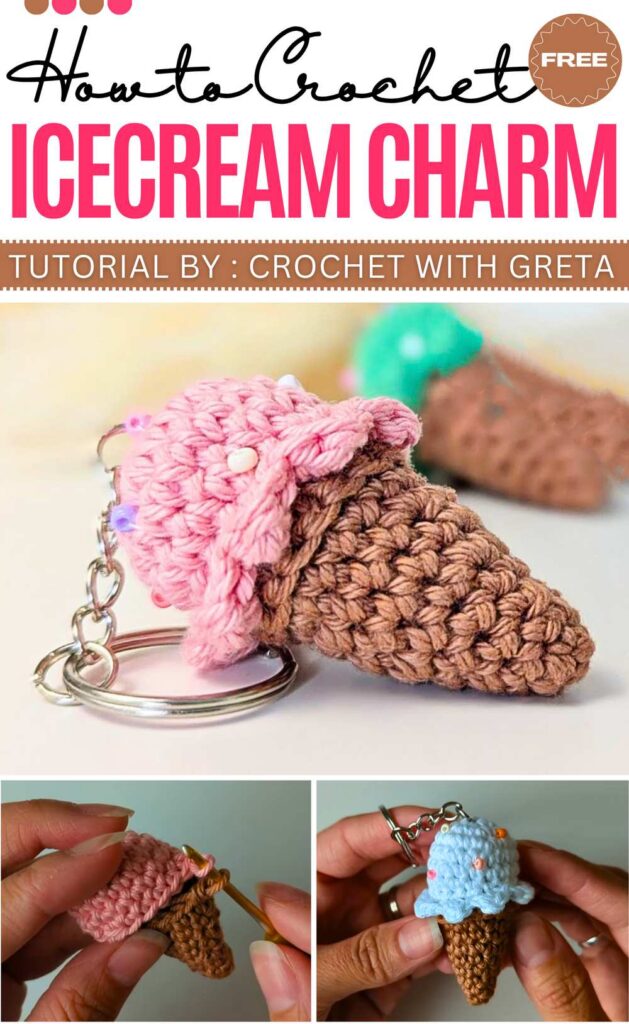
If you love “no-sew” projects, this tiny keychain is for you! It’s made in one continuous piece so you don’t have to worry about sewing parts together later. It’s finished off with colorful beads that look just like real sprinkles, making it a perfect little accessory for your bag or keys.
The Making
Cone: Start at the bottom point and crochet upwards, making the cone wider as you go.
Scoop: Without cutting the yarn, switch to your “flavor” color and crochet a round ball shape directly onto the cone.
Details: Add a wavy “drip” edge around the middle using simple stitches to make it look like the ice cream is melting.
Finish: Stuff it with a little bit of fluffy filling, sew on some colorful beads for sprinkles, and attach your keychain ring.
Video Tutorial:
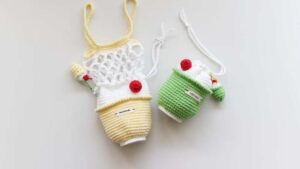
05 of 05 Crochet Lip Balm Holder
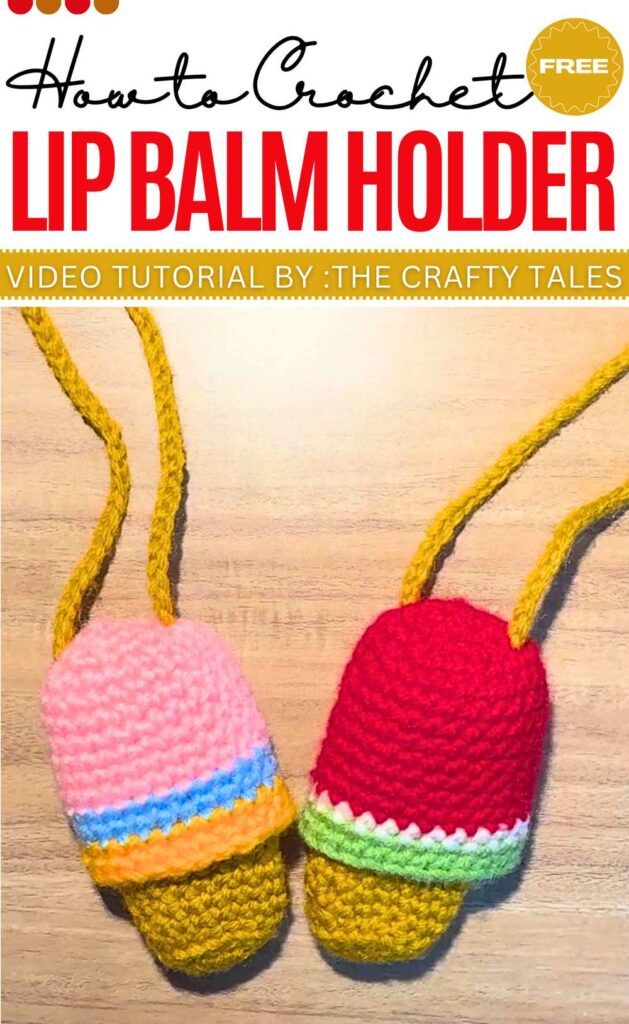
Keep your lip balm handy with this cute popsicle-shaped case! It has a “magic” pulling strap that hides your lip balm inside the popsicle and pulls it out whenever you need a quick swipe.
The Making
Popsicle Case: Crochet a colorful tube using a few different yarn colors to look like a layered popsicle.
The Stick: Crochet a thinner, tan-colored tube for the lip balm to sit inside.
The Strap: Make a long yarn chain (about 60 stitches) to connect the two pieces.
Finish: Thread the strap through the top piece and tie it to the base so you can pull the “stick” up and down.
Video Tutorial:
You may also like

13 Free Crochet Bucket Hat Ideas (Special Summer Patterns)
5 Free Crochet Summer Special Patterns for Kids
Free Crochet Ice-Cream Bag Pattern For Summer
Free Crochet Ice Cream Cone Keychain Pattern