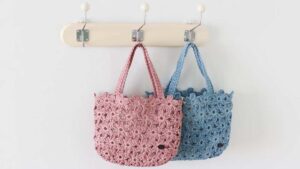
Crochet Flower Bag Pattern Cute Floral Accessory
This flower-themed handbag is a cute and practical crochet project. Small and lightweight, it is perfect for carrying little items like candy, hair clips, coins, or other small essentials. The pretty flower design gives it a sweet look, making it a lovely accessory for everyday use or a nice addition to your handmade collection.

Step by Step Pattern
Materials Needed
Yarn: Medium-weight (DK/Sport) cotton yarn in your desired floral colors.
Crochet Hook: 3.5mm.
Extras: Pearl chain strap, magnetic snap button (optional), yarn needle, and scissors.
Abbreviations
ch: Chain stitch
st(s): Stitch(es)
sl st: Slip stitch
dc: Double crochet
inc: Increase (work 2 dc into the same stitch)
FPdc: Front Post double crochet
Pattern Instructions
Step 1: The Side Panel (Gusset)
This piece forms the bottom and the sides of the bag.
Chain 41.
Work 1 dc into the 3rd chain from the hook, working into the back bump of the chain.
Continue working 1 dc into each back bump across until you reach the end (Total: 39 dc).
Chain 2, work 1 sl st into the final stitch to secure. Fasten off and weave in ends.
Step 2: The Main Panels (Front and Back – Make 2)
These are circular pieces that form the flower design.
Round 1: Create a magic ring. Chain 2, work 10 dc into the ring. Pull tight to close and sl st to join in the first dc.
Round 2: Chain 2, work 2 dc into every stitch around (Total: 20 sts). Sl st to join.
Round 3: Chain 2. Begin increasing: 1 dc in the next stitch, 2 dc in the next (repeat this 2 times), then 1 dc in the next 2 stitches, 2 dc in the next (repeat this 1 time). Follow this rhythmic increase around until you reach a total of 40 sts. Sl st to join.
Round 4: Chain 2. Begin the petal pattern: Work 4 dc, then 1 FPdc around the post of the corresponding stitch from the previous row. Repeat around.
Round 5: Chain 2. Work 5 dc, then 1 FPdc (work the FPdc around the post of the previous round’s FPdc). Repeat around.

Step 3: Assembly (Joining the Panels)
Place the Front Panel against the side panel edge.
Chain 1. Join by inserting your hook through both the Front Panel stitch and the Side Panel stitch simultaneously.
Work 1 dc into this joined stitch.
Continue the established flower pattern (alternating dc groups and FPdc) while simultaneously connecting the side panel to the edge of the front panel.
Ensure you skip one stitch on the side panel between every two petal groups to maintain the correct shaping.
Once you have connected all the way around, work an extra stitch on the FPdc post to lock the seam. Fasten off.
Repeat this process to attach the Back Panel to the other side of the side panel.

Finishing Touches
Strap: Attach a pearl chain to the upper sides of the bag for a decorative look.
Closure: If desired, use a yarn needle to sew a magnetic snap button to the inside top opening of the panels.
Final Check: Gently pull the petals of the flower design to ensure they lay flat and even.
Video Pattern:
Materials Needed
Yarn: Medium-weight (DK/Sport) cotton yarn in your desired floral colors.
Crochet Hook: 3.5mm.
Extras: Pearl chain strap, magnetic snap button (optional), yarn needle, and scissors.
Abbreviations (UK Terms)
ch: Chain stitch
st(s): Stitch(es)
sl st: Slip stitch
tr: Treble crochet (replaces the US “double crochet”)
inc: Increase (work 2 tr into the same stitch)
FPtr: Front Post treble crochet (replaces the US “FPdc”)
Pattern Instructions
Step 1: The Side Panel (Gusset)
This piece forms the bottom and the sides of the bag.
Chain 41.
Work 1 tr into the 4th chain from the hook (the 3rd chain is used for turning height), working into the back bump of the chain.
Continue working 1 tr into each back bump across until you reach the end (Total: 39 tr).
Chain 2, work 1 sl st into the final stitch to secure. Fasten off and weave in ends.
Step 2: The Main Panels (Front and Back – Make 2)
These are circular pieces that form the flower design.
Round 1: Create a magic ring. Chain 3 (counts as first tr), work 9 tr into the ring. Pull tight to close and sl st to join in the top of the ch-3.
Round 2: Chain 3, work 2 tr into every stitch around (Total: 20 sts). Sl st to join.
Round 3: Chain 3. Begin increasing: 1 tr in the next stitch, 2 tr in the next (repeat this 2 times), then 1 tr in the next 2 stitches, 2 tr in the next (repeat this 1 time). Follow this rhythmic increase around until you reach a total of 40 sts. Sl st to join.
Round 4: Chain 3. Begin the petal pattern: Work 4 tr, then 1 FPtr around the post of the corresponding stitch from the previous row. Repeat around.
Round 5: Chain 3. Work 5 tr, then 1 FPtr (work the FPtr around the post of the previous round’s FPtr). Repeat around.
Step 3: Assembly (Joining the Panels)
Place the Front Panel against the side panel edge.
Chain 1. Join by inserting your hook through both the Front Panel stitch and the Side Panel stitch simultaneously.
Work 1 tr into this joined stitch.
Continue the established flower pattern (alternating tr groups and FPtr) while simultaneously connecting the side panel to the edge of the front panel.
Ensure you skip one stitch on the side panel between every two petal groups to maintain the correct shaping.
Once you have connected all the way around, work an extra stitch on the FPtr post to lock the seam. Fasten off.
Repeat this process to attach the Back Panel to the other side of the side panel.
Finishing Touches
Strap: Attach a pearl chain to the upper sides of the bag for a decorative look.
Closure: If desired, use a yarn needle to sew a magnetic snap button to the inside top opening of the panels.
Final Check: Gently pull the petals of the flower design to ensure they lay flat and even.
You may also like
Crochet Flower Bag Pattern For Summer Outgoings
Free Crochet Assemblable Flower Amigurumi Pattern
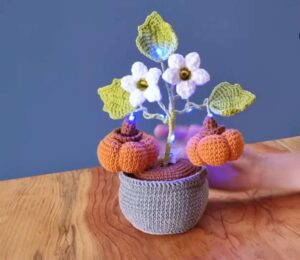
Bi Do: Crochet Mini Pumpkin Potted Flower Decoration for Autumn

9 Free Crochet Beautiful Flower Tutorials for Spring
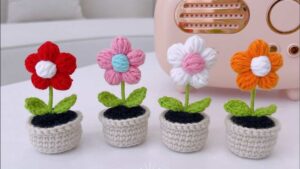
Crochet Flower Pot Pattern For Table Decoration