
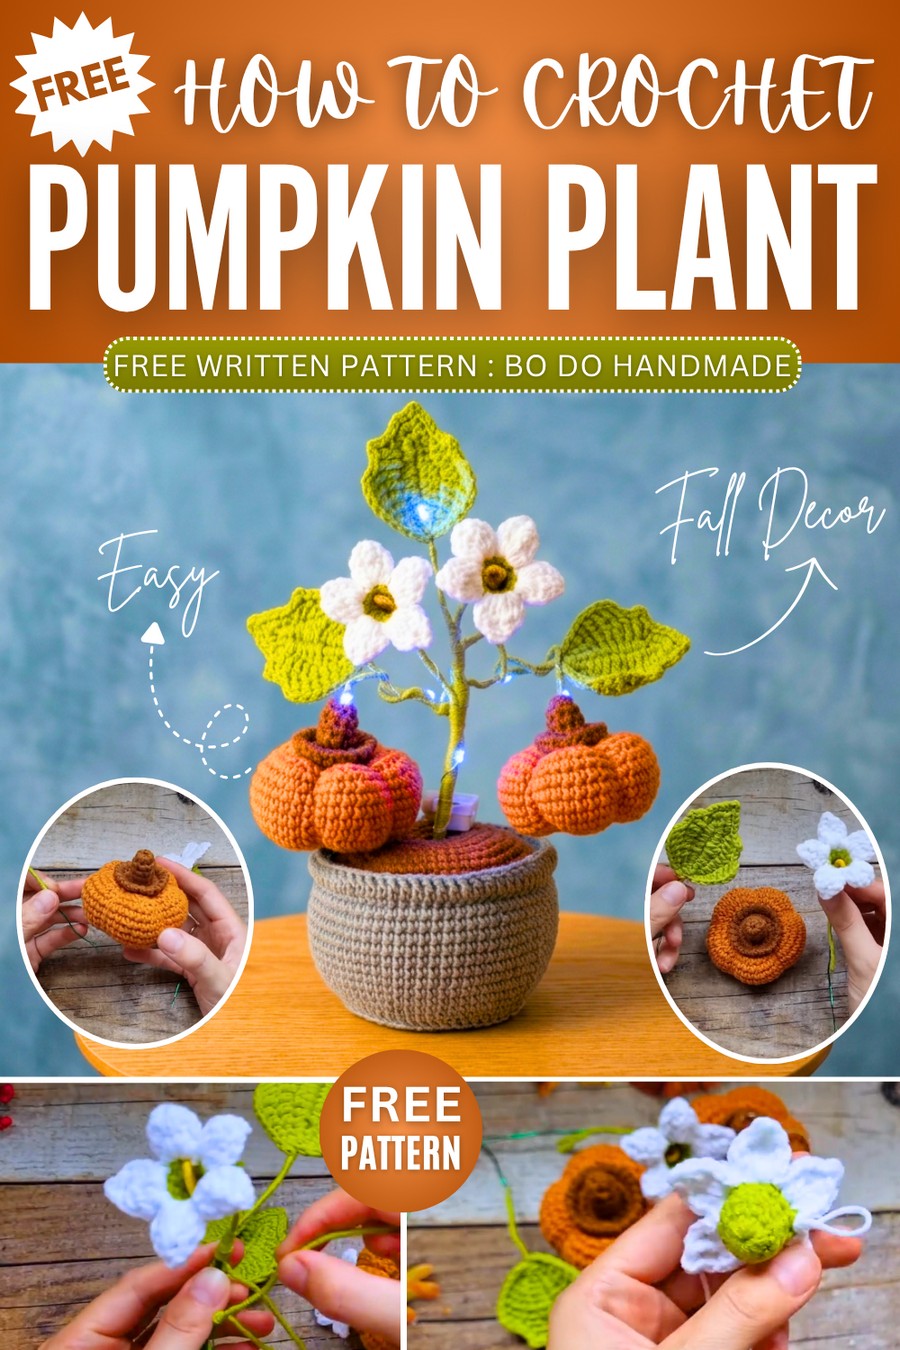
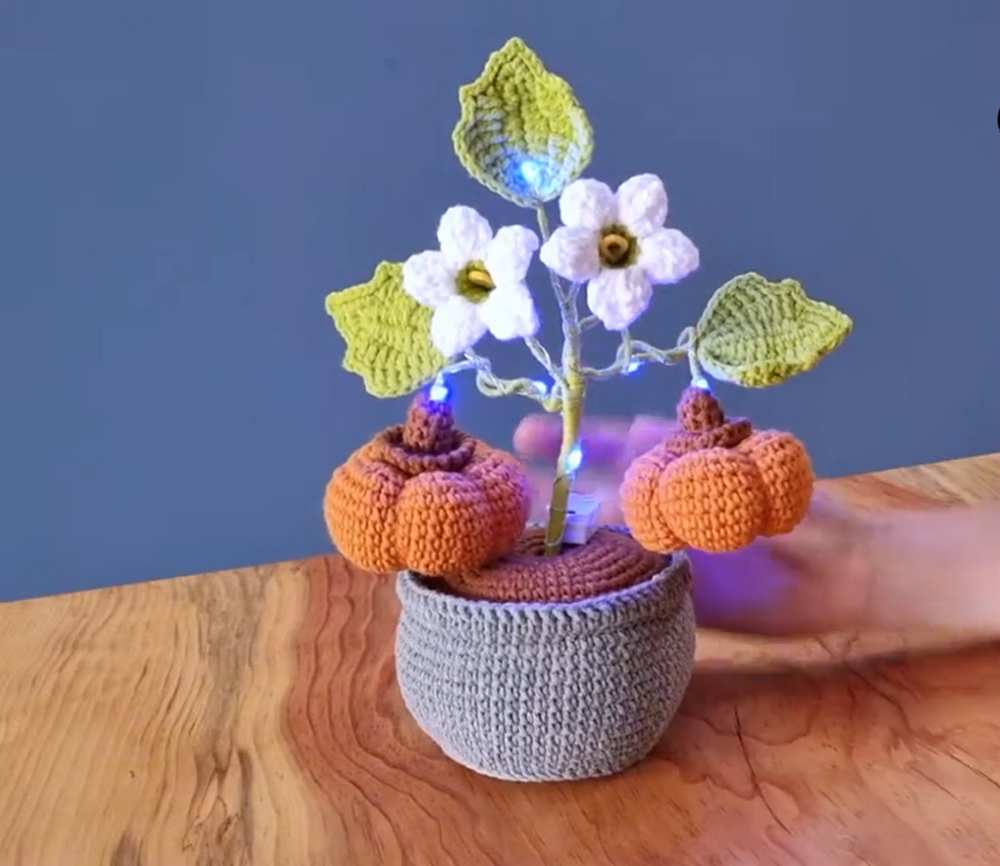
Bi Do: Crochet Mini Pumpkin Potted Flower Decoration for Autumn
This fall, learn how to crochet this elegant mini pumpkin potted flower plant decoration following this FREE written pattern and a tutorial as well. This potted autumn plant decoration has a white bloomed flower, maple leaves and two two hanging pumpkins as well. You can also wrap some fairy lights especially if you are crocheting this decoration for Halloween.
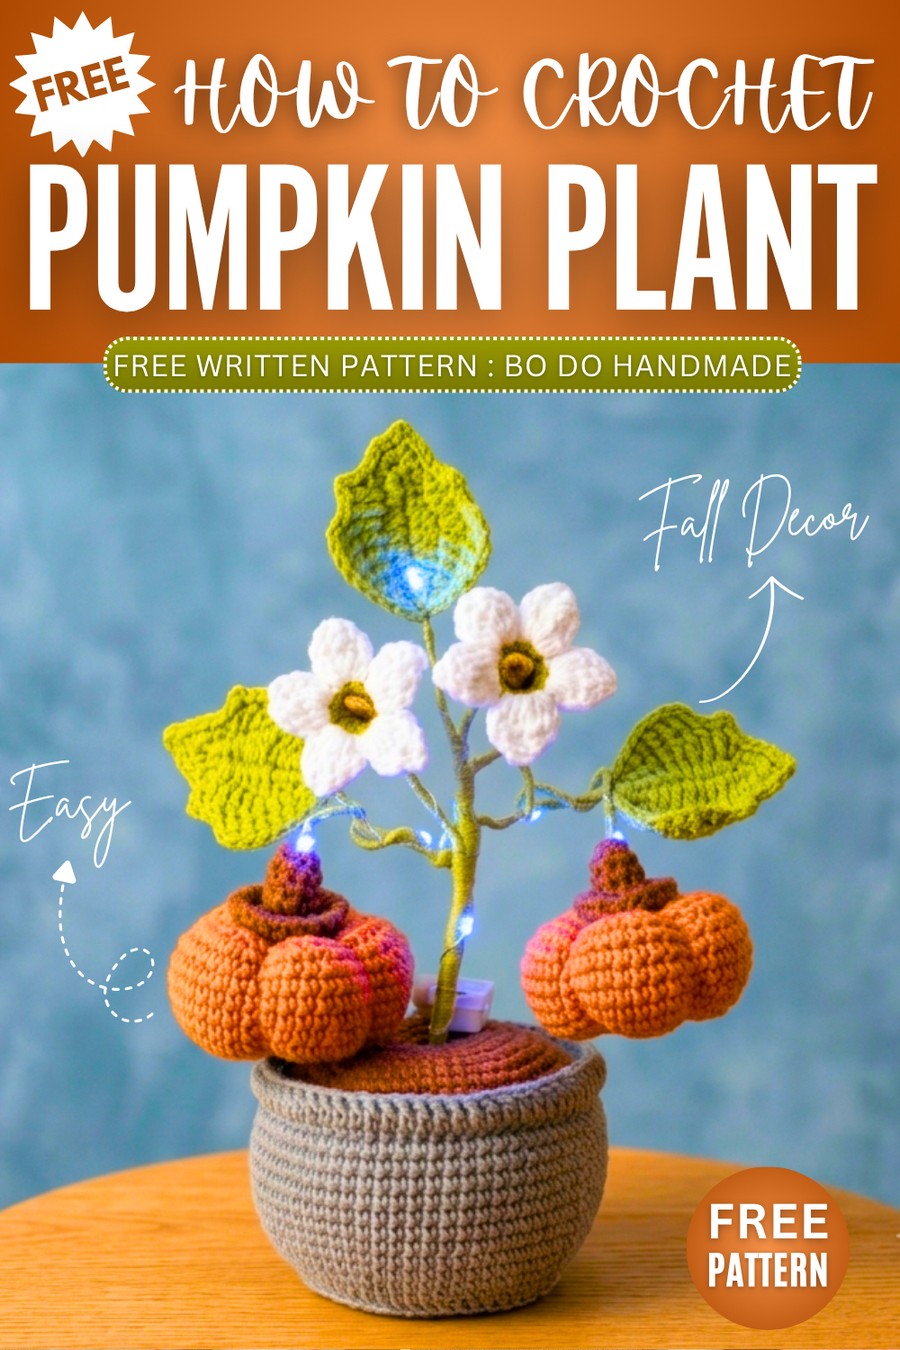
We shall crochet a no-sew pot with the soil as a base and using craft wire as a base for flower plant. Crocheting this pumpkin potted plant won’t take more than 2 hours to finish. Now, continue reading for the full crochet pumpkin amigurumi as well as the plant pattern.
How to Crochet Flower & Pumpkin Plant Decoration
This cheerful and festive project expands upon a miniature pumpkin pattern, creating a complete little potted pumpkin plant! By adding delicate crochet flowers, textured autumn leaves, and a neat stem system that uses floral wire, you can “plant” your little amigurumi pumpkins into a tiny pot.
With the addition of miniature fairy lights, this project becomes a charming, glowing centerpiece perfect for seasonal decorating.
Materials Needed
Yarn: Worsted or DK weight yarn. You’ll need Orange (pumpkins), Dark Green (stems and leaves), Yellow (flower petals), Brown (flower centers), and any color you prefer for the pot.
Crochet Hook: 3mm crochet hook
Stuffing: Polyester fiberfill.
Floral Wire: Thin wire (for the leaves and flower stems) and thicker wire (for the main plant stalk).
Tools: A yarn needle, stitch marker, scissors, and a hot glue gun.
Optional: A small string of battery-operated fairy lights to wrap around the finished piece.
Crochet Abbreviations (US Terms)
MR: Magic Ring
Ch: Chain
Sc: Single Crochet
Hdc: Half Double Crochet
Dc: Double Crochet
Tr: Treble Crochet (or Double Treble, taking two loops on the hook before inserting)
Inc: Increase (2 sc in the same stitch)
Dec: Decrease (crochet 2 stitches together)
Sl st: Slip Stitch
St(s): Stitch(es)
Rnd/Row: Round/Row
Step-by-Step Pattern
1. The Pumpkin Body
(Note: This follows the instructions from the first video to create the pumpkins).
Use your Orange yarn. End every round by slip stitching to the first stitch and chaining 1.
Rnd 1: Work 7 sc inside a MR. (7 sts)
Rnd 2: Work 7 inc. (14 sts)
Rnd 3: Repeat [1 sc, 1 inc] 7 times. (21 sts)
Rnd 4: Repeat [2 sc, 1 inc] 7 times. (28 sts)
Rnd 5: Repeat [3 sc, 1 inc] 7 times. (35 sts)
Rnd 6: Offset the increases: Repeat [2 sc, 1 inc, 2 sc] 7 times. (42 sts)
Rnd 7–12: Work 1 sc in every stitch around. (42 sts)
Rnd 13: Offset your decreases: Repeat [2 sc, 1 dec, 2 sc] 7 times. (35 sts)
Rnd 14: Repeat [3 sc, 1 dec] 7 times. (28 sts)
Rnd 15: Repeat [2 sc, 1 dec] 7 times. (21 sts)
Rnd 16: Repeat [1 sc, 1 dec] 7 times. (14 sts)
Firmly stuff the pumpkin.
Rnd 17: Work 7 dec. (7 sts)
Fasten off, leaving a very long tail. Weave the tail through the final 7 stitches to close the top. To create the ribs, run the needle from the top center to the bottom center, pulling tight against the outside of the pumpkin. Repeat this 5-7 times evenly around the sphere to create the pumpkin shape. Secure and weave in ends.

2. The Flowers
The Center (Yellow or Brown):
Cut a small length of thin floral wire. Fold it in half.
Tie your yarn around the fold and tightly wrap the yarn around the wire loop to create a small, bulbous center. Secure it with hot glue.
The Petals (Yellow):
Rnd 1: Work 9 sc into a MR. Sl st to close, ch 1. (9 sts)
Rnd 2: Work 1 sc in each stitch around. Sl st to close, ch 1. (9 sts)
Rnd 3: Work 1 sc in each stitch around. (9 sts) This creates a tiny cup shape for the flower base.
Petals: Work into the back loops (or the row just behind the slip stitch). In the first stitch, work: [1 sc, 1 hdc, 1 dc, 1 tr, ch 2 and sl st into the first ch to make a picot point, 1 tr, 1 dc, 1 hdc, 1 sc]. This entire sequence creates one pointed petal.
Sl st into the next stitch. Repeat the petal sequence in the next stitch.
Continue this pattern until you have 5 petals around the base. Fasten off.
Push the wire stem of the center through the middle hole of the petal base. Tightly wrap green yarn around the wire underneath the flower to create the stem, securing it with glue at the end.
3. The Leaves
Use your Dark Green yarn. You will be crocheting over a piece of thin floral wire to give the leaf structure.
Row 1 (Center Vein): Ch 10.
Fold your floral wire in half. Place the loop of the wire against the 10th chain. You will crochet the next stitches by trapping the wire inside the stitch.
Row 2 (First Side): Working down the chain: 1 sc in the 9th ch, 1 sc in the next, 1 hdc in the next 2 chs, 1 dc in the next 2 chs, 1 hdc in the next 2 chs, 1 sc in the next. In the final chain (the turning point), work [3 sc, ch 2, 3 sc] while bending the wire around the curve.
Row 3 (Second Side): Working up the opposite side of the chain (mirroring the first side): 1 sc in the next, 1 hdc in the next 2 chs, 1 dc in the next 2 chs, 1 hdc in the next 2 chs, 1 sc in the last.
Row 4 (Shaping the Edges): Sl st to turn and start working back down the leaf to create the jagged points. The sequence uses a combination of sc, hdc, and dc stitches, interspersed with [sl st, ch 2, sl st] points to create the rough edges of a pumpkin leaf. (The video utilizes a complex, continuous border with wire for shaping. For a simpler approach, work [1 sc, 1 hdc, 1 dc, ch 2, sl st into the side of the dc] to make points spaced evenly along the leaf edge).
Once the leaf is finished, tightly wrap green yarn around the remaining exposed wire stems.
4. Assembly & The Pot
Using the thin floral wire, attach small wire stems to the pumpkins by poking the wire through the base of the stems. Wrap these wire stems in green yarn.
Gather your pumpkins, flowers, and leaves.
Take the thick floral wire (the main stalk). Begin wrapping it tightly with green yarn.
As you wrap down the main stalk, incorporate the thin wire stems of the leaves, flowers, and pumpkins by wrapping the green yarn firmly around both wires, binding them together. Alternate the placement of the pieces so they look natural.
Note: The pattern for the small pot isn’t explicitly detailed in this video, but a standard amigurumi pot shape (a flat MR base, increasing to the desired width, then working in the Back Loops Only to build straight sides) will work perfectly!
Place your finished, wired pumpkin vine into the pot (using a foam insert or heavy stuffing to hold it upright).
Carefully wrap your fairy lights around the main stalk and the little pumpkins for a magical finish.
Learn Crochet the Pumpkin Potted Decoration