
5 Free Crochet Summer Fruit Charm Patterns
I am back with some of the BEST patterns from “Summer Fruit Cutie” series, a presentation of Hui. These are oh-so cute smiling fruit dolls and will become the most satisfying amigurumi buddies of yours. While this series mainly featured croceht fruits with eyes, legs and arms, I still have shared two other fruit patterns below such as the simple fruit bag charms and watermelon popsicle icecream. As for the themes, you can crochet pineapple, watermelon, strawberry and lemon amigurumi with these patterns.
Crochet Summer Fruit Charm Patterns
They all end up pretty funnier such as the Hawaiin Pineapple amigurumi which is wearing a skirt and watermelon girl with flower accessory. You can gift them to kids but they will be liked by all. While crocheting them, you will also learn many basic patterns such as a leaf, sprout, Jellycat legs and much more. So, let’s get started with the video patterns.
01 of 05 Crochet Watermelon Girl Amigurumi
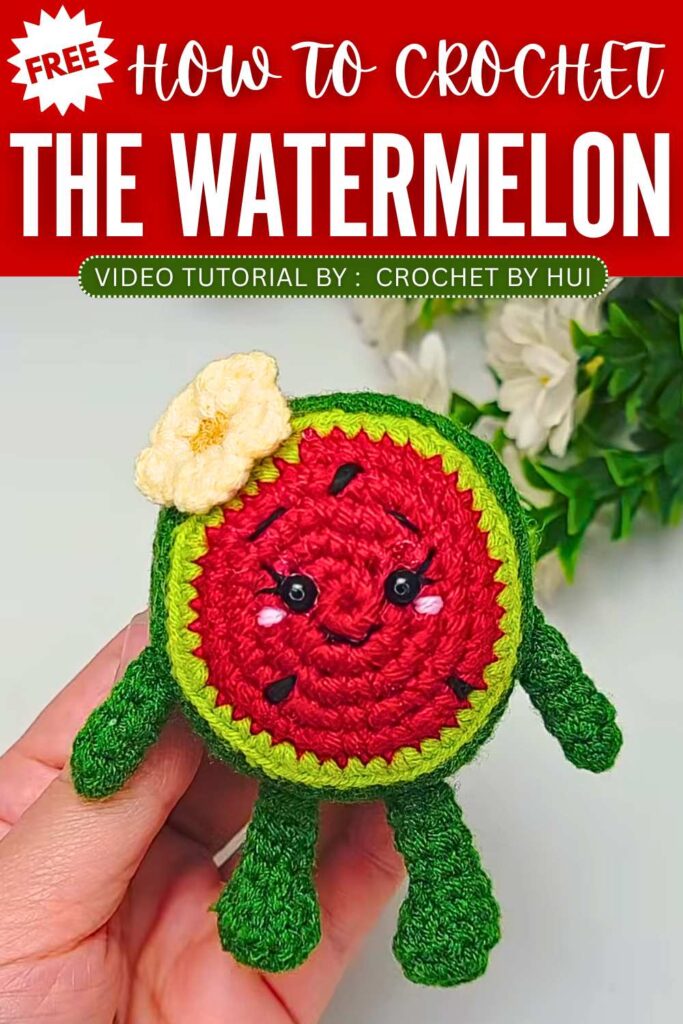
This Daisy Watermelon Girl is a “Fruit Cutie” amigurumi project that has a round watermelon character topped with a small daisy. The pattern focuses on using simple expression changes to give the crochet toy more personality.
Quick Making Guide:
Main Body
Base: Start with a magic ring of 8 sc and increase to 48 stitches over six rounds.
Transition: Change colors at Round 7 using back loops only (BLO).
Shaping: Work rounds of 48 sc, then decrease to 12 stitches before stuffing and closing.
2. Limbs and Flower
Hands (Make 2): Crochet 5-sc tubes for five rounds.
Legs (Make 2): Start with 6 sc, increase to 12, then narrow back to 6 sc.
Daisy: Crochet a yellow center with white chain and half-double crochet petals.
3. Finishing Touches
Eyes: Insert 5 mm eyes between rounds 11 and 12.
Details: Add a black stitched mouth and pink yarn blush.
Assembly: Sew the limbs and daisy to the body.
Video Pattern:
02 of 05 Crochet Hula Pineapple Amigurumi
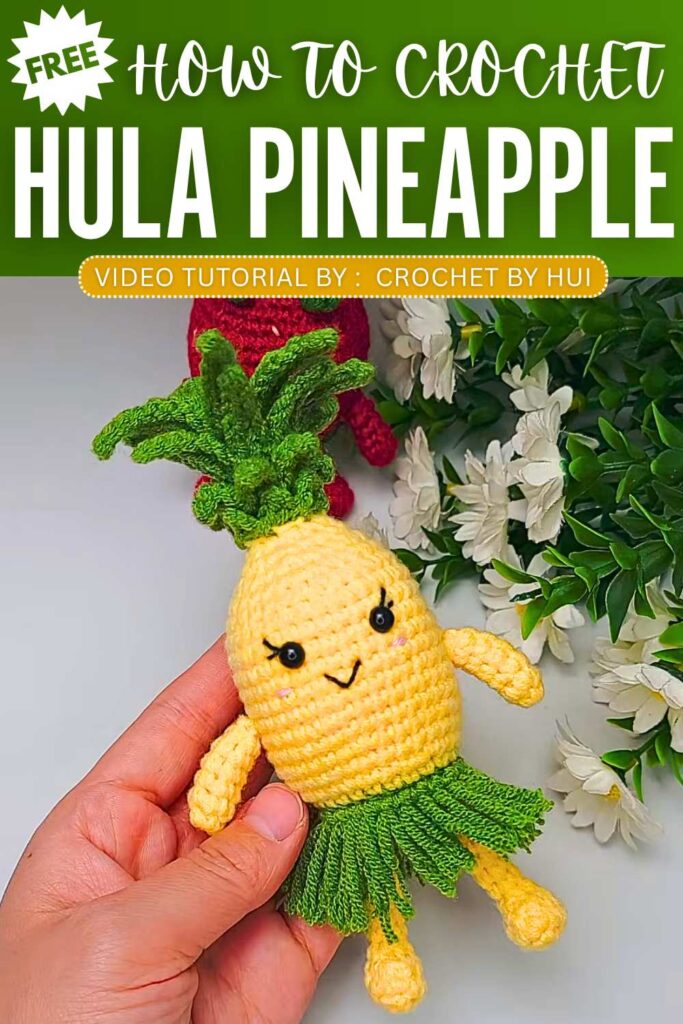
The Hula Pineapple is a playful amigurumi character featuring a leafy head and a grass skirt that moves when shaken. It is part of the “Fruit Cuties” series and is designed to be beginner-friendly.
Quick Making Guide:
Foundation: Start with a green magic ring base and transition to yellow yarn to form the pineapple body.
Body Construction: Build the body upward with several rounds of consistent stitches to create the necessary height.
Shaping: Use increases to widen the middle and then invisible decreases to taper the bottom before stuffing and closing.
Leaf Details: Crochet four rounds of green leaves directly onto the top of the head using various stitch lengths.
Limbs: Create two small tubes for the hands and two slightly longer, shaped pieces for the legs.
Skirting: Loop 25 short strands of yarn around the lower body to create the moving “hula” grass skirt.
Finishing: Attach safety eyes, embroider a simple mouth and blush, and sew the limbs to the body.
Video Pattern:
03 of 05 Crochet Strawberry Amigurumi
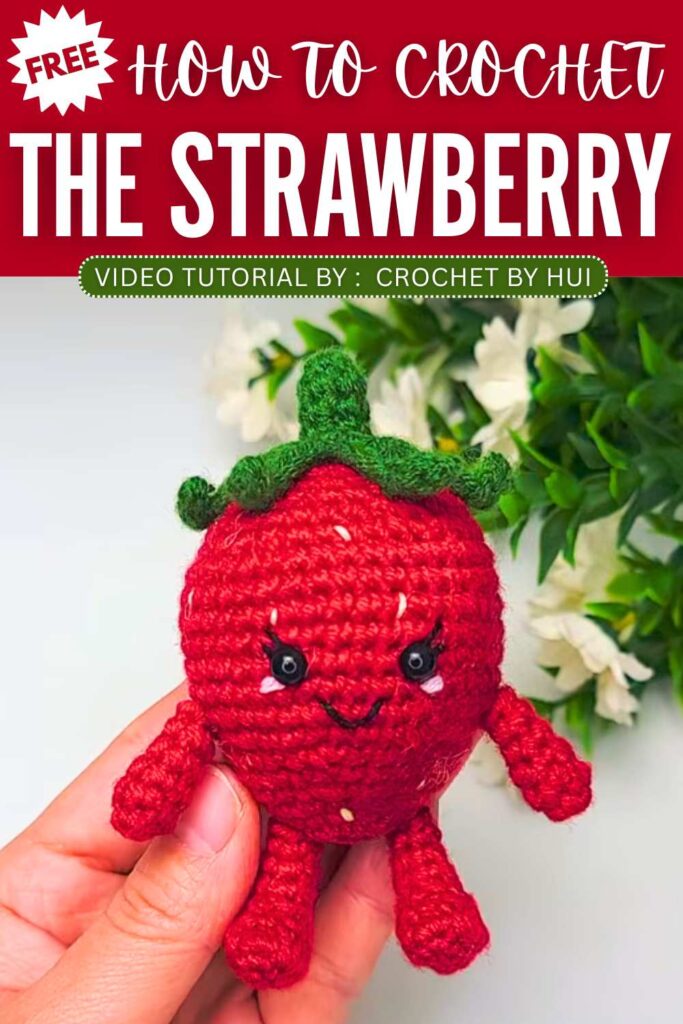
This amigurumi has a round, sweet body and a tiny, healing expression. This tutorial guides you through each step of the process at a slow pace, ensuring that even those new to crochet can successfully complete their own sweet companion.
Quick Making Guide:
Foundation: Start with a red magic ring base and increase over several rounds to form a rounded strawberry body.
Body Construction: Build the height with consistent rounds, then use decreases to taper the bottom before stuffing and closing.
Leaf Details: Crochet a green stem and a six-pointed leaf cap using a combination of chains, slip stitches, and half-double crochets.
Limbs: Create two small tubes for the hands and two slightly shaped pieces for the legs.
Seeds: Use yellow yarn to embroider small “seed” spots across the red surface of the body.
Face: Attach 6 mm safety eyes, embroider a simple black mouth, and add pink blush marks.
Assembly: Sew the green leaf cap and the limbs to the body to complete the strawberry character.
Video Pattern:
04 of 05 Crochet Fruit Charm Amigurumi
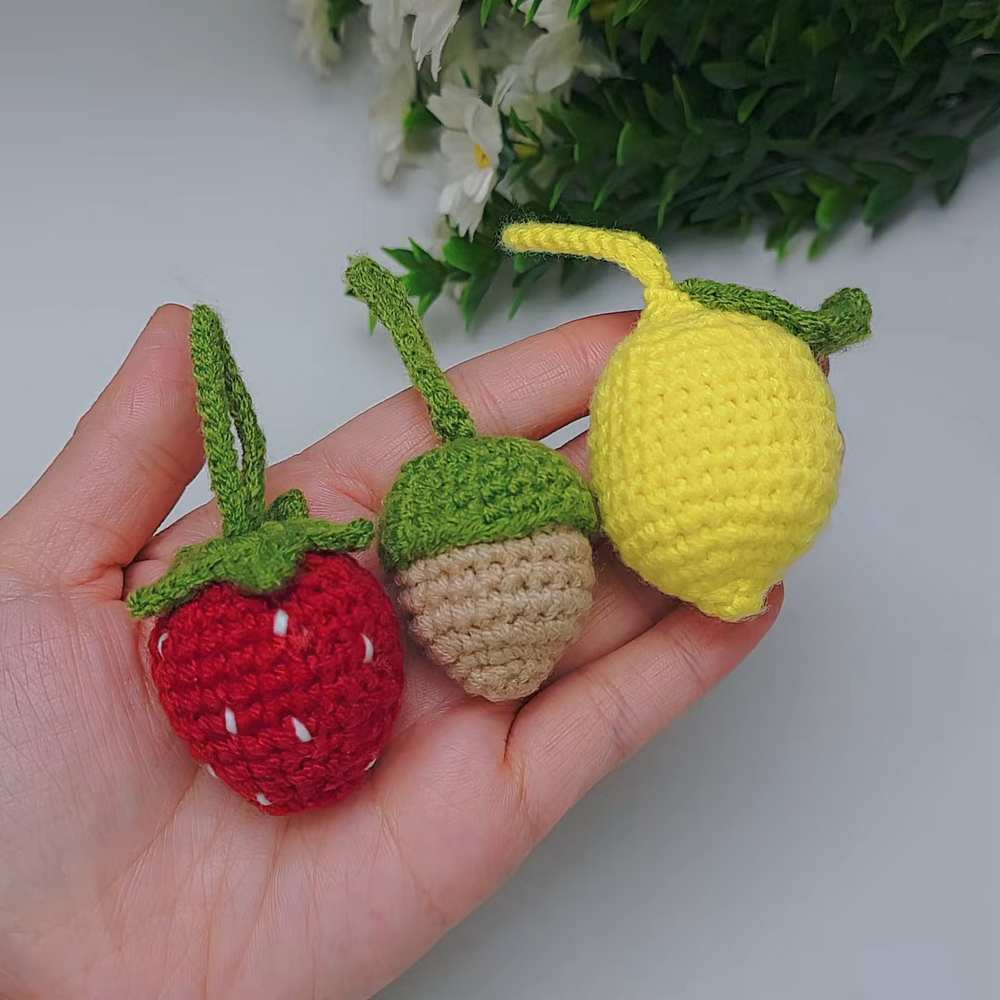
The video tutorial provided by “Crochet By Hui” covers the creation of three types of beginner-friendly fruit charms: a Strawberry, an Acorn, and a Lemon. All charms are worked in rounds starting with a magic ring.
Quick Making Guide:
Foundation: Start with a magic ring base in the primary fruit color (red for strawberry, brown for acorn, or yellow for lemon).
Body Construction: Build the fruit shape by increasing rounds to the desired width, then working several steady rounds for height.
Shaping: Taper the body using decreases to create the specific fruit profile, then stuff and close.
Topper Details: Crochet separate green leaf caps or acorn caps using chains and textured stitches.
Hanging Loop: Add a 25-chain length to the top of each fruit to create a functional charm strap.
Extra Features: For the strawberry, embroider small seed spots; for the lemon, add a larger leaf detail.
Assembly: Sew the toppers and any leaf details securely to the main fruit body to finish the charm.
Video Pattern:
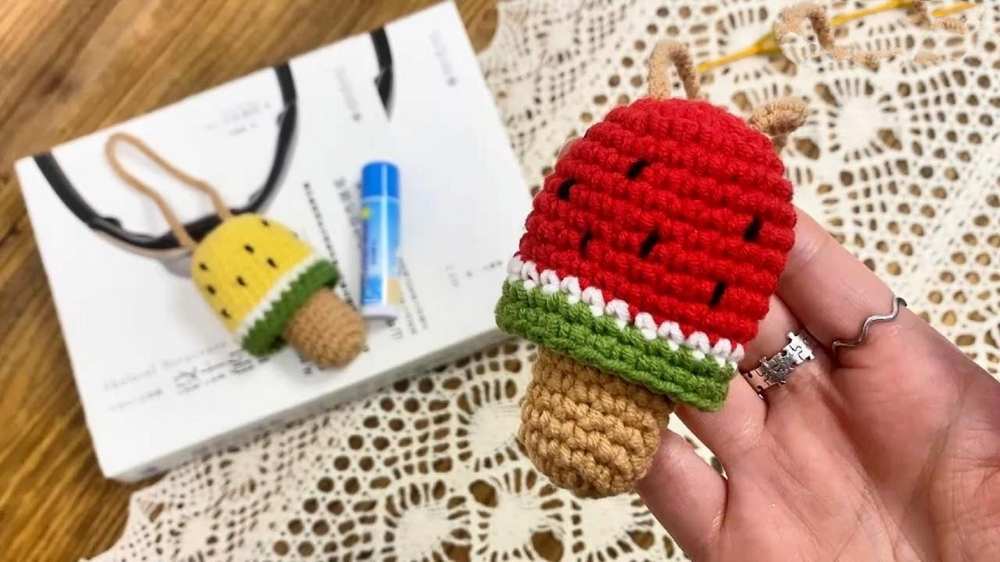
05 of 05 Crochet Watermelon Popstick Lip Balm Holder
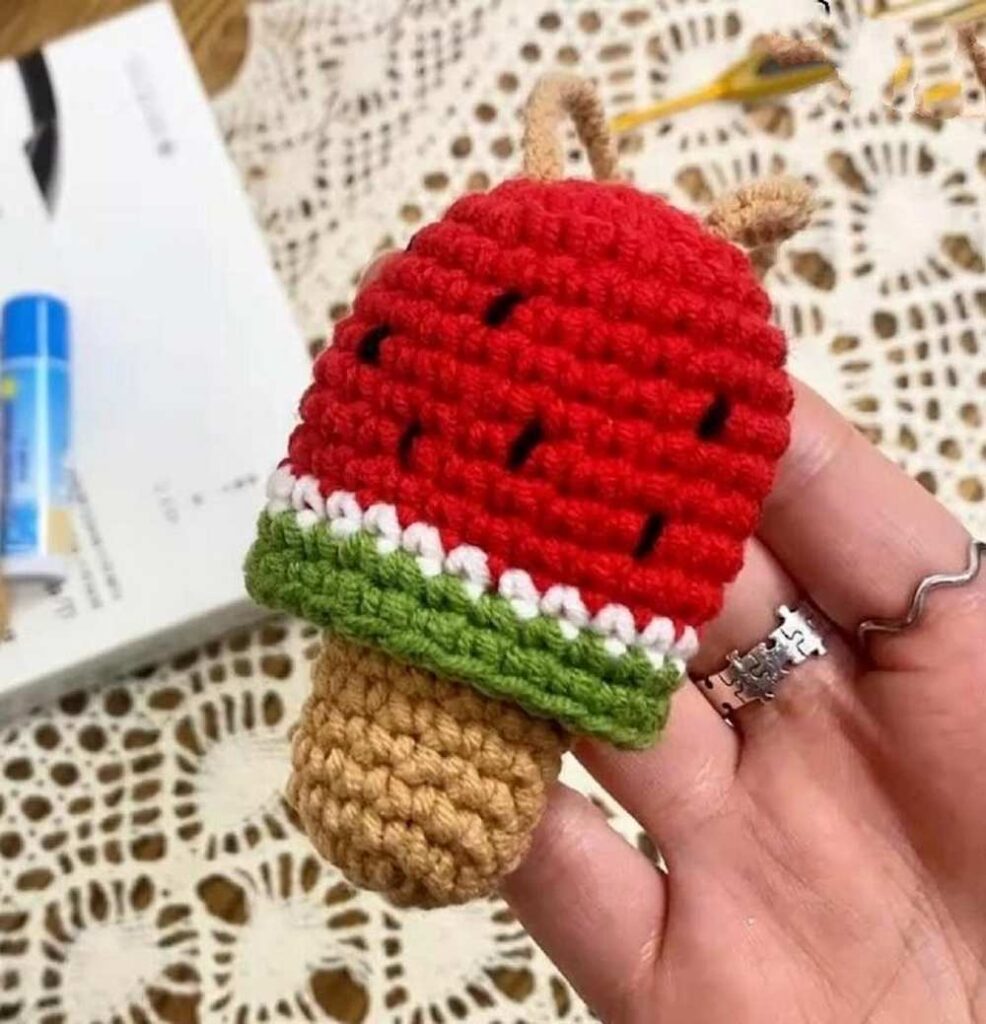
Combining a sweet summer theme with functional design, this project creates a small pouch shaped like a frozen treat to keep your lip balm secure and easy to find. It is a beginner-friendly project that uses basic stitches and bright colors to bring a touch of seasonal charm to your daily essentials.
Quick Making Guide:
Foundation: Start with a magic ring base in your chosen “flavor” color.
Body Construction: Crochet the body upward in a rectangular or rounded shape to mimic a popsicle.
Shaping: Build the height with steady rounds and use decreases at the bottom to taper the piece before stuffing and closing.
Stick Detail: Crochet a small, narrow tube in beige or light brown yarn to act as the wooden stick.
Embellishments: Add personality with safety eyes and a small embroidered smile.
Assembly: Securely sew the stick into the bottom center of the popsicle body.
Finishing: Weave in any loose ends and shape the amigurumi neatly.
Video Pattern: