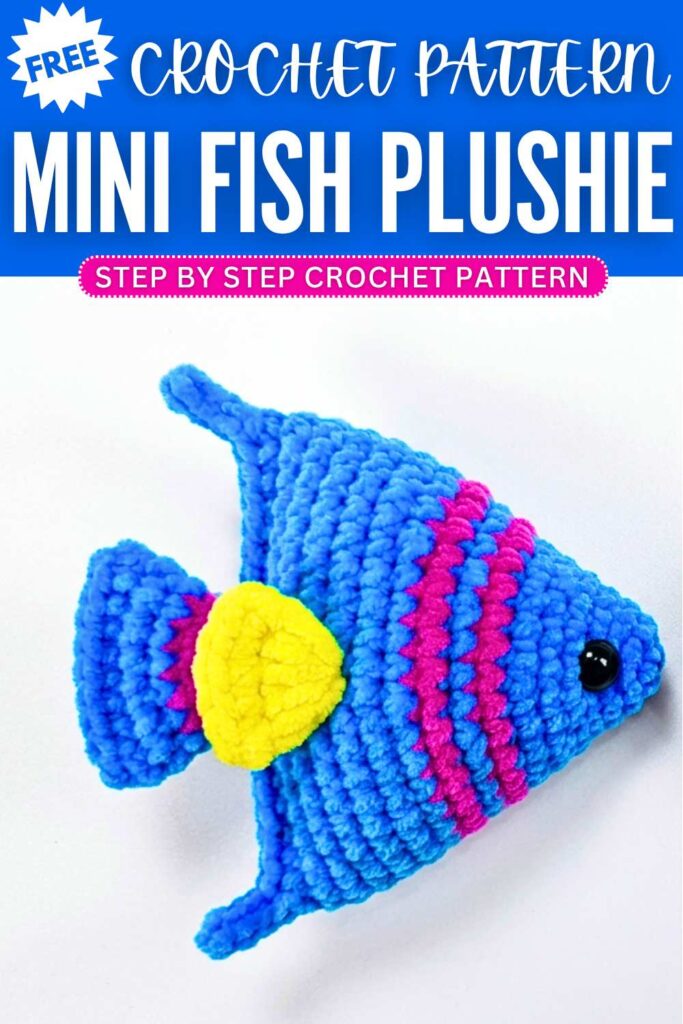
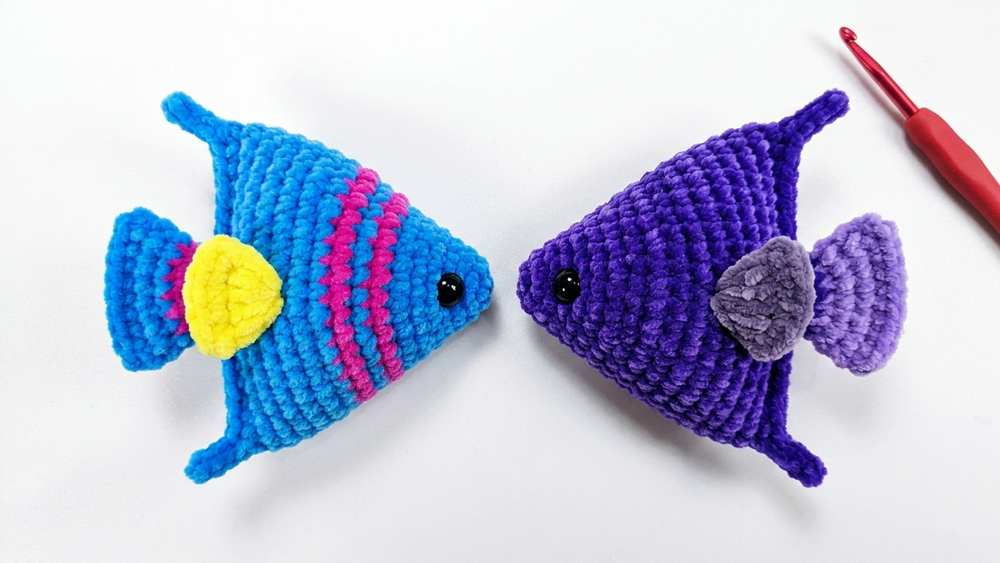
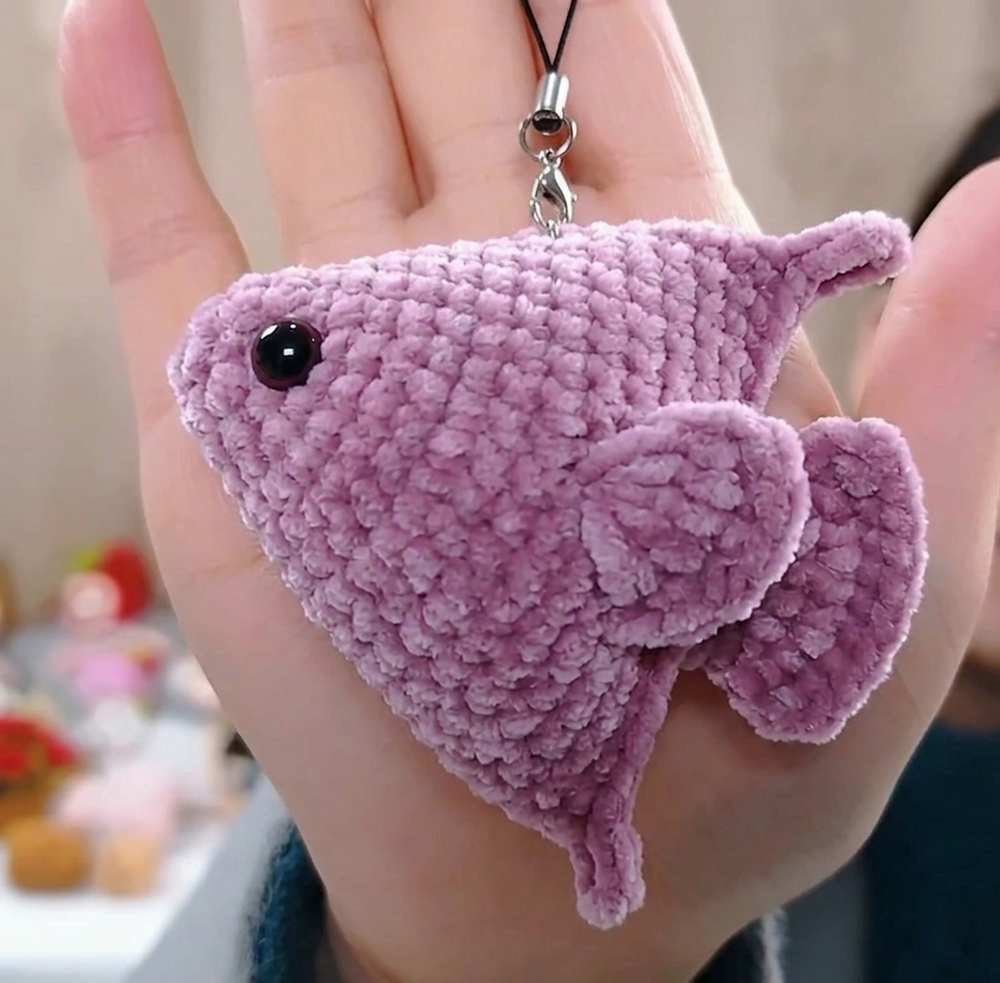
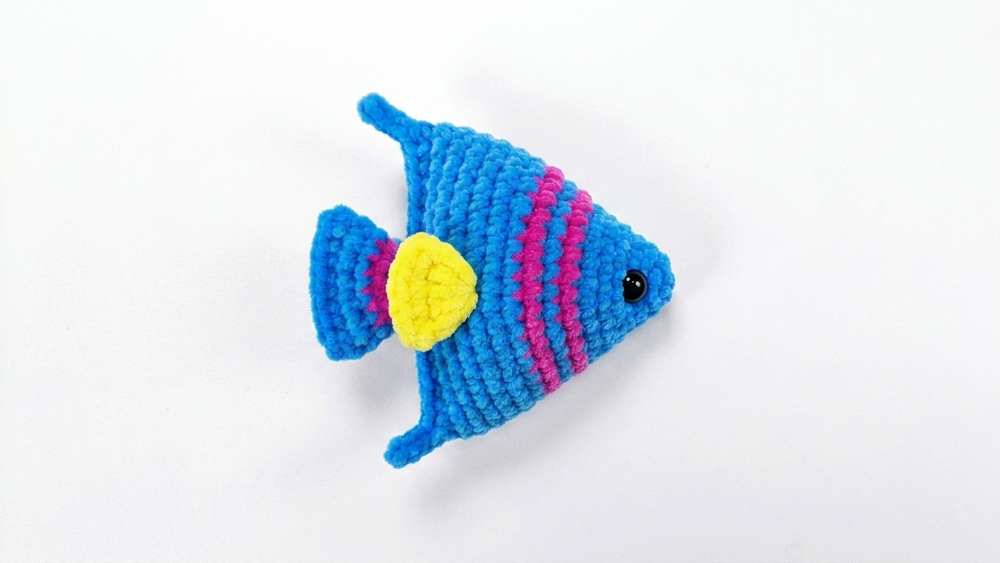
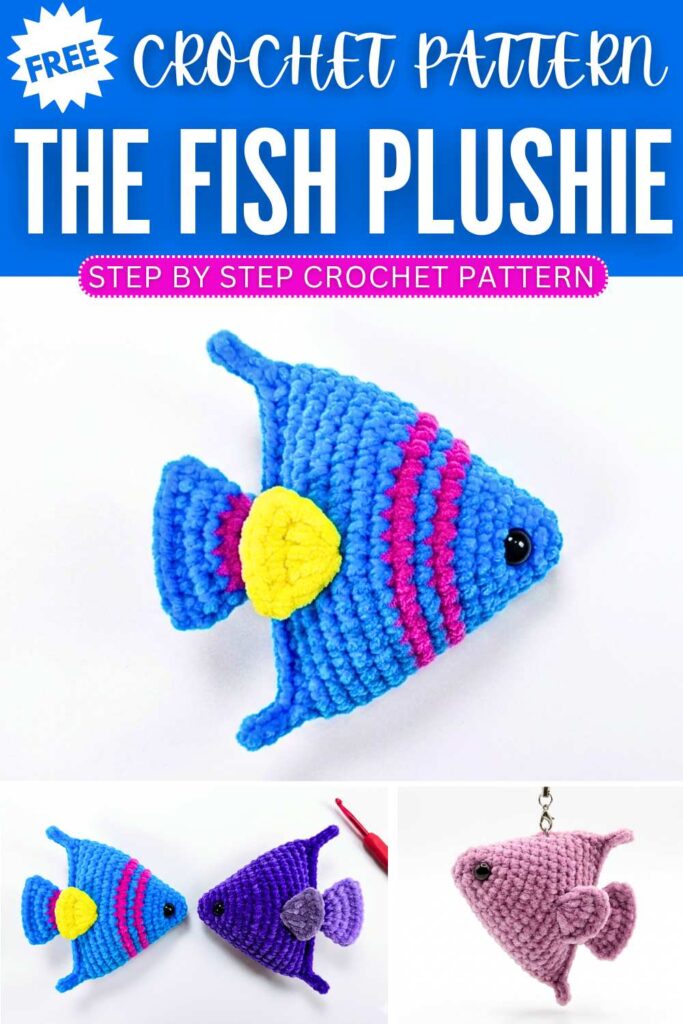
Crochet Tropical Fish Plush Keychain Pattern For Summer
Make a cute tropical fish accessory with this fun crochet project. The fish is made in separate parts like the body, tail, and fins using simple stitches and easy color changes. Step by step, you will shape the mouth, add the fins, and finish the face with small eye details. The finished fish looks bright and playful, making it perfect as a small plushie, bag charm, or handmade decoration.
Step By Step Pattern
Materials Needed
Yarn: Plush yarn in three colors: Pink, Yellow, and Blue (or your choice of a 3-color tropical palette).
Crochet Hook: 4.5 mm
Fiberfill: Stuffing material
Eyes: 1 pair of small black doll safety eyes or flat beads
Tools: Tapestry needle, scissors, sewing thread/needle for creating eye sockets, and a keychain attachment loop.
Abbreviation List
MR: Magic Ring
ch: Chain
sc: Single Crochet
inc: Single Crochet Increase (2 sc into the same stitch)
dc: Double Crochet (yarn over, insert hook, pull up loop, pull through 2 loops, pull through 2 loops)
sl st: Slip Stitch
st(s): Stitch(es)
[ ] × N: Repeat the bracketed pattern sequence N times
Part 1: Main Body & Mouth Threads
Note: The fish is worked continuously from the nose/mouth backward. Use White yarn to start.
Round 1: Using White yarn, MR, ch 1, 6 sc into the ring. Sl st to join. (6 sts)
Round 2: Ch 1, [1 sc, 1 inc] × 3, sl st to join. (9 sts)
Round 3: Ch 1, 9 sc around, sl st to join. (9 sts) Turn the small cone right-side out; these first 3 rounds form the fish’s lips.
Round 4: Ch 1, [1 sc, 1 inc, 1 sc] × 3, sl st to join. (12 sts)
Round 5: Ch 1, [1 sc, 1 inc] × 6, sl st to join. (18 sts)
Round 6: Ch 1, 18 sc around, sl st to join. (18 sts)
Round 7: Ch 1, [1 sc, 1 inc, 1 sc] × 6.
Color Change: On the very last stitch of Round 7, change color to Yellow. Sl st to join. (24 sts)
Round 8: Using Yellow yarn, ch 1, 24 sc around.
Color Change: On the last stitch of Round 8, change color to White. Sl st to join. (24 sts)
Round 9: Using White yarn, ch 1, [3 sc, 1 inc] × 6.
Color Change: On the last stitch of Round 9, change color to Yellow. Sl st to join. (30 sts)
Round 10: Using Yellow yarn, ch 1, 30 sc around.
Color Change: On the last stitch of Round 10, change color to Blue. Sl st to join. (30 sts)
Round 11: Using Blue yarn, ch 1, [2 sc, 1 inc, 2 sc] × 6, sl st to join. (36 sts)
Rounds 12–16 (5 Rounds): Ch 1, 36 sc around, sl st to join. (36 sts)
Long Ribbon Corners & Sealing the Body
Round 17 (Top Streamer): Ch 1, then ch 5. Starting in the 2nd ch from hook, work 4 sl st down the back ridge of the chain.
Stuff the body section firmly with fiberfill.
Flatten the opening of the body by pressing the top and bottom stitch edges together.
Insert your hook through the first stitch and its matching opposite stitch on the flattened layer to begin closing it. Work 17 sc evenly across the edge to seal the fish body shut.
Bottom Streamer: Once the 17 closing sc are complete, ch 5. Starting in the 2nd ch from hook, work 4 sl st down the back ridge of the chain back toward the body. Sl st to the main body to lock it. Fasten off and weave in the ends.
Part 2: Tail Fin
The tail is constructed by working directly into the middle stitches of the body’s flattened edge.
Locate the middle 3 stitches along the 17 sc row of the sealed body edge (roughly counting in to the 8th stitch).
Attach White yarn into the front loop only (the loop closer to you) of the 8th stitch. Ch 1, then work 3 sc into the front loops of those 3 middle stitches.
Pivot the body around. Locate the remaining unworked back loops of those exact same 3 stitches on the opposite side. Work 3 sc into them. Sl st to the first sc to join. (You now have a miniature foundation ring of 6 stitches).
Tail Round 2: Ch 1, work 6 inc around.
Color Change: On the last stitch, complete the pull-through using Blue yarn. Sl st to join. (12 sts)
Tail Round 3: Using Blue yarn, ch 1, 12 sc around, sl st to join. (12 sts)
Tail Round 4: Ch 1, [1 sc, 1 inc] × 6, sl st to join. (18 sts)
Tail Round 5 (Sealing the Fin): Ch 1. Flatten the tail fin opening completely. Insert hook through both opposite layers at once and work 9 sc across to seal the fin flat. Fasten off and hide the yarn tails.
Part 3: Side Fins (Make 2)
Side fins are worked directly on the sides of the fish’s body near Round 14.
Align your hook horizontally along the middle side of the fish near Round 14 (in line with the tail). Attach Blue yarn directly to a stitch surface.
Ch 3. In that exact same stitch space, work 5 dc.
Ch 1, turn your work. Work 6 sc evenly across the stitches of the dc shell.
Fasten off, leaving a short tail. Weave your yarn ends cleanly back inside the fish body.
Repeat on the exact opposite side of the body for the second fin.
Part 4: Indenting the Eyes & Final Assembly
Sinking the Eye Sockets: Thread a tapestry needle with a strong piece of matching yarn or sewing thread. Insert the needle through the head where the first eye should go (around Rounds 3–4), push it straight through the head, and exit out the opposite eye position. Pull the thread tight to squeeze the head inward, creating an indented eye socket look. Knot the threads together tightly to hold the indent and tuck the yarn tails inside the head.
Attaching Eyes: Position and glue your black eye beads/safety eyes directly into these two indented sockets using clear-drying craft glue.
Attach your jump ring and keychain loop through the top center ridge of the fish. Your cute tropical fish charm is complete!
You may also like

Free Crochet Clawn Nemo Fish Keychain Pattern

Free Crochet Amigurumi Cat Holding Fish Pattern
Crochet Lantern Fish Plushie Pattern For Summer

Crochet Fish Pouch Bag Pattern For Summer Outgoings
Free Crochet Halloween Witch Hat & Fish Bone Toy for Black Cat