
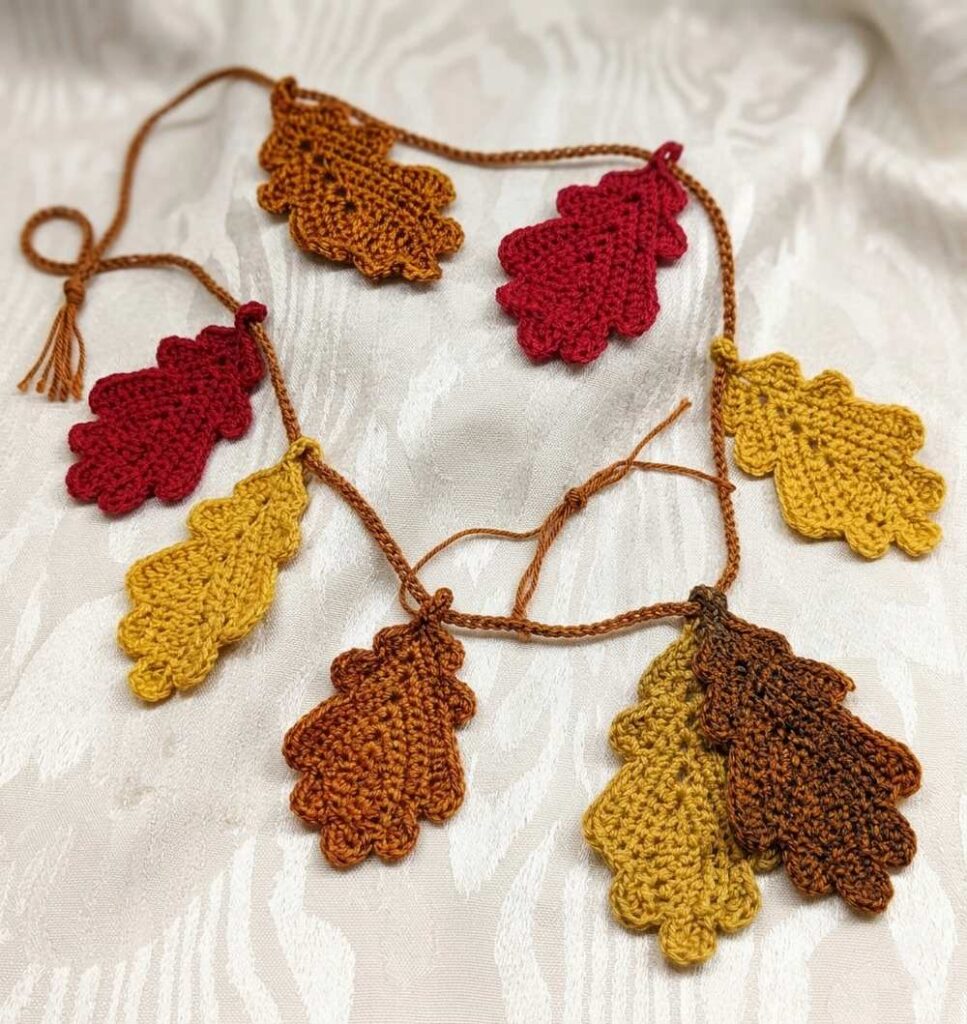
Free Crochet Oak Leaf Autumn Garland Pattern for Beginners
Learn how to crochet an elegant oak leaf garland for your mantle or porch coffee table decoration, following this FREE written pattern. The important part of is to learn how to crochet an oak leaf and that’s what you will learn crocheting in detail in this lleaf pattern. You can crochet oak leaves in different fall shades such as the orange, yellow, red and green and arrange them randomly on the crochet garland.
Crochet Oak Leaf Autumn Garland Pattern
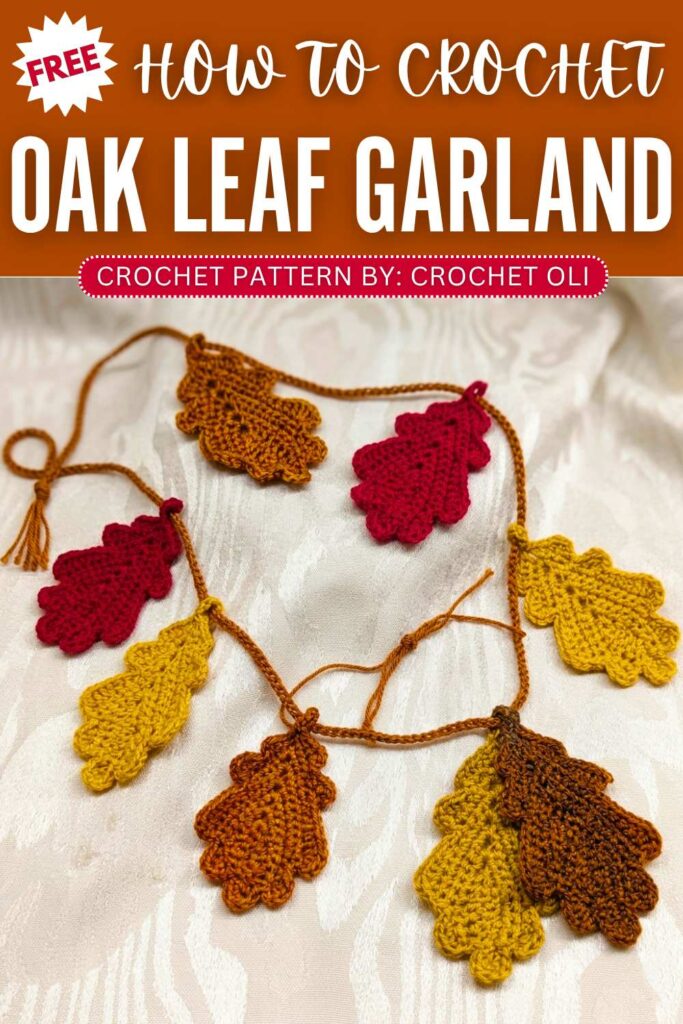
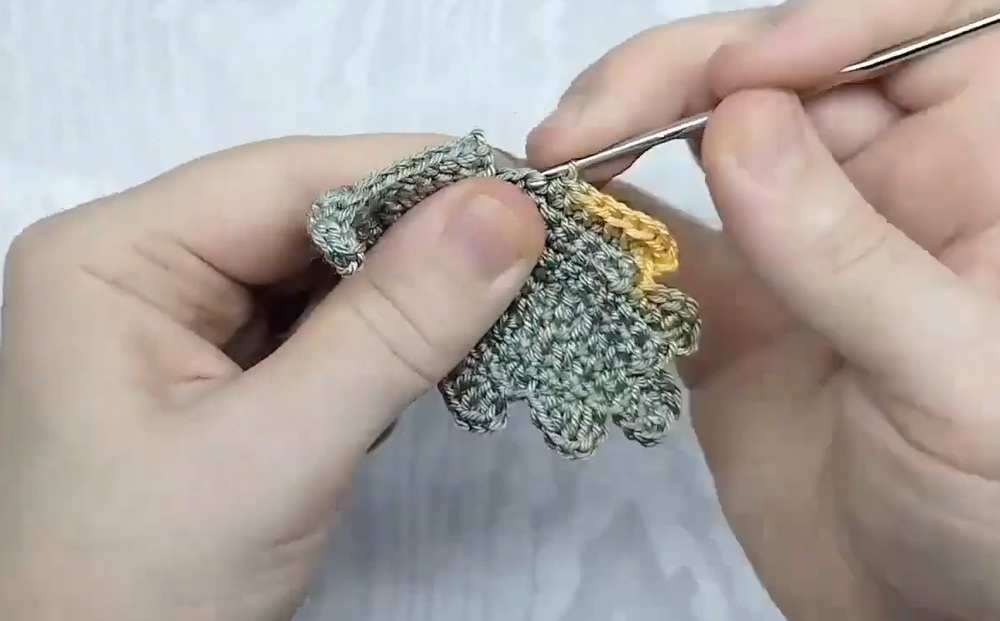
We will use the chain stitch strand for this crochet fall garland unlike those projects I shared last year. Each crochet oak leaf will only take 10 minutes to complete. You will also learn how to crochet hanging loops for them so the look of the leaf is not compromised when the garland will be hung. Let’s get started to the pattern.
How to Crochet Autumn Leaf Garland
Materials
DK cotton Yarn (in autumn colors)
1.9 mm Crochet hook
Scissors
Tapestry needle
Stitch Abbreviations
ch: Chain
sl st: Slip stitch
x: Single crochet (UK double crochet)
v: Increase (2 single crochet in the same stitch)
T: Half double crochet (UK half treble crochet)
干: Double crochet (UK treble crochet)
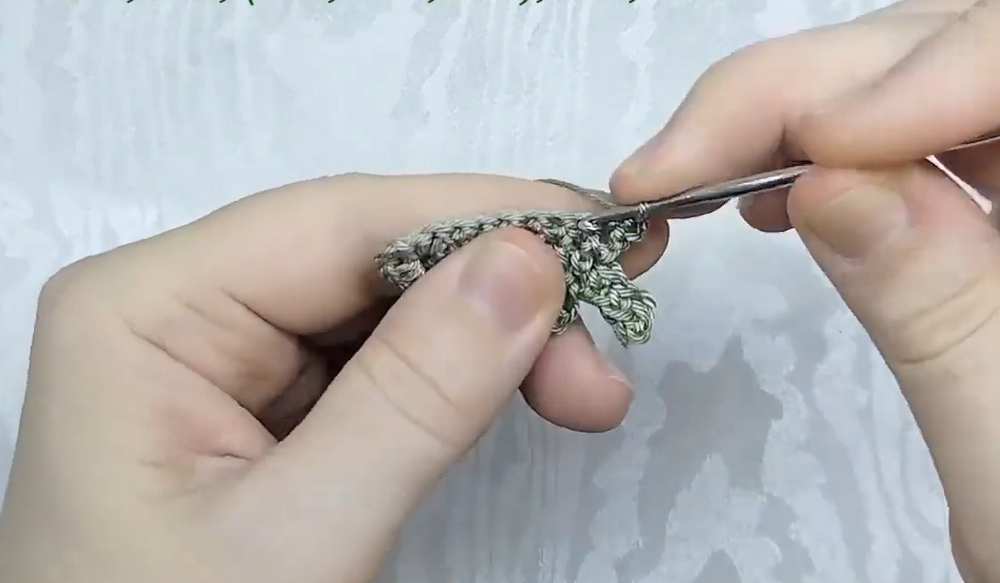
Oak Leaf Pattern
The Base Structure
Base Chain: Ch 10.
Row 1:
Start in 2nd ch from hook: 4 x in back loops.
1 T in next st.
2 干 in each of the next 2 sts.
1 T.
In the last st, work: 2 x, ch 3, 2 x (top arch).
Working down the opposite side of the chain: 1 T, 2 干 in each of the next 2 sts, 1 T, 1 x.
Leave the last 3 sts unworked. Turn.
Row 2:
Ch 1.
7 x.
In the ch-3 arch, work: 2 干, ch 3, 2 x.
7 x down the side.
Leave 3 sts unworked. Turn.
Row 3:
Ch 1.
9 x.
In the ch-3 arch, work: 2 干, ch 3, 2 干.
6 x down the side.
Leave 3 sts unworked. Turn.
Row 4:
Ch 1.
8 x.
In the ch-3 arch, work: 2 干, ch 3, 2 干.
8 x down the side.
Leave 3 sts unworked. Turn.
Row 5:
Ch 1.
10 x.
In the top arch, work: 2 x, ch 3, 2 x.
3 x.
Skip the next 7 sts. Turn.
Row 6:
Ch 1.
5 x.
In the top arch, work: 2 x, ch 3, 2 x.
5 x.
Leave 7 sts unworked. Turn.
Row 7:
Ch 1.
7 x.
Into the top arch, work: 1 x.
Ch 5 (for the stem).
Start in 2nd ch from hook: 4 x down the stem.
Work 1 more x into the top arch.
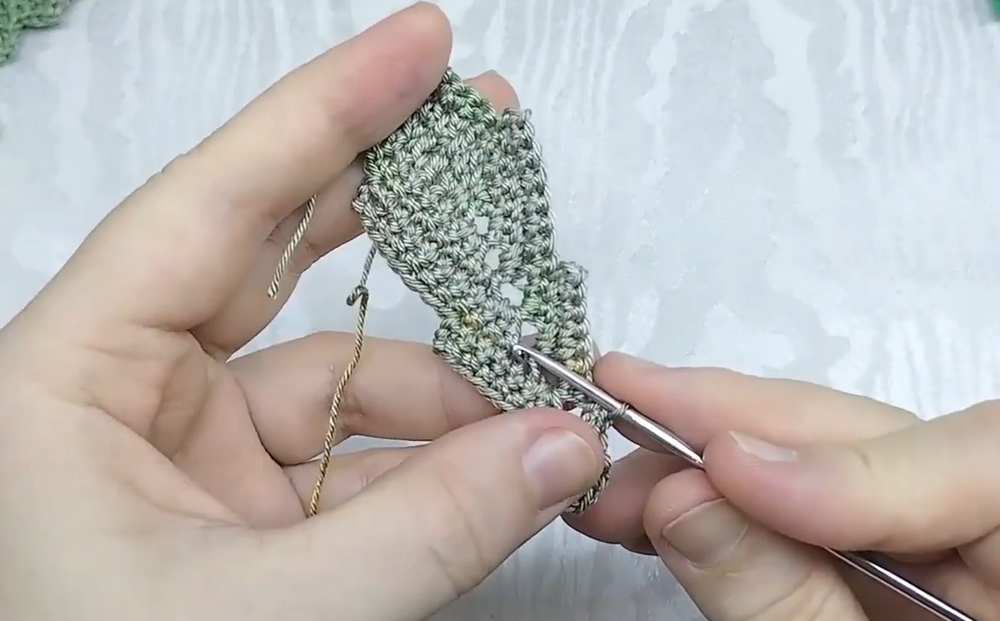
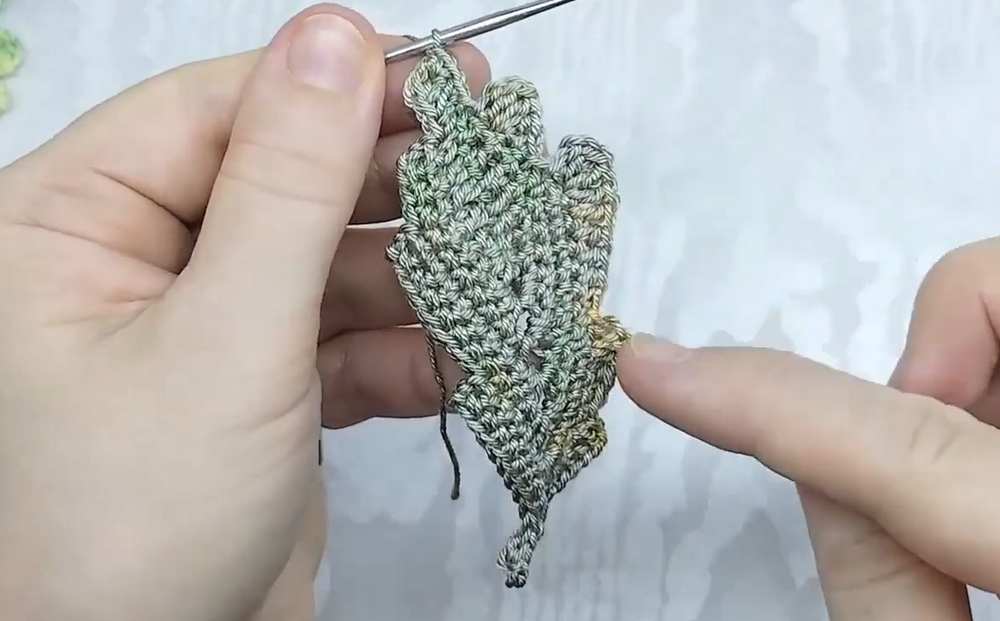
Creating the Lobes
Work around the jagged outer edges to round out the oak leaf shape.
Lobe 1: 1 x, 1 T, 2 T in next st, ch 1, 1 sl st in same st.
Lobe 2: 1 sl st, 1 x, 1 T, 2 干 in next st, ch 2, 1 sl st in same st.
Lobe 3 (Go down 2 rows): 1 sl st, 1 x, 3 T, 1 干, 3 干 in last st, ch 2, 1 sl st in same st.
Lobe 4 (Go down 2 rows): 1 sl st, 1 x, 1 T, 2 干, ch 2, 1 sl st in same st.
Lobe 5 (Leaf Tip): 1 sl st, 1 x, 1 v. Mirror on the opposite side of the tip: 1 v, 1 x, 1 sl st.
Lobe 6 (Go up 2 rows): 1 sl st, ch 2, 2 T in same st, 1 T, 1 x, 1 sl st.
Lobe 7 (Go up 2 rows): 1 sl st, ch 2, 3 干 in same st, 1 干, 3 T, 1 x, 1 sl st.
Lobe 8 (Go up 2 rows): 1 sl st, ch 2, 2 干 in same st, 1 T, 1 x, 1 sl st.
Lobe 9: 1 sl st, ch 1, 2 T in same st, 1 T, 1 x, 1 sl st.
Finishing
Fasten off, pull the yarn through the final loop, and weave in all loose ends securely.
Bunting Loop
Insert the hook in the first stitch to the top tip of the leaf. Make 4 chains and slip stitch the the same chain stitch. (or you can just pass the string through the first stitch if you are gonna use a crochet string).
Bunting String
- Row 1: Ch 100 or the length of the string you want.
Assembly:
Pass the oak leaves through the chain stitch cord and secure each leaf by glue or using the sewing needle.
Oak Leaf Tutorial Pattern