
Sogio: Crochet One-Eyed Buddy Monster Plushie for Halloween
Looking for the fastest crochet monster plushie for Halloween that can still be called the cutest? Learn how to crochet these one-eyed buddy monster plushies with a FREE written pattern and a tutorial for Italians as well. You can crochet this monster plush in 7 different colors including the popular Monster Inc’s Mike version, too. These are also low-sew and beginner-friendly.
Crochet One-Eyed Buddy Monster Plushie
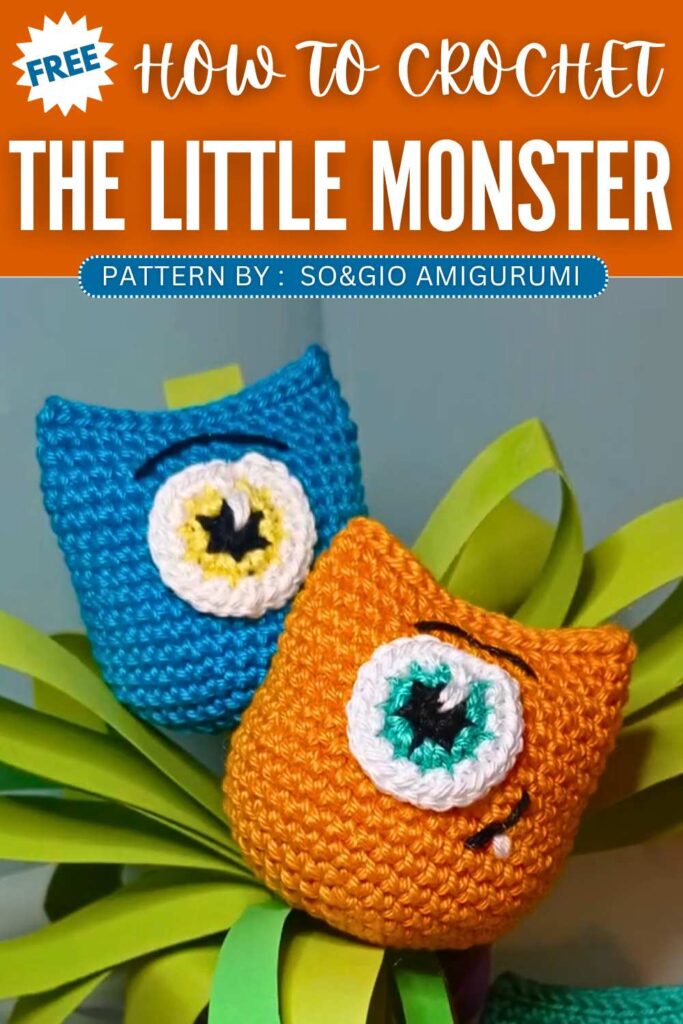
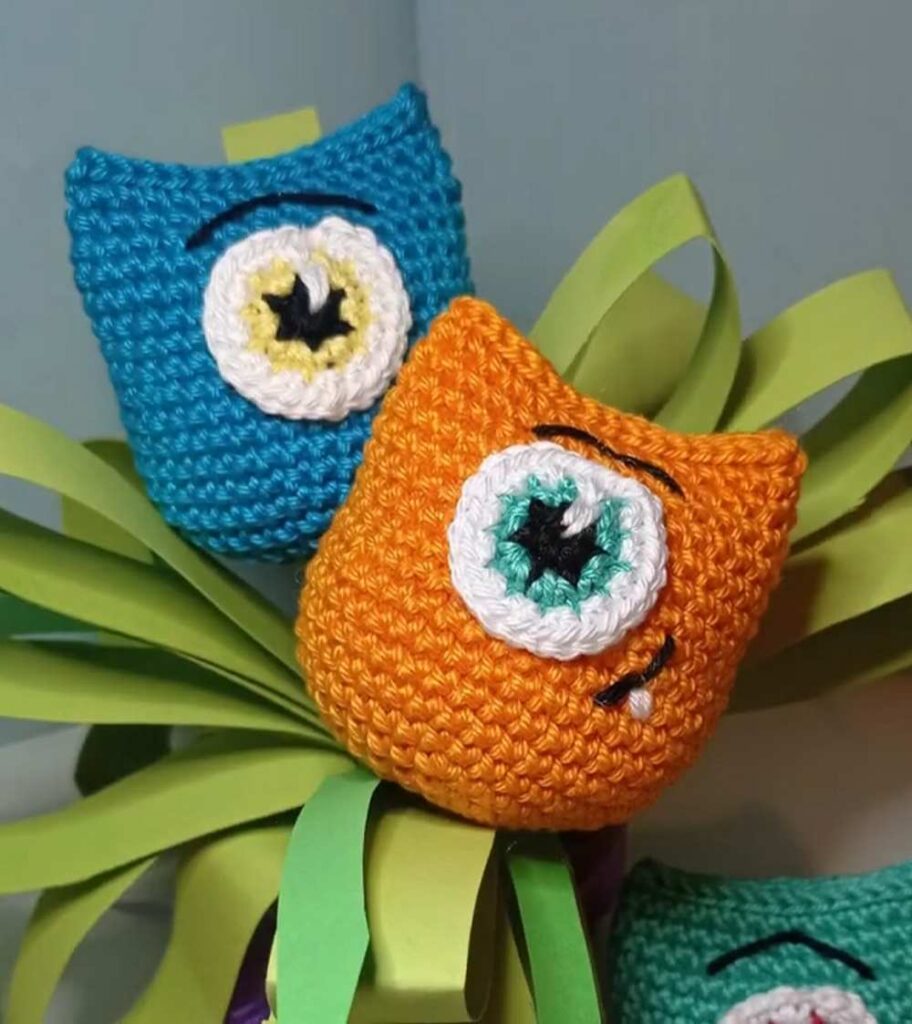
Be sure to crochet a set of these kawaii monsters this Halloween. In the demonstration, you will learn the orange version of this one-eyed buddy monster but red is my favorite. With the teeth, eyebrow and mouth embroidery, you will love these crochet monster plushies.
About the designer: The honored designer behind is @sogio – I have loved all crochet amigurumi and the fall & Halloween amigurumi in particular! If you are an Italian crocheter, be sure to support her!
How to Crochet Monster Buddies Amigurumi Plushies
This adorable amigurumi project features a quick and easy little monster pattern! Perfect for beginners and advanced crocheters alike, these miniature creatures are worked in continuous rounds using bright, vibrant cotton yarn.
You will start by crocheting the main body (the head), stuffing it as you go, and closing the top flat to give it its distinctive horn-like corners.
Then, you’ll crochet a cute, multi-colored eye to attach to the center, finishing it off with fun embroidered details like a little mouth, a single tooth, and expressive eyebrows. They make great keychain charms, gifts, or cute desk companions!
Materials Needed
Main Yarn: 100% Cotton Yarn (such as Filato Fiocco) in your choice of bright color for the monster’s body.
Contrast Yarn: Lightweight yarn (such as Filato Cablè) in Black (for the pupil/mouth), White (for the eye/tooth), and Green or Blue (for the iris).
Crochet Hook: 3.00 mm
Yarn needle (tapestry needle) for sewing and embroidery
Stitch markers
Toy stuffing (fiberfill)
Abbreviations (US Terms)
MR: Magic Ring
sc: single crochet
inc: increase (2 sc in the same stitch)
dec: decrease (sc 2 stitches together)
sl st: slip stitch
hdc: half double crochet
dc: double crochet
st(s): stitch(es)
rnd(s): round(s)
Pattern Instructions
Head / Body
(Use your main color yarn. Work in continuous rounds.)
Rnd 1: 6 sc in a Magic Ring [6 sts]
Rnd 2: 6 inc [12 sts]
Rnd 3: (1 sc, 1 inc) repeat 6 times [18 sts]
Rnd 4: (2 sc, 1 inc) repeat 6 times [24 sts]
Rnd 5: (3 sc, 1 inc) repeat 6 times [30 sts]
Rnd 6: (4 sc, 1 inc) repeat 6 times [36 sts]
Rnd 7: (5 sc, 1 inc) repeat 6 times [42 sts]
Rnds 8 to 12: 1 sc in each st around (5 rounds total) [42 sts]
Rnd 13: (5 sc, 1 dec) repeat 6 times [36 sts]
Rnds 14 to 18: 1 sc in each st around (5 rounds total) [36 sts]
Rnd 19: (4 sc, 1 dec) repeat 6 times [30 sts]
Rnds 20 to 21: 1 sc in each st around (2 rounds total) [30 sts]
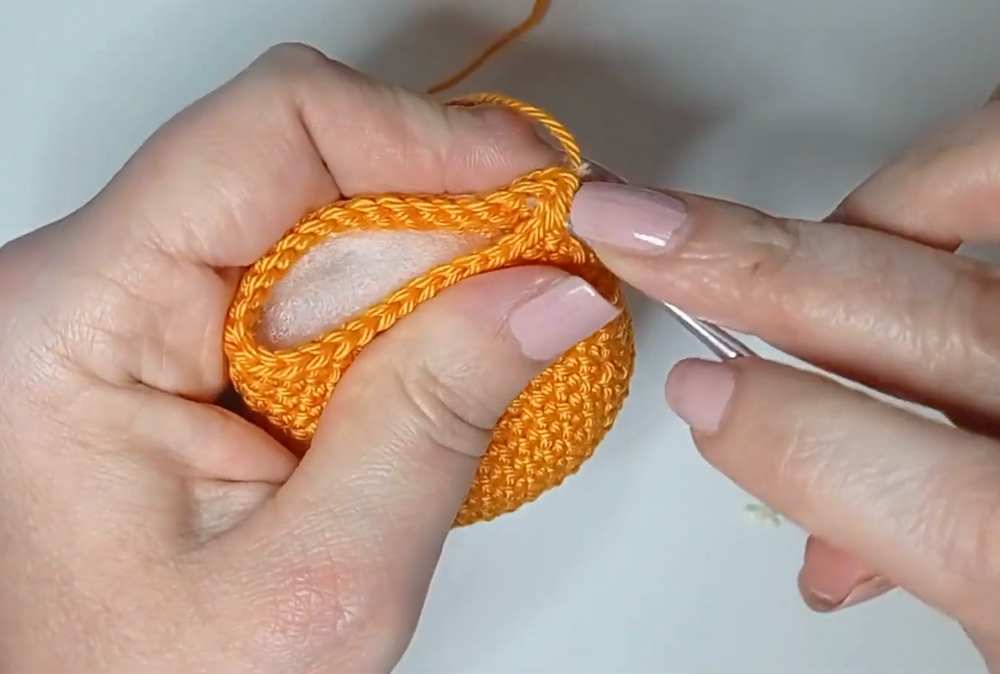
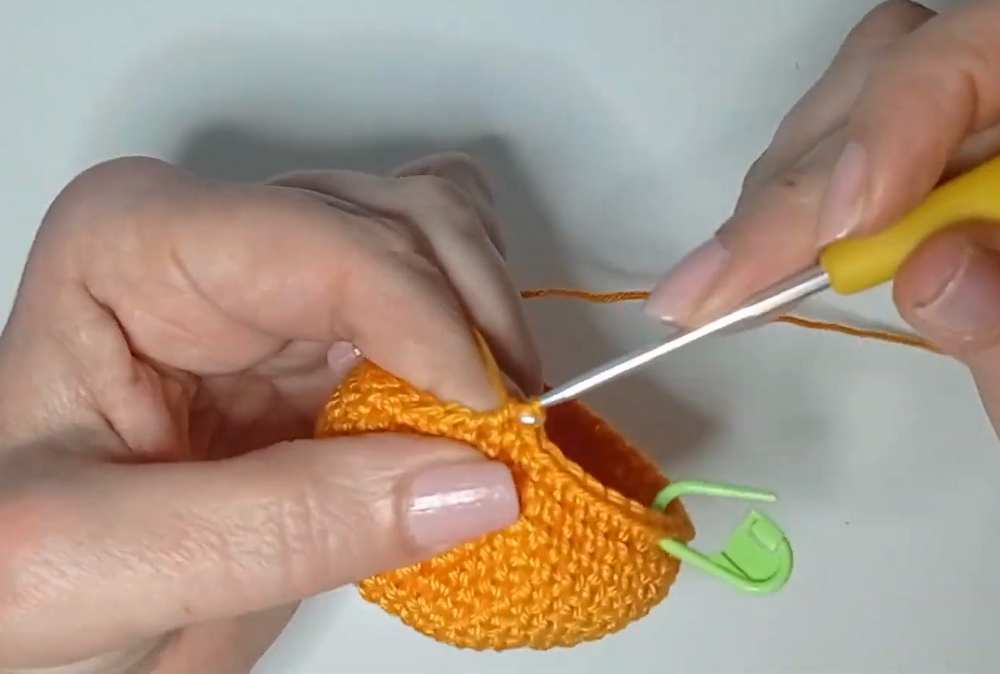
Closing the Body: Stuff the body firmly with fiberfill. Pinch the top opening flat so the stitches on both sides line up. Close the opening by working 15 sl st through both layers all the way across the top. Fasten off and weave in the loose ends.
The Eye
(Start with Black yarn)
Rnd 1: 6 sc in a Magic Ring [6 sts] (Change color to Green, or your chosen iris color)
Rnd 2: 6 inc [12 sts] (Change color to White)
Rnd 3: 12 inc [24 sts]
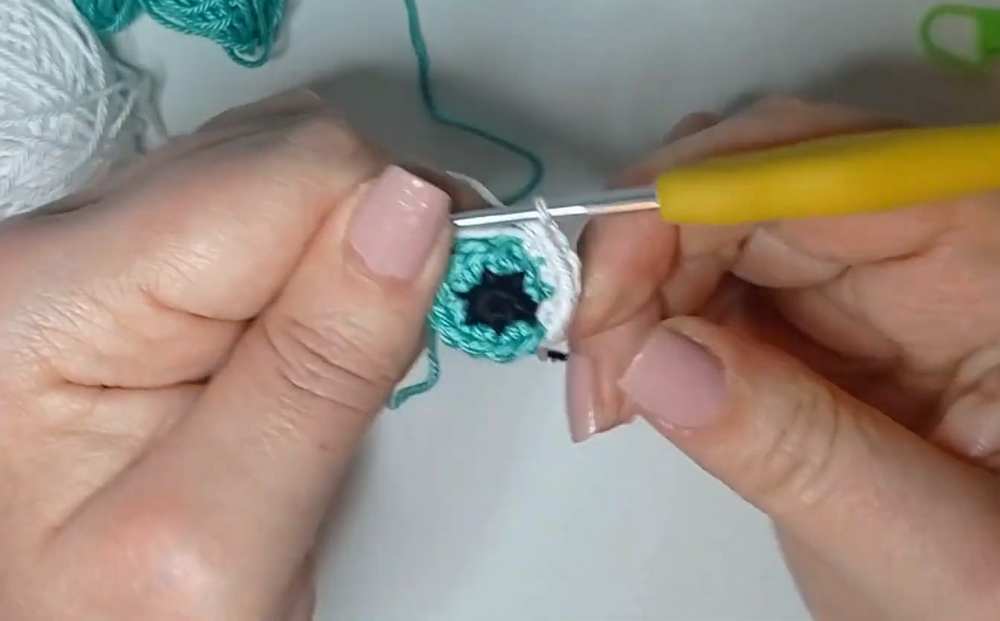
Fasten off, leaving a long white tail for sewing. Using a tiny bit of white yarn, embroider a small “light point” (catchlight) in the upper corner of the black pupil to bring the eye to life.
Assembly & Finishing Details
Attach the Eye: Position the eye right in the center of the monster’s body. You can either sew it on using the long white yarn tail or glue it in place.
Facial Features: Thread your needle with black yarn and embroider a fun, slanted eyebrow above the eye, and a quirky little mouth below it.
The Tooth: Using a bit of white yarn, embroider a small square tooth poking out from the mouth.
Video Tutorial to Learn Even Better