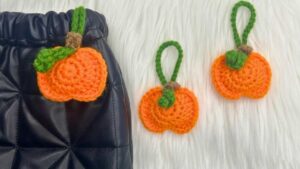
Free Crochet Stack of Pumpkin Keychain Amigurumi Pattern for Fall
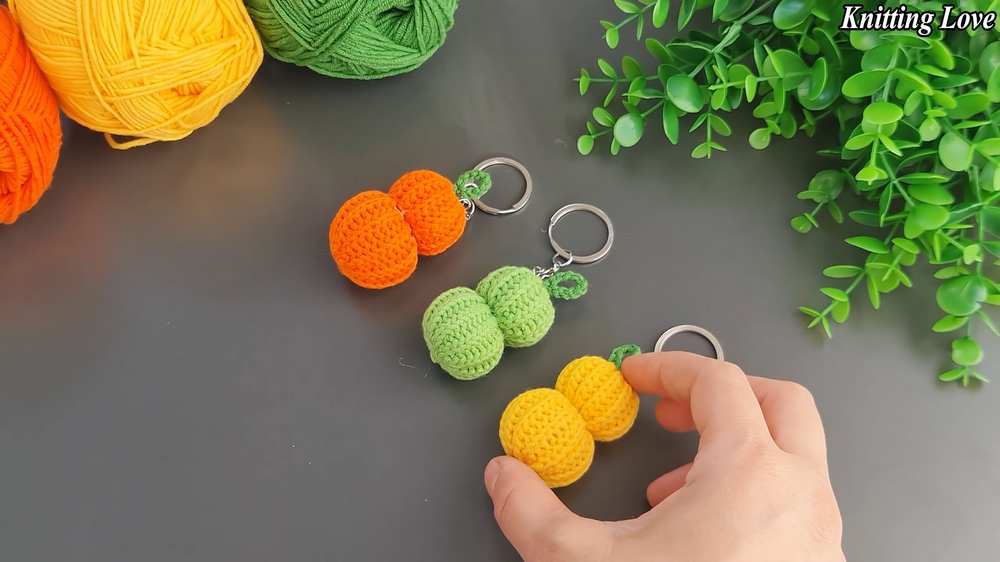
Looking for the fastest crochet pumpkin pattern to sell at fall craft fairs? Learn how to crochet this miniature Stack of Pumpkin Keychain out of a small slip stitch rectangle following this FREE tutorial. This is again a ribbed fall pumpkin amigurumi that you can crochet in orange, light green or yellow.
Stack of Pumpkin Keychain Amigurumi
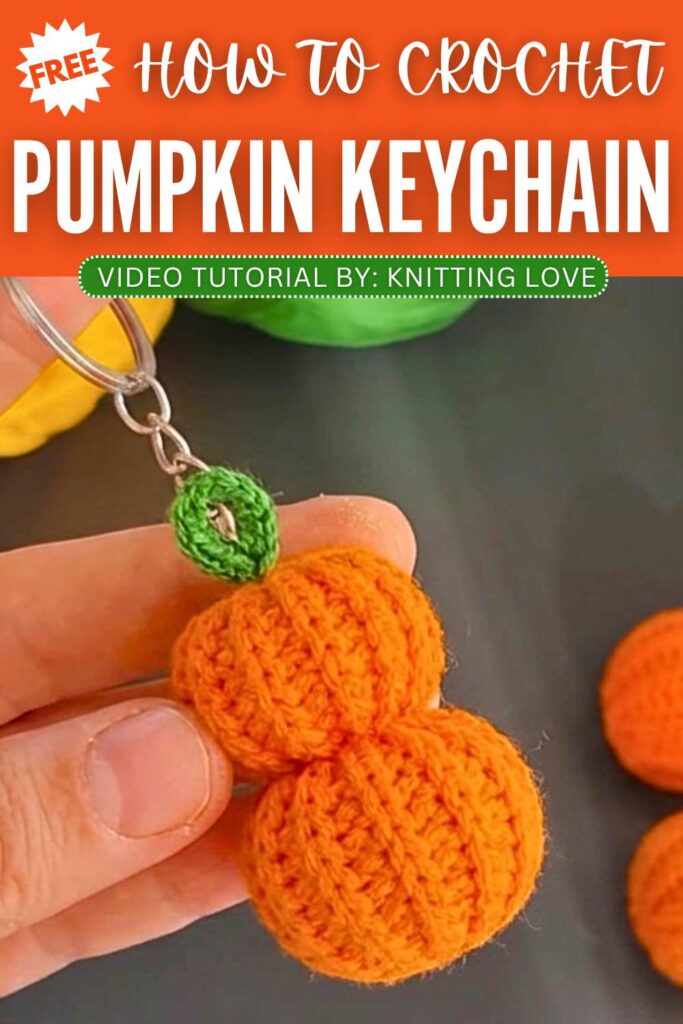
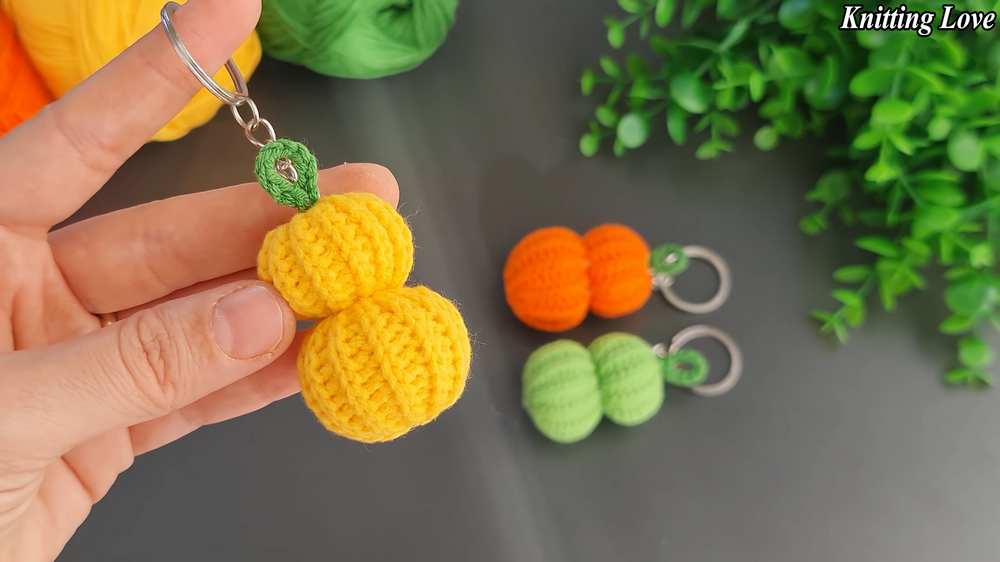
It also has a small hanging loop with it that you can crochet to use it as a charm for your fall bag. It is so small and quick that you can easily crochet it within 20 minutes.
The top pumpkin is small while the bottom pumpkin is bigger that makes it a UNIQUE pumpkin. So, continue reading till the end to crochet it from a written as well the video pattern for absolute beginners.
About the Designer: The designer of this amigurumi pumpkin project is @Knittinglov – I have called her “Quality and Vibrancy” queen in both knitting and crocheting as her projects always have a bright color combo. Her crochet ideas include tons of crochet fall patterns from baskets to amigurumi. We will provide many of her pumpkin tutorials, here.
Crochet Mini Pumpkin Amigurumi Tutorial
Skill Level: Beginner.
Why: You don’t have to to change yarn colors. But be sure you can identify the BLO of the stitch and can work with a stitch as small and tight as the stitch stitch. Also, you should be good at working with the sewing needle.
Quick Guides for Stitches
Here are the quick guides for the stitches, using your abbreviations:
Ch (Chain): Make a slip knot on your hook. Yarn over and pull the yarn through the loop on your hook.
- BLO – Work in the Back Loop Only of the Stitch
Slst (Slip a stitch): Insert your hook into the stitch. Yarn over and pull the yarn through the stitch and through the loop on your hook at the same time.
Supplies Needed
Following are the supplies, you need to gather for crocheting this fall pumpkin amigurumi:
- Cotton yarn 4ply or 5ply in orange and white
- 2.20 mm Crochet hook as used by the tutor
- Colors: Orange
- Sewing Needle
- Keyring
Tip: You can use the Milk Cotton yarn
Fabric Pattern
Since we have to crochet a classical slip stitch ribbed pattern, here is how you will do it:
- Attach slip knot and make 14 chains.
- R1: Slip stitch crochet in each chain starting from the 2nd chain from the hook (13). Turn the work over.
- R2: Ch 1. In the BLO, work Slip stitch crochet in each chain starting from the first slip stitch.
- R3 – 12: Repeat the slip stitch pattern of the R2.
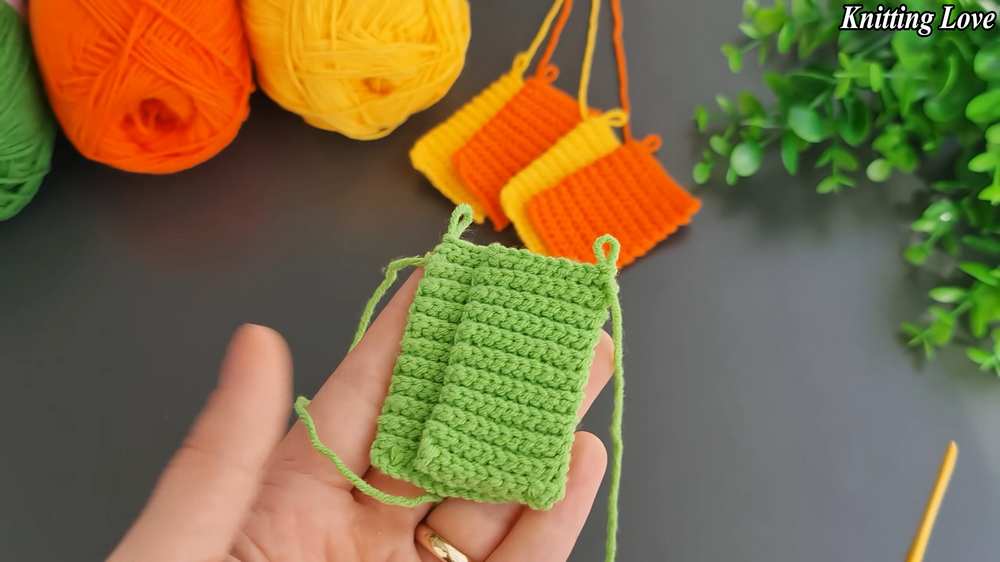
Crochet two slip stitch fabrics of the same size! To close the fabric to make a cylinder so you can make a pumpkin, just slip stitch sideways. Now, learn the remaining pattern from the video tutorial below as you can learn better through that!
Assembly and the Loop Pattern
Be patient while the tutorial is loading to learn in a better way than the pattern:
You may also like
Crafty Crochet Castle: How to Crochet A Pumpkin Charm for Fall out of Pumpkin Appliques

5 Variations of Crochet Top Patterns for Summer

How to Crochet Popular Types of Fingerless Gloves

15 Free Crochet Lily of The Valley Tutorials for Spring
How to Crochet Pair of Couple Cat Dolls for Gifting