
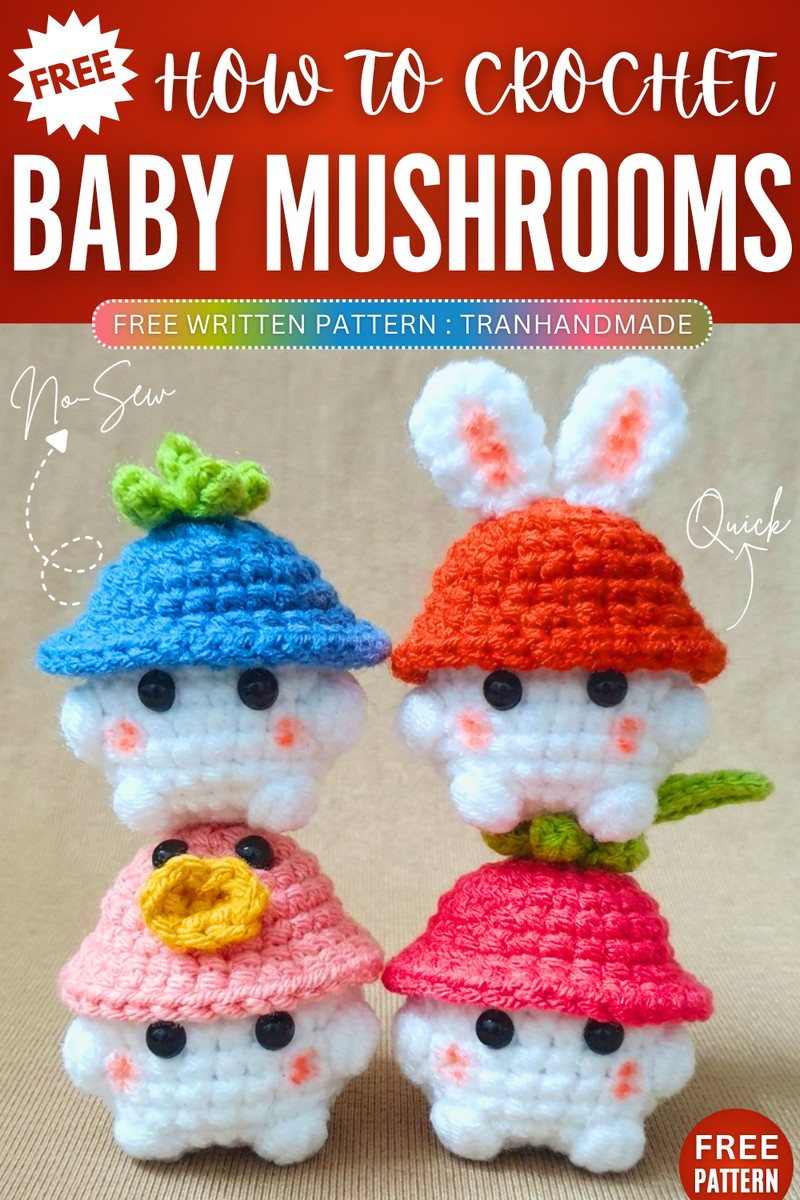
Free Crochet 4-in-1 Baby Mushrooms Pattern for Fall & Summer
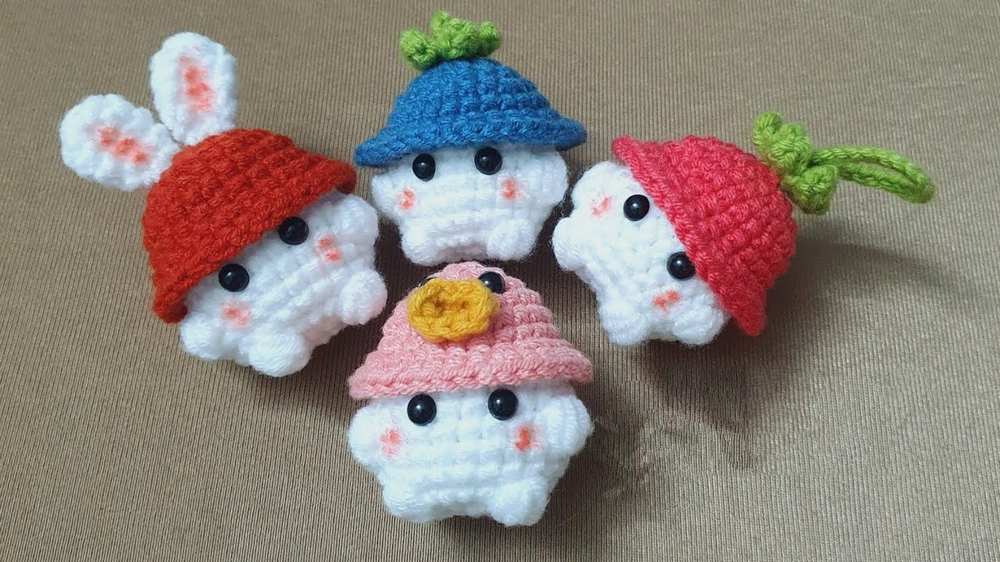
Last year’s crochet “baby mushroom variations” series had been a lot fun. Now, let’s crochet these no-sew crochet baby mushroom variations with a 4-in-1 tutorial for absolute beginners. We shall crochet a mushroom with bunny ears, a dragon fruit mushroom, a blueberry mushroom and lastly a duck mushroom. The base pattern for crocheting all these mushroom amigurumi are the same.
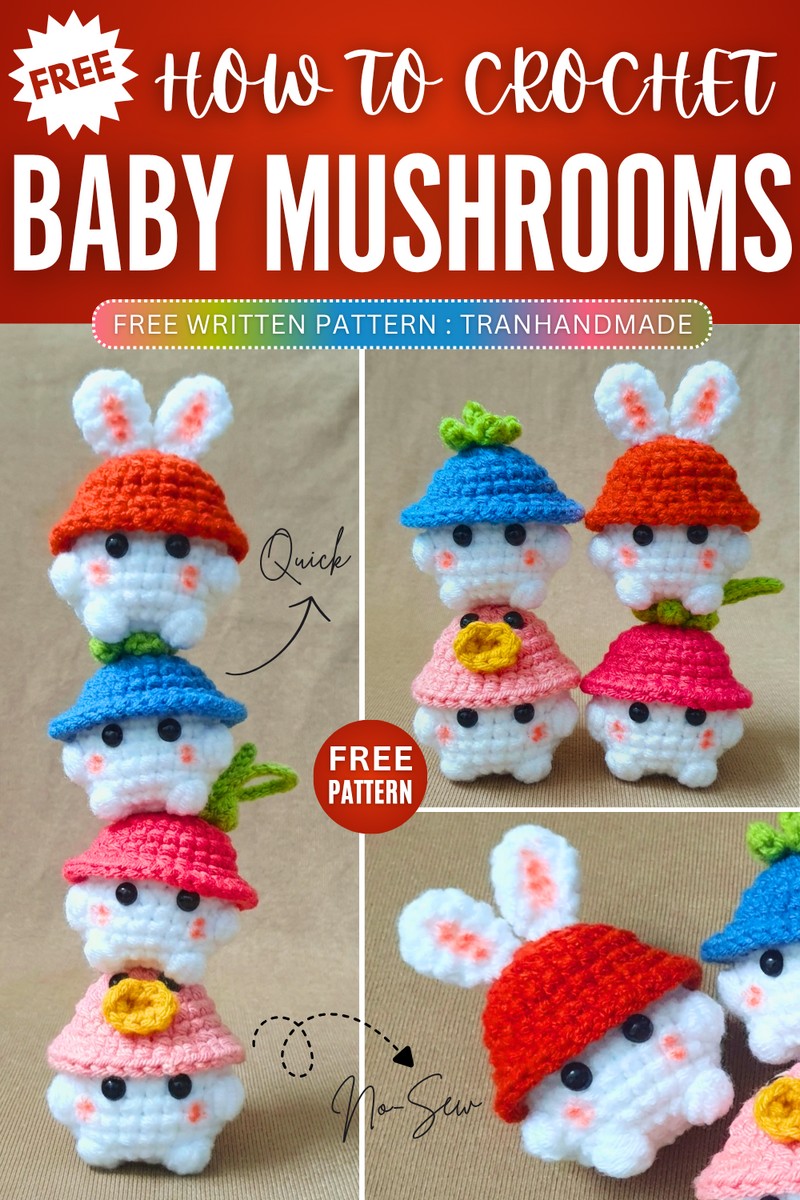
We shall just change the color of the hat and add the elements like the crochet bunny ears, leaves, hanging loops and duck mouth, etc. This way, you will have 4 cutest crochet baby mushroom amigurumi that will make your fall celebrations even more special. So, continue reading for the full crochet mushy set pattern.
Featured designer: Since this is recreation, I have featured the @Tranbrhandmade for these crochet mushrooms. She has many original designs and easy explanations for crocheting many already-available patterns.
Crochet Four Baby Mushrooms Amigurumi
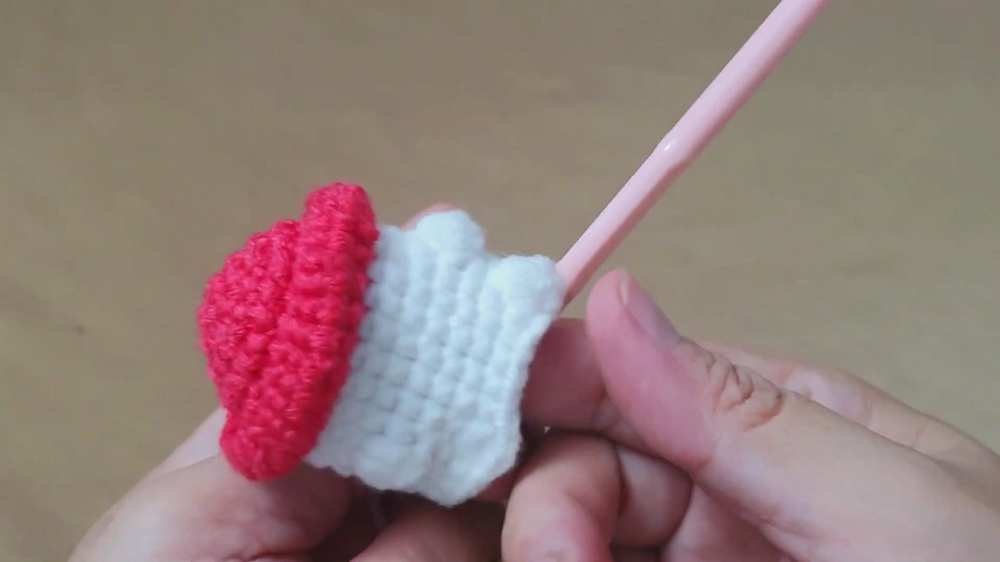
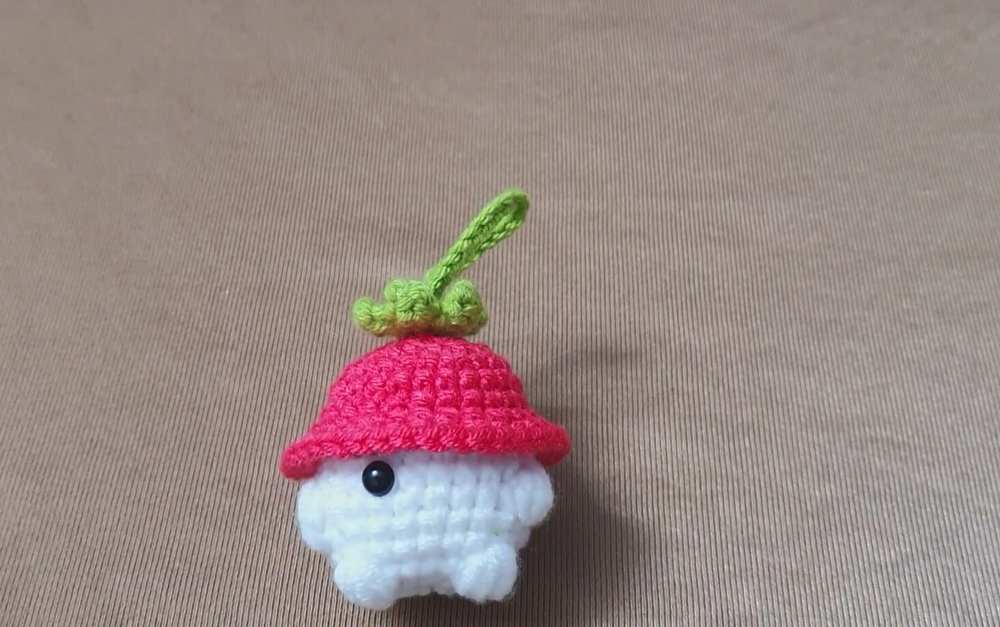
This tutorial demonstrates how to crochet a tiny, super cute mushroom keychain character. It starts from the top of the mushroom cap using colored yarn, increasing stitches to create the wide, rounded shape.
Then, the yarn is switched to white to create the base of the cap and the stem. The stem features little bobble stitches that look like tiny hands and feet.
After stuffing the mushroom and closing the bottom, the creator makes a small green leaf attachment to put on top of the cap and glues on tiny safety eyes to finish the adorable face.
Materials Needed
Yarn in Red (or color of choice for the cap)
Yarn in White (for the stem)
Yarn in Green (for the leaf)
Crochet hook (Size not explicitly specified, but looks like a standard amigurumi size, e.g., 2.0mm – 2.5mm)
Stitch marker
Scissors
Tapestry needle
Stuffing (fiberfill)
Small safety eyes or black beads
Craft glue
Abbreviations
MR: Magic Ring
ch: Chain
x (or sc): Single Crochet
v (or inc): Increase (2 single crochets in the same stitch)
a (or dec): Decrease (single crochet 2 stitches together)
BLO: Back Loop Only (Crochet into the back loop of the stitch)
Bo: Bobble Stitch (In this pattern, it’s made with 4 incomplete double crochets closed together, creating a little bump for hands/feet)
slst: Slip Stitch
R: Round
Full Written Pattern
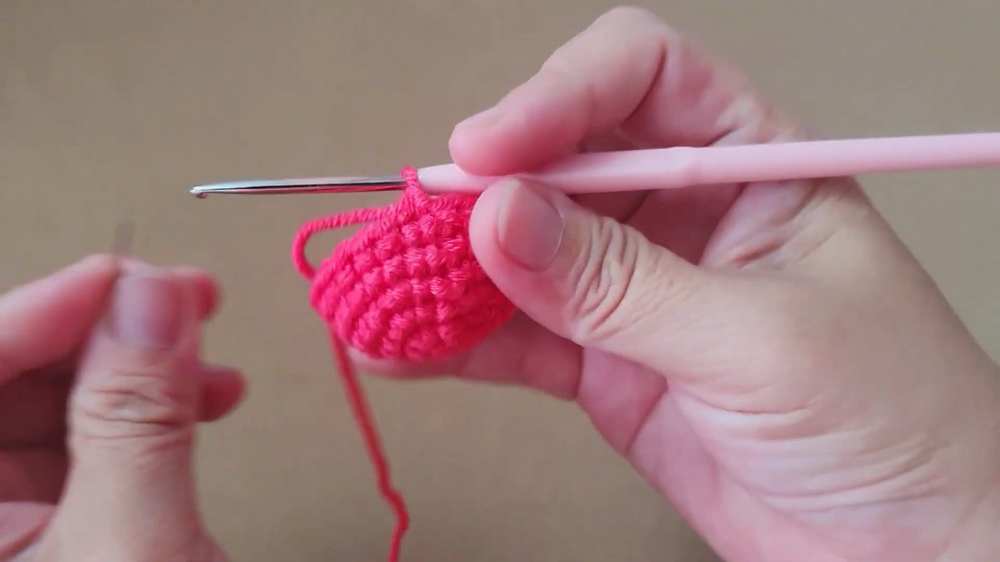
Mushroom Cap & Stem
Note: The pattern uses joined rounds. End each round with a slst and start the next with a ch 1.
R1 (Red): MR, 6x. (6)
R2 (Red): 6v. (12)
R3 (Red): 6 * (1x, 1v). (18)
R4 (Red): 6 * (1x, 1v, 1x). (24)
R5 to R6 (Red): 24x. (24)
R7 (Red): Working in BLO only for this round: 6 * (3x, 1v). (30)
R8 (Red): 6 * (2x, 1v, 2x). (36)
Fasten off the red yarn.
R9 (White): Attach white yarn to the front loops left unworked from R7. 24x. (24)
R10 to R11 (White): 24x. (24)
R12 (White): 7x, 1 Bo, 8x, 1 Bo, 7x. (24) (The bobble stitches create the “arms”)
R13 to R14 (White): 24x. (24)
R15 (White): 9x, 1 Bo, 5x, 1 Bo, 8x. (24) (The bobble stitches create the “feet”)
R16 (White): 12a. (12) (Decrease round)
Stuff the mushroom firmly with fiberfill.
Fasten off, leaving a tail. Use a tapestry needle to weave the tail through the front loops of the remaining 12 stitches and pull tight to close the bottom. Weave in the end.
Leaf Accessory (Green)
R1: MR, 5x. slst to join.
Leaves (make 5 around the ring): ch 3, starting in the 2nd ch from hook: 1x, 1 half-double crochet in the next ch, slst into the next stitch on the MR. Repeat 4 more times.
Fasten off, leaving a long tail for sewing.
Bunny Ear Pattern (Make 2)
R1: Start with a MR and make 6 sc. (6)
R2: (1 sc, 1 inc) repeat 3 times. (9)
R3: 9 sc around. (9)
R4: 9 sc around. (9)
R5: (1 sc, 1 dec) repeat 3 times. (6)
Finish with a slst and ch 1. Cut the yarn, leaving a long tail for sewing.
Sew the ears between round one and round two of the bunny hat.

Duck Mouth (Make 1)
- R1: ch 3.
Assembly
Sew the green leaf to the top center of the red mushroom cap.
Create a small hanging loop using yarn and attach it to the top of the cap (for the keychain).
Use craft glue to attach the small safety eyes between the “arms” (around R12-R13), spacing them about 2 stitches apart. You can use pink yarn to embroider little cheeks under the eyes.
Video Tutorial to Learn even Better