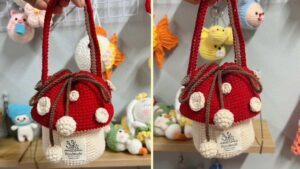
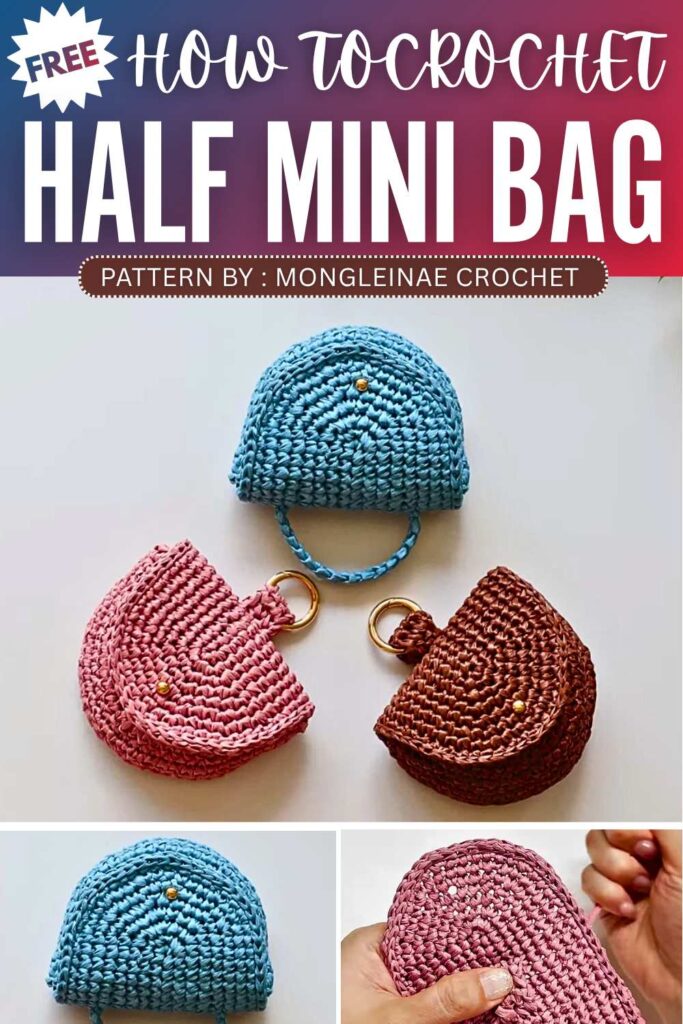
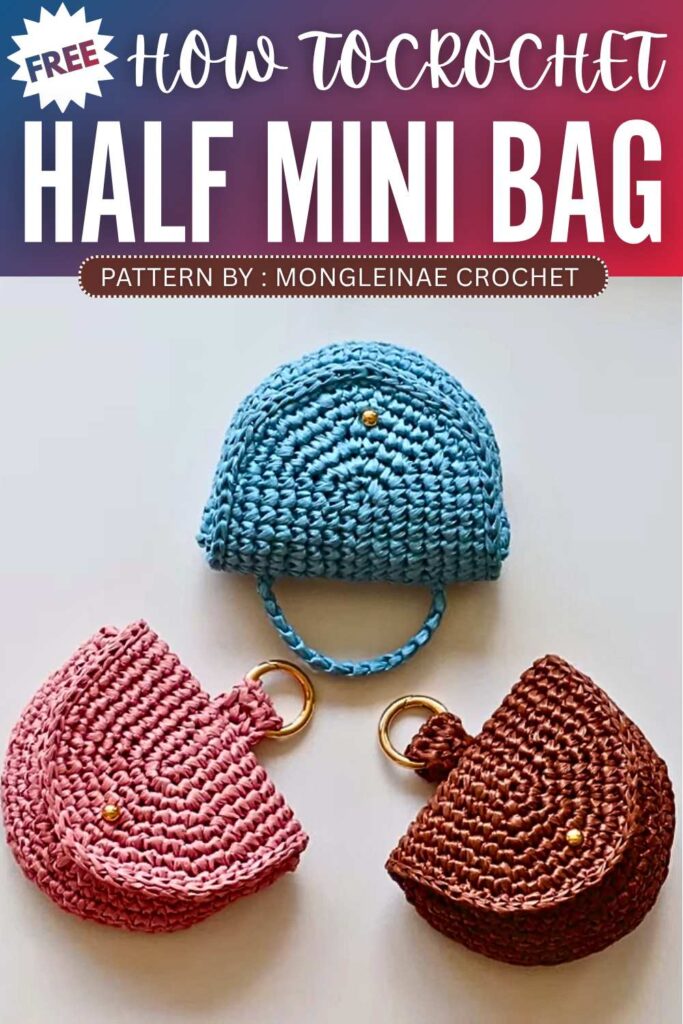
Crochet Half Mini Bag Pattern For Small Stuff
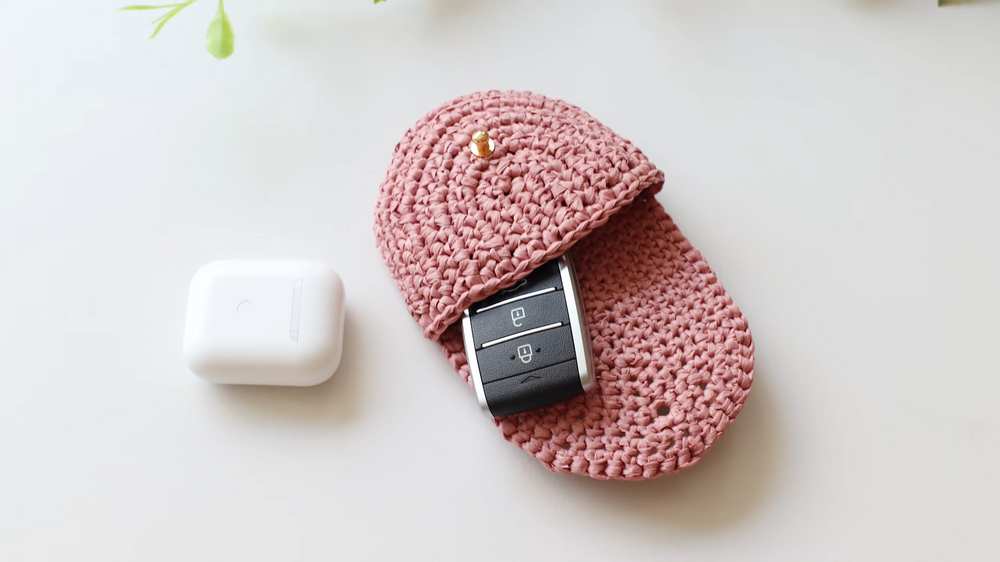
Here we have the pattern to make the “Aloha Half Mini Bag,” a small and stylish crochet pouch for keys, cards, or earbuds. It is made with Aloha yarn and a 5mm hook, starting from a simple chain base and shaped into a half-round form. A second inner piece is added and joined to form the pouch. It finishes with a button fastener and a short handle or strap for easy carrying.
Crochet Half Mini Bag Pattern Step by Step
Required Materials
Yarn: Aloha Yarn (approx. 22g). This is a specialized polyester or paper-style cord yarn that holds its shape well.
Hardware (Closure): 6mm Saltregi (also known as a screw-back stud or monk head button).
Hardware (Optional): 28mm O-ring (if you want to attach the pouch to a larger bag or belt loop).
Required Tools
Crochet Hook: 5/0 (3.0mm) size.
Tapestry Needle: For sewing the front panel to the back and weaving in ends.
Stitch Markers: Very important for marking the increase points on the curved edges.
Scissors: For cutting the yarn.
Steam Iron: Recommended to steam the finished pieces before assembly to ensure they lay perfectly flat.
Crochet Abbreviations Used
MR: Magic Ring
CH: Chain
SC: Single Crochet
INC: Increase (2 stitches in one stitch)
DEC: Decrease (joining 2 stitches into one)
SL ST: Slip Stitch
DC: Double Crochet
TR: Treble Crochet
BLO: Back Loop Only
FLO: Front Loop Only
Step-by-Step Pattern: Aloha Half Mini Bag
1. Main Body (Back & Flap)
Foundation: Leave a 30cm tail. Make 15 double-layered chains.
Round 1: SC 13, 3 SC in the last stitch to turn. Working on the other side of the chain: SC 12, INC. (32 sts)
Round 2: INC, SC 12, 3 INC, SC 12, 2 INC. (38 sts)
Round 3: SC 1, INC, SC 12, (SC 1, INC) x3, SC 12, (SC 1, INC) x2. (44 sts)
Round 4: SC 2, INC, SC 12, (SC 2, INC) x3, SC 12, (SC 2, INC) x2. (50 sts)

Round 5: SC 3, INC, SC 12, (SC 3, INC) x3, SC 12, (SC 3, INC) x2. (56 sts)
Round 6: SC 4, INC, SC 12, (SC 4, INC) x3, SC 12, (SC 4, INC) x2. (62 sts)
Round 7: SC 5, INC, SC 12, (SC 5, INC) x3, SC 12, (SC 5, INC) x2. (68 sts)
Round 8: SC 6, INC, SC 12, (SC 6, INC) x3, SC 12, (SC 6, INC) x2. (74 sts)
Finishing Round: SL ST into every stitch around the entire oval to create a firm edge.
2. Front Pouch Panel
Foundation: Make 5 double-layered chains.
Row 1: SC 3, 3 SC in the last stitch to turn. SC 4. (10 sts)
Row 2 (Turn): CH 1, SC 4, 3 INC, SC 4. (13 sts)
Row 3 (Turn): CH 1, SC 4, (SC 1, INC) x3, SC 4. (16 sts)
Row 4 (Turn): CH 1, SC 4, (SC 2, INC) x3, SC 4. (19 sts)
Row 5 (Turn): CH 1, SC 4, (SC 3, INC) x3, SC 4. (22 sts)
Row 6 (Turn): CH 1, SC 4, (SC 4, INC) x3, SC 4. (25 sts)
Row 7 (Turn): CH 1, SC 4, (SC 5, INC) x3, SC 4. (28 sts)
Row 8 (Turn): CH 1, SC 4, (SC 6, INC) x3, SC 4. (31 sts)
Row 9 (Turn): CH 1, SC 4, (SC 7, INC) x3, SC 4. (34 sts)
Side Walls: SC in each stitch for 3 rows to give the pocket depth.
Flat Edge: SC across the straight top edge of the semi-circle to finish.
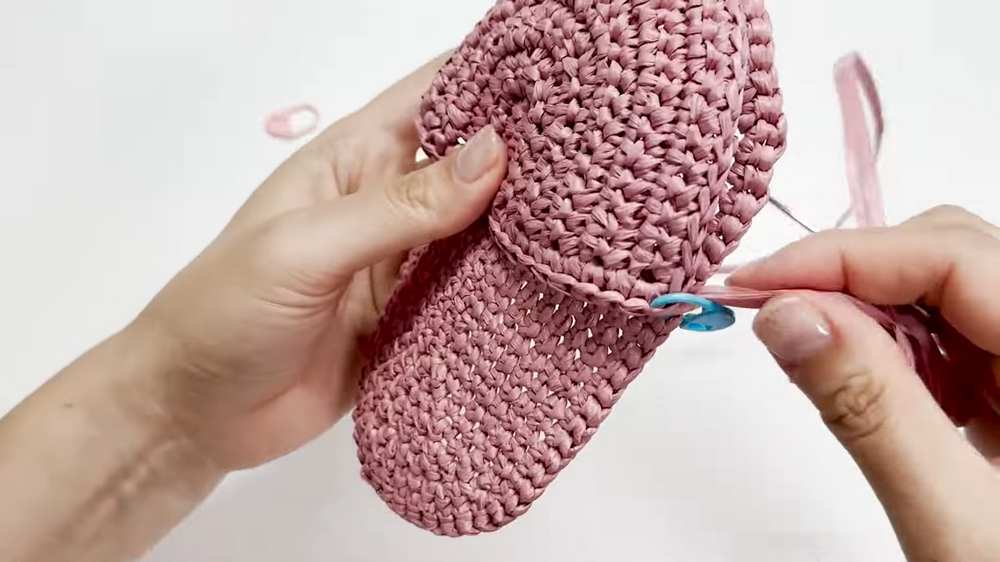
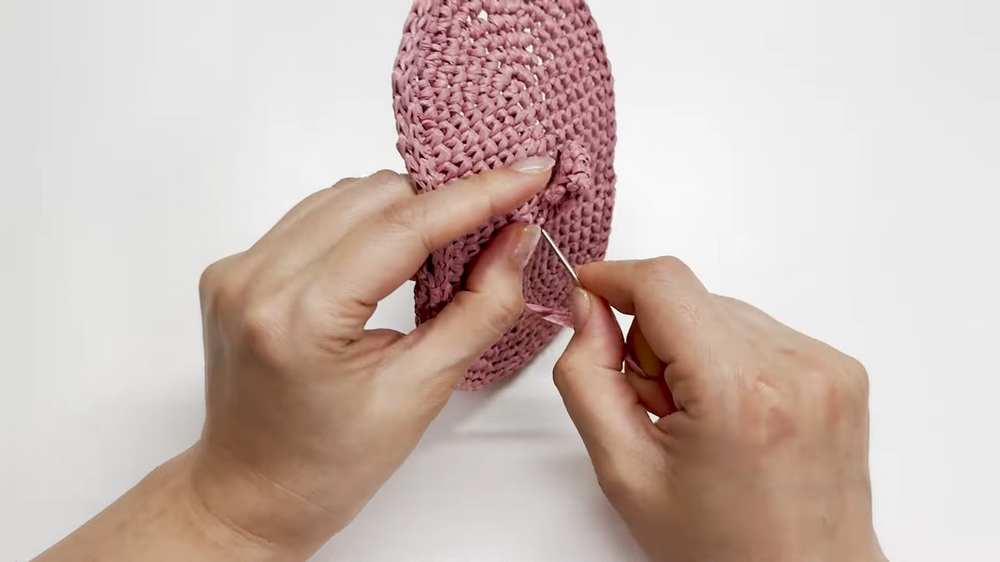
3. Assembly & Hardware
Joining: Place the front pouch over the bottom half of the main body. Use a tapestry needle to sew them together using a whip stitch through the corresponding stitches.
Closure:
Find the center of the front panel (around the 3rd row down).
Insert the saltregi (screw-back stud) and tighten it.
The gap between the stitches on the flap will act as the buttonhole.
O-Ring Tab (Optional):
CH 4, SC 3 for 7 rows.
Fold the strip over an O-ring and sew it to the top back corner of the bag.
Handle (Optional): Create a 10cm Romanian cord (shrimp stitch) and attach it to the top.
Video Tutorial: