Knitting-Love: Crochet Bat In Bow Plushie Pattern for Halloween
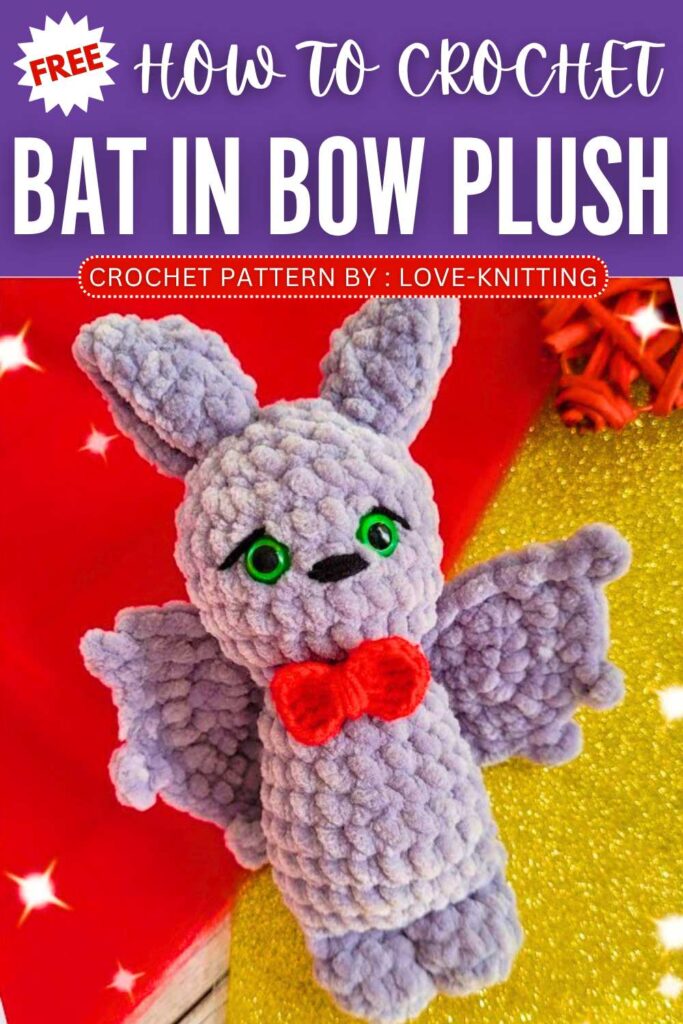
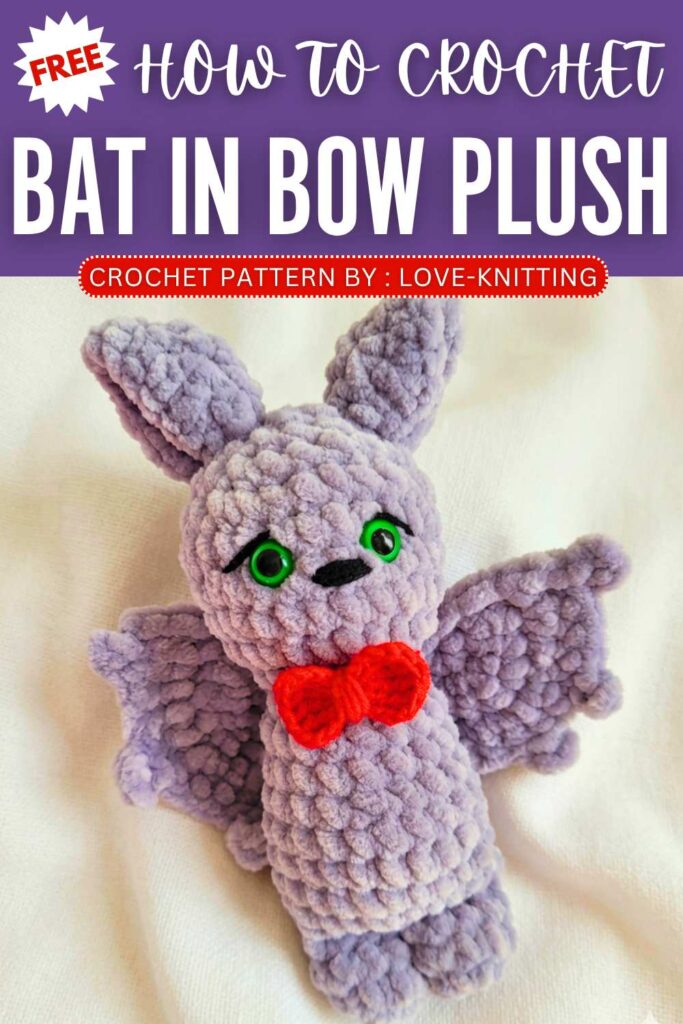
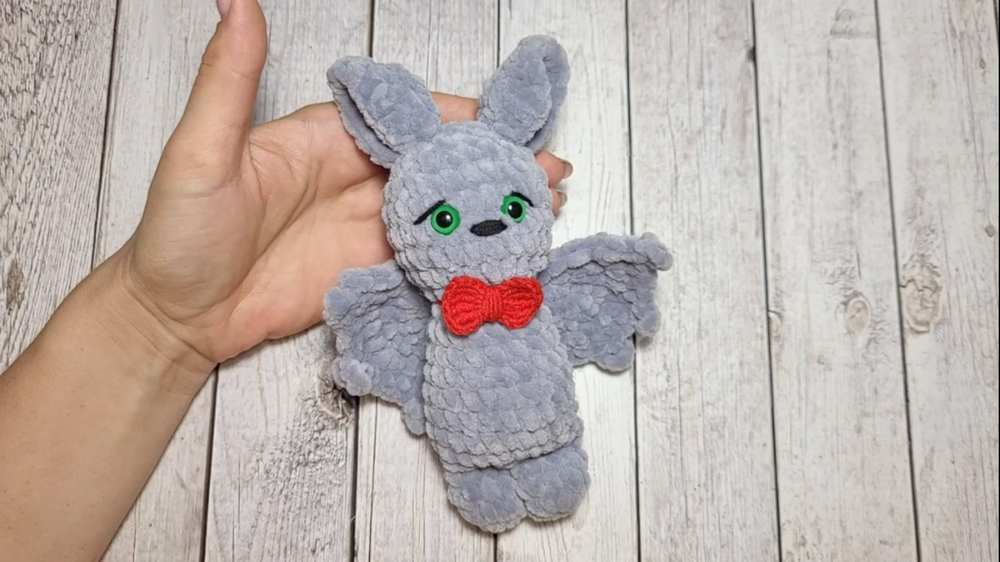
Learn how to crochet a 17 cm bat plush doll that is wearing a tiny bow tie following this FREE written pattern. This crochet bat plush has smaller wings that the “crochet bat plush with the moveable wings” as it is intended more as a snuggler bat plush for little ones. It is crocheted as a bat doll plush with little sewing. You will also learn the crochet bow pattern in this same tutorial and there is also a video in the end.
Low-Sew & Kawaii Bat Plushie Pattern
Crocheting this bat plush is easier than ever as we shall be using animal doll base which most beginners might have already mastered. You can attach the bow of this bat plushie to its head if you want to gift it a girl. Anyway, customization is up to you (whether you crochet it black or purple), below will be the pattern to crochet it.
About the Designer: The designer behind this 15cm bat plush is @love-knitting –with her 1k plush and accessory tutorials, she is a master in crochet whose super bulky yarn series is my favorite.
How to Crochet Bat with a Bow Tie Plushie
This project is a fun, crochet pattern to make a cute plush bat measuring about 17 centimeters tall. You will start by crocheting the legs, joining them together to crochet the body and head all in one piece.
After the main body is stuffed and shaped, you will crochet the triangular bat ears and detailed wings separately.
Finally, you will attach the wings to the back, the ears to the head, and use black yarn to embroider a little nose and eyelashes to complete the adorable bat. You can also make a little red bow to attach to the head or neck!
Materials Needed:
Plush yarn (e.g., Dolce Yarnart, 100g/120m) in grey (main color)
Cotton yarn (e.g., Jeans Yarnart) in black for embroidery and red for the bow
Crochet hooks: 4.0 mm for the bat and 2.0 mm for the bow
10 mm safety eyes
Stuffing (fiberfill)
Yarn needle and scissors
Stitch markers
Abbreviations:
MR: Magic Ring
ch: chain
sc: single crochet
inc: increase (2 sc in one stitch)
dec: decrease (sc 2 together)
slst: slip stitch
tr: treble crochet (yarn over twice)
R: Round / Row
sts: stitches
Pattern – Legs (Make 2):
R1: 6 sc in MR (6 sts)
R2: (sc 2, inc) x 2 (8 sts)
R3: sc around (8 sts)
Fold the piece flat and sc 4 through both sides to close.
Cut the yarn for the first leg. Do not cut the yarn for the second leg, as you will continue to crochet the body.
Pattern – Body:
Working from the second leg:
R1: Turn the work and crochet into the front loops only: 4 sc along the second leg. Then 1 inc into the front loop of the first leg, followed by 3 sc. Turn the work, and crochet into the back loops: 4 sc along the first leg, 1 inc into the back loop of the second leg, 3 sc. (18 sts total)
R2-R5: (5 sc, inc) x 3 (21 sts) Note: crochet 3rd, 4th, and 5th rows as 21 sc.
R6: (5 sc, dec) x 3 (18 sts)
R7-R8: sc around (18 sts)
Stuff the body as you go.
R9: (1 sc, dec) x 6 (12 sts)
Pattern – Head:
Continue from the body:
R10: (1 sc, inc) x 6 (18 sts)
R11: (2 sc, inc) x 6 (24 sts)
R12: (5 sc, inc) x 4 (28 sts)
R13-R14: sc around (28 sts)
R15: (5 sc, dec) x 4 (24 sts)
Insert 10 mm safety eyes between R13 and R14, leaving 4 sts between them.
R16: (2 sc, dec) x 6 (18 sts)
R17: (1 sc, dec) x 6 (12 sts)
R18: 6 dec (6 sts)
Finish stuffing the head. Use a needle to pick up the front loops of the remaining 6 sts, pull tight to close the hole, secure, and weave in the end.
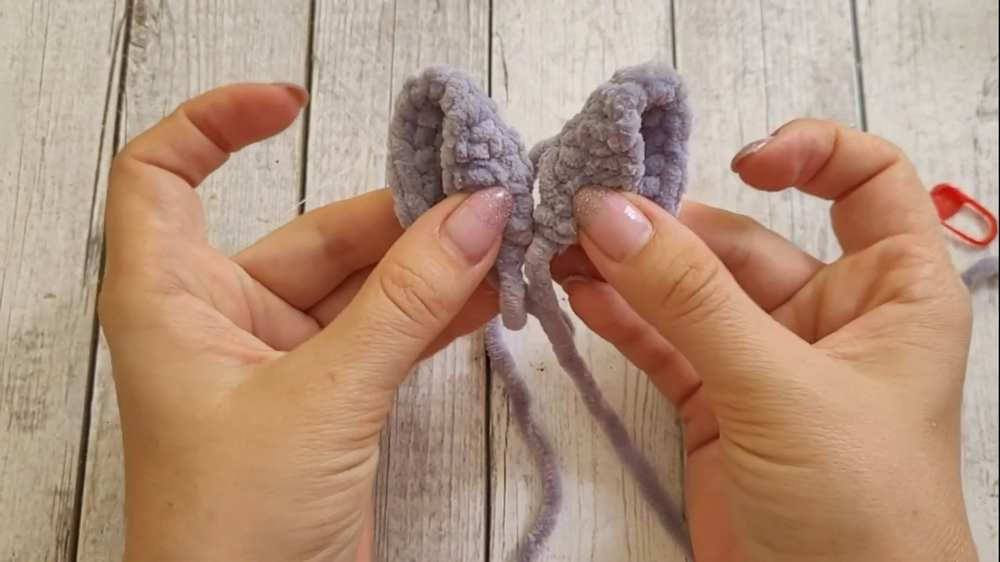
Pattern – Ears (Make 2):
R1: 6 sc in MR (6 sts)
R2: 1 sc, 3 sc in next st, 1 sc, 3 sc in next st, 1 sc, 3 sc in next st (12 sts)
R3: 2 sc, 3 sc in next st, 3 sc, 3 sc in next st, 3 sc, 3 sc in next st, 1 sc (18 sts)
Finish with a slst, leaving a long tail for sewing.
Fold the ear slightly inward at the base when attaching to the head.
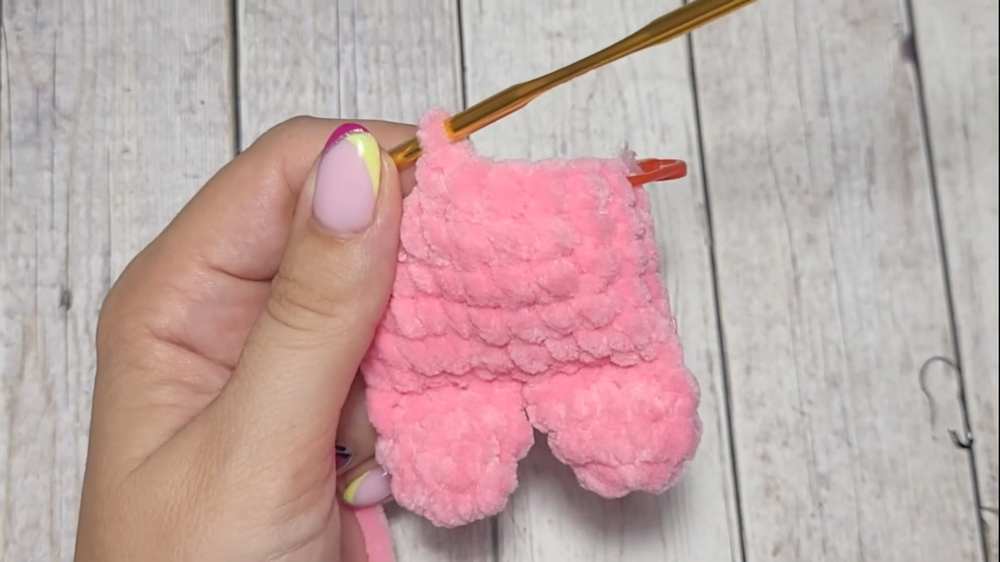
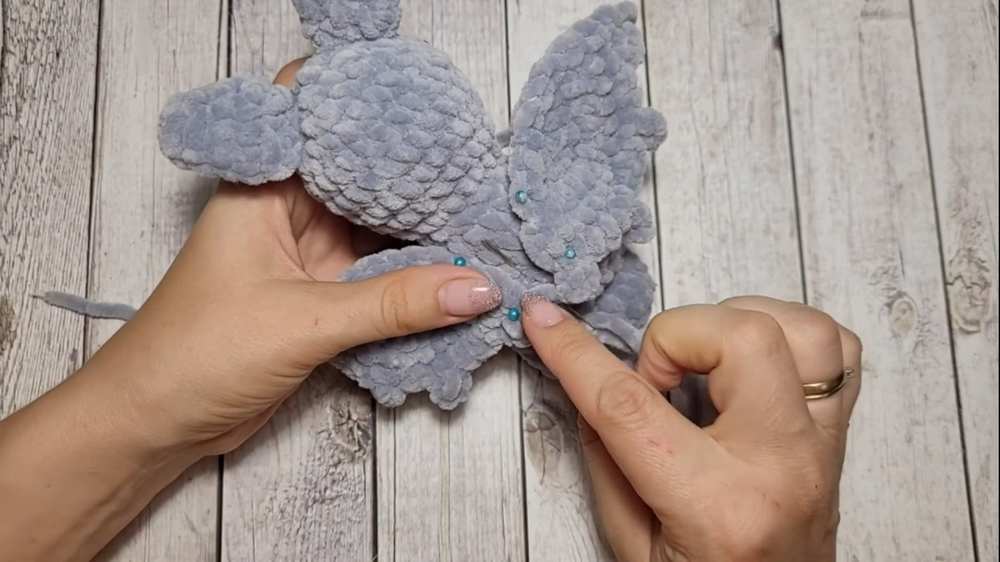
Pattern – Wings (Make 2):
R1: 5 sc in MR (5 sts). Do not join, work in rows. ch 1, turn.
R2: 1 inc, 1 sc, 1 inc, 1 sc, 1 inc (8 sts). ch 1, turn.
R3: 3 sc, 2 inc, 3 sc (10 sts). ch 1, turn.
R4: 1 inc, 8 sc, 1 inc (12 sts). ch 1, turn.
R5: 1 sc, picot (ch 3, slst in 1st ch), 3 sc, picot, 2 sc, picot, 3 sc, picot.
Crochet slip stitches evenly along the top straight edge of the wing.
Leave a long tail for sewing.
Pattern – Bow:
Using red yarn and a 2.0 mm hook:
In a MR: ch 4, 4 tr, ch 4, slst into the ring, ch 4, 4 tr, ch 4, slst into the ring.
Pull the ring closed tight. Leave long tails, wrap them tightly around the center of the bow a few times, and knot in the back.
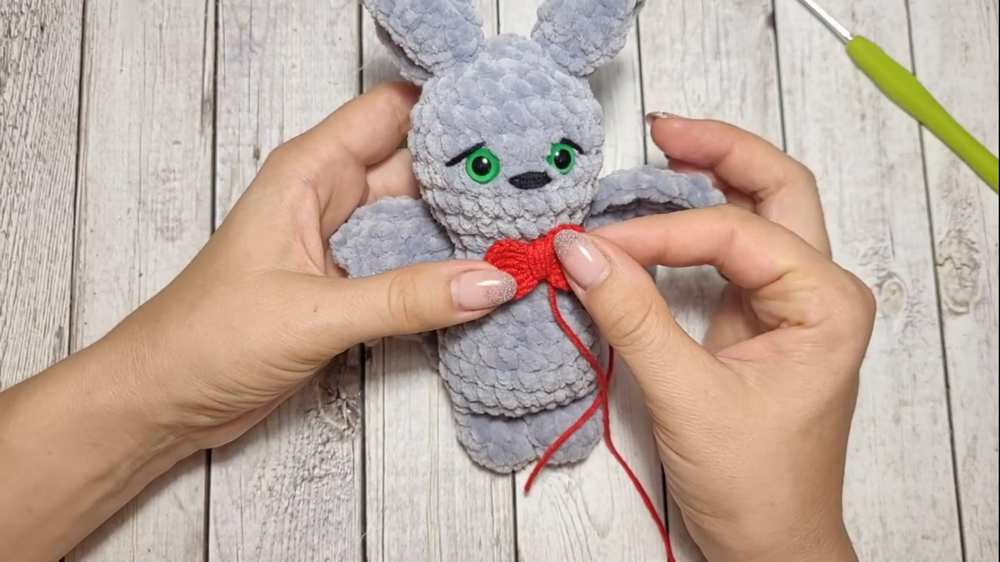
Assembly:
Pin the folded ears to the top sides of the head and sew them securely.
Pin the wings to the back of the body and sew along the straight top edge of the wing to attach.
Embroider eyelashes over the eyes and a small nose between the eyes using black yarn.
Attach the red bow either at the neck (like a bowtie) or near one of the ears.
Video Tutorial to Learn Even Better