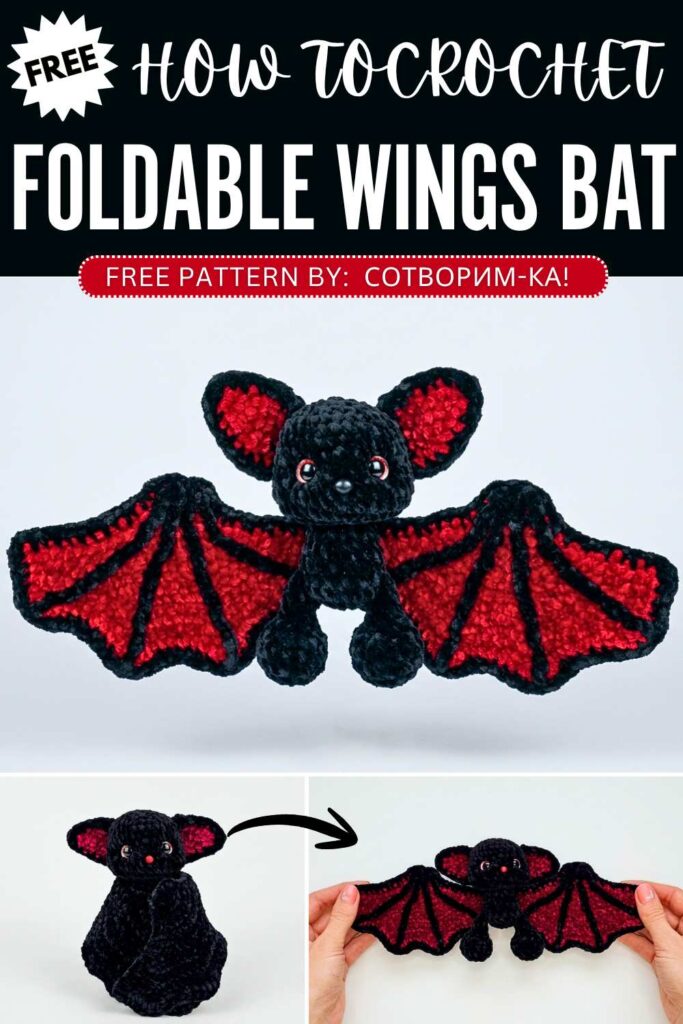
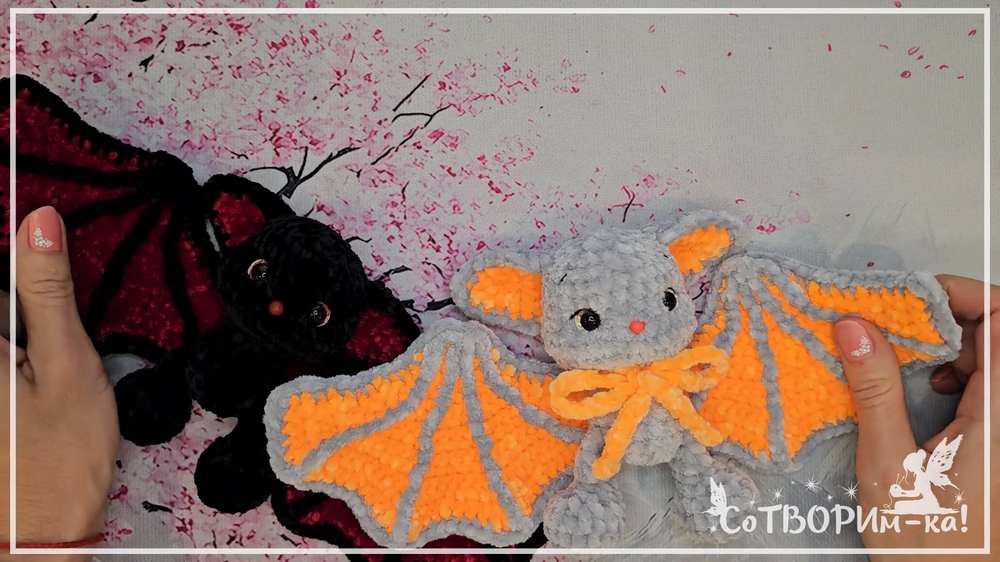
Free Crochet Flying Baby Bat Plushie Pattern for Halloween
Today, let’s crochet this black-and-red long-winged and CUTE crochet bat plushie for Halloween with a FREE pattern. This low-sew crochet bat is definitely a little spookier but even CUTER than that. You can pose it like a crochet flying bat plush or wrap the wings around the body like a Dracula. Both poses are GREAT to use it as a Halloween party hanging. We shall use the crochet black cat body to make this crochet bat, too.
Crochet Flying Baby Bat Plushie
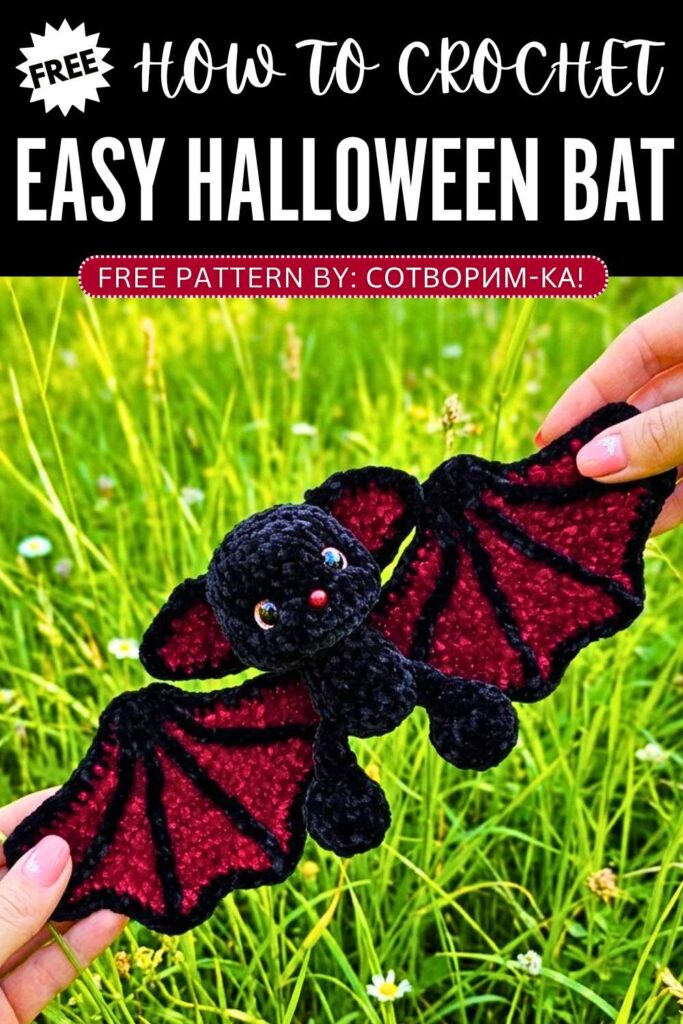
The different pattern is used for the wings and obviously for the wings. With the velvet yarn, red looks much striking than otherwise. Also, this crochet bat has a red nose and glitter red eyes which make it the BEST Halloween addition. Anyway, let’s get started for the full bat pattern.
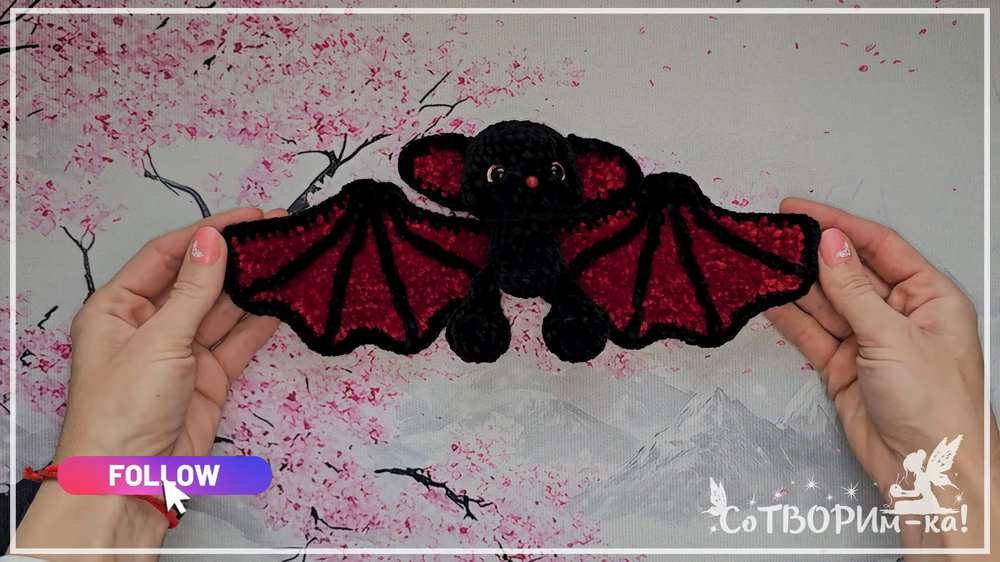
About the designer: The designer behind this crochet Halloween cat plush is @sotvorimka – She designs the CUTEST character and animal plushie and I fell in love with her crochet plushies immediately. You will love her seasonal crochet plushies, in particular.
How to Crochet CUTEST Baby Bat Plushie
This project is a bat toy. You make the bat toy with yarn. You make the bat toy with a hook. The bat toy has two wings. The bat toy has two ears.
The bat toy has two legs. The bat toy has one body. The bat toy has one head. The bat toy has two eyes. The bat toy has one nose. The bat toy is soft. The bat toy is small. You sew the wings to the bat toy. You sew the ears to the bat toy.
Materials:
Yarn in main color
Yarn in contrast color
4 mm crochet hook
Small crochet hook to attach the nose
10 mm safety eyes
One bead for the nose
Stuffing
Black thread for the face
White thread for the face
Sewing needle
Abbreviations:
MR: magic ring
ch: chain
sc: single crochet
dc: double crochet
inc: single crochet increase (two single crochets in one stitch)
dec: single crochet decrease (two single crochets together)
sl st: slip stitch
st: stitch
Legs (Make 2):
Use the main color.
Round 1: 8 sc in MR (8)
Round 2: 8 inc (16)
Rounds 3-4: 16 sc (16)
Round 5: 2 sc, 6 dec, 2 sc (10)
Round 6: 2 sc, 3 dec, 2 sc (7)
Rounds 7-8: 7 sc (7)
Stuff the bottom part of the leg.
Round 9: 3 sc, 1 dec, 2 sc (6)
Fold the top flat. Crochet 3 sc through both sides to close the gap. Fasten off.
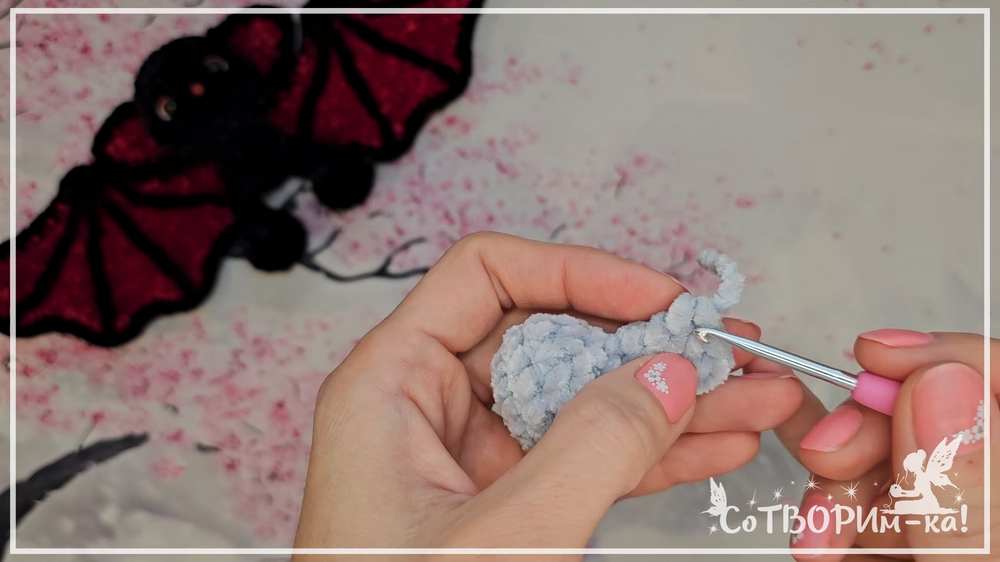
Ears (Make 2):
Inner Ear (use contrast color):
Row 1: 3 sc in MR, ch 1, turn.
Row 2: 1 sc, inc, 1 sc, ch 1, turn. (4)
Row 3: 4 sc, ch 1, turn. (4)
Row 4: inc, 2 sc, inc, ch 1, turn. (6)
Row 5: 6 sc, ch 1, turn. (6)
Row 6: inc, 4 sc, inc. (8) Fasten off.
Outer Ear (use main color):
Repeat Rows 1-6 but do not cut the yarn.
Put the inner ear and outer ear together. Crochet through both pieces around the edge with sc. Put 3 sc in the very top tip stitch. Fasten off and leave a long tail to sew.
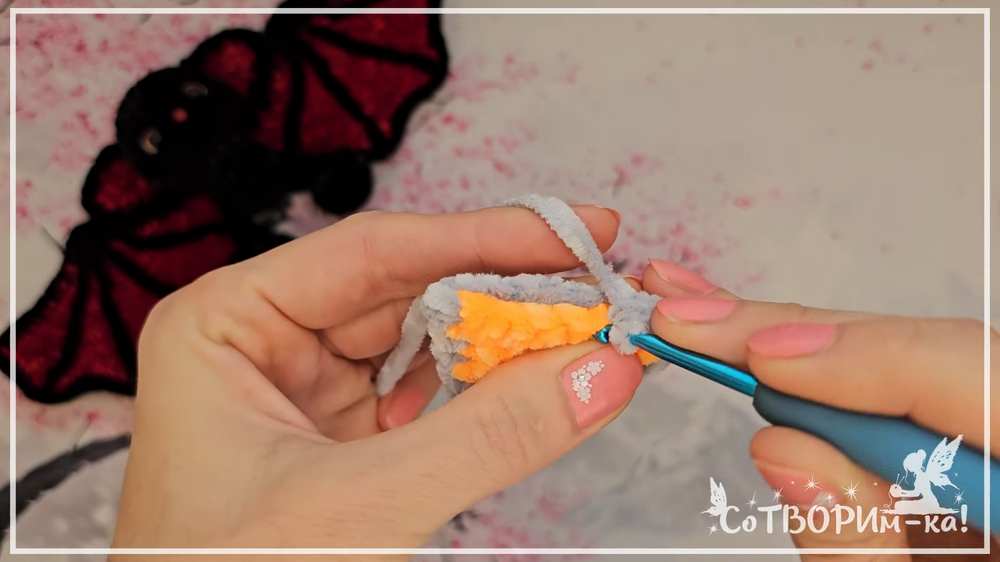
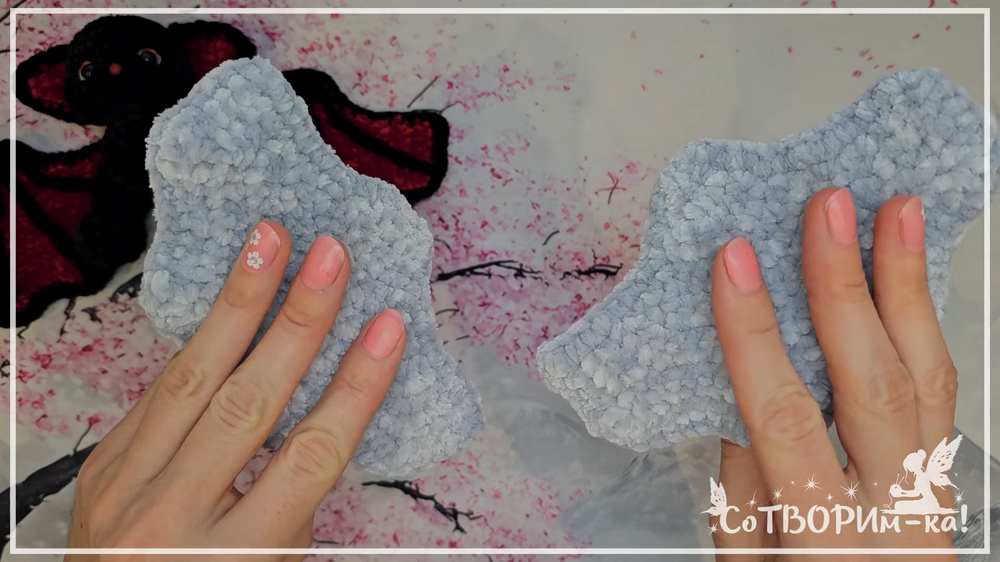
Wings (Make 2):
Inner Wing (use contrast color):
Row 1: 4 sc in MR, ch 1, turn. (4)
Row 2: 4 sc, ch 1, turn. (4)
Row 3: 1 sc, 2 inc, 1 sc, ch 1, turn. (6)
Row 4: (1 sc, inc) 3 times, ch 1, turn. (9)
Row 5: 9 sc, ch 1, turn. (9)
Row 6: inc, (3 sc, inc) 2 times, ch 1, turn. (12)
Row 7: 1 sc, (inc, 2 sc) 3 times, inc, 1 sc, ch 1, turn. (16)
Row 8: 16 sc, ch 1, turn. (16)
Row 9: 2 sc, (inc, 3 sc) 3 times, inc, 1 sc, ch 1, turn. (20)
Row 10: 2 sc, (inc, 4 sc) 3 times, inc, 2 sc, ch 1, turn. (24)
Row 11: 3 sc, (inc, 5 sc) 3 times, inc, 2 sc, ch 1, turn. (28)
Row 12: 3 sc, (inc, 6 sc) 3 times, inc, 3 sc, ch 1, turn. (32)
Row 13: 4 sc, (2 dc in next st, 7 sc) 3 times, 2 dc in next st, 3 sc, ch 1, turn. (36)
Row 14: 4 sc. Repeat the bracket 3 times: [3 dc in the same st, 3 sc, dec, 3 sc]. Then put 3 dc in the same st, 4 sc. Fasten off.
Outer Wing (use main color):
Repeat Rows 1-14 but do not cut the yarn.
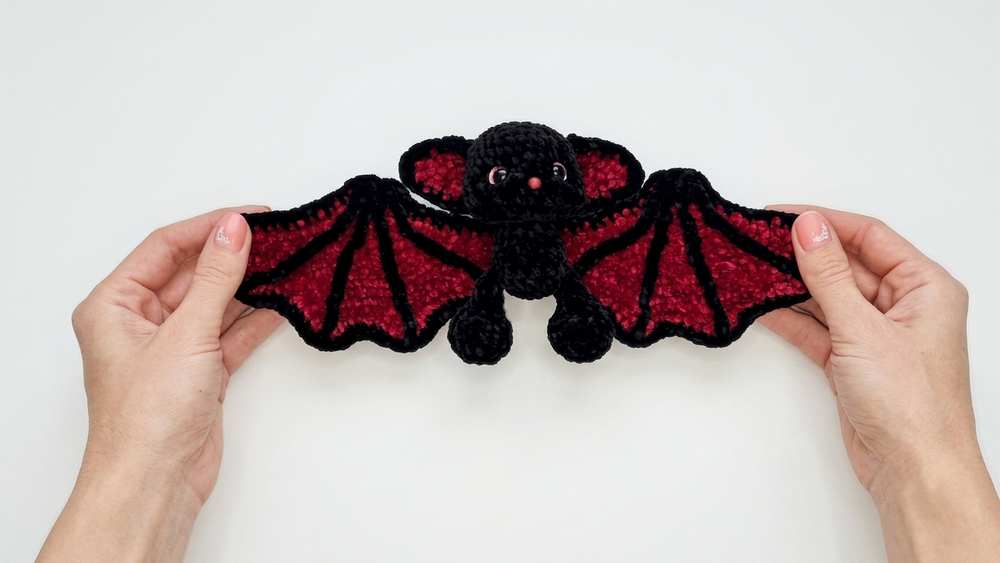
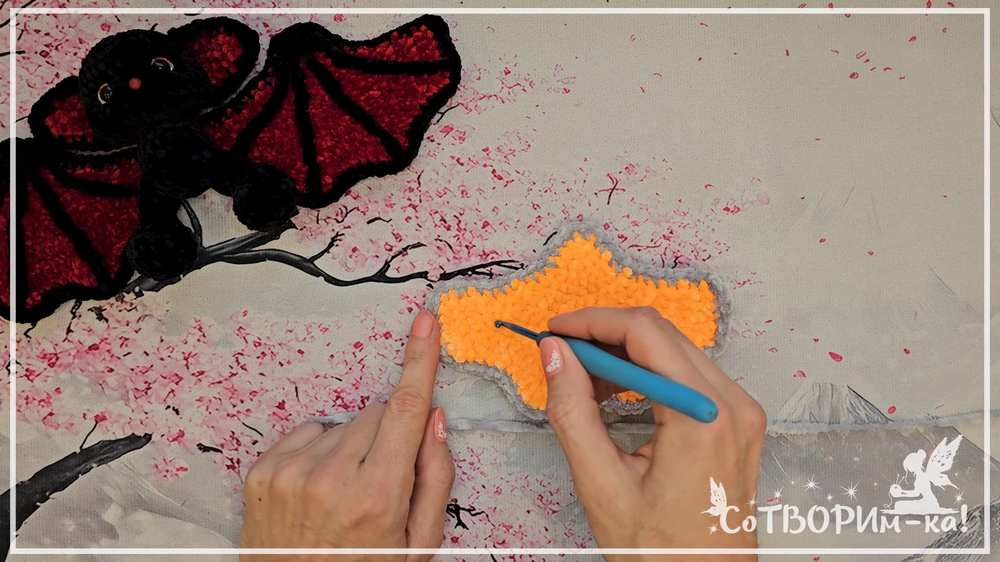
Put the inner wing and outer wing together. Crochet through both pieces around the edge with sc to join them. Put extra sc stitches at the sharp points. Fasten off and leave a long tail to sew. Use a yarn needle to stitch lines on the inside of the wings.
Body and Head (worked in one piece):
Use the main color.
Round 1: 8 sc in MR (8)
Round 2: 8 inc (16)
Round 3: 16 sc (16)
Round 4 (Attaching legs): Crochet 3 sc through the first leg and the body. Crochet 6 sc on the body. Crochet 3 sc through the second leg and the body. Crochet 4 sc on the body. (16)
Rounds 5-6: 16 sc (16)
Round 7: 3 sc, 3 dec, 7 sc (13)
Round 8: 3 sc, 2 dec, 6 sc (11)
Round 9: 11 sc (11) Do not cut the yarn. Start the head.
Round 10 (Head R1): 11 inc (22)
Round 11 (Head R2): (1 sc, inc) 11 times (33)
Rounds 12-13 (Head R3-4): 33 sc (33)
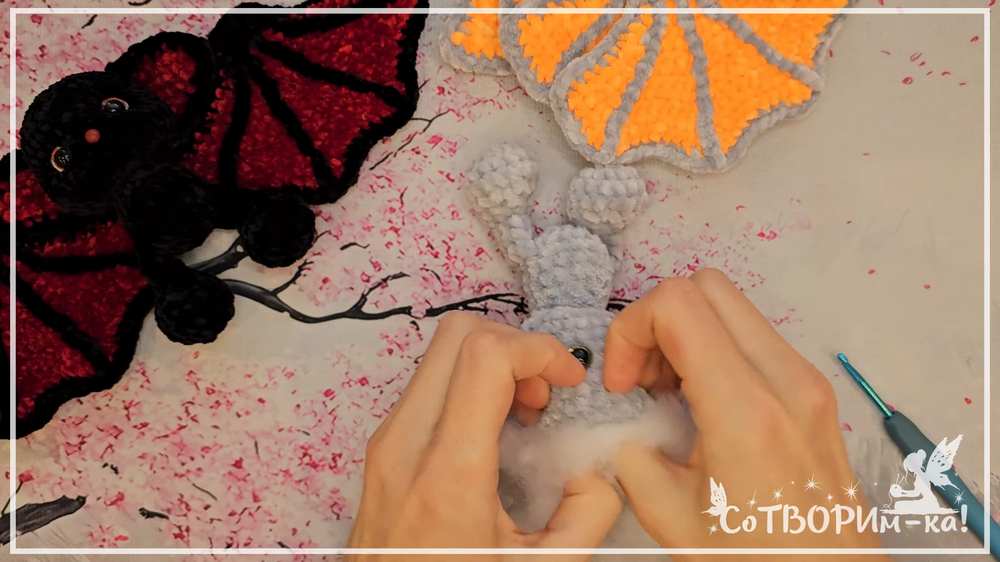
Round 14 (Head R5): Make 3 dec on the left side. Make 3 dec on the right side. In the center front stitch, pull the loop through the bead nose and make a sl st to secure it. Crochet sc in all the remaining stitches. (27)
Rounds 15-18 (Head R6-9): 27 sc (27)
Round 19 (Head R10): (7 sc, dec) 3 times (24)
Insert the safety eyes 1 row above the nose, leaving 5 stitches between the eyes. Stuff the body with stuffing.
Round 20 (Head R11): (2 sc, dec) 6 times (18)
Round 21 (Head R12): (1 sc, dec) 6 times (12)
Stuff the head with stuffing.
Round 22 (Head R13): 6 dec (6)
Fasten off. Close the top hole.
Assembly:
Sew the ears to the top of the head.
Sew the wings to the back of the body diagonally.
Use thread to pull the eyes inward for face shaping.
Sew white thread on the side of the safety eyes.
Sew black thread to make eyebrows and eyelashes.
Video Tutorial to Learn Even Better
Pin For Later: