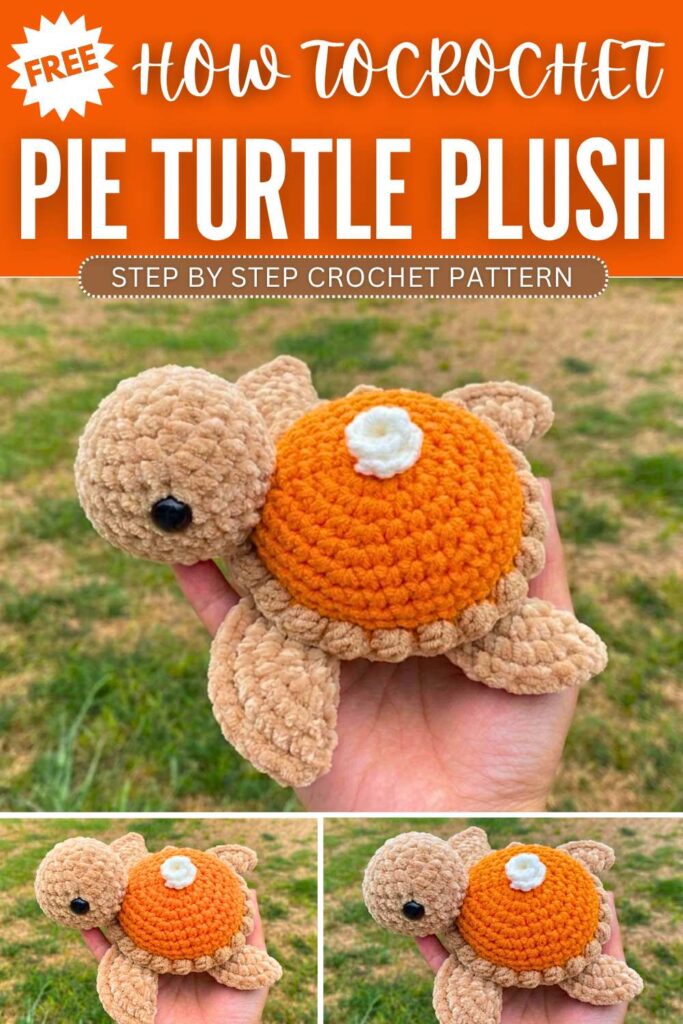
Free Crochet Pumpkin Pie Turtle Amigurumi Pattern for Kids
Learn how to crochet a turtle plushie with a pumpkin pie shell following this FREE pattern. You can crochet this amigurumi turtle for both the National Pie Day and the fall. I recommend crocheting the turtle parts using the thin plush yarn and the pumpkin pie shell using the amigurumi yarn for COOL texture. You can also crochet it as a centerpiece for Thanksgiving dining table.
Crochet Pumpkin Pie Turtle Amigurumi Pattern
This pumpkin pie turtle works up fast and can be finished within an hour. Beginners can also give this amigurumi turtle plush a try, especially using the cotton yarn. We also have a texture of the puff stitch and the whipped cream on the shell. So, be sure to crochet this pumpkin pie turtle with this pattern.
https://mycraftybasket.com/crochet-pumpkin-turtle-plushie/
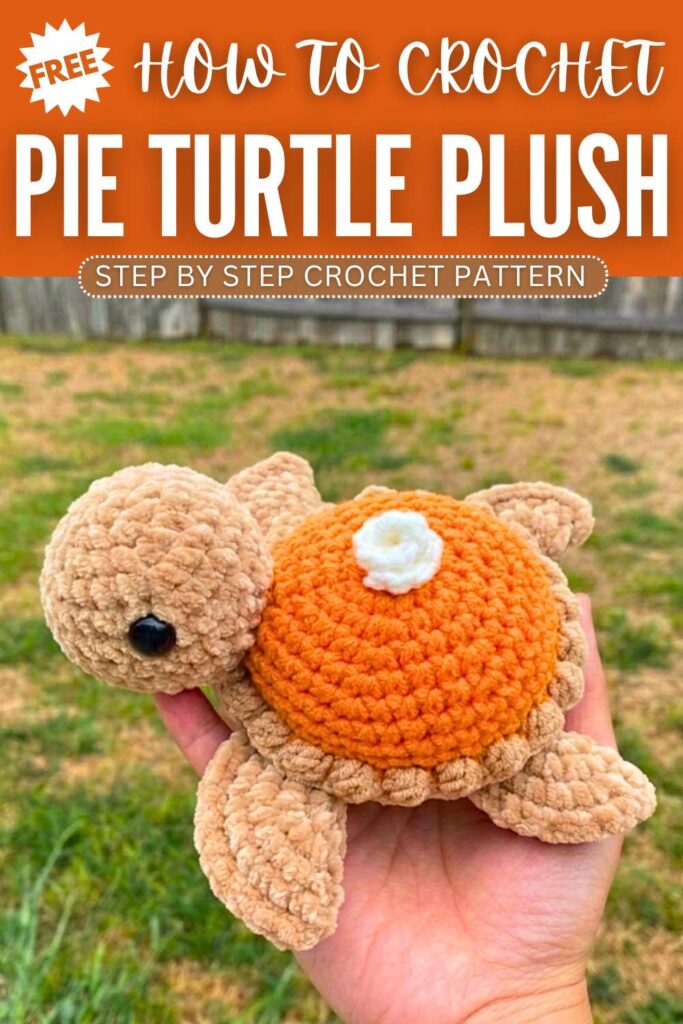
Crochet Pie Turtle Plushie Pattern for Pie Day & Fall
This project is an adorable amigurumi turtle whose shell is designed to look like a tiny, delicious pumpkin pie!
You will begin by making the pie shell using orange and tan yarn, complete with a classic puff-stitch pie crust around the edge.
Then, you will crochet the cute head, two front flippers, and two smaller back flippers.
To finish, you will sew all the parts together, attach safety eyes, and add a sweet little dollop of whipped cream on top of the pie shell.
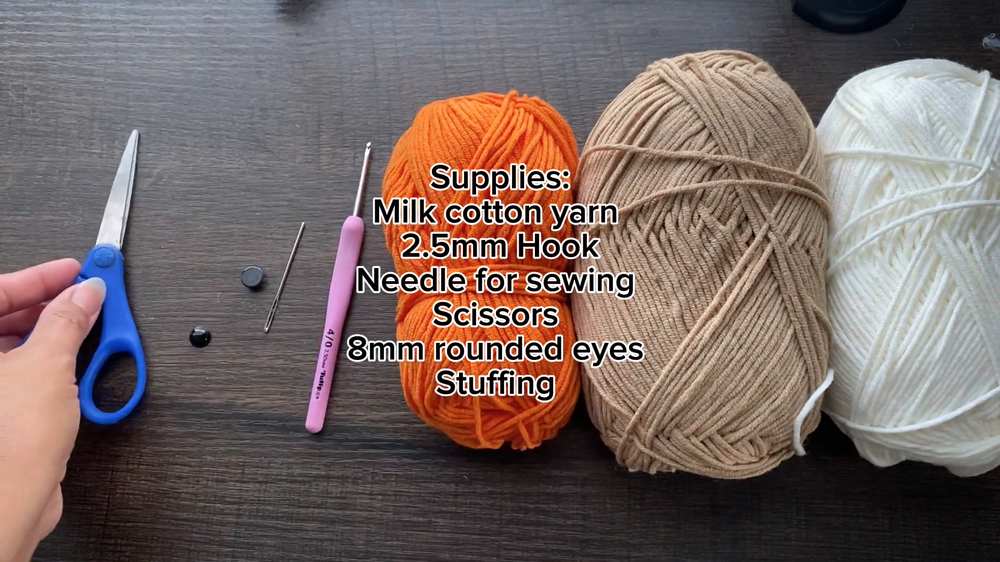
Materials
Milk cotton yarn (Orange, Tan/Beige, and White)
2.5 mm crochet hook
8 mm rounded safety eyes
Stuffing (fiberfill)
Yarn needle for sewing
Scissors
Abbreviations (US Terms)
MR: Magic Ring
ch: Chain
sc: Single crochet
hdc: Half double crochet
inc: Increase (2 single crochets in the same stitch)
dec: Decrease (single crochet 2 stitches together)
slst: Slip stitch
BLO: Back loop only
puff: Puff stitch
Full Pattern
Pumpkin Pie Shell
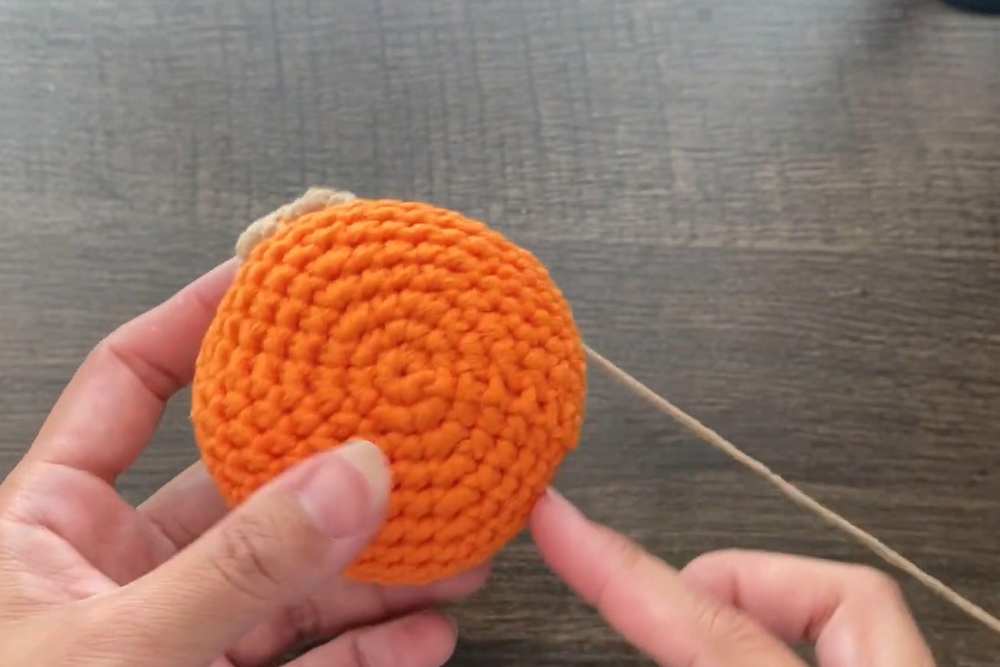
Note: The orange yarn is used for the pumpkin filling, and tan is used for the crust.
R1 (Orange): 6 sc in a Magic ring, slst. (6)
R2: ch 1, 6 inc, slst. (12)
R3: ch 1, (1 sc, 1 inc) * 6, slst. (18)
R4: ch 1, (2 sc, 1 inc) * 6, slst. (24)
R5: ch 1, (3 sc, 1 inc) * 6, slst. (30)
R6: ch 1, (4 sc, 1 inc) * 6, slst. (36)
R7: ch 1, (5 sc, 1 inc) * 6, slst. (42)
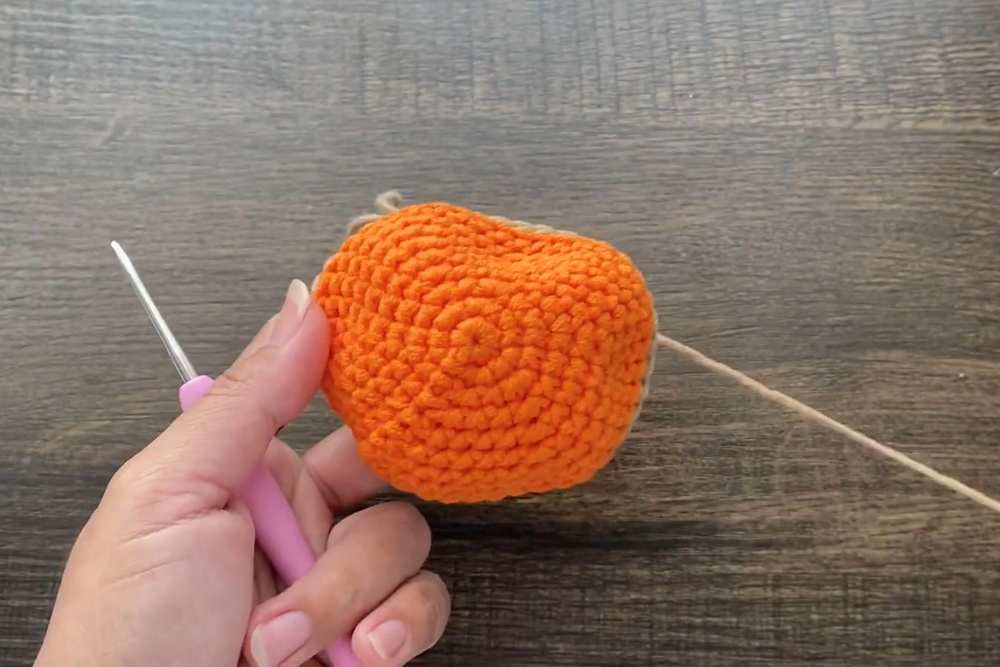
R8 to R9: ch 1, 42 sc, slst. After R9, cut the orange yarn. (42)
R10 (Tan): Attach tan yarn. In BLO, 42 sc, slst. (42)
R11: ch 1, (5 sc, 1 dec) * 6, slst. (36)
R12: ch 1, (4 sc, 1 dec) * 6, slst. (30)
R13: ch 1, (3 sc, 1 dec) * 6, slst. (24)
R14: ch 1, (2 sc, 1 dec) * 6, slst. Add stuffing. (18)
R15: ch 1, (1 sc, 1 dec) * 6, slst. (12)
R16: ch 1, 6 dec, slst. Fasten off and cut yarn. (6)
Pie Crust
Using the tan yarn, attach it to the front loops left unworked from R10 of the shell.
slst in the next stitch, then puff stitch in the following stitch.
Repeat this sequence (slst, puff) all the way around to the end to form the crust edge.
Whipped Cream (White Yarn)
ch 6.
Starting from the 2nd chain from the hook, make 3 sc in each stitch across. (15)
Fasten off, leaving a tail to sew it to the top of the pie. The piece will naturally curl into a dollop.
Front Legs (Make 2 – Tan Yarn)
R1: 6 sc in a MR, slst. (6)
R2: ch 1, 6 inc, slst. (12)
R3: ch 1, (1 sc, 1 inc) * 6, slst. (18)
R4: ch 1, (2 sc, 1 inc) * 6, slst. (24)
R5: ch 1, (3 sc, 1 inc) * 6, slst. (30)
Fold the piece in half and make 15 sc through both layers to close it. Fasten off, leaving a tail for sewing.

Back Legs (Make 2 – Tan Yarn)
R1: 6 sc in a MR, slst. (6)
R2: ch 1, 6 inc, slst. (12)
R3: ch 1, (1 sc, 1 inc) * 6, slst. (18)
R4: ch 1, (2 sc, 1 inc) * 6, slst. (24)
Fold the piece in half and make 12 sc through both layers to close it. Fasten off, leaving a tail for sewing.
Head (Tan Yarn)
R1: 6 sc in a MR, slst. (6)
R2: ch 1, 6 inc, slst. (12)
R3: ch 1, (1 sc, 1 inc) * 6, slst. (18)
R4: ch 1, 5 inc, 13 sc, slst. (23)
R5 to R7: ch 1, 23 sc, slst. (23)
R8: ch 1, 5 dec, 13 sc, slst. (18)
R9: ch 1, 4 dec, 10 sc, slst. (14)
R10: ch 1, 3 dec, 6 sc, 1 dec, slst. (10)
Add stuffing to the head.
R11: ch 1, 3 hdc, 7 sc, slst. (10)
R12 to R13: ch 1, 10 sc, slst. (10)
Fasten off, leaving a long tail for sewing.

Assembly
Insert and attach the 8 mm safety eyes on the head between Rounds 5 and 6.
Sew the head to the front bottom edge of the pie shell.
Sew the two larger front legs to the bottom of the shell near the head.
Sew the two smaller back legs to the rear bottom of the shell.
Sew the whipped cream dollop directly onto the top center of the orange pumpkin pie shell.
Pin For Later: