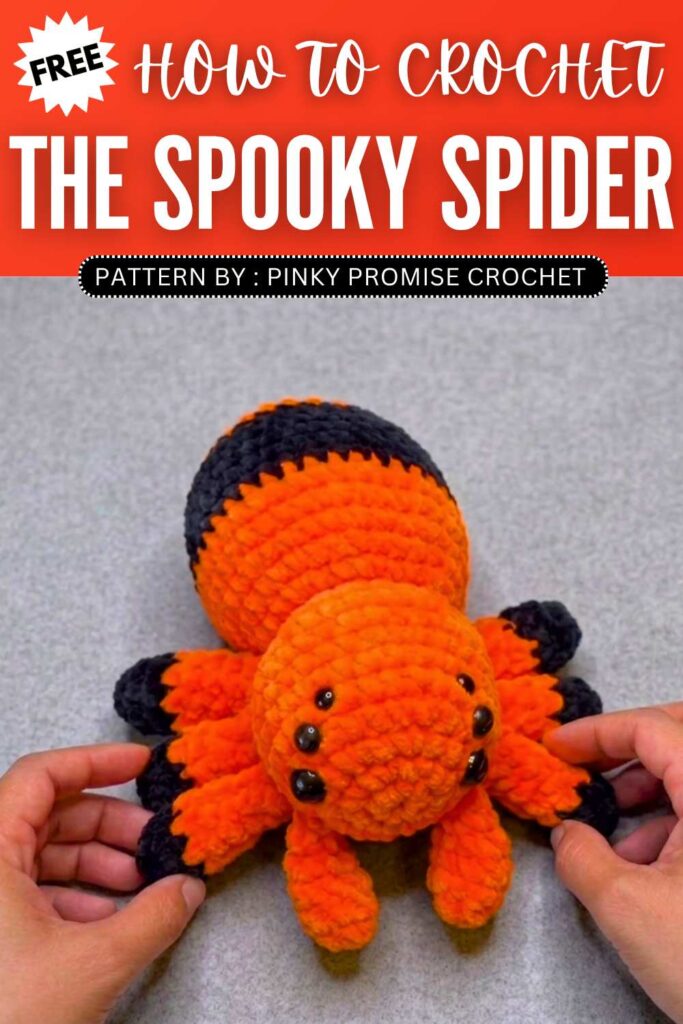
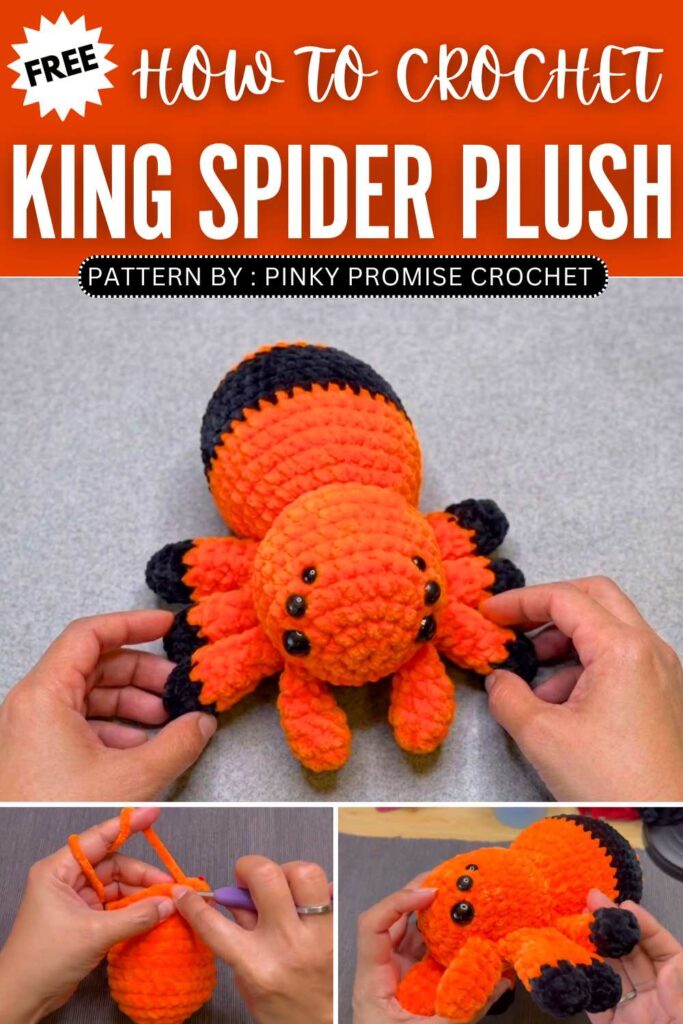
Crochet King Spider Plushie for Halloween (Big Spider with Crown)
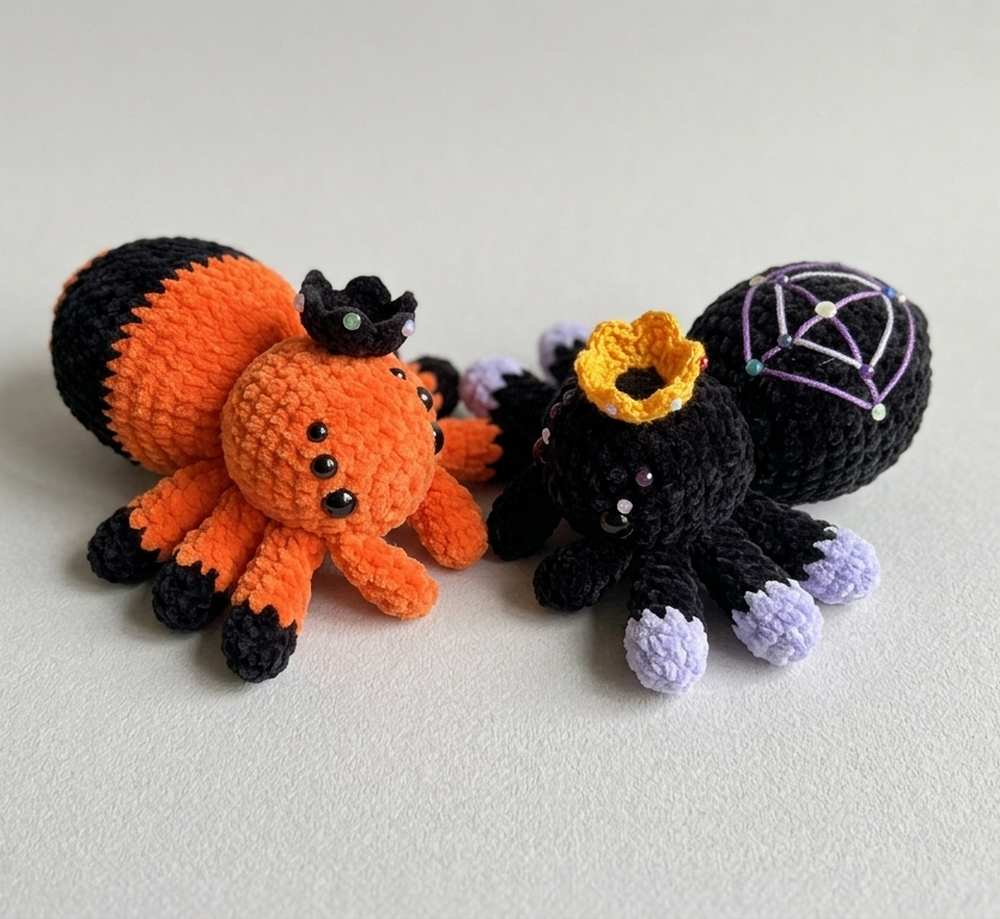
Learn how to crochet a low-sew, a little spookier and much detailed crochet big plushie with this FREE pattern for Halloween. It is named the “King Spider Plush” as you will also learn crocheting a small crown for your crochet spider, as well. Unlike the no-sew crochet spider plush, it has 6 eyes of 3 different sizes. It also has a black belly and leg stripes. You can crochet this as a Halloween present in orange or black.
Crochet King Spider Plushie Pattern for Halloween
You can also sew a spiderweb pattern on the belly of your crochet spider plush and attach the shimmering beads in the center. This crochet spider can sit on your Halloween table and make the celebrations even more special. Now, continue reading for the full crochet Spider plush pattern.
The designer behind this cat donut amigurumi is @Pinkypromise_crochet – she has ONE OF THE MOST PROMISING expertise in crochet plushie and is always able to find new ways of crocheting cute amigurumi and plushies. I have shared tutorials for her plushies multiple times, here such as the popular mushroom dinosaur plush!
Crochet Spooky Spider Plushie For Halloween
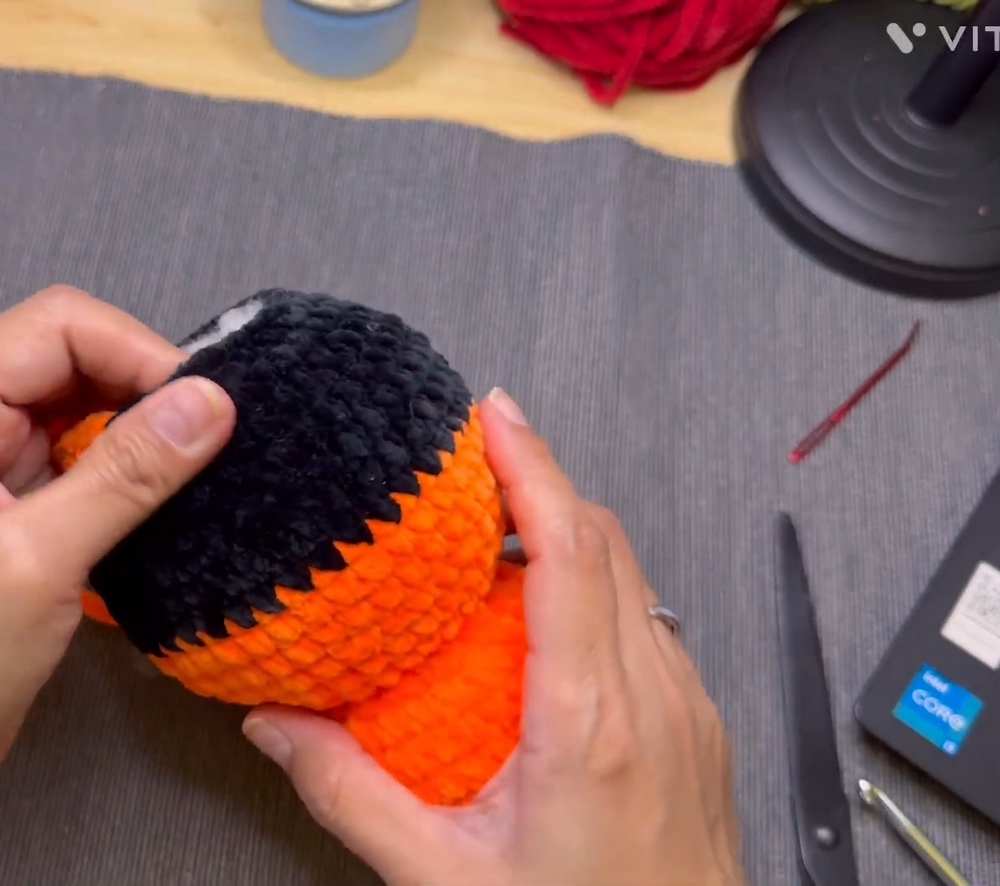
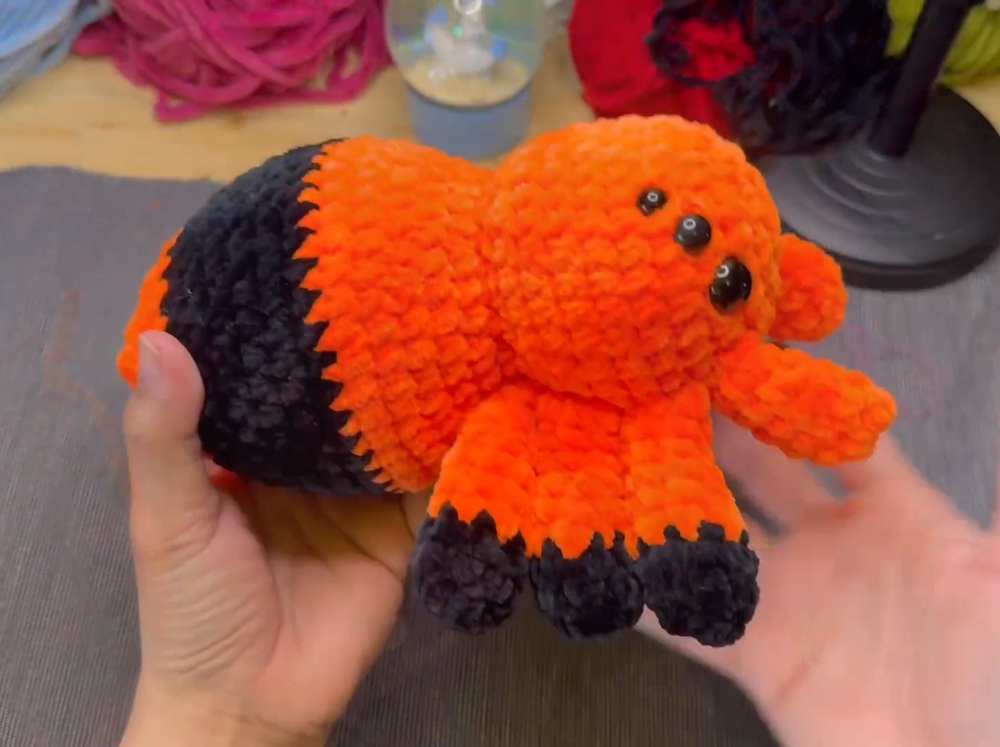
This project is a fun, beginner-friendly amigurumi tutorial for a “Spider King.” Using soft plushie yarn, you will crochet a cute but slightly spooky spider with a bright orange body and a black back.
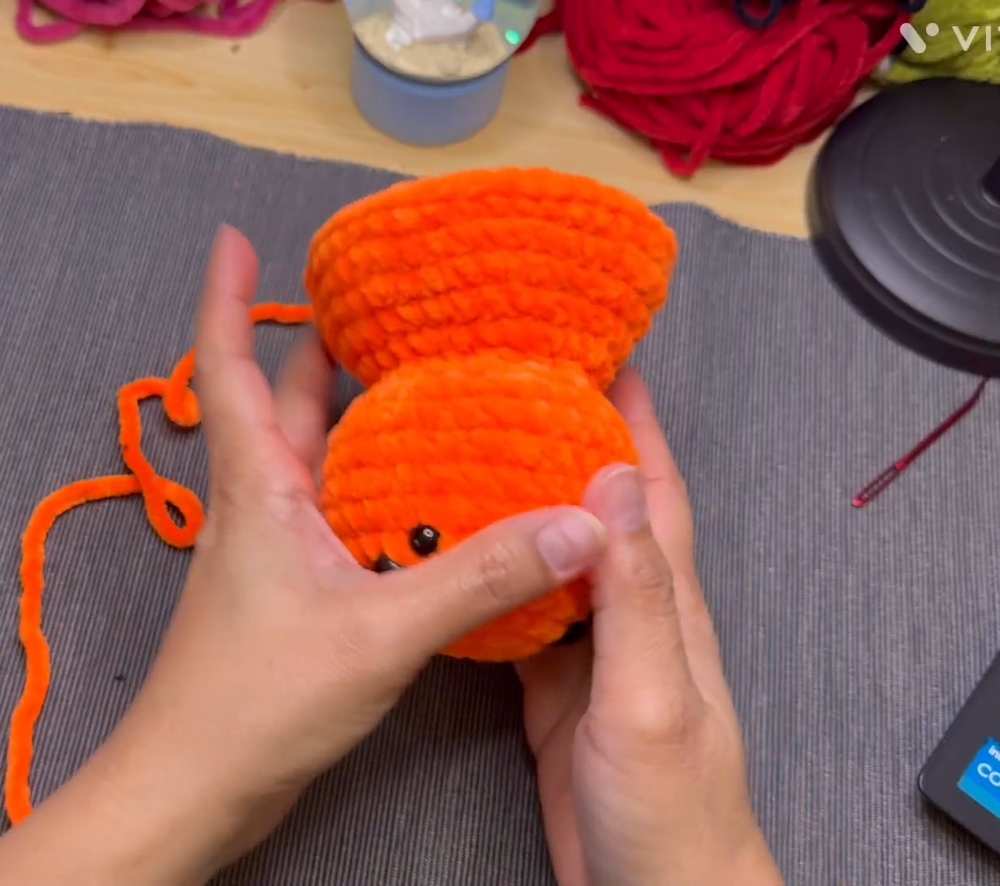
The head and body are crocheted in one continuous piece, stuffed with fiberfill, and decorated with multiple pairs of safety eyes to give it a classic spider look.
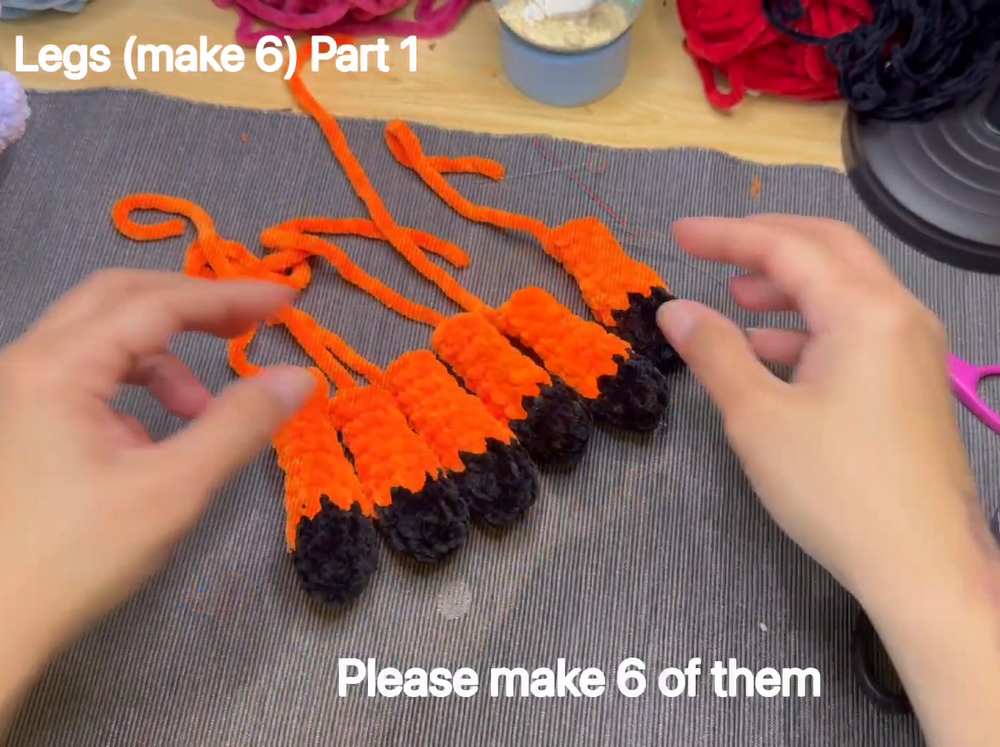
You will then crochet eight little legs (six with black tips and two solid orange ones) and attach them to the body. You also have the option to embroider a magical geometric web design on the back!
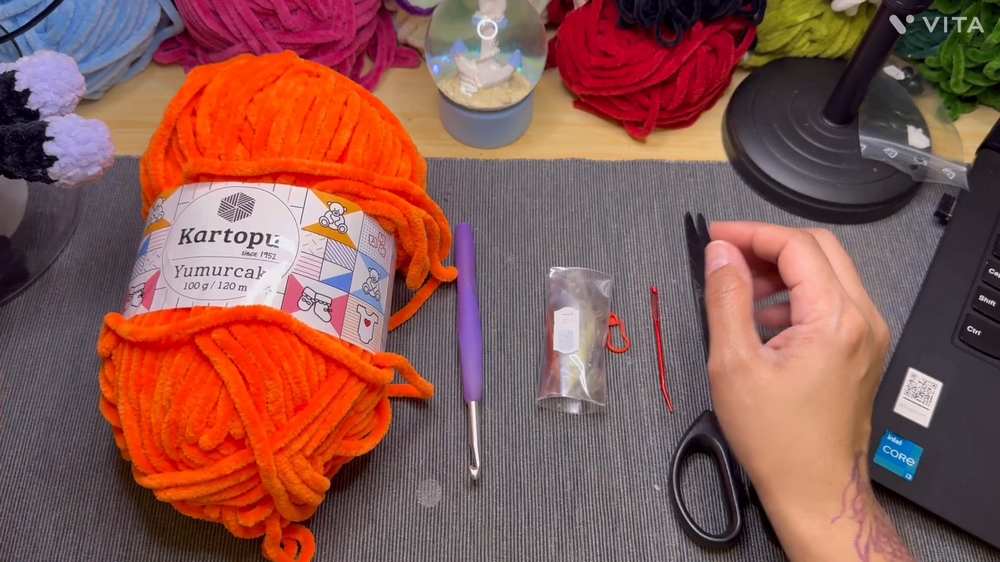
Materials
Polyester yarn / plushie yarn (in Orange and Black, or colors of your choice)
Crochet hook (Size 5 mm)
Fiberfill (stuffing)
Safety eyes (Two 14 mm, two 12 mm, and two 8 mm)
Scissors
Darning needle
Stitch marker
Abbreviations
MR: Magic ring
sc: Single crochet
inc: Increase (2 single crochets in the same stitch)
dec: Decrease (single crochet 2 stitches together)
R: Round
Full Pattern
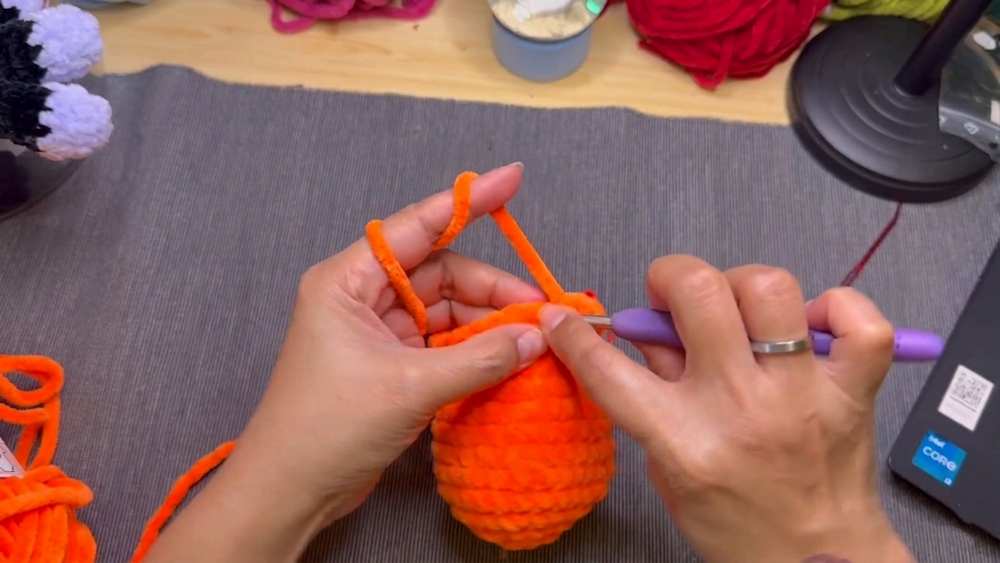
Head and Body
Note: The piece starts at the front of the face and works toward the back.
R1 (Orange): 8 sc in MR. (8)
R2: 8 inc. (16)
R3: (1 sc, 1 inc) x 8. (24)
R4: (3 sc, 1 inc) x 6. (30)
R5 to R9: sc all around. (30)
R10: (3 sc, 1 dec) x 6. (24)
R11: (1 sc, 1 dec) x 8. (16)
R12: (1 sc, 1 inc) x 8. (24)
R13: (1 sc, 1 inc, 1 sc) x 8. (32)
R14: sc all around. (32)
R15: (3 sc, 1 inc) x 8. (40)
R16 to R17: sc all around. (40)
Add stuffing to the head firmly.
Eye Placement: Attach the 14mm safety eyes between R2 and R3, about 8 stitches apart. Place the 12mm safety eyes right above the 14mm ones, and the 8mm safety eyes right above the 12mm ones.
R18 to R20 (Change to Black): sc all around. (40)
R21: (4 sc, 1 dec, 4 sc) x 4. (36)
R22: (7 sc, 1 dec) x 4. (32)
R23: (3 sc, 1 dec, 3 sc) x 4. (28)
R24: (5 sc, 1 dec) x 4. (24)
R25 (Change to Orange): (2 sc, 1 dec, 2 sc) x 4. (20)
R26: (3 sc, 1 dec) x 4. (16)
Stuff the rest of the body firmly with fiberfill.
R27: (1 sc, 1 dec, 1 sc) x 4. (12)
R28: (1 sc, 1 dec) x 4. (8)
R29: 4 dec. (4)
Fasten off, cut the yarn, and weave in the end to close the gap.
Legs Part 1 (Make 6)
R1 (Black): 8 sc in MR. (8)
R2 to R3: sc all around. (8)
R4: (1 sc, 1 dec, 1 sc) x 2. (6)
R5 to R6: sc all around. (6)
R7 to R9 (Change to Orange): sc all around. (6)
Fasten off, leaving a long tail for sewing. Add a tiny bit of stuffing ONLY to the black section (R1-R3).
Legs Part 2 (Make 2)
R1 (Orange): 8 sc in MR. (8)
R2 to R3: sc all around. (8)
R4: (1 sc, 1 dec, 1 sc) x 2. (6)
R5 to R6: sc all around. (6)
Fasten off, leaving a long tail for sewing. Do not stuff.
Foundation Ring
Start by making a slip knot and creating a base chain of ch 21.
Form a ring by joining the last chain to the first chain with a SS.]. Make sure the chain is not twisted.
Crown
Row 1
ch 1, then work 21 sc evenly around into the foundation ring.
Join with a SS into the first sc to close the round.
Row 2
ch 1, then work another 21 sc all the way around into each stitch from the previous row.
Join with a SS into the first sc of the row.
Row 3 (The Crown Peaks)
To create the pointed peaks of the crown, repeat the following pattern sequence around the ring 7 times total:
ch 3.
Work 1 SS into the second chain from your hook.
Work 1 sc into the third chain from your hook.
Secure the peak by making a SS into the next 3 stitches along the main ring body.
Assembly
Sew the two all-orange legs (Part 2) directly next to the face, placing them about 1 stitch away from the large 14mm eyes on each side.
Sew the remaining six black-tipped legs (Part 1) along the sides of the body behind the front legs. Place three on the left side and three on the right side.
Optional: Use straight pins to map out a pentagon/star shape on the black back of the spider and use contrasting yarn or embroidery thread to sew a magical web pattern.
Video Tutorial to Learn Even Better
Save For Later: