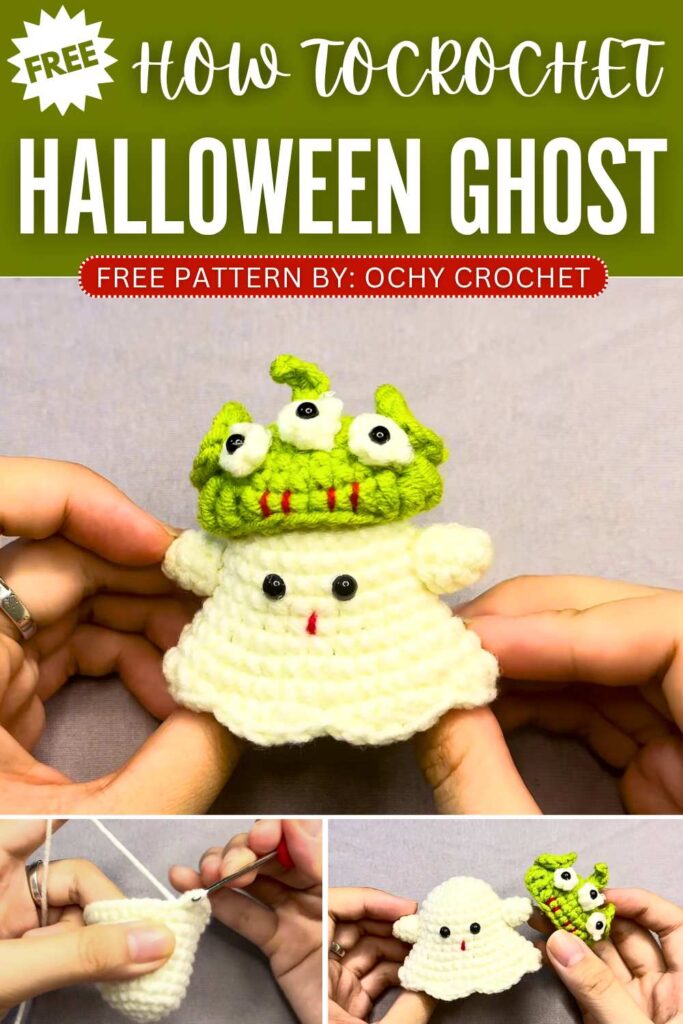
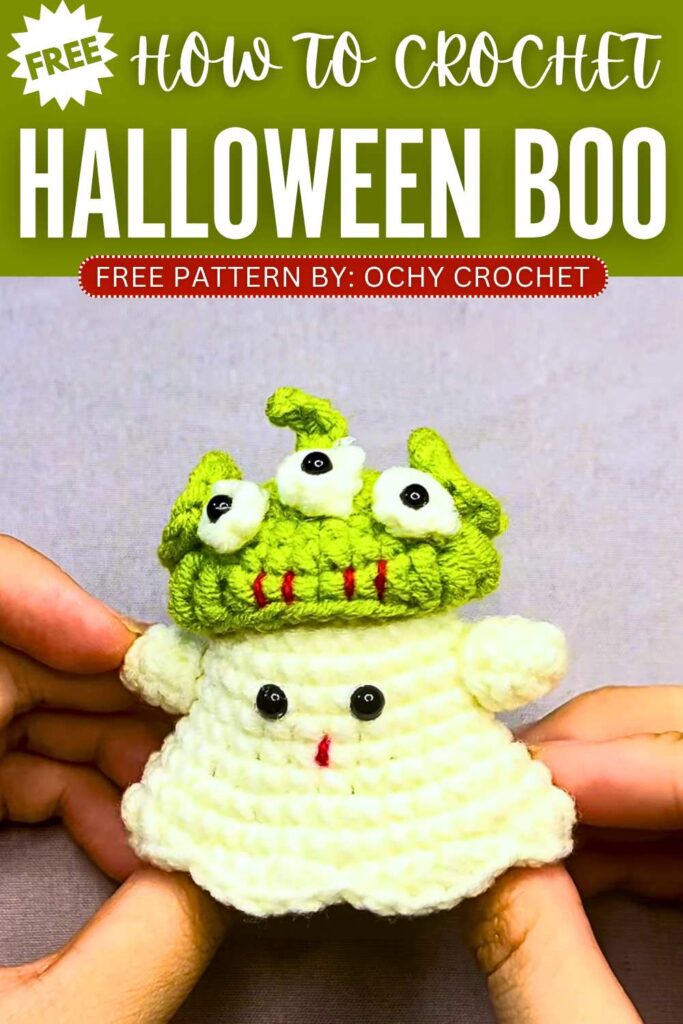
Free Crochet Mini Alien Cosplay Ghost Amigurumi Pattern for Kids
Both Aliens and the ghosts are mysterious! So, this Halloween, let’s combine the both by crocheting this mini Alien Boo Ghost keychain with a FREE pattern for absolute beginners. This will be the CUTEST baby ghost bag charm for your trick-or-treating Halloween bag. It wears a removeable Pizza Planet Alien hat with the same iconic googly eyes.
We will crochet the same no-stuffing boo ghost and all combined, this amigurumi Halloween charm is simply irresistible. It is like our ghost is cosplaying in the Halloween with the Alien theme. Kids will love this crochet boo for its ultimate cuteness. Now, continue reading for the full crochet ghost keychain pattern.
About the designer: The designer behind this oh-so-cute boo ghost keychain is @ochycrochet – she is among our favorite collaborators all for her oh-so cute and miniature amigurumi like this ghost amigurumi. From crochet pumpkins to racoon, other ghost amigurumi and much more, she has the best fall patterns as well as other seasonal patterns and designs.
How to Crochet Mini Cosplay Ghost Amigurumi
This project is a quick, beginner-friendly crochet amigurumi that creates an adorable little Halloween ghost wearing a cute, removable alien-cat hat.
The ghost features a classic flowy, ruffled base to make it look like a floating sheet, and uses simple stitches worked in the round. It’s a perfect festive decoration, keychain, or gift for the spooky season, and uses very little yarn, making it an excellent stash-buster project!
Materials Needed
Yarn: Light worsted or DK weight yarn in White (for the ghost) and a contrasting color of your choice (for the hat)
Crochet Hook: A size appropriate for your yarn (typically 2.5mm or 3.0mm for amigurumi)
Safety Eyes: * One pair of standard safety eyes for the ghost’s face
One pair of slightly smaller safety eyes for the hat’s face
Fiberfill stuffing (to stuff the ghost)
Yarn needle (for sewing pieces together and weaving in ends)
Scissors
Stitch marker
Abbreviations (US Terms)
MR: Magic Ring
ch: chain
sc: single crochet
inc: increase (2 single crochets in the same stitch)
hdc: half double crochet
dc: double crochet
tr: treble crochet (yarn over twice)
sl st: slip stitch
st(s): stitch(es)
[ … ]: repeat the instructions within the brackets the specified number of times
Full Crochet Pattern
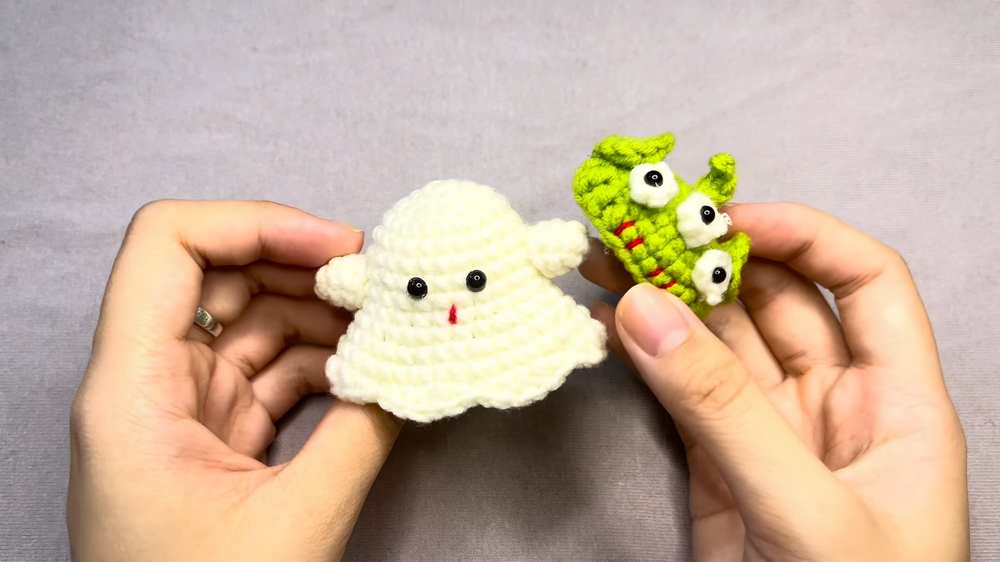
1. The Ghost Body (Use White Yarn)
Round 1: Make 6 sc in a Magic Ring, pull tight, and sl st to the first st to join. (6 sts)
Round 2: ch 1, [inc] in each stitch around. (12 sts)
Round 3: [1 sc, 1 inc] repeat around. (18 sts)
Round 4: [1 sc, 1 inc, 1 sc] repeat around. (24 sts)
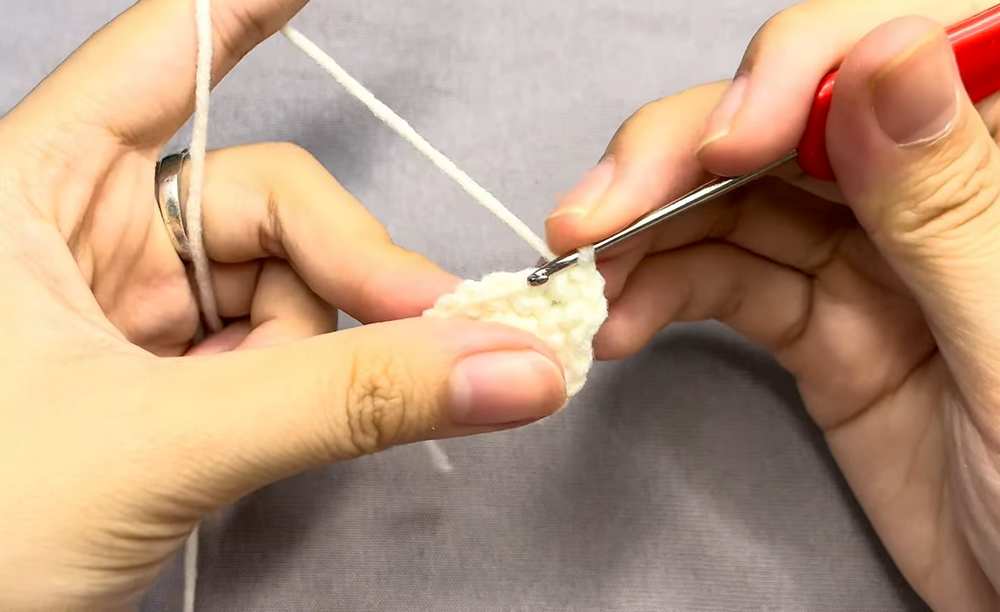
Rounds 5 – 9: 1 sc in each st around. (24 sts for 5 rounds)
Round 10: [3 sc, 1 inc] repeat around. (30 sts)
Round 11: [2 sc, 1 inc, 2 sc] repeat around. (36 sts)
Round 12: [5 sc, 1 inc] repeat around. (42 sts)
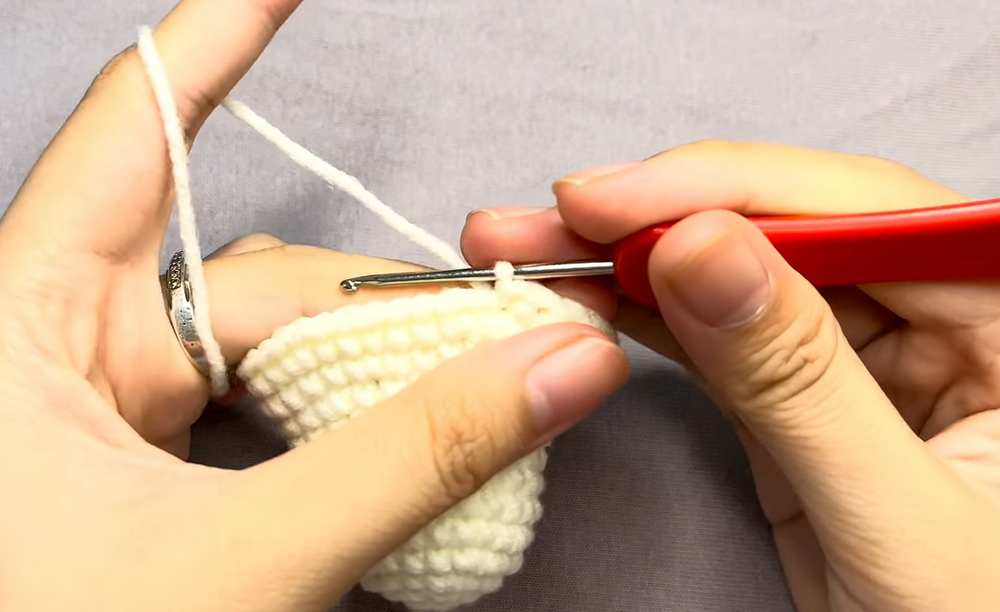
Note: Insert the standard safety eyes onto the ghost’s face between Rounds 5 and 7, and stuff the top of the body lightly with fiberfill.
Round 13 (The Ruffled Edge): [1 sc, 1 hdc, 1 dc, 1 hdc, 1 sc, sl st into the next st] repeat this ruffled sequence all the way around the edge.
Finish: Fasten off, cut the yarn, and weave in the loose ends.
2. The Hat (Use Contrasting Yarn)
Round 1: Make 8 sc in a Magic Ring. (8 sts)
Round 2: [inc] in each stitch around. (16 sts)
Round 3: [1 sc, 1 inc] repeat around. (24 sts)
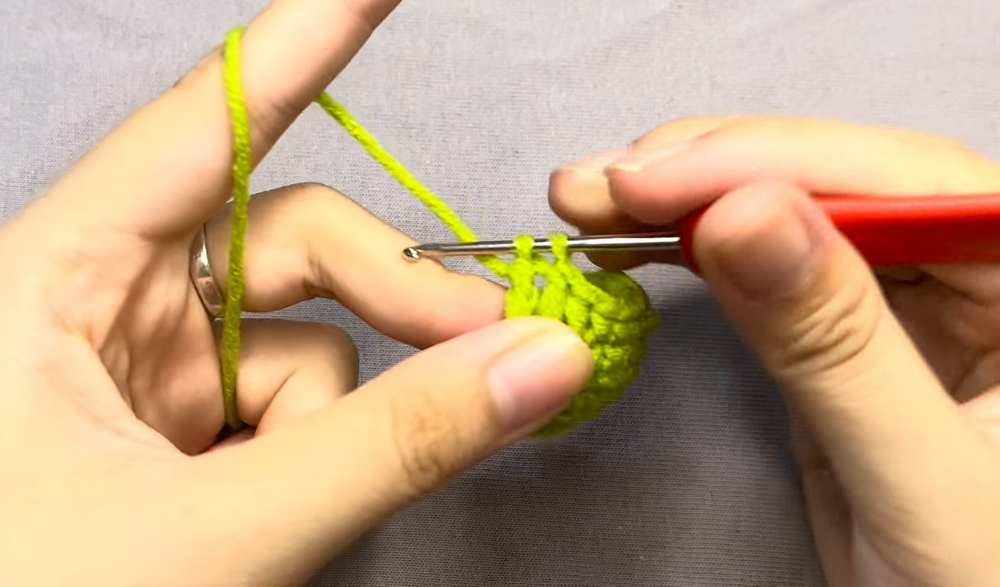
Rounds 4 – 5: 1 sc in each st around. (24 sts for 2 rounds)
Round 6 (Hat Flaps/Shaping): 4 sc, 1 hdc, 1 dc, 1 tr in the next st, 1 tr in the next st, 1 dc, 1 hdc, 4 sc. Continue the sequence around to shape the rim.
Finish: Fasten off and weave in ends.
3. Hat Ears (Make 2 using Hat Yarn)
Step 1: Create a Magic Ring and ch 1.
Step 2: Working into the ring, crochet: 2 sc, 2 hdc, ch 3, 2 hdc, 2 sc.
Step 3: Sl st into the first st to join, pull the magic ring tightly to form the ear shape.
Finish: Fasten off, leaving a long tail for sewing.
4. Hat Antenna (Use Hat Yarn)
Step 1: Make a slip knot (which counts as your first chain) and ch 3 more (4 chains total).
Step 2: Sl st into the 3rd ch from the hook.
Step 3: Sl st into the next ch.
Step 4: Place 2 sc into the very last chain (the initial slip knot).
Finish: Fasten off, leaving a tail for sewing.
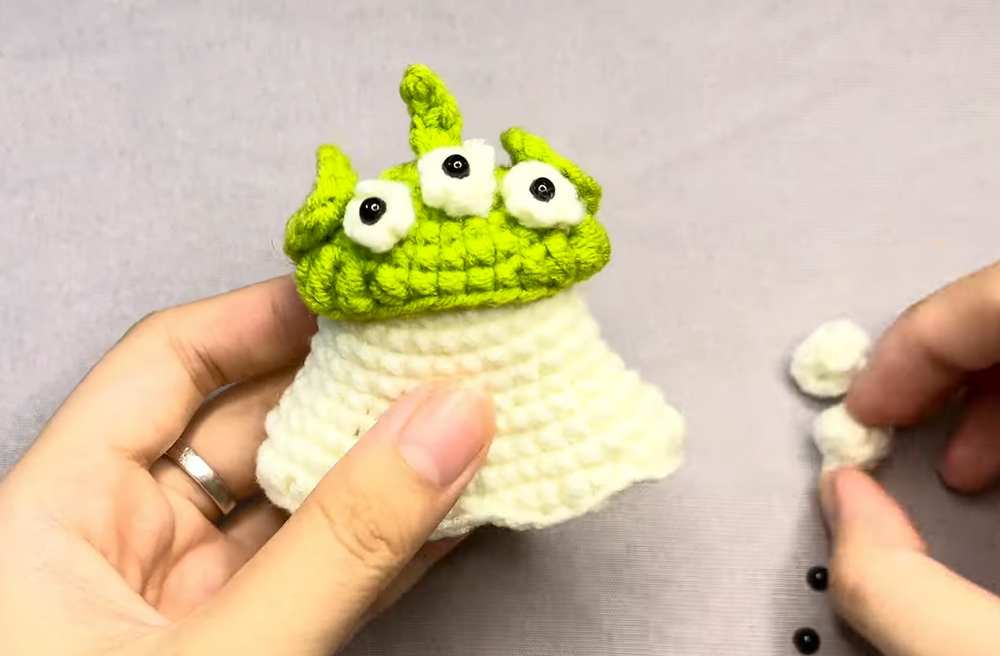
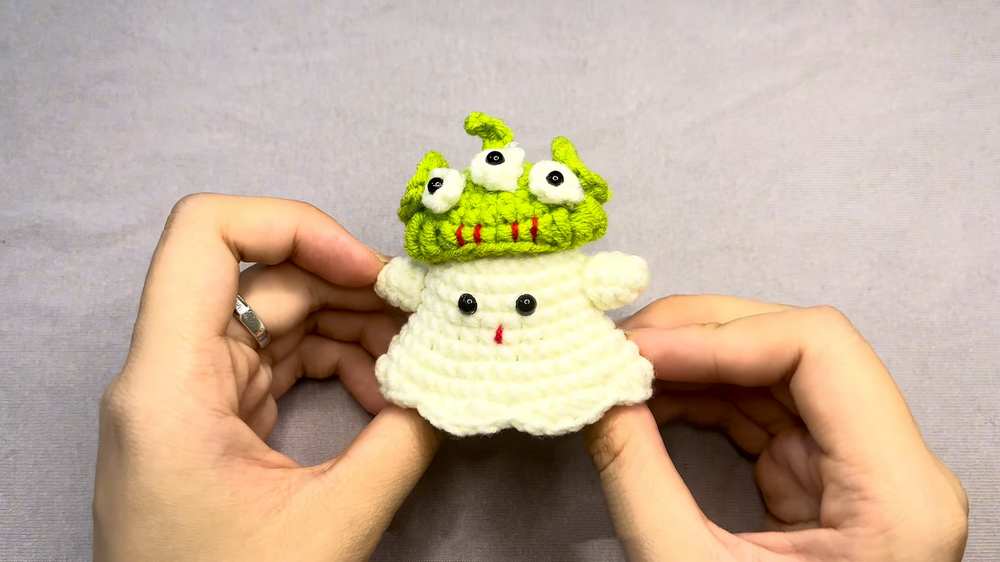
5. Assembly
Hat Details: Take the smaller pair of safety eyes and attach them to the front of the hat.
Sewing: Using a yarn needle, securely sew the two ears to the top sides of the hat. Sew the little antenna directly to the top center of the hat.
Dress Up: Pop the finished hat onto your little white ghost!
Video Tutorial
Save for Later!