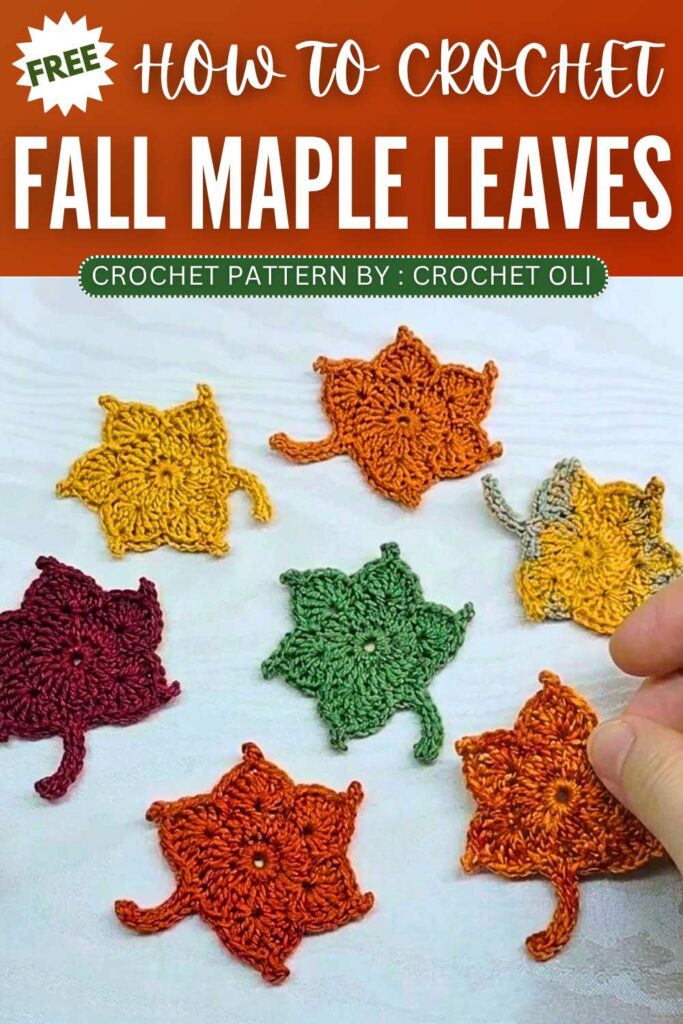
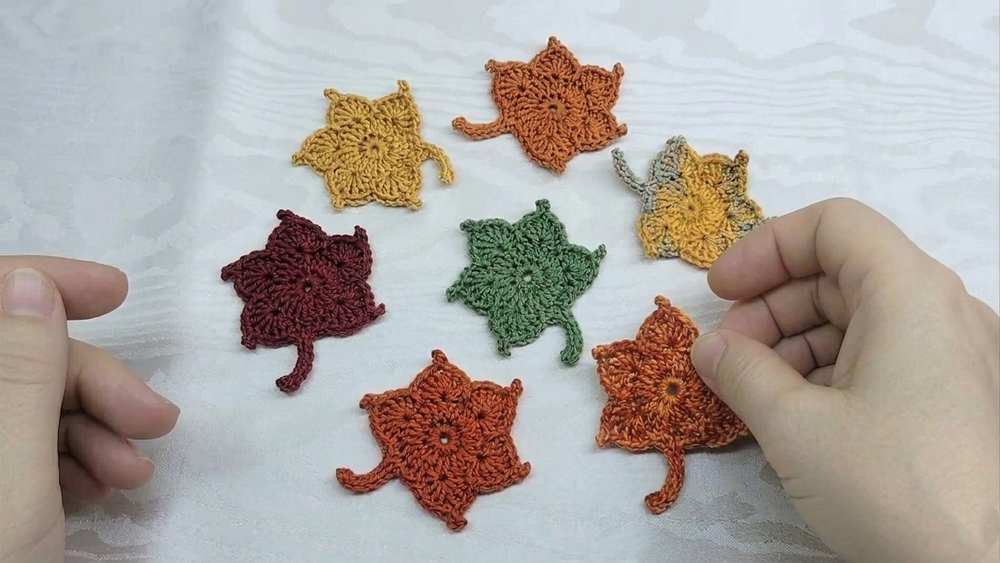
Crochet Oli: Crochet 5-Minute Life-Like Maple Leaf Pattern for Fall
Learn how to crochet a SIMPLE but really appealing crochet maple by just working in 2 rounds following this FREE pattern. This 5-minute crochet leaf pattern is the most favored and easy for beginners. Unlike the Tunisian crochet leaf, it is much simpler to understand the pattern for and you can crochet it in any fall color. Use it then in crochet fall hairclips, decorating your crochet table, making a fall bunting and even to use as a keychain.
Crochet 5-Minute Life-Like Maple Leaf Pattern
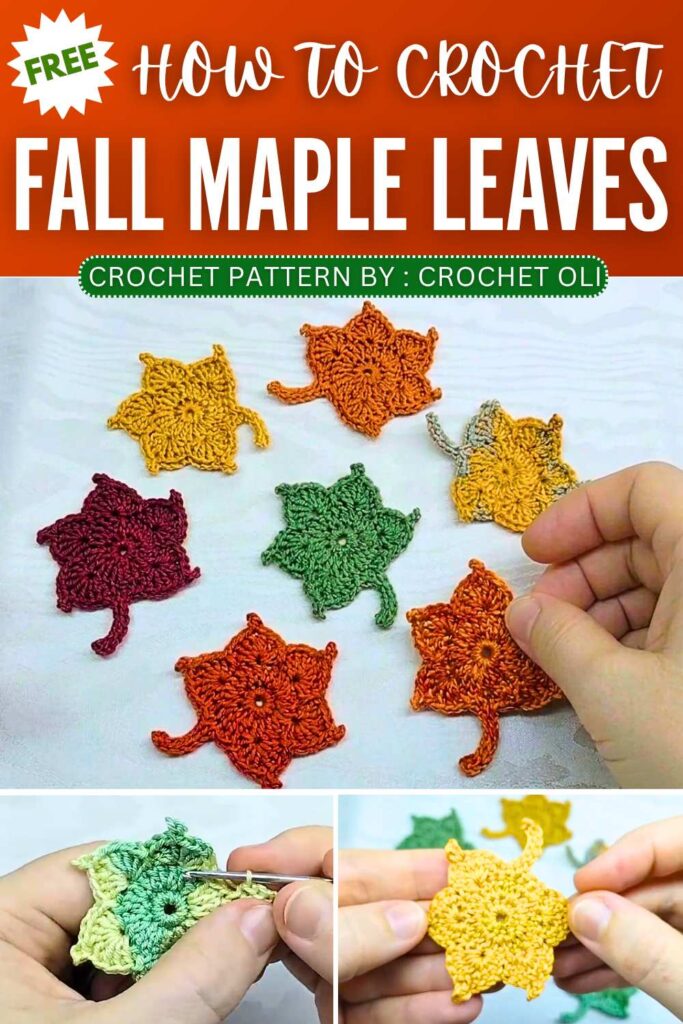
You can also crochet it with a random fall colorwork for a more natural look or keep it in orange or green just like the maple leaf project I shared last year. We shall also use the picot stitch to make it look life-like. Now, continue reading for the full crochet maple leaf in rounds pattern.
About the Designer: The designer behind this crochet fall leaf is @CrochetOli – Her tutorials are very easy to follow and she teaches the basics very well, even if you are just starting out. She asked me to “never forget her,” so here was her short intro.
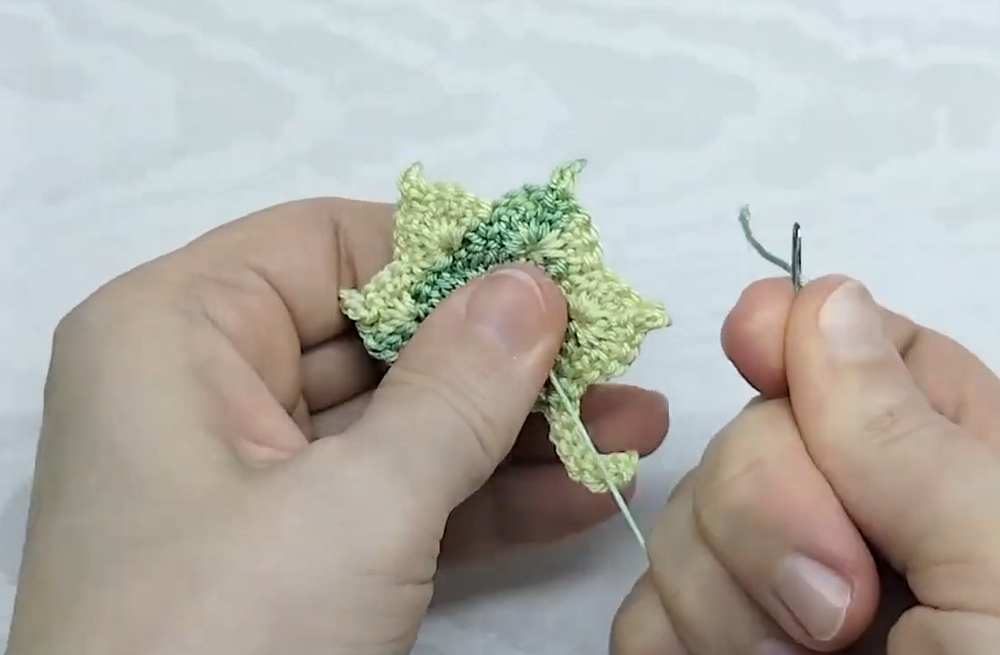
Quick Making Guide: Small 5-Pointed Autumn Leaf
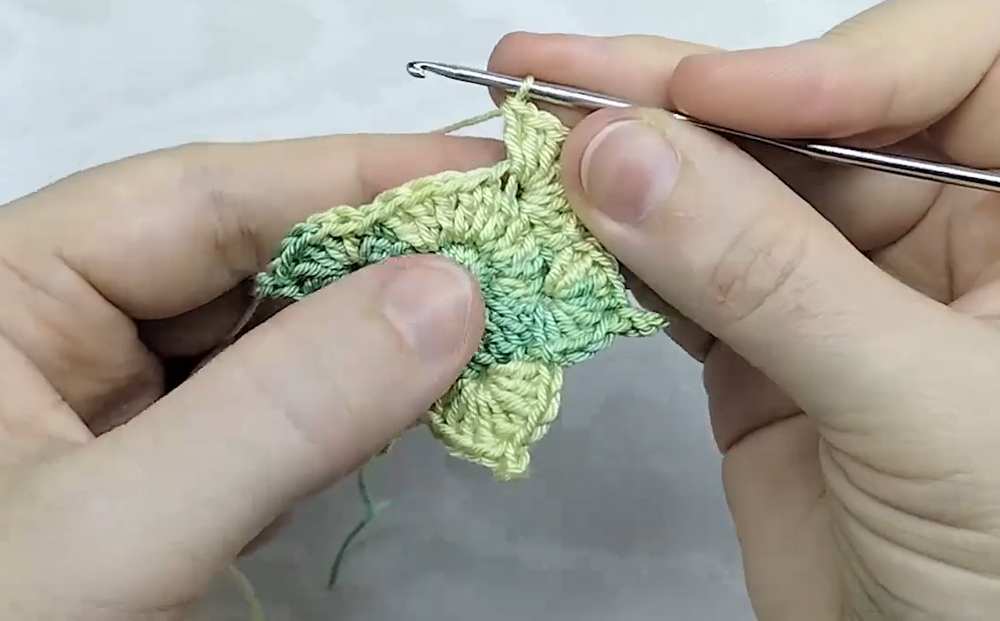
Make a small, five-pointed autumn leaf. You start by making a flat circle for the base, then work a series of shell stitches around the edge to create the pointed lobes of the leaf.
Each point is topped with a tiny “picot” stitch to make it sharp. Finally, you chain a small stem at the bottom to complete the shape.
This is a leaf. You make the leaf with yarn. You use a hook. You make a circle. You make points on the circle. The points make the leaf shape. You make five points. You make a small stick at the bottom. You cut the yarn. The leaf is done.
Materials
100% Cotton Yarn
2.5 mm crochet hook
Scissors
Tapestry needle
Abbreviations (US Terms)
MR: Magic Ring
ch: chain
sl st: slip stitch
sc: single crochet (referred to as a “column without yarn over” in the Russian transcript)
dc: double crochet (referred to as a “column with one yarn over” in the Russian transcript)
st / sts: stitch / stitches
picot: chain 3, then sl st into the 3rd chain from the hook
Written Instructions
Round 1: Start with a MR (leave a long tail for weaving in later). Work 12 sc into the MR. Join with a sl st to the first sc. Pull the MR tight. (12 sts)
Round 2: Ch 2 (counts as first dc). Work 1 dc into the exact same stitch where you joined the sl st. Then, work 2 dc in every single stitch around. Join with a sl st to the top of the initial ch-2. (24 sts)
Creating the Leaf Points (Lobes):
Point 1: Skip 1 st. In the next st, work: [4 dc, picot, 3 dc]. Skip 1 st. Sl st into the next st.
Point 2: Skip 1 st. In the next st, work: [4 dc, picot, 3 dc]. Skip 1 st. Sl st into the next st.
Point 3 (Center Point): Skip 1 st. In the next st, work: [4 dc, picot, 4 dc]. Skip 1 st. Sl st into the next st.

Point 4 (Mirrored): Skip 1 st. In the next st, work: [3 dc, picot, 4 dc]. Skip 1 st. Sl st into the next st.
Point 5 (Mirrored): Skip 1 st. In the next st, work: [3 dc, picot, 4 dc]. Skip 1 st. Sl st into the next st.
Creating the Stem:
Work 1 sc in each of the next 2 sts.
Ch 7.
Working into the back bumps of the chain: starting in the 2nd ch from the hook, work 6 sl st down the chain.
Work 1 sl st into the same stitch on the circle where the chain started.
Work 1 sc into the next st.
Sl st into the final st to finish.
Finishing: Cut the yarn, fasten off, and weave in all ends securely using a tapestry needle.
Video Tutorial to Learn Even Better
Save For Later: